Miele PT 8257 WP Operating And Installation Instructions
Hide thumbs
Also See for PT 8257 WP:
- Operating instructions manual (40 pages) ,
- Operating and installation instructions (108 pages)

Related Manuals for Miele PT 8257 WP


Summary of Contents for Miele PT 8257 WP
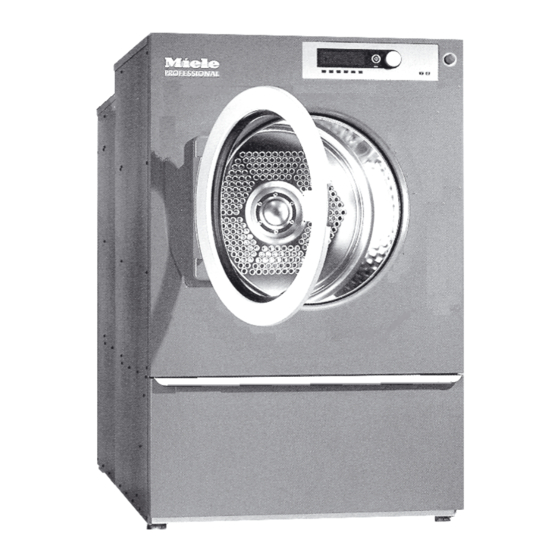
- Page 1 Operating and Installation Instructions PT 8257 WP PT 8337 WP To prevent accidents en - US and machine damage read these instructions M.-Nr. 09 390 531 before installing or use.
-
Page 3: Table Of Contents
Contents IMPORTANT SAFETY INSTRUCTIONS ............4 Caring for the environment . -
Page 4: Important Safety Instructions
Installation, repair and maintenance work should be If hot laundry items are stacked or packed they could performed by a Miele authorized service technician. spontaneously combust. Work by unqualified persons could be dangerous... - Page 5 Unprofessional repairs may create unforeseeable risks or experience with the appliance should not use it without for the user, for which Miele assumes no liability. Repairs supervision or instruction by a responsible person. should be carried out only by authorized Miele technicians Do not let children play in, on or near the dryer.
- Page 6 Do not use the dryer without the built-in lint filter in place. Fire hazard! Only accessories expressly allowed by Miele may be If the lint filter is damaged it must be replaced immediately. installed. Adding or installing other parts will void any A build-up of lint will block the airflow and heating, warranty and/or product liability claims.
-
Page 7: Caring For The Environment
Caring for the environment Disposal of packing materials Information on saving energy The packing materials are intended to protect the You have purchased a heat pump dryer featuring the machine from damage during shipping. They have latest technology. This dryer uses 50% less energy been selected for environmental compatibility and than conventional dryers with electric heating. -
Page 8: General Description Of The Appliance
General description of the appliance a Emergency Stop button f Electrical connection Use only in case of an emergency. After the problem has been eliminated, unlock the the g Exhaust air opening switch by turning the dial to the right. Do not use the Emergency Stop switch to switch h Air intake opening off the dryer during normal operation! -
Page 9: Operating Panel
General description of the appliance Operating panel d Optical PC interface a Display* For data transfer between the machine’s controls and a PC. White Cottons e Jog shuttle Cottons Colors Turn the jog shuttle for display selections and input fields. Press the jog shuttle to confirm display selections or After turning on, the "Welcome"... - Page 10 General description of the appliance Control keys Operator card f Stop / End No programs are saved on this card. To transfer the Press to stop a selected program or end an already data from the control to the card and vice versa see stopped program.
-
Page 11: Drying
Drying Before first use Important drying information: ^ Wipe the interior of the drum with a soft dry cloth – Articles made from pure wool and wool mixtures may become matted. Dry these with the Woolens program only. – Pure linen may become rough with tumble drying. Preparing the laundry Consult the manufacturer’s instructions before drying. -
Page 12: Turn On The Dryer
Drying 1. Turn on the dryer Maximum laundry weight ^ Turn on the power main (on site). PT 8257 PT 8337 PT 8407 PT 8507 ^ Press the l "On" button to turn the dryer on. Drum volume The Welcome screen shows. 66 gal 86 gal 106 gal... -
Page 13: Select A Program
Drying 4. Select [ "Blockplus" (if desired) 3. Select a program The dryer uses an electronic sensor system which (Not available for standard programs) monitors the residual moisture in the laundry and a ^ Confirm the selected program by pressing the jog timer for extra safety. -
Page 14: Adjust The Program (If Desired)
Drying 5. Adjust the program (if desired) Residual moisture To change program settings before starting the In 1 % steps from -4 to 40 %. program: ^ Turn the jog shuttle to "Residual moisture" (0 %) ^ Confirm the selected program by pressing the jog and press to confirm the selection. -
Page 15: Select Delay Start (If Desired)
Drying 6. Select Delay Start (if desired) The program will start at the selected time. Use the m "Delay start" button to start a program at a Cottons 22.0 lb later time. Drying 2:07pm -2.13.2006 Start: 2:10pm-2.13.2006 Setting the delay start ^ Select a program. -
Page 16: Start A Program
Drying 7. Start a program 8. End of program ^ Press the "Start" button to begin the program. Cottons Program end Anti-crease Finish at 12:35 The program end is shown in the display and the buzzer sounds. ^ Open the drum door. ^ Remove the laundry. -
Page 17: Extra Features
Extra features Skip or repeat program sequences Program stop ^ Press the f "End" button to stop the program. Sequences of a program in progress can be skipped or repeated. Cottons ^ Press the f "End" button to stop the program. Program stop Cottons Press Start. -
Page 18: K Information
Extra features K Information Language ^ Press the K "Information" button during the program The display language can be temporarily changed to see program information. with the flag symbol. Examples: White Cottons Cottons Cottons Colors Delay start: 10.7.2003 Start time: 9:47 ^ Press the FC function button. -
Page 19: Program
Program Estates Program Fabric Type max. load White items made of cottons, linens White Cottons Cottons White or colored items made of cottons, linens or mixed fabrics PT 8257 22-29 lb (10-13 kg) PT 8337 29-35 lb Colors Colored items made of cottons, linens or mixed fabrics (13-16 kg) Darks Dark items made of cottons, linens or mixed fabrics... - Page 20 Program Program Fabric Type max. load Outerwear Coats and jackets made of mixed fabrics PT 8257 11-14.6 lb (5-6,6 kg) PT 8337 14.6-19.8 lb (6,6-9 kg) Hand wash Silks Blouses, dresses, pants, skirts, coats, evening gowns, wedding gown, faux furs made of silk, rayon, satin, acetate, PT 8257 8.8 lb viscose...
-
Page 21: Chip Card Use / Coin Mechanism
Chip card use / Coin mechanism If the machine is programmed for card operation, If the card was inserted the wrong way only the drying programs on the card can be used. Card fault Cards containing a program are programmed for a §... -
Page 22: Cleaning And Care
Lint will settle in the dryer and cause malfunctions. Have Miele Technical Service check for lint deposits Clean the lint filter at least once a day and and clean the following once a year: when the "Clean lint filter"... -
Page 23: Heat Exchangers
– Before turning on the power supply, make sure that volume of use, by Miele Technical service. no electrical parts have come into contact with For easier cleaning a nozzle is included with the rinsing water. -
Page 24: Frequently Asked Questions
Repairs to electrical, gas or steam appliances If the following error messages cannot be fixed with should only be carried out by a Miele authorized five restarts, a general message will show: technician in accordance with local and national safety regulations. - Page 25 ^ When contacting Technical Service report the fault in the display. Only use original Miele spare parts when performing maintenance or repairs on this machine. When ordering please quote the model, serial number (SN)
- Page 27 Installation instructions...
-
Page 28: Important Safety Instructions
CAUTION: An unvented dryer produces combustible lint. Exhaust outdoors! Any installation, service or repair work is to be done by a Miele Service Technician. Any work done by an No filters or louvers should be built into the exhaust unauthorized person could be dangerous. -
Page 29: Installation
Installation For ease of maintenance and servicing, the minimum The dryer must be installed and tested by Miele's dimensions and distance to the wall with passage Technical Service Department or an authorized must be observed. dealer. This appliance must be installed in accordance with the applicable regulations and may be used only in rooms with adequate ventilation. -
Page 30: Install Dryer And Heat Pump
Installation Install dryer and heat pump Remove dryer cover. Rout the connection line through the heat pump and connect to dryer (see electrical connection). Insert the heat pump-dryer connection line, plug into the socket on the dryer. Tilt the heat pump slightly so that the bottom lug fits over the bottom profile edge on the dryer. -
Page 31: Leveling The Dryer
* can be ordered from Miele. Communication module XKM RS232 Installation on an elevated base (where available) The dryer can be installed on an elevated concrete The communication module makes it possible to base. -
Page 32: Electrical Connection
Installation Electrical connection Intake air, ambient air The electrical connections must be carried out by a certified electrician in accordance with all the national regulations. Observe the enclosed wiring diagram. Before installation, make sure that the voltage and frequency listed on the data plate correspond with the site’s electrical supply. -
Page 33: Technical Data
Technical Data PT 8257 WP PT 8337 WP Height 4' 7 1/8" (1400 mm) 4' 7 1/8" (1400 mm) Width 2' 11 11/16" (906 mm) 2' 11 11/16" (906 mm) Depth 3' 11 7/16" (1205 mm) 4' 6 13/16" (1393 mm) Depth with door open 6"... -
Page 35: Quick Guide
Quick Guide 1. Sort the laundry Not all fabrics are suitable for drying in a tumble dryer. Pay attention to the manufacturer’s instructions on the wash care label. q = Dry at normal temperature r = Dry at low temperature s = Do not tumble dry Sort the laundry by fabric and color 2. - Page 36 M.-Nr. 09 390 531 / 00 Alteration rights reserved / 2012 INFORMATION IS SUBJECT TO CHANGE. PLEASE REFER TO OUR WEBSITE TO OBTAIN THE MOST CURRENT PRODUCT SPECIFICATIONS, TECHNICAL & WARRANTY INFORMATION.
Need help?
Do you have a question about the PT 8257 WP and is the answer not in the manual?
Questions and answers