
Subscribe to Our Youtube Channel
Related Manuals for Blanco BDW4510X


Summary of Contents for Blanco BDW4510X
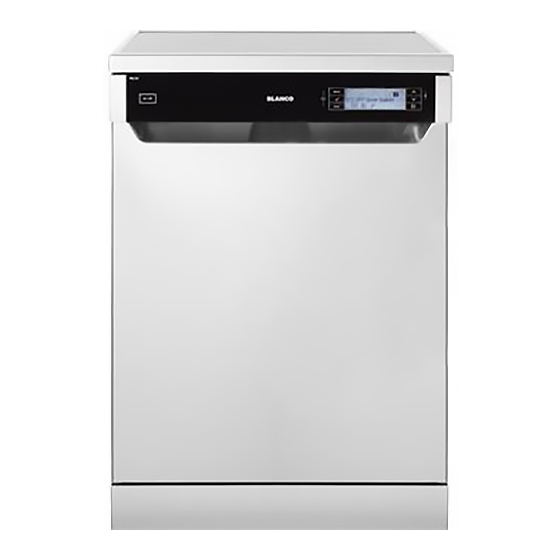
- Page 1 Dishwasher Instruction Manual Instruction Manual Instruction Instruction Manual Manual BDW4510X...
-
Page 2: Table Of Contents
CONTENTS Technical specifications …………………………………………………….. • Conformity with the standards and Test data …………………………….. 4 • Safety information and Recommendations………………………………….. Recycling ..………………………............• Safety information …………………………………………………………… • Recommendations …...……………………………………………………… • Items not suitable for dishwashing ………………………………………… • Installing the machine ………………………………………………………….. Positioning the machine …………………………………………………….. - Page 3 Loading your dishwasher .……………………………………………………. Top basket…………………………………………………………………... • Lower basket………………………………………………………………... • Alternative basket loads …………………………………………………... • Programme descriptions .…………………………………………………….. Programme items ………………………………………………………….. • Getting familiar with your machine …………………………………………… 25 Selection of Program and Starting of the Machine..……………..Selection of Program and Starting of the Machine ……………………. •...
-
Page 5: Technical Specifications
Technical specifications Capacity 15 place settings Height 850 mm Height 820 mm (without worktop) Width 598 mm Depth 598 mm Net Weight 62 kg Electricity input 220-240 V, 50 Hz Total Power 2200 W Heating Power 2000 W Pump Power 100 W Drain Pump Power 30 W... -
Page 6: Safety Information And Recommendations
SAFETY INFORMATION AND RECOMMENDATIONS Recycling • Certain components and the packaging of your machine have been produced from recyclable materials. • Plastic parts are marked with international abbreviations: (>PE< , >PS< , >POM<, >PP<, ) • Cardboard parts have been produced from recycled paper and they should be disposed of into waste paper collection containers for recycling. - Page 7 • Check whether the indoor electrical fuse system is connected according to the regulations. • All electrical connections must match the values indicated on the rating plate. • Pay special attention and be sure that the machine does not stand on the electricity supply cable. •...
- Page 8 mental capabilities or lack of experience and knowledge if they have been given supervision or instruction concerning use of the appliance in a safe way and understand the hazards involved. Children shall not play with the appliance.Cleaning and user maintenance shall not be made by children without supervision.
-
Page 9: Recommendations
For your children’s safety • After removing the machine’s packaging, make sure that the packaging material is out of reach of children. • Young Children should be supervised to ensure they do not play with the appliance. • Keep your children away from detergents and rinse aids. •... -
Page 10: Items Not Suitable For Dishwashing
• Use the pre-wash programme only whenever necessary. • Place such hollow items as bowls, glasses and pots into the machine in such a way that they will face down. • You are recommended not to load into your machine any dishes different or more than indicated. -
Page 11: Water Connections
Do not put your machine in any location where there is the probability for the room temperature to fall below 0°C. Before positioning, take the machine out of its packaging by following the warnings located on the package. Position the machine close to a water tap or drain. You need to site your machine, taking into consideration that its connections will not be altered once they are made. -
Page 12: Water Inlet Hose
Water inlet hose Do not use the water inlet hose of your old machine,if any. Use the new water inlet hose supplied with your machine instead. If you are going to connect a new or long - unused water inlet hose to your machine ,run water through it for a while before making the connection. -
Page 13: Water Outlet Hose
Water outlet hose The water drain hose can be connected either directly to the water drain hole or to the sink outlet spigot. Using a special bent pipe (if available), the water can be drained directly into the sink via hooking the bent pipe over the edge of the sink. -
Page 14: Electrical Connection
Electrical connection The earthed plug of your machine should be connected to an earthed outlet supplied by suitable voltage and current. If there is no earthing installation, have a competent electrician carry out an earthing installation. In case of usage without earthing installed, our company will not be responsible for any loss of usage that might occur. -
Page 15: Fitting The Machine Undercounter
Fitting the machine undercounter If you wish to fit your machine undercounter, check whether you have sufficient space under your countertop and whether the wiring-plumbing is suitable to do so.1 If you decide that the space under the countertop is suitable for fitting your machine, remove the worktop as shown in the illustration. - Page 16 Adjust the machine feet according to the slope of the floor.3 Fit your machine by pushing it undercounter without letting the hoses get crushed or bent.4 Product Without Insulation With Insulation All Product For 2nd Basket For 3rd Basket Height 820 mm 830mm 835 mm Warning: After removal of worktop, the machine should be placed in such a closed place of which dimensions are shown at fig.
-
Page 17: Preparing The Machine For Use
PREPARING THE MACHINE FOR USE Prior to using the machine for the first time Check whether the electricity and supply water specifications match the values indicated by the • installation instructions for the machine. Remove all packaging materials inside the machine. •... -
Page 18: Filling With Rinse Aid And Making The Setting
Points to consider when using this type of products: Always make sure to check the specifications of the product you will use or whether or not • it is a combined product. Check if the detergent used is appropriate for the hardness of mains water that machine is •... - Page 19 To put rinse aid, remove the rinse aid compartment cap by turning it.1 Fill the rinse aid compartment with rinse aid until the rinse aid level indicator becomes dark;2 refit the cap and close it by turning it in a way that the nails will correspond to one another. By checking the rinse aid level indicator on the detergent dispenser, you can understand whether or not your machine needs rinse aid.
-
Page 20: Loading Your Dishwasher
LOADING YOUR DISHWASHER If you properly place your dishes into the machine, you will be using it in the best way in terms of energy consumption, washing and drying performance. There are two separate baskets for you to load your dishes into your machine. You can load into the lower basket such round and deep items as pots with long handles, pot lids, plates, salad plates, cutlery sets. -
Page 21: Lower Basket
Top basket height adjustment while it is full Basket height adjustment mechanism on the top basket of your machine is designed to let you adjust the height of your top basket upwards or downwards, without removing it from your machine when it is full, and create large spaces at the top or bottom area of your machine as needed. - Page 22 Upper Cutlery Basket The upper cutlery basket is designed for you to place forks, spoons and knives, long dippers and small items. Because it can easily be taken out of the machine, it allows your dishes to be taken out of the machine along with the basket after washing.
-
Page 23: Alternative Basket Loads
Alternative basket loads Lower Basket Top basket... - Page 24 Faulty loads Important Note for Test Laboratories For detailed information on performance tests, please contact following address: "dishwasher@standardtest.info” . In your email, please provide the model name and serial number (20 digits) which you can find on the appliance door. ...
-
Page 26: Getting Familiar With Your Machine
GETTING FAMILIAR WITH YOUR MACHINE 1-On/Off 5-Delay Button 2-Door Handle 6-Start/Pause button 3-Confirmation Button 7-Up Selection Button 4-Option Button 8-Down Selection Button... -
Page 27: Selection Of Program And Starting Of The Machine
Selection of Program and Starting of the Machine 9 10 11 12 13 14 15 16 1-On/Off 15-Rinse Aid Level Warning Indicator 2-Door Handle 16-Child Lock Indicator 3-Confirmation Button 17-Delay Indicator 4-Option Button 18-Remaining Time/Delay Time Indicator 5-Delay Button 19-Program Number Indicator 6-Start/Pause button 20-Display Information Line 7-Up Selection Button... - Page 28 BUTTONS Power On/Off Button When you press the on/off button, the machine is energized and the display shows the last used program; in the off position, the LCD on the display are off. Door Handle Please use the door handle to open-close the door of your machine. Confirmation Button Confirms (saves) your additional functions and settings.
- Page 29 If you have little amount of dishes in your machine and if you have to wash them, you can also activate the semi-filling function for some programs. If you have dishes in both baskets, select the half load function and select the position in which both images are highlighted.
-
Page 30: Selection Of Program And Starting Of The Machine
Selection of Program and Starting of the Machine 1- Press Power On/Off switch. Note: Select your washing program appropriate for your dishes by the help of the program items page in the user guide. 2- You may select the washing program by using up/down (7,8) selection buttons. Note: You may follow the program time in the time indicator. -
Page 31: Programme Follow-Up
Program Follow-up You can follow the progress by the help of the program follow-up symbols on the display.( 22 - a,b,c,d). As the washing proceeds, respectively Washing and Drying symbols will be illuminated. When the drying symbol is on, the machine remains silent for about 40-50 minutes. Do not open the door before the completion indicator light is on. -
Page 32: Adding Additional Functions To The Program
Adding Additional Functions to the Program You may change the program according to your preferences by adding additional functions to the washing program.The washing programs have been designed so as to obtain the best cleaning considering the type of smear, amount of smear and properties of the washing materials. - Page 33 In order to add additional functions to the program; 1-Select the appropriate washing program for your dishes using the up/down buttons (7,8) after pressing the option button. 2- Enter the additional functions menu (4) by pressing the option button. After selecting the additional function using up/down buttons (7,8), illuminate the additional function indicators (9-10-11-12-13-14) by pressing the confirmation button.
-
Page 34: Settings Menu
Settings Menu In order to enter the Settings Menu, hold the option and delay buttons for 3 seconds. The display will show an expression (“Keep Pressing ..X”) to let you know how many more seconds you have to hold the button. When this number is zero, you will see the Menu settings on the display. - Page 35 4- Brightness level You may adjust the level of your machine’s display brightness here After entering the menu, select the “4- Brightness” by using the selection buttons. Here you will see “brightness :X” (X:L1,L2,L3 ). L1 is the lowest, L3 is the highest brightness level. select the desired brightness level and save the selection by pressing the confirmation button After pressing the confirmation button, activate “X”...
- Page 36 Delayed Start:(Snooze) You may delay the starting time of the selected programme up to 24 hours. You can not make a delay setting after the programme starts. In order for you to be able to make a delay setting, the selected programme needs not to be in operation. 1- Press the delay button (5) 2- Hour “00:00”...
-
Page 37: Maintenance And Cleaning
MAINTENANCE AND CLEANING Cleaning the machine in regular intervals prolongs the machine’s service life. Oil and lime may accumulate in the machine’s washing section. In case of such accumulation -Fill the detergent compartment without loading any dishes into the machine, select a programme that runs at high temperature, and start the machine. -
Page 38: Spray Arms
Spray arms Check whether or not the holes for the upper and lower spray arms are clogged. If there is any clogging, remove the spray arms and clean them under water. You can remove the lower spray arm by pulling it upwards, while the upper spray arm nut can be removed by turning the nut to the left. - Page 40 If one of program monitor lights is on and start/Pause light is on and off Your machine’s door is open, shut the door. If the programme won’t start Check if the plug is connected. • Check your indoor fuses. • Be sure that the water inlet tap is turned on.
-
Page 41: Practical And Useful Information
If the dishes won't dry up A programme without a dry operation selected. • Rinse aid dosage set too low • Dishes unloaded too fast. • If there are rust stains on the dishes Stainless-steel quality of the dishes washed is insufficient. •... - Page 42 Our Warranty (which is subject to the conditions below) covers rectification free of charge of any fault arising from defective materials or components, or faulty workmanship. The product will be repaired or replaced at the option of Blanco, and all costs of installation, removal, cartage, freight travelling expenses and insurance are to be paid by the customer.
- Page 43 52158850 R20-0...
Need help?
Do you have a question about the BDW4510X and is the answer not in the manual?
Questions and answers