Table of Contents
Advertisement
WARNING
1. Improper installation, adjustment,
alteration, service or maintenance can
cause property damage, injury or death,
and could cause exposure to substances
which have been determined by various
state agencies to cause cancer, birth
defects, or other reproductive harm. Read
the installation, operating, and
maintenance instructions thoroughly
before installing or servicing this
equipment.
2. Do not locate ANY gas-fired units in areas
where chlorinated, halogenated, or acidic
vapors are present in the atmosphere.
These substances can cause premature
heat exchanger failure due to corrosion
which can cause property damage, serious
injury or death.
CAUTION
As with all infrared equipment, clearances to
combustible materials are critical. Be sure all
units have reflectors installed along the
entire length of the tube, and that they are not
mounted at an angle greater than 45° from
the horizontal plane. In locations used for
storage of combustible materials, signs shall
be clearly posted in the vicinity of the heater
where readily apparent to material handlers
to specify the maximum permissible stacking
height to maintain required clearances from the
heater to the combustibles.
PLEASE BE SURE TO LEAVE IT WITH THE OWNER WHEN YOU LEAVE THE JOB.
INSTALLATION AND SERVICE MANUAL
low intensity gas-fired pressurized infrared heaters
THIS MANUAL IS THE PROPERTY OF THE OWNER.
FOR YOUR SAFETY
IF YOU SMELL GAS:
1. Open windows (indoor installation only).
2. Do not touch electrical switches.
3. Extinguish any open flame.
4. Immediately call your gas supplier.
FOR YOUR SAFETY
The use and storage of gasoline or other
flammable vapors and liquids in open
containers in the vicinity of this unit is
hazardous.
IMPORTANT
The use of this manual is specifically intended
for a qualified installation and service agency.
A qualified installation and service agency
must perform all installation and service of
these appliances.
Inspection upon Arrival
1. Inspect unit upon arrival. In case of damage, report it
immediately to transportation company and your local Modine
Sales Representative.
2. Check rating plate on unit to verify that power supply
meets available electric power at the point of installation.
3. Inspect unit upon arrival for conformance with description of
product ordered (including specifications where applicable).
9-511
5H0819050000
August, 2015
model IPT
Advertisement
Table of Contents

Related Manuals for Modine Manufacturing IPT


Summary of Contents for Modine Manufacturing IPT
-
Page 1: General Information/Installation Codes
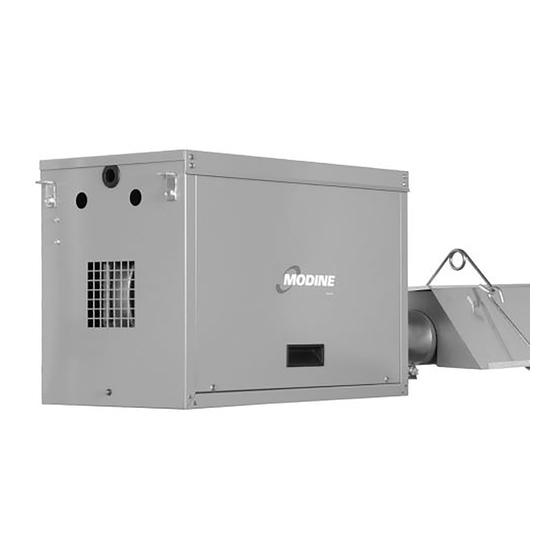
9-511 5H0819050000 August, 2015 INSTALLATION AND SERVICE MANUAL low intensity gas-fired pressurized infrared heaters model IPT FOR YOUR SAFETY IF YOU SMELL GAS: 1. Open windows (indoor installation only). 2. Do not touch electrical switches. WARNING 3. Extinguish any open flame. -
Page 2: Special Precautions
IMPORTANT: Indicates a situation which, if not avoided, Modine Manufacturing Company. Refer to the rating MAY result in a potential safety concern. plate on the unit for complete unit model number, serial number, and company address. -
Page 3: Table Of Contents
SI (METRIC) CONVERSION FACTORS/UNIT LOCATION Table 3.1 - SI (Metric) Conversion Factors IMPORTANT To Convert Multiply By To Obtain To Convert Multiply By To Obtain "W.C. 0.249 feet 0.305 1. Approval requirements for infrared heaters specify that °F (°F-32) x 5/9 °C Gal/Hr. -
Page 4: Unit Location
UNIT LOCATION /AIR REQUIREMENTS Table 4.1 - Combustible Material Clearances (inches) ➀ Location Recommendations 1. When locating the heater, consider the general space and Combustible Material Clearances (inches) heating requirements and availability of gas and electrical supply. Input MBH “A” “B”... -
Page 5: Installation
INSTALLATION Rotation of Gas Control Unit Mounting – Pre-Installation Notes WARNING WARNING 1. To prevent risk of fire or improper unit operation, radiant 1. All field gas piping must be pressure/leak tested prior to tube baffle must be properly selected from Table 10.1 operation. -
Page 6: Straight Tube Components
INSTALLATION Figure 6.1 - Straight Tube System Components Ref # Part Description Burner Burner Support Bracket (Qty. 4) Tube Clamp Tube & Reflector Hanger w/ Reinforcing Bar Radiant Tube Tube & Reflector Hanger Reflector Reflector End Cap Turbulator Baffle Table 6.1 - Straight Tube System Component List Tube Single-Tube Single-Tube... -
Page 7: U-Tube Components
INSTALLATION Figure 7.1 - U-Tube System Components Ref # Part Description Burner Burner Support Bracket (Qty. 4) Tube Clamp Double Tube & Reflector Hanger w/ Reinforcing Bar Radiant Tube Double Tube & Reflector Hanger U-Tube Reflector Reflector End Cap Turbulator Baffle Table 7.1 - U-Tube System Component List Tube Double-Tube... -
Page 8: Unit Mounting - Tube System
INSTALLATION Unit Mounting – Tube System • For units under 150,000 Btu/hr, all tubes and clamps are the same. WARNING • For units 150,000 Btu/hr and over, the first tube is shinier than the other tubes and is stenciled with the words “First Tube”. - Page 9 INSTALLATION Figure 9.1 - U-Tube System Suspension Ref # Part Description Burner (installed In later steps) Turbulator Baffle Chain & “S” Hooks Radiant Tube DBL Tube & Reflector Hanger w/ Reinforcing Bar Tube Clamp Double Tube & Reflector Hanger U-Tube Self-Tapping Sheet Metal Screws Table 9.1 - U-Tube Chain Spacing Espacement des chaînes...
-
Page 10: Unit Mounting - Turbulator Baffle
INSTALLATION Unit Mounting – Turbulator Baffle 3. Insert the completed turbulator baffle assembly into the last radiant tube, flush with the end as shown in Figure 10.2. WARNING Figure 10.2 - Insertion of Turbulator Baffle Assembly To prevent risk of fire or improper unit operation, radiant tube baffle must be properly selected from Table 10.1 Reflector according to fuel type, burner input, and tube system length... -
Page 11: Unit Mounting - Reflector
INSTALLATION Unit Mounting – Radiant Reflector 4. Slide the next reflector through the tube and reflector hangers and center over the next tube. The reflector should overlap CAUTION the previous reflector by 4". Repeat until all reflectors are installed (alternating top and bottom overlaps). 5. -
Page 12: Venting
INSTALLATION Venting Figure 12.1 - Vertical Venting WARNING 2' Min. Listed cap 1. Do not join two sections of Type B double wall vent pipe within the vent system. A compromised pipe joint/liner pipe may not be detected, resulting in serious injury or death. 1' Min. - Page 13 INSTALLATION Figure 13.1 - Vertical Venting through Sloped Roof 3. The vent system shall terminate at least 3' above any forced air inlet (except direct vent units) located within 10', and at least 4' below, 4' horizontally from, or 1' above any door, Listed Cap window or gravity air inlet into any building.
-
Page 14: Gas Connections
INSTALLATION Figure 14.1 - Common Venting Entering at CAUTION Different Levels To Vent Termination 1. Purging of air from gas supply line should be performed as described in ANSI Z223.1 - latest edition “National Fuel Gas Code”, or in Canada in CAN/CGA-B149 codes. 6"... - Page 15 INSTALLATION Figure 15.2 - Recommended Installation of Flexible 7. When pressure/leak testing pressures above 14" W.C. (1/2 psi), close the field installed shut-off valve, Gas Connector disconnect the unit, and its combination gas control from the gas supply line, and plug the supply line before testing. When Alternate Supply Locations testing pressures 14"...
-
Page 16: High-Altitude Accessory Kit
INSTALLATION - HIGH ALTITUDE ACCESSORY KIT HIGH ALTITUDE ACCESSORY KIT Manifold Pressure Adjustment The inlet pressure to the unit must be confirmed to be within Modine’s gas-fired equipment standard input ratings are acceptable limits (6-7" W.C. for natural gas and 11-14" W.C. certified by ETL. - Page 17 INSTALLATION - HIGH ALTITUDE ACCESSORY KIT Table 17.1 - High Altitude Kits for IPT Conversion IPT - Natural Gas 0-2000 FT 77823 77824 2001-3500 FT 77832 3501-4000 FT 77831 4001-4500 FT 77825 77834 4501-5000 FT 77826 77827 77828 77829 77830...
-
Page 18: Electrical Connections
INSTALLATION/START-UP PROCEDURE Electrical Connections IMPORTANT WARNING Start-up and adjustment procedures should be performed by a qualified service agency. 1. Disconnect power supply before making wiring connections to prevent electrical shock and equipment damage. 1. Turn off power to the unit at the disconnect switch. Check 2. -
Page 19: Start-Up Procedure
START-UP PROCEDURE Main Burner Adjustment Primary Air Shutter (Propane Gas Only) The gas pressure regulator (integral to the combination gas Propane gas models 75-200 are equipped with an adjustable control) is adjusted at the factory for average gas conditions. primary air shutter, mounted flush with the end of the gas It is important that gas be supplied to the heater in accordance orifice, as shown in Figure 19.2. -
Page 20: Dimensional Data
DIMENSIONAL DATA Figure 20.1 - Casing Dimensions (in.) TOP VIEW 10.00 23.12 BACK VIEW ø 1.000 GAS CONNECTION SIDE VIEW FRONT VIEW 12.39 1.36 2.61 ø .875 ø .875 14.99 THERMOSTAT LINE VOLTAGE 13.58 CONNECTION CONNECTION 3.65 4.00 4.00 6.00 6.00 21.91 11.00... -
Page 21: Performance
PERFORMANCE Table 21.1 - Performance Input MBH 20, 30, 30, 40, 40, 50, 50, 60, 50, 60, 20, 30 20, 30, 40 50, 60 Certified Tube Lengths (ft.) 50 ➁ Recommended 10 – 12 10 – 12 12 – 14 ➂ 12 –... -
Page 22: Maintenance
Figure 22.1. Once the screws are removed, Modine Manufacturing Company. Refer to the rating plate the burner enclosure side panels can be removed for access to on the unit for complete unit model number, serial number, the burner assembly. - Page 23 TROUBLESHOOTING Table 23.1 - Troubleshooting TROUBLE POSSIBLE CAUSE POSSIBLE REMEDY Unit does nothing 1. Power supply is off 1. Turn on main power 2. No 24V power to thermostat 2 a. Check control transformer b. If failed transformer - check thermostat wire gage and length 3.
-
Page 24: Replacement Parts Ordering
SERVICE & TROUBLESHOOTING/REPLACEMENT PARTS ORDERING LED Diagnostic Capability Replacement Parts Ordering The LED on the ignition controller indicates the condition of When servicing, repairing or replacing parts on these units, locate the model identification plate of the unit and always the control system. -
Page 25: Wiring Diagram
Figure 25.1 - Model Number Designations DIGIT SEQUENCE 1, 2, 3 4, 5, 6 8, 9 10, 11 IPT 200 S 01 11 MODEL NUMBER MODEL PREFIX: CONTROL CODE: IMPROVED PRESSURE TUBE: IPT 11: SINGLE STAGE, NATURAL GAS 21: SINGLE STAGE, PROPANE GAS... - Page 26 THIS PAGE INTENTIONALLY LEFT BLANK 9-511...
- Page 27 THIS PAGE INTENTIONALLY LEFT BLANK 9-511...
-
Page 28: Warranty
Burners High Intensity Infrared Units Sheet Metal Parts All Products As Modine Manufacturing Company has a continuous product improvement program, it reserves the right to change design and specifications without notice. Modine Manufacturing Company 1500 DeKoven Avenue Racine, WI 53403 Phone: 1.800.828.4328 (HEAT)
Need help?
Do you have a question about the IPT and is the answer not in the manual?
Questions and answers