Table of Contents
Advertisement
Quick Links
Advertisement
Table of Contents

Related Manuals for Logik L5SSTB12


Summary of Contents for Logik L5SSTB12
- Page 1 500GB Freeview SD TV Recorder Instruction Manual L5SSTB12...
-
Page 3: Table Of Contents
Contents Unpacking ..........................5 Product Overview ........................6 Front View ................................6 Rear View ................................6 Remote Control ..............................7 Battery Replacement of the Remote Control ................... 9 – Handling the Batteries ......................... 9 – Handling the Remote Control ......................9 Remote Control Operation Range........................ 9 Initial Set Up ..........................11 Plug In and Switch On ............................11 Standby Modes ........................11... - Page 4 Time Shift Recording ............................21 Manual Timer Programming ........................22 – Add Timer ...............................22 Play Recorded Programme .....................23 Channel List Setting ........................24 Select Channel..............................24 Delete Channel..............................24 Rename Channel ..............................25 Lock Channel ..............................25 Favourite Channel ............................25 Info ..................................25 Timers Setting ..........................26 Delete Timer ...............................26 Edit Timer ................................26 Add Timer ................................26 Recordings Library Setting .....................27...
-
Page 5: Unpacking
Thank you for purchasing your new Logik 500GB Freeview SD TV Recorder. We recommend that you spend some time reading this instruction manual in order that you fully understand all the operational features it off ers. You will also fi nd some hints and tips to help you resolve any issues. -
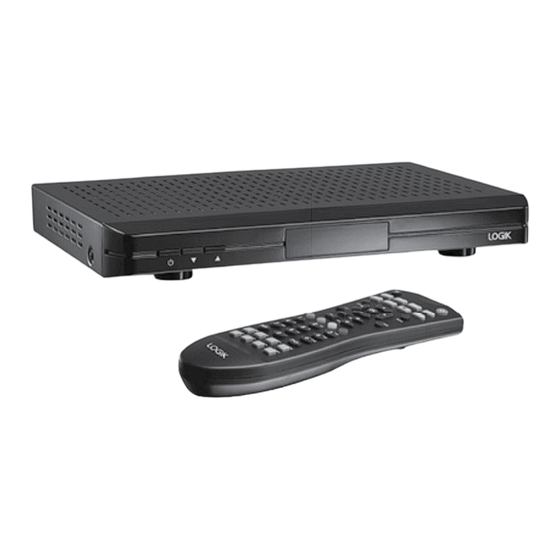
Page 6: Product Overview
Product Overview Front View LED Display Button • Displays the current time in active Switch the unit between on and standby, switches off in low power standby mode. standby. Button • Displays the current programme number To change channels. after the unit is turned on. Rear View ANTENNA ANTENNA... -
Page 7: Remote Control
Remote Control Button Mute and restore your unit’s sound. Button Switches the unit on and off. Button TIMERS Allows fast reversing of the recorded programmes. GUIDE INFO PLAY Button TEXT BACK Start /resume playback. Button Allows fast forwarding of the recorded programmes. - Page 8 14. TEXT Button Displays interactive and digital text services (where available). 15. BACK Button Return to the previous menu. TIMERS 16. PR + / – Button • Switches to the next or previous GUIDE INFO channel. • Moves one page up or down in the TEXT BACK channel list.
-
Page 9: Battery Replacement Of The Remote Control
Battery Replacement of the Remote Control Squeeze the cover lever and lift the battery cover to access the battery compartment of the remote control. Insert two AAA size batteries (included). Ensure the polarities (+ and –) of the batteries match the (+) and (–) ends indicated in the battery compartment. -
Page 10: System Connection
System Connection Aerial To RF IN RF Coaxial Cable socket (not included) RF Coaxial Cable (not included) SCART Cable To SCART (not included) socket To aerial wall socket ANTENNA ANTENNA OPTICAL SCART (TV) DC IN AUDIO OUT Digital Optical Cable To Mains Socket (not included) To SPDIF... -
Page 11: Initial Set Up
Initial Set Up Plug In and Switch On Connect the mains adapter cable to the mains socket after you have completed all the connections and switch on. At this stage, the unit switches to standby mode. The red LED indicator will illuminate on the front panel of the unit. -
Page 12: First Time Installation
Low Power Standby Mode When the unit is in On mode, press the button once, the unit will enter the active standby mode and the power indicator will illuminate red. To turn the unit on again, press the button again. The power indicator will illuminate green. The unit enters into the low power standby mode approximately 2-3 minutes. -
Page 13: Target Region Descriptor
The tuning progress screen will be displayed, showing you how many channels have been found and saved. The tuning may take several minutes to complete. You can press the MENU button to cancel the auto tuning. Target Region Descriptor During tuning your TV may have received signals from more than one transmitter. -
Page 14: Programme Guide (Epg)
Programme Guide (EPG) This system has an Electronic Programme Guide (EPG) to help you navigate through all the possible viewing options. The Programme Guide supplies information such as programme listings, start and end times for all available services (the availability and amount of programme information will vary, depending on the particular broadcaster). -
Page 15: Programme Options
Programme Options Press the buttons to select the desired channel and then press the buttons to select the desired programme. Press the OK button to display the Programme Options. Select Channel Press the buttons to select Select Channel and then press the OK button to switch to channel of the programme which is selected. -
Page 16: Set Reminder / Delete Reminder
Set Reminder / Delete Reminder Press the buttons to select Set Reminder and then press the OK button to set a reminder for future programs. The reminder setting will be indicated as a yellow surround to the programme listing. To cancel an already set reminder, select that programme and press the OK button to display the Programme Options. -
Page 17: Guide Search
Guide Search You can search the EPG for upcoming programmes. From the EPG view, press the TEXT button to display the Guide Search menu. Press the buttons to select the following options: Select from: Current Channel List / Single channel / All channels / All TV Search channels / All Radio channels. -
Page 18: Basic Features
Basic Features Information Bar Press the INFO button to display information about the current programme. Channel number currently viewed Current programme name Channel name currently viewed Programme progress bar Current programme start time Next programme name Current programme end time 10. -
Page 19: Teletext Selection
Teletext Selection Digital teletext can access special digital teletext services and specific services which broadcast digital teletext. First, ensure the Subtitle function is turned off. Press the TEXT button to enter Teletext. (If Teletext is transmitted.) Follow the instructions on digital teletext and move onto the next step by pressing OK, , RED, GREEN, YELLOW, BLUE or 0-9 buttons etc. -
Page 20: Recording
Recording Make sure that the unit’s built-in HDD has enough available memory space. Instant Recording Use this function to record the DTV programme you are watching on the main screen and save them for future viewing. Press the button to record the programme that you are currently watching, a message will appear on the TV screen and the Record icon will appear briefly in the top left hand corner of the TV screen. -
Page 21: Time Shift Recording
Time Shift Recording This function allows the unit to virtually record the live viewing broadcast programme. • Time shift and recording functions may not work if the signal strength is weak. • Recording will stop automatically when the disk is full. •... -
Page 22: Manual Timer Programming
Manual Timer Programming This function is used to perform scheduled recording. The recording from timer programme or direct recording may have a little bit of delay when it starts to record the broadcast programme. Press the Timers button to display the Timers menu. -
Page 23: Play Recorded Programme
Channel Navigate through the TV or Radio list. Record Type Display the recording type. Date Start Date. Start Start Time. End Time. Duration Displays the duration of the recording. Permit or block playback for other users. (“Use parental Playback settings” is default.) Change / Delete Permit or prohibit any modifications for other users. -
Page 24: Channel List Setting
Channel List Setting Press the MENU button to display the main menu. Press the buttons to select Channel List and then press the OK button. The Channel List menu will be displayed. You can press the OK button to display the Channel List directly. -
Page 25: Rename Channel
Rename Channel Press, press the buttons to select the desired channel you want to rename. buttons to select Edit name and then press the OK button. Press the The name appears on the middle of the screen with the first character highlighted. Use buttons to move to the previous/next character and the use the buttons to toggle the current character. -
Page 26: Timers Setting
Timers Setting This function is used to perform scheduled recording. The recording from timer programme or direct recording may have a little bit of delay when it starts to record the broadcast programme. Press the MENU button to display the main menu. -
Page 27: Recordings Library Setting
Recordings Library Setting Press the MENU button to display the main menu. Press the buttons to select Recordings library and then press the OK button. The Recordings library menu will be displayed the saved recorded programme. You can press the LIB. button to access the Recording library menu directly. Capacity Space of Hard Disk 1. -
Page 28: Edit Recording
Edit Recording Press the buttons to select the recorded programme you want to edit. Press the GREEN button to enter Edit Recording Details menu. Only the Start recording at and Stop recording at options are active. If you have already separated recording, you could select any chapter to begin with the archiving and stop it. -
Page 29: Play Options
Play Options Press the MENU button and then press the buttons to select Recordings Library or the LIB. button to display the Recording Library menu. In Recordings library menu, press the buttons to select the recorded programme you want to play. Press the OK button to enter Play Options menu. -
Page 30: Chapters Options
Chapters Options During playback, press the MENU button to display the Chapter Options menu. Press the buttons to select the following options and then press the OK button. Create New Set a chapter mark anywhere Chapter Mark your want. Forwards to If there is more than one Next Chapter chapter, go to the next chapter. -
Page 31: Edit Recording
buttons to select the Create Press the Archive and the press the OK button to display Archive Management menu. Edit Recording buttons in Edit recordings tab to Press the go to recorded programme list on the right side of the menu. Press the buttons and then press the OK button to select the recorded programme you... -
Page 32: Recording Title
Recording Title Press the buttons to select Recording title. buttons to select Include to display a recording title or Skip to disable. Press the • If you select Skip in Recording Title tab, the options Display and Duration below will be also disable. •... -
Page 33: Recording Setup
Recording Setup Press the MENU button to display the main menu. buttons to select Setup & Retune Press the and then press the OK button. The Setup & Retune menu will be displayed. buttons to select Recordings Press the and then press the OK button. The Recording Configuration menu will be displayed. - Page 34 Use the buttons to select the following options and the buttons to adjust the settings. Select the maximum time allowed for timeshifting. For more details, please Timeshift refer the section Time Shift Recording. When the HDD is full and a timer is set to record, the unit will automatically discard previous recordings based on this setting.
-
Page 35: Configuration Setup
Configuration Setup Press the MENU button to display the main menu. buttons to select Setup & Retune Press the and then press the OK button. The Setup & Retune menu will be displayed. buttons to select Configuration Press the and then press the OK button. The Configuration menu will be displayed. - Page 36 The unit will automatically switch to standby mode 3 hours after the last Auto Power time the remote control was used. A reminder screen will pop up and Down count down before the unit switches to standby mode. Auto OAD (Over Air Download) The unit auto detects the latest firmware through the DTV signal and allows you to accept or refuse...
-
Page 37: Language Setup
Language Setup Press the MENU button to display the main menu. buttons to select Setup & Retune Press the and then press the OK button. The Setup & Retune menu will be displayed. buttons to select Language Press the and then press the OK button. The Language settings menu will be displayed. -
Page 38: Installation Setup
Installation Setup Press the MENU button to display the main menu. buttons to select Setup & Retune Press the and then press the OK button. The Setup & Retune menu will be displayed. buttons to select Installation Press the & Retune and then press the OK button. The Installation menu will be displayed. -
Page 39: Hints And Tips
Hints and Tips If a problem does occur, it may often be due to something very minor. The following table contains various tips. If you require additional assistance please call our UK Call Centre on 0844 561 1234. Our UK Customer Contact Centre is open Monday-Saturday 8am-8pm or Sunday 8am-6pm. -
Page 40: Specifications
Specifications Model L5SSTB12 General Characteristics Supply Voltage 220-240V AC ~50Hz Input Frequency 470 Mhz - 862 Mhz Maximum Power Consumption 18 W Standby Power Consumption Operating Temperature 5°C to +40°C Storage Temperature -15°C to +55°C Humidity 25 to 75 % rel... -
Page 41: Safety Warnings
Safety Warnings • Read all the instructions carefully before adapter and consult your dealer. using the unit and keep them for future Ventilation reference. • To prevent the risk of electric shock or fire • Retain the manual. If you pass the unit hazard due to overheating, ensure that onto a third party make sure to include this curtains and other materials do not obstruct... - Page 42 Batteries Service • Batteries used in the remote control for this • To reduce the risk of electric shock, do not unit are easily swallowed by young children remove screws. The unit does not contain and this is dangerous. any user-serviceable parts. Please leave all maintenance work to qualified personnel.
- Page 43 How the digital switchover may affect you: Television in the UK is going digital, bringing us all more choice and new services. Starting in late 2007 and ending in 2012, television services in the UK will go completely digital, TV region by TV region. The map shows when your area will switchover to digital.
- Page 44 Visit Partmaster.co.uk today for the easiest way to buy electrical spares and accessories. With over 1 million spares and accessories available we can deliver direct to your door the very next day. Visit www.partmaster.co.uk or call 0844 800 3456 (UK customers only). Calls charged at National Rate.
Need help?
Do you have a question about the L5SSTB12 and is the answer not in the manual?
Questions and answers