
Related Manuals for Logik L1HSTB12


Summary of Contents for Logik L1HSTB12
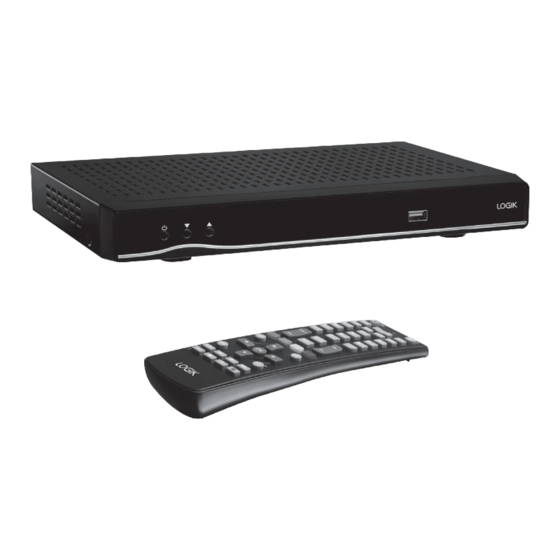
- Page 1 1TB Freeview HD TV recorder Instruction Manual L1HSTB12 L1HSTB12_IB_120725_CS4_Edits_Pauline.indd 1 30/07/2012 14:57...
- Page 2 L1HSTB12_IB_120725_CS4_Edits_Pauline.indd 2 30/07/2012 14:57...
-
Page 3: Table Of Contents
Contents Unpacking ..........................5 Product Overview ........................6 Front View ................................6 Rear View ................................6 Remote Control ..............................7 Battery Replacement of the Remote Control ................... 9 – Handling the Batteries ......................... 9 – Handling the Remote Control ......................9 Remote Control Operation Range........................ 9 Initial Set Up ..........................11 Plug In and Switch On ............................11 Standby Modes ........................11... - Page 4 Viewing Photos ..............................26 Playing Slideshow ............................27 Watching Movies ..............................27 File Operations ..............................29 Channel List Setting ........................30 Select Channel..............................30 Delete Channel..............................30 Delete Multiple Channels ..........................31 Rename Channel ..............................31 Lock Channel ..............................31 Lock Multiple Channel ............................32 Favourite Channel ............................32 Channel List Filter .............................33 Info ..................................33 Timers Setting ..........................34 Delete Timer ...............................34...
-
Page 5: Unpacking
Thank you for purchasing your new Logik 1TB Freeview HD TV recorder. We recommend that you spend some time reading this instruction manual in order that you fully understand all the operational features it offers. You will also find some hints and tips to help you resolve any issues. -
Page 6: Product Overview
Product Overview Front View Button LED Display • Switches the unit between the ON • Display is blank when in standby and STANDBY modes. mode. Button • Displays the current programme • To change channels. number after the unit is turned on. Power indicator Remote Control Sensor • Lights up red when the unit is in... -
Page 7: Remote Control
Remote Control Power Indicator Standby Button • Switches the unit on and off. Standby MUTE 0-9 Buttons • Selects a channel. • Enter numeric values in the set-up PIP– PIP+ menus. WIDE SWAP LANG(AD) TIMERS • Selects characters for renaming. TEXT Button .,?* • Displays interactive and digital text... - Page 8 14. GUIDE Button • Displays the EPG Electronic Programme Standby MUTE Guide. Buttons • Navigates menus and programme guides. PIP– PIP+ 16. OK Button • Confirms a selection in the OSD menu. WIDE SWAP LANG(AD) TIMERS • Displays the channel list. 17.
-
Page 9: Battery Replacement Of The Remote Control
Battery Replacement of the Remote Control Squeeze the cover lever and lift the battery cover to access the battery compartment of the remote control. Insert two AAA size batteries (included). Ensure the polarities (+ and –) of the batteries match the (+) and (–) ends indicated in the battery compartment. -
Page 10: System Connection
System Connection Audio System To SPDIF Aerial socket RF Coaxial Cable (not included) Digital Optical To Mains Socket Cable (not included) To aerial wall Mains Adapter Cable socket (included) ANTENNA IN ANTENNA OUT HDMI OUTPUT ETHERNET OPTICAL SCART (TV) DC IN AUDIO OUT To SCART socket... -
Page 11: Initial Set Up
Initial Set Up Plug In and Switch On Connect the mains adapter cable to the mains socket after you have completed all the connections and switch on. At this stage, the unit switches to standby mode. The red LED indicator will illuminate on the front panel of the unit. -
Page 12: Low Power Standby Mode
Low Power Standby Mode When the unit is in On mode, press the Standby once, the unit will enter the active standby mode and the power indicator will illuminate red. To turn the unit on again, press the button again. The power indicator will illuminate green. The unit enters low power standby mode after approximately 1 minute. -
Page 13: Target Region Descriptor
Press the buttons to select Yes and then press the OK button to begin automatic channel scan. The tuning progress screen will be displayed, showing you how many channels have been found and saved. The tuning may take several minutes to complete. You can press the MENU button to cancel the auto tuning. -
Page 14: Programme Guide (Epg)
Programme Guide (EPG) This system has an Electronic Programme Guide (EPG) to help you navigate through all the possible viewing options. The Programme Guide supplies information such as programme listings, start and end times for all available services (the availability and amount of programme information will vary, depending on the particular broadcaster). -
Page 15: Event Options
Displays Guide Search menu. (For more details, please refer to TEXT (Search) section Guide Search page 17.) Shows the current programme. PLAY Exit Programme Guide and return to normal TV viewing. GUIDE Event Options Press the buttons to select the desired channel and then press the buttons to select the desired programme. -
Page 16: Check Conflicts
Check Conflicts If more than two programmes are set for recording in the same time interval or if more than two reminders have the same starting time, a conflict is caused. The Too Many Timers window will automatically open. (For more details, please refer to the section Alternative Timer Record.) Split Record Split programme... -
Page 17: Guide Search
Guide Search You can search the EPG for upcoming programmes. From the EPG view, press the TEXT button to display the Guide Search menu. Press the buttons to select the following options: Select from: Current Channel List / Single channel / All channels / All TV Search channels / All Radio channels. -
Page 18: Basic Features
Basic Features Information Bar Press the i button to display information about the current programme. 5 6 7 13 14 Channel number currently viewed Current programme name Channel name currently viewed Programme progress bar Definition of programme (High 10. Current programme start time Definition or Standard Definition) 11. -
Page 19: Tv/Radio Selection
TV/RADIO Selection Press the TV/RADIO button to switch between TV and Digital radio channels. Teletext Selection Digital teletext can access special digital teletext services and specific services which broadcast digital teletext. First, ensure the Subtitle function is turned off. Press the TEXT button to enter Teletext. (If Teletext is transmitted.) Follow the instructions on digital teletext and move onto the next step by pressing OK,... -
Page 20: Recording
Recording Make sure that the unit’s built-in HDD has enough available memory space. Instant Recording Use this function to record the TV programme you are watching on the main screen and save them for future viewing. Press the button to record the programme that you are currently watching, Instant Recording screen will be displayed for a short time. -
Page 21: Time Shift Recording
Time Shift Recording This function allows the unit to virtually record the live viewing broadcast programme. • Time shift and recording functions may not work if the signal strength is weak. • Recording will stop automatically when the disk is full. • During time shift, changing channels will cause time shift to terminate. -
Page 22: Manual Timer Programming
Manual Timer Programming This function is used to perform scheduled recording. The recording from timer programme or direct recording may have a little bit of delay when it starts to record the broadcast programme. Press the Timers button to display the Timers menu. -
Page 23: Play Recorded Programme
Press the buttons to select the following options and the or 0-9 buttons to change the settings. Channel Navigate through the TV or Radio list. Record Type Display the recording type. Date Start Date. Start Start Time. End Time. Duration Displays the duration of the recording. -
Page 24: Viewing The Media Browser
Viewing the Media Browser Connecting a USB Storage Device USB memory stick USB Cable (not included) USB Hub Portable Hard Disk • Some versions of portable hard disk may require more power than the unit USB socket can provide. To ensure correct operation please use the power adapter for that device. - Page 25 Press the buttons to select Media Browser and then press the OK button. The Media Browser menu will be displayed. Press the buttons to select your select your storage device and then press the OK button to display the file list. Press the buttons to navigate in the file list.
-
Page 26: Viewing Photos
Viewing Photos Press the MENU button to display the main menu. Press the buttons to select Media Browser and then press the OK button. The Media Browser menu will be displayed. Press the buttons to select your select your storage device and then press the OK button to display the file list. -
Page 27: Playing Slideshow
Playing Slideshow Press the buttons to select photos in media browser and then press the OK button. PLAY button to start slideshow. Press the Use the following buttons to select options. Remote Control Function Button Plays all photos in the folder starting with the selected PLAY photo. - Page 28 Press the buttons to navigate in the file list. Press the buttons according to the following list. Remote Control Function Button 0-9 (Jump) Jumps to the selected movie. OK (Play This) Plays the selected movie. Copy or move the folder / sub-folder / file from USB to hard BLUE (File disk or vice versa.
-
Page 29: File Operations
File Operations You can move or copy your files to hard disk from external USB. Press the MENU button to display the main menu. buttons to select Media Browser Press the and then press the OK button. The Media Browser menu will be displayed. Press the buttons to select your select your storage device and then press the OK button to... -
Page 30: Channel List Setting
Channel List Setting Press the MENU button to display the main menu. Press the buttons to select Channel List and then press the OK button. The Channel List menu will be displayed. You can press the OK button to display the Channel List directly. -
Page 31: Delete Multiple Channels
Delete Multiple Channels Press the buttons to select the desired channel you want to delete. Press the YELLOW button to tag the channel. The selected channel will be marked. You can press the GREEN button to tag all channels in the list at once. Repeat step 2 until all desired channels have been marked. -
Page 32: Lock Multiple Channel
Lock Multiple Channel Press the buttons to select the desired channel you want to lock. Press the YELLOW button to tag the channel. The selected channel will be marked. You can press the GREEN button to tag all channels in the list at once. Repeat step 2 until all desired channels have been marked. -
Page 33: Channel List Filter
Channel List Filter It is possible to filter the channel list to show only the channels to suit your criteria. To filter the channel list in either EPG view or channel list view, press the Blue button to display the Channel List Filter. Press the buttons to select the following options. -
Page 34: Timers Setting
Timers Setting Press the MENU button to display the main menu. Press the buttons to select Timers and then press the OK button. The Timers menu will be displayed. You can press the TIMERS button to access the Timers menu directly. Delete Timer Press the buttons to select the desired programme you want to delete. -
Page 35: Recordings Library Setting
Recordings Library Setting Press the MENU button to display the main menu. Press the buttons to select Recordings library and then press the OK button. The Recordings Library menu will be displayed the saved recorded programme. You can press the LIB button to access the Recording library menu directly. Capacity Space of Hard Disk 1. -
Page 36: Edit Recording
Edit Recording Press the buttons to select the recorded programme you want to edit. Press the GREEN button to enter Edit Recording Details menu. Only the Start recording at and Stop recording at options are active. If you have already separated recording, you could select any chapter to begin with the archiving and stop it. -
Page 37: Play Options
Play Options Press the MENU button and then press the buttons to select Recordings Library or the LIB button to display the Recording Library menu. In Recordings library menu, press the buttons to select the recorded programme you want to play. Press the OK button to enter Play Options menu. -
Page 38: Chapters Options
Chapters Options During playback, press the MENU button to display the Chapter Options menu. Press the buttons to select the following options and then press the OK button. Create New Set a chapter mark anywhere Chapter Mark your want. Forwards to If there is more than one Next Chapter chapter, go to the next chapter. -
Page 39: Edit Recording
Press the buttons to select the Create Archive and the press the OK button to display Archive Management menu. Edit Recording buttons in Edit recordings tab to Press the go to recorded programme list on the right side of the menu. buttons and then press the OK Press the button to select the recorded programme you... -
Page 40: Main Title
Main Title Press the buttons to select Main title. buttons to select Include to display a main title or Skip to disable. Press the If you select Skip in Main Title tab, the options Text and Duration below will also be disabled. -
Page 41: Recordings Setup
Recordings Setup Press the MENU button to display the main menu. Press the buttons to select Setup and then press the OK button. The Setup menu will be displayed. Press the buttons to select Recordings and then press the OK button. The Recording Configuration menu will be displayed. - Page 42 Use the buttons to select the following options and the buttons to adjust the settings. Selects the maximum time allowed for timeshifting. For more details, Timeshift please refer the section Time Shift Recording. When the HDD is full and a timer is set to record, the unit will automatically discard previous recordings based on this setting.
-
Page 43: Configuration Setup
Configuration Setup Press the MENU button to display the main menu. buttons to select Setup and then Press the press the OK button. The Setup menu will be displayed. Press the buttons to select Configuration and then press the OK button. The Configuration menu will be displayed. - Page 44 Allows you to select 16:9 / 4:3. Widescreen picture shown in the full 16:9 screen. TV Type Widescreen picture shown in the full screen with black bars on the top and bottom of the screen. Allows you to select from CVBS / RGB from the SCART socket.
- Page 45 The Lock System is designed to prevent accidental retuning of the TV / losing channels and prevent children watching unsuitable programmes. To access the menus, you must enter the password. Enter the default password “0000” for first time use. If you change the password, be sure to remember the new password! If you forget the new password, press the master password “4725”.
-
Page 46: Language Setup
Language Setup Press the MENU button to display the main menu. Press the buttons to select Setup and then press the OK button. The Setup menu will be displayed. buttons to select Langauage Press the and then press the OK button. The Language settings menu will be displayed. -
Page 47: Installation Setup
Installation Setup Press the MENU button to display the main menu. Press the buttons to select Setup and then press the OK button. The Setup menu will be displayed. buttons to select Installation and Press the then press the OK button. The Installation menu will be displayed. -
Page 48: Ip (Internet Protocol) Installation Setup
IP (Internet Protocol) Installation Setup Press the MENU button to display the main menu. Press the buttons to select Setup and then press the OK button. The Setup menu will be displayed. Press the buttons to select IP Settings and then press the OK button. -
Page 49: Hints And Tips
Hints and Tips If a problem does occur, it may often be due to something very minor. The following table contains various tips. If you require additional assistance please call our UK Call Centre on 0844 561 1234. Our UK Customer Contact Centre is open Monday-Saturday 8am-8pm or Sunday 8am-6pm. -
Page 50: Specifications
Specifications Model L1HSTB12 General Characteristics Supply Voltage 220-240V AC ~50Hz Input Frequency 470 Mhz - 862 Mhz Frequency Band Maximum Power Consumption 19.2 W Standby Power Consumption Operating Temperature 5°C to 40°C Storage Temperature -15°C to +55°C Humidity 25 to 75 % rel... -
Page 51: Safety Warnings
Safety Warnings • Read all the instructions carefully before Ventilation using the unit and keep them for future • To prevent the risk of electric shock or fire reference. hazard due to overheating, ensure that • Retain the manual. If you pass the unit curtains and other materials do not obstruct onto a third party make sure to include this the ventilation vents. - Page 52 Batteries Service • Batteries used in the remote control for this • To reduce the risk of electric shock, do not unit are easily swallowed by young children remove screws. The unit does not contain and this is dangerous. any user-serviceable parts. Please leave all maintenance work to qualified personnel.
- Page 53 How the digital switchover may affect you: Television in the UK is going digital, bringing us all more choice and new services. Starting in late 2007 and ending in 2012, television services in the UK will go completely digital, TV region by TV region. The map shows when your area will switchover to digital.
- Page 54 Visit Partmaster.co.uk today for the easiest way to buy electrical spares and accessories. With over 1 million spares and accessories available we can deliver direct to your door the very next day. Visit www.partmaster.co.uk or call 0844 800 3456 (UK customers only). Calls charged at National Rate.
- Page 55 L1HSTB12_IB_120725_CS4_Edits_Pauline.indd 55 30/07/2012 14:57...
- Page 56 L1HSTB12_IB_120725_CS4_Edits_Pauline.indd 56 30/07/2012 14:57...
Need help?
Do you have a question about the L1HSTB12 and is the answer not in the manual?
Questions and answers