C. Crane CCWiFi Instruction Manual
Hide thumbs
Also See for CCWiFi:
- Instruction manual (48 pages) ,
- Firmware installation & usage manual (4 pages) ,
- Instruction manual (48 pages)
Table of Contents
Advertisement
Quick Links
Advertisement
Table of Contents

Related Manuals for C. Crane CCWiFi


Summary of Contents for C. Crane CCWiFi
-
Page 1: Internet Radio
Internet Radio INSTRUCTION MANUAL Rev. 2 - 2015... -
Page 2: Unpacking
CAUTION • Before turning the unit on, set your volume control to a low setting. • Slowly increase the sound until you can hear it comfortably and clearly without distortion. • Long-term exposure to loud sounds may cause hearing damage. It is best to avoid high volume levels when using headphones/ earbuds, especially for extended periods. -
Page 3: Table Of Contents
Table of Contents Unpacking ................2 Location of Controls ............4-5 Getting Started Turning the Radio On ..........6 Connecting to a Wireless Network ......7 Entering Your WEP or WPA Key ......8 Connecting to Network Using Ethernet Cable ..10 Choosing a Radio Station ............. -
Page 4: Location Of Controls
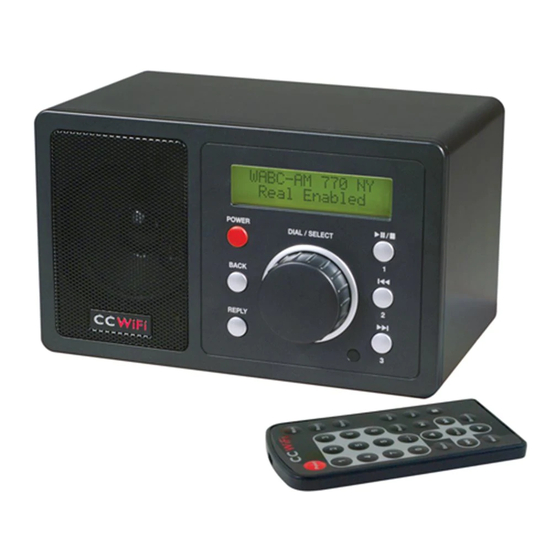
Location of Controls — Front and Back of Radio POWER ill / DIAL / SELECT BACK REPLY ii l WiFi LCD Display DIAL/VOLUME/SELECT PLAY/PAUSE/STOP or REPLY PRESET #1 BACK PREVIOUS or PRESET #2 POWER ON/OFF NEXT or PRESET #3 Speaker Remote Sensor LINE DC IN 7.5V... -
Page 5: Location Of Controls
Location of Controls — Remote Control Buttons 23-26 and 29-30 are used only in Media Player mode while playing tracks from your computer. POWER: Switch radio STOP: Stop track play. Press ON/OFF and hold to delete a track from the playlist 1-9: Store presets and recall NEXT: Play next track functions... -
Page 6: Getting Started
Getting Started – Turning On Your WiFi Radio Plug the power adapter cube into a 120V AC power outlet. Connect the power adapters small plug into the jack on the back of the radio that is labeled “DC IN 7.5V”. Caution: Use only the power adapter supplied with the radio. -
Page 7: Connecting To A Wireless Network
Getting Started – Turning On Your WiFi Radio Connecting to a Wireless Network When the radio finds wireless networks, it will show the network names (also called the ESSID) in the display screen. Example: SELECT NETWORK < > WiFi Network 1 Note: You can always use the BACK button to start over at the previous screen. -
Page 8: Entering Your Wep Or Wpa Key
Connecting to a Wireless Network Connecting to If the display then continue Network shows: on to page 12. However, if the screen displays: Enter WPA Key Enter WEP Key you must enter the correct WEP or WPA wireless encryption key (Wireless Password) to proceed. - Page 9 Entering Your WEP or WPA Key (Wireless Password) ABCDE F GHIJ Turn the dial to the next character in the password and SELECT. Repeat this process until your entire wireless password is entered on the lower line. Example: XYZab c defg Frank12abc _ Note: WEP passwords use numbers 0-9 and upper case letters A-F.
-
Page 10: Connecting To Network Using Ethernet Cable
1-4 on the back of your router. Note: Ethernet cables can be purchased from C. Crane Company or your local electronics store. 2. Connect the opposite end of the Ethernet cable to the Ethernet port on the back of your radio. -
Page 11: Choosing A Radio Station
Choosing a Radio Station 1. From the Primary Menu, choose “Stations” by turning the dial until brackets are positioned on both sides. Press the dial to select. < > Stations Personal Radio 2. Next, turn the dial to choose a radio station from either the “Location”, “Genre”... - Page 12 Choosing a Radio Station < > 101 RU Classic Example: 101 RU Humor Radio stations are listed in alphabetic order, so you may need to turn the dial many times until your desired station is reached. 5. Press the dial to listen to a selected station. <...
-
Page 13: Searching For A Station
Searching for a Station You can search for an Internet radio station by directly entering the station name or call sign into the radio. 1. From the Primary Menu, choose “Stations” by turning the dial until brackets are positioned on both sides. Press the dial to select. <... -
Page 14: Changing The Volume
Changing the Volume You can change the volume by turning the dial clockwise to increase the volume and counterclockwise to decrease the volume. The display shows the volume bar. You cannot change the volume when you are in a menu, except when using the remote control. After a station is selected and begins to play, you can then change the volume with the main dial. -
Page 15: Menu Time Out
Menu Time-Out When a radio station is playing — if BACK or SELECT is pressed, the radio will go into menu selection mode. If no radio controls are used within ten seconds, the radio will “time-out” and go back to the currently playing radio station. -
Page 16: Setting The Alarm
Setting the Time and Date Set Time 12:00 AM 7. Turn the dial until the day of the month is correct — press the dial to select. Follow the same method for setting the month and year. Set Date 01 Jan 2008 8. - Page 17 Setting the Alarm 4. Turn the dial and choose one of the five alarm slots to set — press the dial to select. Disable All < > 1 OFF 5. Turn the dial until the hour setting is correct — press the dial to select.
-
Page 18: Setting The Sleep Timer
Setting the Sleep Timer With the sleep timer enabled, the internet radio will automatically switch itself off after a set amount of time. Note: At any point, you can use the BACK button to start over at the previous screen. 1. -
Page 19: Media Player Functions
Media Player Functions 6. “Timer Set” will show in the display indicating that the radio will play for the selected amount of time before switching itself off. Timer Set Media Player Functions The CC WiFi Radio is able to play the following audio formats: FILE TYPE FILE EXTENSION SHOWN ON PC .mp3... - Page 20 Media Player Functions Using “UPNP Servers” to access stored audio: This method scans for Universal Plug and Play (UPNP) servers on the network. UPNP servers gather media and distribute to other network devices. If using a Mac: You will be required to use third party software to enable your computer as a UPNP server.
- Page 21 Media Player Functions Play a Whole Album You may only play Whole Albums after you have accessed a computer’s stored audio. Refer to the section titled “Accessing a Computer’s Stored Audio” on page 19. 1. Turn the dial to “Music” — press the dial to select. 2.
- Page 22 Media Player Functions Browsing the List of Queued Tracks Press the BROWSE button on the remote control. The name of the track that is currently playing will be listed first. Turn the dial clockwise or press the ▼ button on the remote control, to view all the tracks listed in the queue.
-
Page 23: Configure Menu Options
Configure Menu Options To access the “Configure” menu follow these steps: 1. Briefly press the dial once to access the Primary Menu. You can also access the Primary Menu by pressing and holding the BACK button. The Primary Menu contains six options: STATIONS, PERSONAL RADIO, MY STUFF, MEDIA PLAYER, CONFIGURE and ALARM CLOCK. - Page 24 Configure Menu Options If the firmware upgrade is interrupted, your radio may endure permanent damage. A firmware upgrade may take several minutes to finish. <Language> Allows you to change the display language. <Reset Factory Defaults> This option puts all settings back to their default, as they were when the radio left the factory.
-
Page 25: Configuring "My Stuff
Configure Menu Options the UPNP Server. <WiFi Signal Strength> This option will give you your current WiFi signal strength between the radio and the router. Our experience shows that a signal strength of 20 to 30% is required for good reception. Configuring “My Stuff”... -
Page 26: Adding Content To "My Streams" Or "My Podcasts
Configuring “My Stations” 5. Click on the Station Icon of your choice. 6. Reciva will show that the station has “Passed or Failed the Reciva Daily Stream Test”. 7. If the radio station “Passed”, scroll down and click the “Add to My Stations” button. 8. -
Page 27: Setting Up Extra Features
Setting Up Extra Features There are several extra features and services that can be added to your CC WiFi Radio to enhance your listening experience. These services cannot be added to your radio until you have created a Reciva radio account online. See “Configuring ‘My Stuff’” on page 25. Once your computer is logged-in to your Reciva radio account (radios.reciva.com), follow the steps below: 1. - Page 28 Using “My Pandora” < > The Beatles Radio The Doors Radio 4. If you are new to Pandora, you will not have any stations yet. Select “Create Station” and then enter in your favorite song title or artist name. Notice that the middle character on the top line is the one that is ready for selection.
-
Page 29: Using "My Aupeo
Using “My Pandora” your radio for quick playback. Also, this station will be saved in the “Stations” portion of “My Pandora”. Visit www.pandora.com for more options using the same Pandora username and password that you entered into your Reciva account. Using “My Aupeo”... - Page 30 Using “My Aupeo” “Jazz”). Once your preferences are selected, Aupeo begins to play music that matches accordingly. Artist Station – In this area, you can enter your favorite artist and Aupeo will play artists with similar type music. Once “Artist Station” is selected, the radio will display an interface for entering your artist name.
-
Page 31: Using "Live365
About “Live365” Live365 is a special collection of unique stations that are run by real people and not generate by computers or focus groups. Some free stations are available without having to create a Live365 premium account. See “Setting Up Extra Features” on page 27. Using “Live365”... - Page 32 Using “Live365” VIP Stations. These stations are categorized by genre (or type) of audio content, such as Rock, Talk, and Blues, etc. Search Live365 – In this area, you can enter your favorite artist, music type, or station name and Live365 will search its database and display results of stations that play similar type of audio.
-
Page 33: Help
Help Pages — Wireless Network Help “No Networks Found” shows after scanning for wireless net- works: 1. Sometimes your wireless network will not show on the first scan. Try scanning for networks again on your radio. 2. Check the LED lights on the front of your wireless router. Be sure that the “power”... - Page 34 It may be necessary to call your inter- net service provider for help repairing your internet connection. 5. Check to see if the radio will work using an Ethernet cable. If still no success, then call C. Crane (800-522-8863) for troubleshooting assistance. Page 34...
- Page 35 Help Pages — Error Message Troubleshooting Timeout Getting IP Address: 1. An incorrect WEP or WPA key may have been entered into the radio. This is the most common reason for this error. Check your router to make sure your wireless encryption key is correct or see page 33-34 for more help with finding your encryption key.
- Page 36 Help Pages — Error Message Troubleshooting 2. UPNP may be disabled on your router. UPNP must be enabled for the radio to work correctly. Consult your router’s user manual for enabling UPNP or contact the manufacturer of the router for more assistance.
- Page 37 2. Your Ethernet cable may be damaged or incompatible. Use a “Straight Through” Cat5 or Cat6 Ethernet Cable. You can purchase Ethernet cables from C. Crane or your local electronics store. Having Trouble Connecting to a Network using an Ethernet Cable: 1.
- Page 38 Help Pages — Radio Station Help Having Trouble Playing a Radio Station: 1. If you are unable to play all radio stations, the radio may have lost connection to your router. Unplug the radio’s power cord momentarily and reconnect. 2. The radio is “buffering” on a particular station: a) Try moving the radio closer to the router.
- Page 39 Notes CC WiFi Page 39...
-
Page 40: Menu Flow Charts
Menu Flow Chart STATIONS USA, UK, GERMANY, FRANCE, LOCATION CHINA ... AND MANY MORE NEWS, TALK, ROCK, JAZZ, GENRE OLDIES ... AND MANY MORE DIRECTLY ENTER A STATION SEARCH NAME TO SEARCH VIEW PRESETS, RECOMMENDATIONS, LIVE365 FREE STATIONS, VIP STATIONS OR SEARCH LIVE365 PERSONAL RADIO MY PANDORA... -
Page 41: Menu Flow Chart
Menu Flow Chart MY STUFF CONTAINS STATIONS ADDED TO MY STATIONS YOUR RECIVA ACCOUNT USING A COMPUTER CONTAINS STREAMS MANUALLY MY STREAMS ENTERED TO YOUR RECIVA ACCOUNT USING A COMPUTER CONTAINS PODCASTS MANUALLY MY PODCASTS ENTERED TO YOUR RECIVA ACCOUNT USING A COMPUTER VIEW PRESETS AND LIVE365 RECOMMENDATIONS... - Page 42 Menu Flow Chart - Wifi and Network Setup CONFIGURE WI-FI and SCAN FOR NETWORK NETWORKS SETUP ACTIVE ENTER BACKLIGHT NETWORK INACTIVE SETTINGS NAME STANDBY VIEW CONFIGURATION SET TIME/ EDIT DATE CLOCK CONFIGURATION SET-UP CLOCK FORMAT REGISTRATION SERVICE PACK UPNP SERIAL NUMBER VERSION SERIAL...
-
Page 43: Safety Instructions
2) DISCONNECT THE RADIO IN CASE OF MALFUNCTION m If you smell or notice smoke, disconnect the AC Adapter immediately, taking care to avoid burns. Contact C. Crane Company or their representative for inspection and service before any future operation. -
Page 44: Memory Preset Log
Memory Preset Log Preset Location/Genre Station Host Please feel free to copy this page. Page 44 CC WiFi... - Page 45 Memory Preset Log Preset Location/Genre Station Host Please feel free to copy this page. CC WiFi Page 45...
- Page 46 Memory Preset Log Preset Location/Genre Station Host Please feel free to copy this page. Page 46 CC WiFi...
- Page 47 Memory Preset Log Preset Location/Genre Station Host Please feel free to copy this page. CC WiFi Page 47...
-
Page 48: Location Of Cc Wifi Radio Serial Number
Location of Your CC WiFi Radio Serial Number From the “Primary Menu” of the CC WiFi Radio, follow this path to find your serial number: Configure > Version > Serial Number Record your serial number here for future reference: This product contains software licensed under version 2 of the GNU public license and version 2.1 of the GNU Lesser Public License.
Need help?
Do you have a question about the CCWiFi and is the answer not in the manual?
Questions and answers