Table of Contents
Advertisement
Advertisement
Table of Contents

Related Manuals for Wilton 99192


Summary of Contents for Wilton 99192
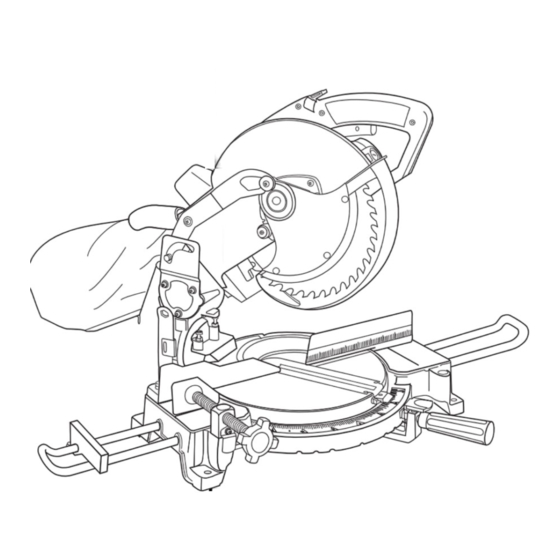
- Page 1 10" Compound Miter Saw Models 99192 and 99195 Model 99192 shown Operation and Safety Instructions ® For your safety WARNING: Read and understand all instructions. Failure to follow all instructions may result in electric shock, fire, and/or serious injury.
-
Page 2: Table Of Contents
LIMITED WARRANTY Wilton Power Tools are warranted against defects in workmanship and material for a period of two (2) years from the date of purchase. This warranty does not cover defects due directly or indirectly to misuse, abuse, negligence or accidents, normal wear-and-tear, improper repair or alterations, lack of maintenance, or use for purposes other than those for which the tool was designed. -
Page 3: Safety General Safety Warnings
SAFETY Read, understand and follow all operating instructions, Wear the proper apparel – and non-slip footwear safety operations and symbols in this manual and when operating power tools. Do not wear loose warning labels on the miter saw before operating, clothing, gloves, neckties, rings, bracelets or other maintaining, and cleaning your power tool. -
Page 4: Special Safety Rules For Miter Saws
SAFETY Never leave the tool unattended while it’s Avoid injury from jams, slips, or thrown pieces running – turn OFF the power. Do not leave the tool Use the correct 10-inch blade for the material and unattended until it reaches a complete stop. type of cut. - Page 5 SAFETY Inspect the workpiece for nails or other foreign Whenever Your Miter Saw is Running objects before it is cut. WARNING: Do not allow anyone to stand behind the saw or close to the workpiece where debris can be thrown. •...
-
Page 6: Special Safety Rules For The Laser
SAFETY SPECIAL SAFETY RULES FOR ELECTRICAL REQUIREMENTS THE LASER WARNING: • Use only manufacturer’s recommended replacement parts, or equivalent, when servicing this tool. • Do not touch the metal blades on the power cord plug when removing or installing the plug into an electrical outlet. •... - Page 7 SAFETY In the event of a malfunction or breakdown, Guidelines for Extension Cords grounding provides the path of least resistance for Use proper extension cord. Make sure your electric current and reduces the risk of electric shock. extension cord is in good condition. When using an This tool is equipped with an electric cord that has an extension cord, be sure to use one heavy enough to equipment grounding conductor and a grounding plug.
-
Page 8: Before You Start
10 Dust bag 2 Lower blade guard 11 Laser module 3 Fence 12 Power switch 4 Extension wing assembly 13 Safety lock-out button (model 99192) 5 Miter handle 14 Laser switch 6 Miter index scale 15 Dust port 7 Clamp vise assembly... -
Page 9: Unpacking The Miter Saw
• Avoid fire and toxic reaction. Never use gasoline, naphtha, acetone, lacquer, thinner or any volatile solvents to clean the miter saw. Model 99192 shown Figure 2 1 Compound miter saw with laser line 5 Blade wrench... -
Page 10: Assembly
ASSEMBLY WOODWORKING TERMS Saw Blade wrench 1. Store the blade wrench (1) in the slot at the rear of Arbor – shaft which mounts the cutting tool. the saw to prevent loss. Bevel cut – angle cut made through the face a workpiece. -
Page 11: Release The Handle
ASSEMBLY 4. Insert both rails of an extension wing through the first set of holes (4) on the outside of the saw base. 5. Place a bar holder clamp (6) over each rail. Figure 7 To raise the handle: 1. Push down on the saw handle. 2. -
Page 12: Base-To-Blade Adjustment
ASSEMBLY 3. If the blade does not contact the full length of the square, loosen the bevel adjustment screw (4). Hold the square against the base. Rotate the bevel adjustment screw (5), up or down, until the full length of the square is against the blade. Figure 9 4. -
Page 13: Bevel Stop Adjustment
ASSEMBLY BEVEL STOP ADJUSTMENT (Figure 13) Make sure the bevel indicator aligns with the bevel index 45° mark when the handle assembly is against the bevel stop adjustment screw. If adjustment is necessary: Figure 14 To secure the saw to a work surface: 1. -
Page 14: Operation
OPERATION BODY AND HAND POSITIONS WARNING: Do not cut short workpieces. You cannot properly hold a short workpiece and have your hand a safe distance from the blade. Never cross your arms or place your hands near the cutting area. Figure 16 USING CARBIDE TIPPED BLADES WARNING:... - Page 15 OPERATION To replace the blade: 1. Loosen the guard plate screw (1). Figure 20 5. Clean any sawdust from both blade collars before Figure 17 installing the blade. Install a 10" (25.4 cm) blade only. Verify the rotation arrow on the blade matches 2.
-
Page 16: Miter Cut
OPERATION MITER CUT 1. Make sure the safety lock-out button and the laser switch are in the OFF position. To make a miter cut, loosen the miter lock handle. 2. Put a padlock on the power switch to make sure the Move the handle to the desired angle. -
Page 17: Cutting Bowed Material
OPERATION CUTTING BOWED MATERIAL COMPOUND CUT Inspect your workpiece before cutting it. If it is bowed, To make a compound cut, select the correct miter and position the workpiece against the fence with the bow bevel angles. Lock the blade into position. Move your facing as illustrated. -
Page 18: Cutting Crown Molding
OPERATION CUTTING CROWN MOLDING 2. To avoid splintering and marking, tape the cutting line and any surface that is being clamped. Crown molding must be compound mitered with 3. The angle settings for the two pieces of molding extreme accuracy. The two surfaces on the crown that will be adjoining in any one corner will be molding must fit the wall or ceiling, and each other. -
Page 19: Maintenance
MAINTENANCE LUBRICATION WARNING: Before performing any maintenance or cleaning on your saw, All the ball bearings are permanently lubricated and do unplug the power cord from the power source. The power cord not require lubrication. must remain unplugged whenever you are working on your saw. -
Page 20: Service
SERVICE FOR REPLACEMENT PARTS AND SERVICE When servicing your Wilton ® product, use only Wilton ® replacement parts. Use of any other parts may cause product damage. All servicing of the tool should be performed by a qualified service technician. When requesting service or ordering parts, always provide the model number, part number and description.
Need help?
Do you have a question about the 99192 and is the answer not in the manual?
Questions and answers
Please I need to get some parts for My old miter saw 99192
You can order parts for the Wilton miter saw model 99192 by providing the model number, part number, and description. In the U.S., contact WMH TOOLGROUP Consumer Relations at 1-800-274-6846 for technical assistance or 1-800-274-6848 for parts. In Canada, contact WMH TOOLGROUP LTD Customer Service at 1-800-689-9928.
This answer is automatically generated
Auto guard will not slide up ?
The auto guard on the Wilton 99192 may not slide up due to issues with its components. Possible reasons include:
1. Obstruction or Debris – Dust, wood chips, or other debris may be blocking the movement of the guard.
2. Damaged or Worn Parts – The guard/spring assembly (99164N049) or related components like the washer (99164N048) and lock nut (99164N054A) may be damaged or worn.
3. Loose or Tightened Fasteners – Screws and washers (99164N116, 99164N128) might be too tight or loose, restricting movement.
4. Rubber Bumper Issues – The lower guard rubber bumper (99164N117A) may be obstructing the guard’s movement or improperly installed.
Inspect and clean the components, check for wear or damage, and ensure all parts are properly tightened and aligned.
This answer is automatically generated