Hoover Elite Rewind Ad492918D7Cefdedeacd0Cf2B162Ca
Hide thumbs
Also See for Elite Rewind:
- Owner's manual (12 pages) ,
- Owner's manual (24 pages) ,
- User manual
Table of Contents
Advertisement
Available languages
Available languages
Quick Links
Advertisement
Chapters
Table of Contents

Related Manuals for Hoover Elite Rewind


Summary of Contents for Hoover Elite Rewind
- Page 1 Upright Cleaner Aspirateur vertical Elite Rewind Owner’s Manual Guide de l’utilisateur ENGLISH > pp. 1-12 Review this manual before operating the cleaner. Lire attentivement ces instructions avant d’utiliser l’appareil. hoover.com hoover.ca # 59881084...
-
Page 2: Table Of Contents
• Do not use with damaged cord or plug. If appliance is not working as it should, has been dropped, damaged, left outdoors, or dropped into water, take it to a Hoover Sales and Service Center or Authorized Hoover Warranty Service Dealer (Depot). -
Page 3: Assembling Cleaner
If you need any assistance: Visit our website at hoover.com. Click on the “Service” button to find the service outlet nearest you OR Call 1-800-944-9200 for an automated referral of authorized service outlet locations (U.S. only) OR Call 1-800-263-6376 to speak with a representative in our Consumer Response Center. -
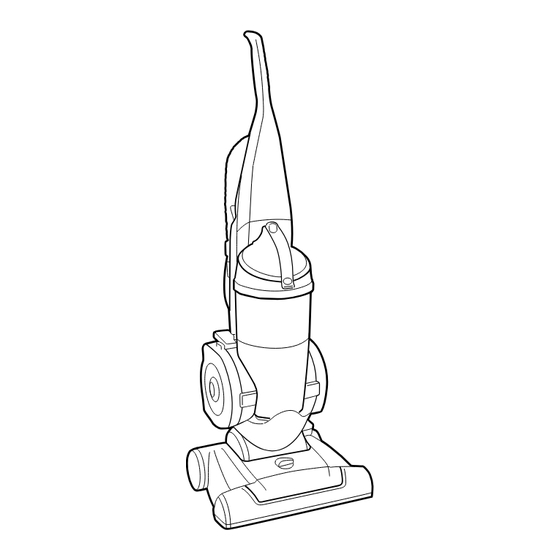
Page 4: Cleaner Descriptions
Wrap hose over hook (I). Push hose end (J) firmly onto tube (K) as shown. 2. How to use Cleaner description 15. Combination tool 1. Handle grip 16. Crevice wand 2. Dirt cup release button 17. Hose handle 3. Carrying handle/Dirt 18. -
Page 5: Cleaning Tools
Handle positions Transporting cleaner Carrying cleaner The handle of your cleaner has three To move your cleaner from room to The cleaner can also be moved by using positions; upright for storage and room, put handle in upright position, tilt the carrying handle, located on the top when using cleaning tools;... -
Page 6: Maintenance
2-11 2-12 2-13 Attach wand and tools Select proper tool Attach tool to the hose (F) by pushing it C. Dusting Brush use with brush firmly onto hose. attached for carved furniture, table tops, books, lamps, lighting fixtures, venetian Twist wand or tool slightly to tighten or blinds, baseboards, shutters, and reg- loosen the connection. -
Page 7: Cleaning Filters
Place bottom of dirt cup in first. Pivot How to empty Holding dirt cup over trash recep- cup into cleaner body. tacle, press dirt cup door release rod Disconnect cleaner from electri- (C) on back of dirt cup to open dirt cup Press dirt cup firmly until you hear a cal outlet. -
Page 8: Replacing Belt
What to buy Belt replacement 3-15 To assure effective operation, use only The belt on your Hoover cleaner causes genuine HOOVER belts with your clean- the agitator to rotate and is important for er. When purchasing a new belt, ask for the effective operation of the cleaner. -
Page 9: Lubrication
The motor is equipped with bearings When purchasing a new agitator, ask for When to replace that contain sufficient lubrication for the HOOVER part No. 48414-113. When agitator brushes are worn, the agi- life of the motor. The addition of lubri- How to replace tator should be replaced. -
Page 10: If You Have A Problem
(U.S. only). Do not send your cleaner to Hoover, Inc., in Glenwillow, Ohio for service, this will only result in delay. 4. If you have a Problem: Cleaner hard to push... -
Page 11: Clearing Blockages
Clearing blockages Checking airflow path Disconnect cleaner from electrical 2. Plug cleaner in and turn ON. Check for outlet. suction at end of hose (A). Low suction or pick up may be due to If there is suction, continue with step 3. a blockage in the system. -
Page 13: Salvaguardias Importantes
Anote los números COMPLETOS de modelo y serie a continuación. Modelo ___________________________________ Consejo: Adjunte su recibo de compra a este Manual del propietario. Para obtener el servicio de garantía de su producto HOOVER puede requerirse la verificación de la fecha de compra. Manual del Asegúrese de llenar y devolver la tarjeta adjunta de registro del producto incluida... -
Page 14: Ensamblado De La Aspiradora
Gírelo para trabarlo en su lugar. Si necesita asistencia: corriente polarizada, sólo de una manera. El conector de la manguera permite que ésta Visite hoover.com. Haga clic en el Si el enchufe no encaja completamente en gire. botón “Service” para encontrar el centro la toma de corriente, inviértalo. -
Page 15: Accesorios De Limpieza
posiciones: vertical, para guardarla y 2-10 C. Uso del accesorio combinado con usar los accesorios de limpieza; posición la escobilla incluida para muebles tallados, de funcionamiento, para uso general Limpieza de superficies de las mesas, libros, lámparas, sobre alfombras y pisos; y baja, para accesorios de iluminación, persianas escaleras aspirar debajo de muebles de poca altura. -
Page 16: Mantenimiento
Vacíe el depósito para polvo. La suciedad y los residuos se pueden limpiar del cartucho del filtro cepillándolo con el La correa de su aspiradora Hoover hace Encaje la puerta del depósito para polvo para accesorio combinado de la aspiradora. -
Page 17: Si Tiene Un Problema
3-19 colocar la correa, el agitador nuevo y la placa autorizados (solamente en EE.UU.). inferior en su lugar. No envíe su aspiradora a Hoover en Reemplazo del rodillo de Glenwillow, Ohio para obtener servicio; esto escobillas del agitador Lubricación sólo ocasionará... -
Page 18: Servicio Autorizado
Problema: Los accesorios de la manera si la manguera o el tubo para el aspiradora no aspiran polvo están obstruidos: Causa posible Solución posible • La correa está rota o desgastada 3. Apague la aspiradora y • Reemplace la correa desconéctela. - Page 20 Printed in Mexico / Imprime au Mexique 59881084 8-08...
Need help?
Do you have a question about the Elite Rewind and is the answer not in the manual?
Questions and answers