
Related Manuals for Hoover Platinum Collection F8100900


Summary of Contents for Hoover Platinum Collection F8100900
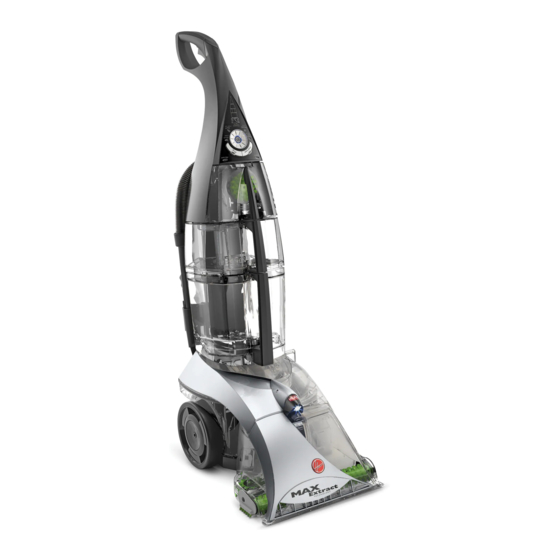
- Page 1 ™ www.hoover.com ©2008 Healthy Gain Investments, Ltd. All rights reserved #960009435-01 11/08...
- Page 2 ™ C A R P E T CLEANER OWNER’S MANUAL OPERATING AND SERVICING INSTRUCTIONS Please read these instructions carefully before using your vacuum.
-
Page 3: Table Of Contents
TABLE OF CONTENTS Safe ty Ins tructi o n s ......3 1. FEATU RE S ........5 2. -
Page 4: Safe Ty Ins Tructi O N S
THIS PRODUCT IS INTENDED FOR HOUSEHOLD USE ONLY. IMPORTANT SAFETY INSTRUCTIONS When using an electrical appliance, basic precautions should always be followed, including the following: • READ ALL INSTRUCTIONS BEFORE USING THIS APPLIANCE. • WARNING: THIS PRODUCT CONTAINS CHEMICALS KNOWN TO THE STATE OF CALIFORNIA TO CAUSE CANCER, BIRTH DEFECTS OR REPRODUCTIVE HARM. -
Page 5: Save These Instructions
• Do not put any object into openings. Do not use with any opening blocked; keep free of dust, lint, hair, and anything that may reduce air flow. • Keep hair, loose clothing, fingers, and all parts of body away from openings and moving parts. -
Page 6: Features
1. FEATURES Cord Hooks Crevice Tool Retainer Crevice Tool Handle Release Pedal Stretch Hose Carrying Handle / Hose Retainer Cord Hose Pocket Carpet/Upholstery Tool C/U Tool Holder and Cord Wrap SpinScrub Powered Hand Tool Detergent Tank Clean Water Tank LED Headlight Spot and High Traffic Sprayer Heated Drying Nozzle Control Panel... - Page 7 1. FEATURES C o ntro l Pan e l Detergent Tank is Empty Clean Water Tank is Empty Recovery Tank is Full Cleaning Selector Power Button Surface Selector Wash Indicator Rinse Indicator...
-
Page 8: How To Assemble
O ptio n al A cce s s o ri es Accessories not included with your model purchased separately visiting www.hoover.com, or your local HOOVER vice center. SpinScrub™ Hand Tool Crevice Tool Carpet/Upholstery Tool ser-... -
Page 9: Attach Handle
2. HOW TO ASSEMBLE Attach Han d le TOOL REQUIRED: PHILLIPS OR FLATHEAD SCREWDRIVER Slide upper handle down into cleaner body. Insert bolts into center of cord hooks (H) - Open tool door on front storage area and attach nuts. Tighten with screwdriver. - Page 10 2. HOW TO ASSEMBLE Pos it io n Hos e 2.10 Loop over hose retainer/carry handle. 2.10 Firmly insert hose into hose pocket. Failure to do so could result in suction loss at the floor.
-
Page 11: How To Operate
3. HOW TO OPERATE G r oun din g I n s tr uc ti o ns This appliance must be grounded. If it should malfunction or breakdown, grounding provides a path of least resistance for electric current to reduce the risk of electric shock. This appliance is equipped with a cord having an equipment- grounding conductor (C) and grounding plug (A). -
Page 12: On / Off Button
3. HOW TO OPERATE ON / OFF B u tton H a n d l e R el ea s e Ped a l To turn cleaner ON, H o l d h a n d l e push button. stepping release pedal to lower To turn cleaner OFF,... -
Page 13: Tank Status
Empty ing th e Di r ty Wa te r Rec o v er y Ta n k Turn carpet cleaner off and unplug from outlet. Do not use without float in place. If broken or dislodged, take to an authorized Hoover dealer for repair. -
Page 14: Preparing The Machine For Cleaning
Fill large Clean Water Tank (A) with hot tap water (under 140˙f/60˙c) to fill line. Do not boil or microwave. 3.16 Fill Detergent Tank (B) to fill line. Use only Hoover brand detergents ® cleaners; others may foam too much and cause leaking or cause damage to the cleaner and void the warranty. -
Page 15: How To Clean
4. HOW TO CLEAN BEFORE YOU BEGIN CLEANING How to C lea n A. Vacuum thoroughly - For carpet, use a HOOVER vacuum cleaner with an ® agitator for best results. Vacuum upholstery with a vacuum cleaner with clean- ing tool attachments. Use a crevice tool to reach into tufts and folds. Do not use the carpet cleaner as a dry vacuum cleaner. -
Page 16: How To Clean
D. Pull towards you, this is the 2nd dry cycle. Steps A through D should be performed in approximately 24 seconds for best results. This speed is much slower than dry vacuum cleaning. For best cleaning and drying it is very important to perform steps A through D in one path before moving to the next section. -
Page 17: Spot Cleaning
Do not scrub the same area for more than 30 seconds. NOTE: The vacuum motor is turned off in Spot Clean mode. This allows for maximum cleaning effectiveness. Always rinse areas that have been cleaned with the Spot Clean function, this removes the soils and the detergent from your carpet. -
Page 18: Spill Pick Up
4. HOW TO CLEAN S pill Pick- Up Use for picking up small liquid spills (one gallon or less, never to exceed 1/8 in. in depth) on carpet or upholstery 1. Press power button. 2. Turn cleaning mode selector dial to “Spill Pick-up”. 3. - Page 19 4. HOW TO CLEAN C le a nin g ca r pe ted s t a i r s 1. Place handle in upright position. Agitator brushes will not rotate while handle is in upright position. 2. Hose length may require that machine be placed at the top of the stairs to clean upper half of stairway and at bottom of stairs to clean lower half.
- Page 20 5. To clean in corners or creases, lift the tool one-half inch from the fabric and press the solution trigger. 6. Vacuum up the solution with the tool without pressing the trigger. 7. For heavily soiled areas, it may be necessary to repeat the cleaning process.
-
Page 21: After Cleaning
4. HOW TO CLEAN AFTE R C LE A N I N G Unplug carpet cleaner from electrical outlet. 1. Empty any water that remains in the Clean Water Tank. 2. If the cleaner will be stored for an extended period of time empty the Detergent Tank. -
Page 22: Troubleshooting
Exclusive Hoover Platinum Collection™ Member Services Line 1.877.MYPLTNM (1.877.697.5866) In the event that further assistance is required, see your Yellow Pages for an authorized HOOVER any transportation to and from any place of repair are to be paid by the owner. The service parts used in this unit are easily replaced and readily available from an authorized HOOVER Dealer or retailer. -
Page 23: Service
• calling 1-800-944-9200 for an automated referral of authorized service outlet locations (U.S. only). Do not send your cleaner to Hoover result in delay. If further assistance is needed, contact the Exclusive Hoover Platinum Collection™ Member Services Line 1.877.MYPLTNM (1.877.697.5866), Mon- Fri 8am-5pm EST. In Canada, contact Hoover K6B 5J9, Phone: 1.877.697.5866, Mon-Fri 8am-5pm EST. -
Page 24: Warranty
/ detergents, and in accordance with the Owner’s ® Manual, your Hoover Platinum Collection™ Carpet Cleaner is warranted against original defects in material and workmanship for a full six years from date of purchase (the “Warranty Period”). During the Warranty Period, Hoover will provide labor and parts, at no cost to you, to ®... - Page 26 Español pàg.E1-E23 ™ ASPIRADORA PARA MOQUETAS MANUAL DEL USUARIO INSTRUCCIONES DE FUNCIONAMIENTO Y MANTENIMIENTO Lea atentamente estas instrucciones antes de usar su aspiradora.
- Page 27 ÍNDICE In struccion es de s eg ur i d a d ....E3 1. FUNC IO NE S ........ E5 2.
-
Page 28: In Struccion Es De S Eg Ur I D A D
ESTA ASPIRADORA PARA ALFOMBRAS ESTÁ DISEÑADA PARA USO DOMÉSTICO. INSTRUCCIONES DE SEGURIDAD IMPORTANTES GUARDE ESTAS INSTRUCCIONES Cuando use un aparato eléctrico, siempre siga las precauciones básicas, que incluyen las siguientes: • LEA TODAS LAS INSTRUCCIONES ANTES DE USAR ESTE APARATO. •... - Page 29 • No tire del cordón ni traslade el aparato jalando del cordón, ni tampoco lo use como manija; no cierre la puerta cuando el cordón está atravesado ni tire de este alrededor de bordes o esquinas filosos. • No haga funcionar el aparato encima del cordón. Mantenga el cordón lejos de superficies calientes.
-
Page 30: Funciones
1. FUNCIONES Ganchos para el cordón Dispositivo de retención del accesorio para hendiduras Accesorio para hendiduras Pedal para soltar el mango Manguera extensible Asa de transporte/dispositivo de retención de la manguera Cordón Bolsillo de la manguera Accesorio para alfombras/tapizados Sujetador de accesorios para alfombras/ tapizados y enrollador de cordón Accesorio de mano turboaccionado SpinScrub... - Page 31 1. FUNCIONES Pa n el de co n tr o l El tanque de detergente está vacío El tanque de agua limpia está vacío El tanque de recuperación está lleno Selector de limpieza Botón de encendido Selector de superficies Indicador de lavado Indicador de enjuague...
-
Page 32: Ensa M Bl A Je
Ac ce so rio s o p ci o na l es Los accesorios no incluidos con su mode- lo pueden comprarse por separado, visitando www.hoover.com, o su Centro de servicio local de HOOVER ® Accesorio de mano SpinScrub™... -
Page 33: Colocación Del Mango
2. ENSAMBLAJE DE LA ASPIRADORA C o loca ció n Del M a n g o ACCESORIO NECESARIO: DESTORNILLADOR PHILLIPS O DESTORNILLADOR DE PUNTA PLANA. 2.3 Deslice la parte superior del mango hacia abajo en el cuerpo de la limpiadora. 2.4 Introduzca los pernos en el centro de los ganchos para el cordón. - Page 34 2. ENSAMBLAJE DE LA ASPIRADORA Pos ició n de la man g ue r a Pásela sobre el dispositivo de retención de la manguera/asa de transporte. 2.10 Introduzca con fuerza la manguera en el bolsillo de la manguera. No hacerlo podría ocasionar pérdida de succión.
-
Page 35: Funcionamiento
3. FUNCIONAMIENTO GInstrucciones de conexión a tierra Este aparato debe estar conectado a tierra. En caso de desperfecto o falla, la conexión a tierra ofrece un circuito de menor resistencia para la corriente eléctrica a fin de reducir el riesgo de choque eléctrico. -
Page 36: Botón De Encender/Apagar
3. FUNCIONAMIENTO Botón de encender Ped a l p a ra /apagar s o l t a r e l m a n g o Para encender la lim- Pise el pedal para sol- piadora, empuje tar el mango para bajar botón. -
Page 37: Estado Del Tanque
Apague la limpiadora de moquetas y desconéctela de la toma de corriente. No use la limpiadora si el flotador no está en su sitio. Si se ha roto o descolocado, lleve la limpiadora a un comerciante Hoover Baje el mango de la limpiadora hacia el piso. -
Page 38: Cómo Preparar La Máquina Para La Limpieza
140 °F/60 °C) hasta la línea de llenado. 3.16 Llene el tanque de detergente (B) hasta la línea de llenado. Use detergentes de marca Hoover ; otros detergentes pueden ® provocar un exceso de espuma y fugas o dañar la limpiadora y anular la garantía. -
Page 39: Antes De Limpiar
4. CÓMO LIMPIAR ANTES DE COMENZAR A LIMPIAR C ó mo limpi ar A. Aspire bien. En el caso de alfombras, use una aspiradora HOOVER ® un agitador para obtener los mejores resultados. Limpie los tapizados con una aspiradora que tenga accesorios de limpieza. Use un accesorio para hendi- duras para limpiar nudos y pliegues. -
Page 40: Lavado/Enjuague
4. CÓMO LIMPIAR Séquese las manos y conecte la limpiadora en una toma de corriente con una conexión a tierra adecuada. La va d o /E nju a g ue a uto m á ti c o Us e e st a f u nc ió n para l a l im pi eza d e pi sos norma les . 1. -
Page 41: Limpieza De Manchas
4. CÓMO LIMPIAR Limpie za de man c h a s U s e e s t a f u n c i ó n p a r a m a n c h a s y á r e a s d e a l t o t r á... -
Page 42: Aspirado De Derrames
4. CÓMO LIMPIAR S p i l l P i c k Up ( A s p i r a d o d e d e r r a m e s ) Use esta función para aspirar pequeños derrames de líquido (no aspire derrames de más de 6 oz). - Page 43 4. CÓMO LIMPIAR Limpieza de escaleras alfombrad a s 1. Coloque el mango en posición vertical. Los cepillos del agitador no giran mientras el mango se encuentra en posición vertical. 2. Según la longitud de la manguera, es posible que la máquina deba colocarse en la parte superior de las escaleras para limpiar la mitad superior de las escaleras y, al pie de las escaleras, para limpiar la...
- Page 44 4. CÓMO LIMPIAR Li m p iez a de ta p iz ad os Asegúrese de consultar el código de limpieza en su tapizado. Use su limpiadora sólo en tapizados marcados con “W” o “W/S”. 1. Coloque el mango en posición vertical. Los cepillos del agitador no giran mientras el mango se encuentra en posición vertical.
-
Page 45: Después De Limpiar
4. CÓMO LIMPIAR Apague la limpiadora de moquetas y desconéctela de la toma de corriente. D E SPU ÉS DE L I MPI A R 1. Vacíe el agua que queda en el tanque de agua limpia. 2. Si la limpiadora se va a almacenar por un tiempo prolongado, vacíe el tanque de detergente. -
Page 46: Guía De Solución De Problemas
CUALQUIER OTRO MANTENIMIENTO DEBE SER REALIZADO POR UN REPRESENTANTE DE MANTENIMIENTO AUTORIZADO. Línea exclusiva de servicios a los miembros de la gama Platinum Collection™ de Hoover 1.877.MYPLTNM (1.877.697.5866) En caso de necesitar más ayuda, busque a un Concesionario autorizado de HOOVER porte desde y hacia el lugar de reparación estarán a cargo del propietario. -
Page 47: Ma Nt En Imie Nto
M an ten imien to Para obtener el servicio aprobado HOOVER localice el Centro de ventas y servicio de Hoover o el Concesionario autorizado de servicio de garantía de Hoover (depósito) más cercano: • Consultando la sección “Service” (Servicio) de Hoover www.hoover.com O... -
Page 48: Garantía
, y según el Manual del usuario, su aspiradora para alfombras de la gama Platinum Collection™ de Hoover estará garantizada contra defectos originales en el material y la fabricación durante seis años completos desde la fecha de compra (el “Período de Garantía”). Durante el Período de Garantía, Hoover ®...
Need help?
Do you have a question about the Platinum Collection F8100900 and is the answer not in the manual?
Questions and answers