
Related Manuals for Teac CD-H750


Summary of Contents for Teac CD-H750
- Page 1 CQX1A1710Z CD-H750 Compact Disc Player OWNER’S MANUAL MODE D’EMPLOI MANUAL DEL USUARIO...
- Page 2 DO NOT REMOVE THE EXTERNAL CASES OR CABINETS TO Changes or modifications to this equipment not expressly approved EXPOSE THE ELECTRONICS. NO USER SERVICEABLE PARTS by TEAC CORPORATION for compliance will void the user’s warranty. ARE INSIDE. o IF YOU ARE EXPERIENCING PROBLEMS WITH THIS PRODUCT, CONTACT TEAC FOR A SERVICE REFERRAL.
-
Page 3: Precautions Concerning Batteries
IMPORTANT SAFETY INSTRUCTIONS 1) Read these instructions. Optical pickup 2) Keep these instructions. Type : EP-C101 3) Heed all warnings. Manufacturer : Ever Bright Te chnolo gy and Science 4) Follow all instructions. Electronical Co.,Ltd 5) Do not use this apparatus near water. Laser output : Less than 1mW on the objective lens 6) Clean only with dry cloth. - Page 4 For European Customers Disposal of electrical and electronic equipment (a) All electrical and electronic equipment should be disposed of separately from the municipal waste stream via collection facilities designated by the government or local authorities. (b) By disposing of electrical and electronic equipment correctly, you will help save valuable resources and prevent any potential negative effects on human health and the environment.
-
Page 5: Table Of Contents
Contents Before use Thank you for choosing TEAC. Read this manual carefully to Read this before operation get the best performance from this unit. < Avoid placing the unit in direct sunlight or close to any source of heat, such as radiators, heaters, open fireplaces, amplifiers, etc. -
Page 6: Discs
CD standard might not play correctly in this player. If you < Discs should be returned to their cases after use to avoid dust and use such discs in this unit, TEAC and its subsidiaries will not scratches that could cause the laser pickup to “skip”. -
Page 7: Mp3 And Wma
< An iPod shuffle connected to this port cannot be played. Compatible iPod/iPhone Software In case your iPod/iPhone will not work with CD-H750 or with the remote control unit, a software update may solve the problem. Visit the Apple website and download the latest iPod/iPhone... -
Page 8: Connections
Connections CD-H750 CAUTION < Turn off the power of all the equipment before making connections. < Read the instructions of each component you intend to use with this unit. Wall socket DIGITAL IN DIGITAL IN Audio input (COAXIAL) (OPTICAL) (LINE IN, etc.) -
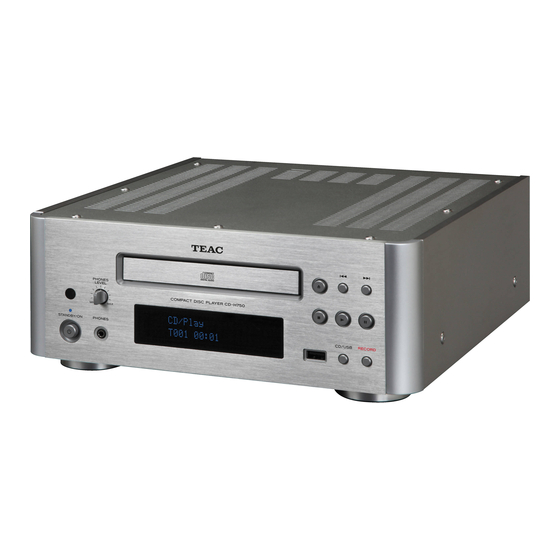
Page 9: Part Names (Main Unit)
Part names (main unit) Remote sensor Display When operating the remote control unit, point it towards the remote sensor. Stop (H) Use this button to stop playback and recording. LEVEL knob Turn this knob to adjust the volume of the headphones. iPod/USB port Connect an iPod/iPhone or USB flash drive here. -
Page 10: Part Names (Remote Control)
Part names (remote control) STANDBY/ON button Press this button to turn the unit on or put it in standby mode. CD/USB button Use this button to select CD or USB mode. Use to select playback of the CD or playback of the USB flash drive or iPod/iPhone connected to the iPod/USB port. -
Page 11: Remote Control Unit
Remote control unit Precautions for use CLEAR button Use this button to clear a program. (page 21) V Misuse of batteries could cause them to rupture or leak leading to fire, injury or the staining of items nearby. Please PROGRAM button carefully read and observe the precautions on page 3. -
Page 12: About The Erp
About the ErP This product is compliant with the European ErP Standby Power Use the Skip/Search (.m/,/) buttons to turn it Regulation. ON/OFF. Under any of the following conditions, the unit will switch to standby Each time you press a Skip/Search (.m/,/) button mode if no operation has occurred for 30 minutes or more. -
Page 13: Basic Operation
Basic operation How to turn the unit on or put it in standby Listening through headphones Press the STANDBY/ON button to turn the unit on or put it in When using headphones, first lower the volume before inserting standby mode. the headphones plug into the PHONES jack. -
Page 14: Listening To A Cd
Listening to a CD Press the CD/USB button to select “CD”. Press the Open/close button (L) to close the tray. < Be careful not to pinch your finger. Press the Open/close button (L). < It takes a few seconds for the unit to load a disc. No buttons will work during loading. -
Page 15: Listening To Files On A Usb Flash Drive
Listening to files on a USB flash drive Press the Play button (y) to start playback. You can play MP3/WMA files by connecting USB flash drive. Press the CD/USB button to select “USB”. “Not connected” will be displayed if no USB f lash drive is connected. -
Page 16: Listening To An Ipod/Iphone
< If the display mode is set to “Extended mode” (see page 24), playback don’t start automatically. When the iPod/iPhone is connected while CD-H750 is set to another source, the iPod/iPhone will turn on and enter the pause mode. Playback starts from the selected track/file. -
Page 17: Direct Mode
iPod Playing back files in a folder Going back to the previous menu You can select a folder that contains WMA/MP3 files. Use the FOLDER buttons (¥/˙) to select a folder. Press the MENU button to go back to the previous menu. This button is equivalent to the MENU button on your iPod/iPhone. -
Page 18: Stopping Playback
Playback (2) USB iPod Skipping to the next or a previous track/file Stopping playback Press the Stop button ( H ). During playback, press the Skip/search buttons (.m/ ,/) repeatedly until the desired track/file is found. To start playback again, press the Play button (y). The selected track/file will be played from the beginning. -
Page 19: Programmed Playback (1)
Programmed playback (1) For example, to select track/file number 25, press “2” first then “5”. To select numbers less than 10, press “0” and then the number. As Up to 32 tracks/files can be programmed in the desired order. an example, to select number 5, press “0” then “5”. (Optionally, you Press the PROGRAM button while in the stop mode. - Page 20 Programmed playback (2) You can also use the numeric buttons. Checking the programmed order Press the PROGRAM button. In stop mode, press the PROGRAM button repeatedly. The track/file number and program number will be shown on the display. Changing or adding a track/file to the program In stop mode, press the PROGRAM button repeatedly until the program number for which you want to change the track/file appears on the display.
-
Page 21: Shuffle Playback
Shuffle playback Clearing the program In the stop mode, press the PROGRAM button. When the SHUFFLE button is pressed, the tracks/files on the disc or USB flash drive will be played randomly. When CD is selected Hold down the CLEAR button for more than 4 seconds. CD/Shuffle T003 00:07... -
Page 22: Repeat Playback
Repeat playback USB iPod Repeating a designated section (A-B repeat mode) Press the PLAY (G) button to start playback. Set the point at which playback should start (point A) by pressing the A-B button. Every time the 1/ALL button is pressed, the mode is changed as follows: RPT 1 RPT Folder... -
Page 23: Time
Time Display (1) During playback of WMA/MP3 files, press the DISPLAY button to scroll During playback, press the TIME button repeatedly to change the the information on the display. information on the display. Audio CD, MP3/WMA file: Default display (scrolling): Title - Artist Name - Album Name The display changes as follows: current track number and elapsed time of the current track... -
Page 24: Before Recording
Information of the songs is displayed on the display of CD-H750. < The maximum number of files that CD-H750 can operate is 2000. If more than 2000 files are stored on the USB flash drive, CD-H750 < CD-H750 cannot display symbols or full-size or double-byte can not play correctly, and cannot record any files. -
Page 25: Setting The Recoding Mode
Setting the Recoding Mode Bit rate You can set the bit rate, speed and number of tracks (one or all) when recording. You can set the bit rate of MP3 files for recording. Press the CD/USB button repeatedly to select “CD”. CD/Stop REC SET: MP3 64K Each time the Skip/search button ( ,/ ) pressed, the bit rate is... -
Page 26: Recording To A Usb Flash Drive
Set the number of songs to be recorded to “1 song” or “CD ALL”. (See page 25) Connect an external USB flash drive to the USB port of CD-H750. Depending on the selected setting, the selected song will be recorded or recording starts from the beginning of the first song on the CD. -
Page 27: Deleting A File From A Usb Flash Drive
Deleting a file from a USB flash drive Restoring factory settings You can delete a file on the external USB flash drive. If the unit is not working properly, restoring the factory settings might restore it to proper operation. In the stop mode, use the FOLDER buttons (¥/˙) to select a folder. -
Page 28: Troubleshooting
Check whether there are MP3 or WMA files on the USB and disc. e Non-playable file formats (e.g MPEG 1 LAYER 2 file) cannot be played. “Power protect” blinks on the display and CD-H750 enters standby mode. “No Song title”, “No artist”, and “No album” appear on the e The power supply is unstable. -
Page 29: Specifications
Specifications CD Player General Pickup ....... . 3-beam, semiconductor laser Power requirements . - Page 30 Phone: +81-42-356-9156 TEAC AMERICA, INC. 7733 Telegraph Road, Montebello, California 90640 U.S.A. Phone: +1-323-726-0303 TEAC MEXICO, S.A. DE C.V. Río Churubusco 364, Colonia Del Carmen, Delegación Coyoacàn, CP 04100, México DF, México Phone: +52-55-5010-6000 TEAC AUDIO EUROPE Liegnitzer Straße 6, 82194 Gröbenzell, Germany Phone: +49-8142-4208-141 This device has a serial number located on its rear panel.
Need help?
Do you have a question about the CD-H750 and is the answer not in the manual?
Questions and answers