Table of Contents
Advertisement
Operating Instructions
GB
English,1
A6TMC2 C (X) AUS
COOKER AND OVEN
Contents
Warning, 2
Installation, 3-9
Table of characteristics
Start-up and use, 11-14
Using the oven
Precautions and tips, 15-16
Care and maintenance, 17-18
Service information, 19
GB
Advertisement
Table of Contents

Related Manuals for Ariston A6TMC2 C X AUS


Summary of Contents for Ariston A6TMC2 C X AUS
-
Page 1: Table Of Contents
Operating Instructions COOKER AND OVEN Contents Warning, 2 Installation, 3-9 Positioning and levelling English,1 Mounting a Power Supply Cable Electrical connection Gas connection Adapting to different types of gas Post Installation Checks Technical specifications Table of characteristics Description of the appliance, 10 Overall view Control panel Start-up and use, 11-14... -
Page 2: Warning
WARNING Do not close the glass cover (if WARNING: The appliance and its present) when the gas burners or accessible parts become hot electric hotplates are still hot. during use. WARNING: Ensure that the Care should be taken to avoid appliance is switched off before touching heating elements. -
Page 3: Installation
Installation This appliance must be installed by an authorised person in accordance with this instruction manual AS/NZS 5601.1 – Gas installations (installation and pipe sizing), local gas fitting regulations, local electrical regulations, Building Code of Australia and any other government authority. ! Before operating your new appliance please read A = 3 ×... -
Page 4: Positioning And Levelling
The appliance may only be installed in permanently- • If the cooker is installed ventilated rooms, in accordance with current national underneath a wall HOOD legislation. The room in which the appliance is cabinet, there must be installed must be ventilated adequately so as to a minimum distance of Min. -
Page 5: Mounting A Power Supply Cable
a washer should be used. Concrete wall requires the screw of at least 8mm of diameter, and 60mm of length. Connecting the power supply cable to the mains. Ensure that the chain is fixed to the rear wall of the cooker and to the wall, as shown in figure, so that after installation Fit a normalized plug to the cable, which it is tensioned and parallel to the ground level. -
Page 6: Gas Connection
right gas connection, the cap should be inverted ! The manufacturer declines any liability should and the seal supplied with the appliance should be these safety measures not be observed. replaced when changing the connection. Gas connection If a flexible hose is used, it should be as short as possible with a maximum length of 1. -
Page 7: Adapting To Different Types Of Gas
! Should the gas pressure used be different (or vary Duplicate Data Plate Where the data plate is obscured by cabinetry when slightly) from the recommended pressure, a suitable the cooker is in the installed position, place a pressure regulator must be fitted to the inlet hose in duplicate data plate on a surface of the cabinetry accordance with current national regulations relating adjacent to the cooker. -
Page 8: Post Installation Checks
Post Installation Checks For other minor adjustments or if the appliance does not Perform post installation checks and ensure proper perform correctly: contact Arisit Pty Ltd 1300 762 219 and safe operation before leaving. Test all burners individually and in combination. Leak Check Anti-tilt Wall Bracket •... -
Page 9: Technical Specifications
Technical specifications The product was tested in accordance with AS4551 standard Gas Consumption Natural Gas (1.0 kPa) ULPG (2.75 kPa) Injector Gas Input Injector Gas Input Diameter Diameter 0. 85 mm 3.5 MJ/h 0.55 mm 3. 7 MJ/h Auxiliary Burner 1. -
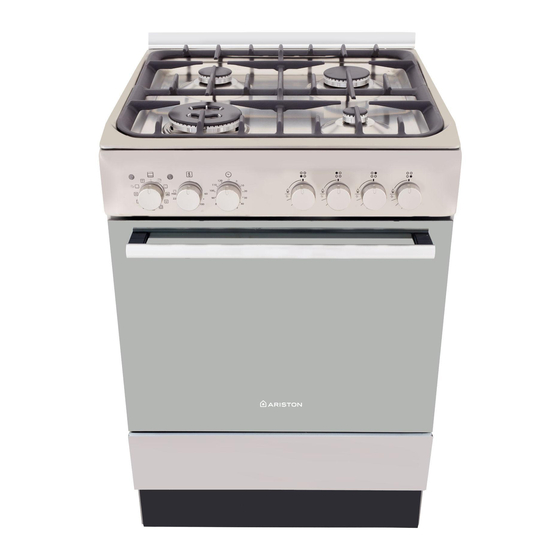
Page 10: Description Of The Appliance
Description of the appliance Overall view Gas burner Containment surface for spills Hob grid GUIDE RAILS Control panel for the sliding racks position 5 GRILL rack position 4 position 3 DRIPPING PAN rack position 2 position 1 Adjustable foot Adjustable foot Control panel SELECTOR knob THERMOSTAT indicator light... -
Page 11: Start-Up And Use
Start-up and use to replicate the flame intensity and to identify Using the hob easily the preferred level for different cooking Lighting the burners operations. For each BURNER knob there is a complete ring NOTE: Failure to follow these lighting and NOTE: Failure to follow these lighting and NOTE: Failure to follow these lighting and NOTE: Failure to follow these lighting and... -
Page 12: Using The Cooking Timer
! Never put objects directly on the bottom of the oven; ! To use the oven manually, in other words when you this will avoid the enamel coating being damaged. do not wish to use the end of cooking timer, turn the COOKING TIMER knob until it reaches the ... - Page 13 GRILL mode ! In the GRILL cooking mode, place the dripping pan in position 1 to collect cooking residues (fat and/or grease). The central part of the top heating element is switched on. The high and direct temperature of the grill is GRILL recommended for food that requires a high surface temperature (veal and beef steaks, fillet steak and...
-
Page 14: Oven Cooking Advice Table
Oven cooking advice table Cooking Foods Weight Rack Position Pre-heating Recommended Cooking modes (in kg) time temperature time (minutes) (minutes) Duck 65-75 Roast veal or beef 70-75 Traditional Pork roast 70-80 Oven Biscuits (short pastry) 15-20 Tarts 30-35 Tarts 20-30 Fruit cakes 2 or 3 40-45... -
Page 15: Precautions And Tips
Precautions and tips provided, and should be used for the purpose for ! This appliance has been designed and manufactured in which it was designed. Any other purpose (for compliance with international safety standards. example, heating the room) constitutes improper The following warnings are provided for safety reasons and use of the cooker and is dangerous. -
Page 16: Maintenance Warnings
If you have any doubts, do not use the appliance and contact Assembling the sliding rack kit your nearest Ariston Service Centre. • There are no user serviceable parts within this To assemble the sliding racks: appliance. -
Page 17: Care And Maintenance
Care and maintenance Switching the appliance off Replacing the oven light bulb 1. After disconnecting the oven Disconnect your appliance from the electricity from the electricity mains, supply before carrying out any work on it. remove the glass lid covering the lamp socket ( see figure ). -
Page 18: Gas Tap Maintenance
cold and wipe off with a clean, dry cloth. The Removing and fitting the oven door: enamel could dull if cleaned while still hot. 1.Open the door Stainless steel and chromed parts 2.Make the hinge clamps of the oven door rotate backwards completely (see photo) •... - Page 19 6.Replace the glass. Steam-Assisted Oven Cleaning This method of cleaning is recommended especially after WARNING! Oven must not be operated with inner cooking very fatty (roasted)meats. door glass removed! This cleaning process allows to facilitate the removal of WARNING! When reassembling the inner door dirt of the walls of the oven by the generation of steam glass insert the glass panel correctly so that the that is created inside the oven cavity for easier cleaning.
- Page 20 07/2013 - 195116247.01 XEROX FABRIANO ARISTON PRIORITY SERVICE ARISTON PRIORITY SERVICE ARISTON PRIORITY SERVICE ARISTON PRIORITY SERVICE ARISTON PRIORITY SERVICE If you are not completely satisfied with your appliance or require service call: Australia Phone: 1300 815 589 New Zealand Phone: (09) 306 1020 GENUINE ACCESSORIES &...
Need help?
Do you have a question about the A6TMC2 C X AUS and is the answer not in the manual?
Questions and answers