
Subscribe to Our Youtube Channel
Related Manuals for Beko DCY 9316 W


Summary of Contents for Beko DCY 9316 W
-
Page 1: User Manual
Dryer User Manual DCY 9316 W DCB 93166 W DCB 93166 B DCB 93166 R 2960311143_EN/040316.1214... - Page 2 Please read this user manual first! Dear Customer, Thank you for prefering a Beko product. We hope that your product which has been manufactured with high quality and technology will give you the best results. We advise you to read through this manual and the other accompanying documentation carefully before using your product and keep it for future reference.
-
Page 3: Table Of Contents
TABLE OF CONTENTS 1 Important safety and 6 Operating th product environmental instructions 6.1 Control panel ........19 1.1 General safety ........4 6.2 Screen symbols ........19 1.1.1 Electrical safety .......5 6.3 Preparing the machine ....20 1.1.2 Product safety .........6 6.4 Programme selection ...... -
Page 4: Important Safety And Environmental Instructions
Important safety and environmental instructions This section contains safety instructions that will help protect from risk of personal injury or property damage. Failure to follow these instructions shall void any warranty. 1.1 General safety • The dryer can be used by children at and above 8 years old and by persons whose physical, sensory or mental capabilities were not fully developed or who lack experience and knowledge provided that they are... -
Page 5: Electrical Safety
Important safety and environmental instructions 1.1.1 Electrical safety Electrical safety instructions should be followed while electrical connection is made during the installation. • Connect the dryer to a grounded outlet protected by a fuse at the value specified on the type label. (See 2.1 Overview) Have the grounding installation performed by a qualified electrician. -
Page 6: Product Safety
Important safety and environmental instructions 1.1.2 Product safety • Superheating of the clothes inside of the dryer can occur if you cancel the programme or in the event of a power failure whilst the dryer is running, this concentration of heat can cause self-combustion and fire so always activate the ventilation programme to cool down or quickly remove all laundry from the dryer in order to hang them up... - Page 7 Important safety and environmental instructions Below specified laundry or items must not be dried in the dryer due to the fire hazard: • Garments or pillows bolstered with rubber foam (latex foam), shower caps, water resistant textiles, materials with rubber reinforcement and rubber foam pads.
- Page 8 Important safety and environmental instructions Clothing that contains metal reinforcements should not be dried in the dryer. Dryer may be damaged if metal reinforcements come loose and break off during drying. Use softeners and similar products in accordance with the instructions of their manufacturers. Always clean the lint filter before or after each loading.
-
Page 9: Mounting Over A Washing Machine
Important safety and environmental instructions 1.2 Mounting over a washing machine • A fixing device should be used between the two machines when installing the dryer above a washing machine. The fitting device can be obtained through spare part suppliers. •... -
Page 10: Child Safety
Important safety and environmental instructions 1.4 Child safety • Packaging materials are dangerous for the children. Keep packaging materials away from children. • Electrical products are dangerous for the children. Keep children away from the product when it is operating. Do not let them tamper with the dryer. -
Page 11: Package Information
Important safety and environmental instructions 1.6 Compliance with RoHS Directive: The product you have purchased complies with EU RoHS Directive (2011/65/EU). It does not contain harmful and prohibited materials specified in the Directive. 1.7 Package information Packaging materials of the product are manufactured from recyclable materials in accordance with our National Environment Regulations. -
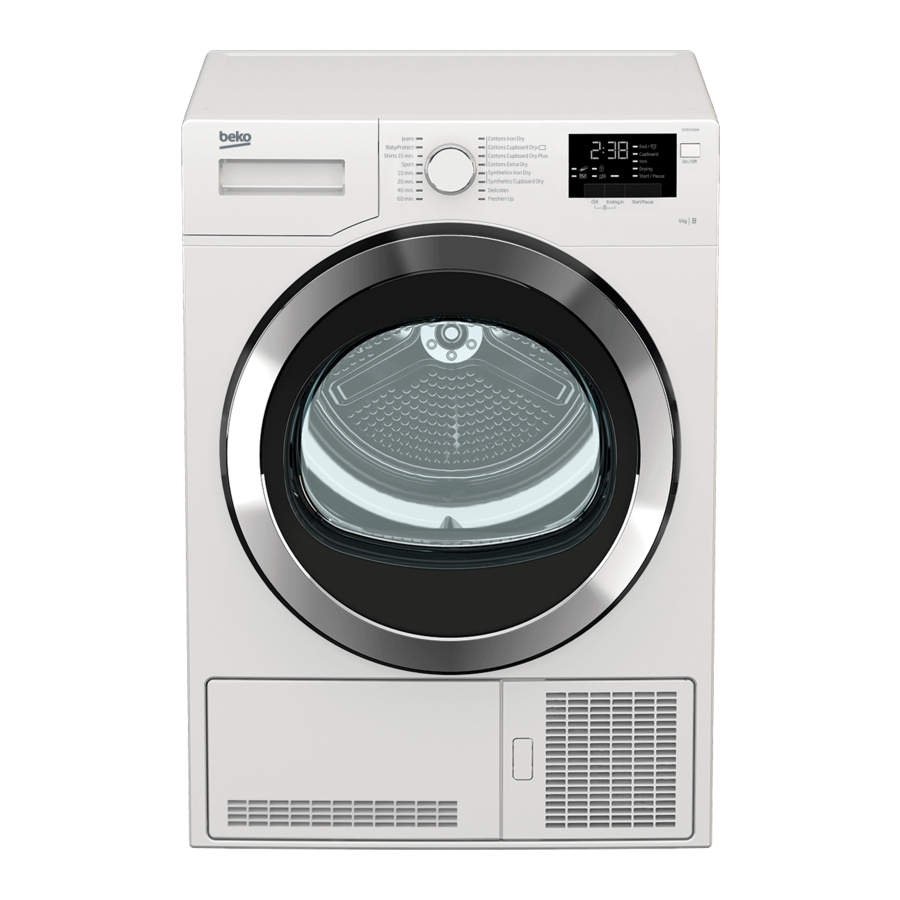
Page 12: Overview
2.1 Overview 1. Top panel 2. Control panel 3. Loading door 4. Kick plate opening button 5. Ventilation grids 6. Adjustable feet 7. Kick plate 8. Type label 9. Lint filter 10. Water tank drawer 11. Power cord Dryer / User Manual 12 / EN... -
Page 13: Package Contents
Your Dryer 2.1 Package Contents 1. Water drain hose * 2. Filter drawer spare sponge* 3. User Manual 4. Drying basket* 5. Drying basket user manual* *It can be supplied with your machine depending on its model. 13 / EN Dryer / User Manual... -
Page 14: Installation
Installation Before the calling the nearest Authorized on the Do not place the dryer Service for the installation of the dryer, en- power cable. sure that electrical installation and water 3.2 Removing the drain is appropriate referring to the user's manual.(See 3.3 Connecting to the drain and transportation safety assembly 3.5 Electrical connection) If they are not... -
Page 15: Adjusting The Feet
Installation Connect the other end of the drain hose Never unscrew the adjustable feet directly to the wastewater drain or to the from their housings. washbasin. 3.5 Electrical connection For specific instructions for electrical connec- tion required during installation (See 1.1.1 Electrical Safety) 3.6 Transportation of the dryer Unplug the dryer before transporting it. -
Page 16: Electrical Connection
Electrical Connection Make sure that you have an earthed power Do not operate without the top outlet socket rated at 13 amps (minimum). cover fitted. Risk of injury. 4.1 Attention! When installed, the socket must be reachable Important after installation, or a separate switch (which can disconnect the two poles) must be used in the installation. -
Page 17: Preparations
Preparation 5.1 Laundry suitable for drying in the dryer • Always obey the instructions given on the garment tags. Dry only the laundry having a label stating that they are suitable for drying in a dryer and make sure that you select the appropriate programme. -
Page 18: Correct Load Capacity
Preparation • Clean the condenser regularly at least Following weights are given as examples. once every month or after every 30 drying Approximate weights cycles. Laundry (g)* • Ventilate the room, where the dryer is located, well during drying. Cotton quit covers 1500 (double) 5.5 Correct load capacity... -
Page 19: Operating The Product
Operating the product 6.1 Control panel Programme selection knob Remaining duration indicator On/Off button 4. Start/pause button End duration button Sound warning button 6.2 Screen symbols Tank Child-proof Filter Volume up Anti Mute lock full cleaning Creasing 19 / EN Dryer / User Manual... -
Page 20: Preparing The Machine
Operating the product 6.3 Preparing the machine 6.5 Main Programmes Plug in the machine The main Programmes are given below based Place laundry inside the machine. on fabric type. Press the On/Off button. • Cotton 4. When your machine turns on for the first Dry durable laundry with this Programme. -
Page 21: Timed Programmes
Operating the product It is recommended to dry your delicates in laundry bag to prevent wrinkles and damage. When the Programme ends, take your laundry out of the machine immediately and hang them to prevent wrinkles. • Freshen Up It only performs ventilation for 10 minutes without blowing hot air. -
Page 22: Programme Selection And Consumption Table
Operating the product 6.7 Programme selection and consumption table Spin speed in washing Approximate amount Programs Capacity (kg) of remaining humidity Drying time (minutes) machine (rpm) Cottons / Coloreds Extra dry 1000 % 60 Cupboard dry 1000 % 60 Iron dry 1000 % 60 Shirts 15 min. -
Page 23: Auxiliary Function
Operating the product 6.8 Auxiliary functions Sound warning cancel Drying machine makes sound warnings when the Programme is completed. If you don’t Loading door open want sound notifications, press the “Sound Notification” button. Start/Pause led blinks when the loading door When you press the sound notification but- of the drying machine is open. -
Page 24: Starting The Programme
Operating the product Canceling the end duration function A warning sound is heard when any button is pressed (except for On/Off button) or the If you want to cancel the end duration setting Programme Selection knob is turned while countdown and start the Programme right the child lock is active. -
Page 25: Cancelling The Programme
Operating the product 6.15 Programme end If a new Programme is selected When the Programme ends, the Final/Wrinkle by changing the position of the Prevention, Fiber Filter Cleaning and Water Programme selection knob while Tank Warning leds on the Programme follow your machine is in stand-by mode, up indicator light up. -
Page 26: Maintenance And Cleaning
Maintenance and cleaning Service life of product extends and frequently before reinstalling it. experienced problems will be reduced if it is cleaned at regular intervals. 7.1 Cleaning Lint Filter / Loading Door Inner Surface Lint and fibre released from the laundry to the air during the drying cycle are collected in the Lint Filter. -
Page 27: Draining The Water Tank
Maintenance and cleaning • Drain the water in the tank. Never use solvents, cleaning agents or similar substances for cleaning due to the risk of fire and explosion! • If there is lint accumulation in the funnel of the water tank, clean it under running water. - Page 28 Maintenance and cleaning 2. Unlock the 2 condenser locks after opening 5. Place the condenser in its housing. Fasten the kick plate. the 2 locks and make sure that they are seated securely. 3. Pull out the condenser. 6. Close the kick plate cover. 4.
-
Page 29: Troubleshooting
Troubleshooting Drying process lasts for a long time. • Pores of the fibre filter might be clogged. >>> Wash the filter with warm water. • Condenser might be clogged. >>> Wash the condenser. • Ventilation grills at the front of machine might be blocked. >>> Remove any items in front of the ventilation grills that block ventilation. - Page 30 Troubleshooting Filter cleaning warning led is on. • Fibre filter might not have been cleaned. >>> Clean the filter. Filter cleaning warning led flashes. • Filter bearing might be clogged with fibre. >>> Clean the filter bearing. • There might be a layer in the filter pores that causes clogging. >>> Wash the filter with warm water.
-
Page 31: Republic Of Ireland
Service Please keep your purchase receipt or other proof of purchase in a safe place; you will need to have it should the product require attention under guarantee. You should also complete the details below; it will help us assist you when requesting service. (The model number is printed on the Instruction Booklet and the serial number is printed on the Rating Label affixed to the appliance) Model No:... -
Page 32: What Is Covered
• Disclaims any liability for incidental or consequential damages. • The guarantee does not in anyway diminish your statutory or legal rights. Beko plc, Beko House, 1 Greenhill Crescent, Watford, WD18 8QU Tel: 0845 6004911 Email: service@beko.co.uk Fax: 0845 6004922 www.beko.co.uk...
Need help?
Do you have a question about the DCY 9316 W and is the answer not in the manual?
Questions and answers