
Related Manuals for Siemens gigaset C350


Summary of Contents for Siemens gigaset C350
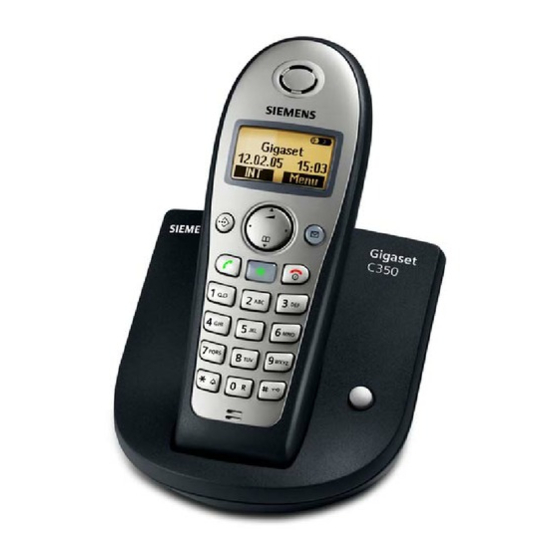
- Page 1 Communications Repair Manual Gigaset C350, C355 up to level 2.5 Confidential COM MD CC GRM T J. Junggebauer Version 1.0 July 2005...
-
Page 2: Table Of Contents
Communications 1 Table of contents TABLE OF CONTENTS ..........................2 PROCEDURES.............................3 ....................3 ERVICE PROCEDURES FOR THE HANDSET C 350 355................4 ERVICE PROCEDURES FOR IGASET LASERED IMPRINT AND STICKER ON MICROPROCESSOR............6 TEST AND IDENTIFICATION OF FAULTY COMPONENT ..............7 ..........8 HECK OF COMPLETE SYSTEM WITH FAULT DESCRIPTION OF CUSTOMER ........8 HECK OF COMPLETE SYSTEM WITHOUT FAULT DESCRIPTION OF CUSTOMER ............8... -
Page 3: Procedures
Communications 2 Procedures Since the C350/ 355 is a C340/ C345 in a PTT design housing, all procedures are identical. Hidden service procedures for the handset and base stations. Note: The service procedures are confidential. 2.1 Service procedures for the handset Read out IPUI of the handset (for identification purposes): menu-key, *, #, 0, 6, # Press 1, 4 and 7 simultaneously and keep keys pressed Switch on and keep key pressed until "SERVICE"... -
Page 4: Service Procedures For Gigasetc 350 And 355
Communications 2.2 Service procedures for Gigaset C 350 and 355 Press: "menu-key", 5, 4, 9, ABCD (see table below), o.k. Pos. acknowledge tone (rising sequence of notes) = Procedure has been accepted. Feature D (Option) Read out RFPI number of base station Pause after access code 1 1 = 1 sec. - Page 5 Communications Read customer settings (menu, 54918): Menu for Hotline purposes that enables to check some customer settings in 1 procedure. Instead of asking the customer which flash time…he has said he just needs to tell the Hotline this special code. Example: 110000 The first 6 characters show the registered handsets from 1 to 6:...
-
Page 6: Lasered Imprint And Sticker On Microprocessor
- S16xx means Portfolio 2004 (here: 1607 = handset for C350 base). - The following 2 characters indicate the country. B1 means Germany (Siemens); A1 means Germany (PTT) C1 Austria, C4 Australia, N1 France, V1 Ireland, K1 Italy, S2 Poland, S3 Russia, S7 Hungary, B4 Turkey, L1 UK, F1 Switzerland, M1 Netherlands, D1 Spain, .. -
Page 7: Test And Identification Of Faulty Component
Communications 4 Test and identification of faulty component Not all incoming components or systems have to be faulty. The customer could have problems with the operation of the phone or could have placed it close to a device (PC...) that affects it. It could also happen, that there is a loose connection in the phone (due to a dry joint or something else). -
Page 8: Check Of Complete System With Fault Description Of Customer
Communications Check of complete system with fault description of customer Try to reconstruct the fault using the description of the customer. Check the batteries and the AC-adapter. Find out whether the customer has programmed something wrong by checking the procedures concerned. If that was not successful do an incoming test. -
Page 9: Functional Test
Communications 4.5 Functional Test There is an incoming and an outgoing test. The difference between them is that in the outgoing test you do a reset on the component after testing in case of swap (to deregister, reset PIN and set to factory defaults). -
Page 10: Block Diagrams
Communications 5 Block diagrams 5.1 Block diagram handset HF-Amp integ. SC14430 Antenna VBAT (3.6V max) RF- module 3.3V VDD 1.8V Adaptation- DCDC unit SC 14430 DC/ DC Charging-contact Analog converter Charging- DSP + Front 3.3V Hands Free Ctrl. switch LDO 1.8V UP (CR 16B) Power- LDO 2.5V... -
Page 11: Block Diagram C350 Base Station
Communications 5.2 Block diagram C350 base station serial EEPROM 8K x8 or 16k x 8 Paging Switch also usable for registration of mobiles I2C-Interface SC14438 (National) V24 Test-Interface - µP DIP - 5MBit Flash / ROM LIU o. MWI Not implemented Crystal10,368MHz - 10,5kB RAM+11,5 shared... -
Page 12: Block Diagram C355 Base Station
Communications 10,368MHz Testschnittstelle I 5.3 Block diagram C355 base station +3V3 +1V8, +2V5, +3V3 +3V3 Amt (a/b) Step 9 –HF Line Interface (Philips) VBAT VEGA Bluebird VR1_CTRL +8V0 VR2_CTRL SPEAKER JTAG LH-Verstärker MC34119 SPKENQ CHARGE_DETECT CHARGE Lade-schaltung +8V0 150mA/1mA Graifik-Display (nicht Andalucia) (nur Andalucia-AM) Keypad... -
Page 13: Repair Of Handset
Communications 6 Repair of handset ESD regulations have to be followed in the complete repair process! 6.1 Special equipment and tools Opening-tool G2000/4000 F30032-P175-A1 Battery-dummy G5000 F30032-P270-A1 Recommended: Self-made tool to open the 2 latches in the battery compartment (see picture). Take a paper clip and folder it like described on the picture. Helpful self-made tools: 1. -
Page 14: Disassembling Of Handset
Communications 6.2 Disassembling of handset 1. alternative (recommended): Insert the self-made paper clip tool between the 2 latches in the battery compartment like (see picture below) and turn it a little. The open latches should look like shown on the picture. The opening procedure with this paper clip tool is the easiest way to do the first step in opening the housing. - Page 15 Communications Insert the opening tool G2000/ 4000 between both case shells and turn it in direction to the keypad. Do the same at the latch on the microphone like described on the pictures below. Continue with opening doing the same procedure on the other side latches. Continue with opening doing the same procedure on the top latches.
- Page 16 Communications Open the last 2 latches in the battery compartment with the opening tool G2000/40000 or the self-made paper clip tool. Now all latches are open and the upper case shell can be picked up. Confidential COM MD CC GRM T J.
-
Page 17: Assembling Of Handset
Communications 6.3 Assembling of handset The assembling procedure of the C35 handset is the same as the one of the C34 handset. Insert keypad and earphone and afterwards PCB in upper case shell. Close handset with lower case shell by pressing both case shells together. Pay attention on the battery contact springs on board. -
Page 18: Board Layout Of Handset
Communications Board Layout of handset Confidential COM MD CC GRM T J. Junggebauer Version 1.0 July 2005... -
Page 19: Humidity Or Liquid Damage
Communications 6.6 Humidity or liquid damage Diagnosis code IRIS: 61000 (DEVICE / MOISTURE DAMAGE) Boards with oxidation on the keypad side do not have to be scrapped if the vias are not affected by green oxidation layer. Clean board Boards with humidity damages on the component side have to be scrapped. Look at all electronic components on the back side. -
Page 20: Earphone Capsule/ Receiver Faulty
Communications Earphone capsule/ receiver faulty Affected unit: Handset Diagnosis code IRIS: 72100 (ACOUSTICS / RECEIVING / EARCAP) Repair level: Level 1 Components: Earphone capsule/ receiver Needed equipment: Multimeter Working material: None Diagnosis: The diaphragm of the earphone could be affected by deposits with increasing age. There will be a higher attenuation when measuring RLR (receiving loudness rating). -
Page 21: Loudspeaker Faulty
Communications 6.8 Loudspeaker faulty Affected unit: Handset Diagnosis code IRIS: 72200 (ACOUSTICS / RECEIVING / LOUDSPEAKER) Repair level: Level 1 Components: Loudspeaker Needed equipment: Multimeter Working material: None Diagnosis: The diaphragm of the loudspeaker could be affected by dust or humidity or the loudspeaker could be electrically faulty. -
Page 22: Display Cover Broken Or Scratched
Communications 6.9 Display cover broken or scratched Affected unit: Handset Diagnosis code IRIS: 23100 (DISPLAY / MECHANICAL DEFECT / SCRATCHES) Repair level: Level 1 Components: Display cover Needed equipment: Screwdriver Working material: None Diagnosis: Display cover broken or scratched. Repair: Replace display cover. -
Page 23: Display Module Faulty
Communications 6.10 Display module faulty Affected unit: Handset Diagnosis code IRIS: 21100 (DISPLAY / PERFORMANCE / NO LETTERS) 21200 (DISPLAY / PERFORMANCE / LINE-/COLUMN ERROR) 23200 (DISPLAY / MECHANICAL DEFECT / DISPLAY BROKEN) Repair level: Level 2.5 Components: Display module Needed equipment: 50 watts soldering station Weller WTCP 50 or WS (D) 50, Soldering tip FP7, small soldering tip... - Page 24 Communications Put some flux on the pads and resolder them until the surface is even. Take a new display and a piece of tape and fix it on the display foil. Confidential COM MD CC GRM T J. Junggebauer Version 1.0 July 2005...
- Page 25 Communications Align the display foil on the PCB and fix it. Put some flux between foil and pads. Confidential COM MD CC GRM T J. Junggebauer Version 1.0 July 2005...
- Page 26 Communications Put the soldering tip FP7 on the soldering iron and solder the display in 2 steps as described in the picture below. The result should look like the last picture. Confidential COM MD CC GRM T J. Junggebauer Version 1.0 July 2005...
- Page 27 Communications Fix the display foil with a finger and gently remove the tape. Test the soldered connection by gently pulling the display foil. Test: Do a display test. Press 1,4 and 7 simultaneously and keep pressed while switching on the handset. Release all keys. Press a key.
-
Page 28: Microphone Faulty
Communications 6.11 Microphone faulty Affected unit: Handset Diagnosis code IRIS: 73110 (ACOUSTICS / TRANSMITTING / MICROPHONE / NO FUNCTION) 73170 (ACOUSTICS / TRANSMITTING / MICROPHONE / LOW VOICE LEVEL) Repair level: Level 2.5 Components: Microphone Needed equipment: Soldering iron Working material: Desolder wick, solder Diagnosis: The diaphragm of the microphone is affected by humidity or nicotine with increasing... -
Page 29: Repair Of Basestation
Communications 7 Repair of basestation The procedures are absolutely the same as for G340/ G345. 7.1 Disassembling of base station C350 ESD regulations have to be followed in the complete repair process! Needed material: Suitable screw driver with cross recess, Opening-tool G2000/4000 F30032-P175-A1 Unscrew the 3 screws of the lower case shell. - Page 30 Communications Open the housing as described on the picture below. Confidential COM MD CC GRM T J. Junggebauer Version 1.0 July 2005...
-
Page 31: Disassembling C355
Communications 7.2 Disassembling C355 Needed material: suitable screw driver with cross recess Unscrew the 6 screws on the lower case shell and lift it. 7.3 Assembling C350 and C355 Needed material: suitable screw driver with cross recess Put charger contact springs in upper case shell. Insert keypad. -
Page 32: Exploded View C350/ C340
Communications 7.4 Exploded view C350/ C340 Confidential COM MD CC GRM T J. Junggebauer Version 1.0 July 2005... -
Page 33: Exploded View C355/ C345
Communications 7.5 Exploded view C355/ C345 Confidential COM MD CC GRM T J. Junggebauer Version 1.0 July 2005... -
Page 34: Board Layout C350
Communications 7.6 Board Layout C350 Confidential COM MD CC GRM T J. Junggebauer Version 1.0 July 2005... -
Page 35: Board Layout C355
Communications 7.7 Board Layout C355 Confidential COM MD CC GRM T J. Junggebauer Version 1.0 July 2005... -
Page 36: Lightning Stroke Damage
Communications 7.8 Lightning stroke damage Diagnosis code IRIS: 62000 (DEVICE / LIGHTNING/OVER VOLTAGE) The picture below is taken from a Gigaset 4010 base station and shows a small lightning stroke damage. Scrap all base stations with lightning stroke damage. Inspect the board with your eyes and look for chipped components, black soot on the board or components that look like those on the picture below (yellow signs). -
Page 37: Loudspeaker Faulty
Communications 7.9 Loudspeaker faulty Affected unit: Gigaset C355 Diagnosis code IRIS: 72200 (ACOUSTICS / RECEIVING / LOUDSPEAKER) Repair level: Level 1 Components: Loudspeaker Needed equipment: Screwdriver or similar tool, multimeter Working material: none Diagnosis: The diaphragm of the loudspeaker could be affected by dust or humidity or the loudspeaker could be electrically faulty. -
Page 38: Charging Problems
Communications 7.10 Charging problems Affected unit: Gigaset C350, C355 Diagnosis code IRIS: 97000 (FUNCTIONALITY / DEVICE NO CHARGING) Repair level: Level 1 Components: Charger contact springs, charger pads Needed equipment: Soldering iron, glass fibre pen Working material: Desolder wick, solder Diagnosis: The battery segment on the handset display doesn’t start blinking when charging. -
Page 39: Line Seizure Problems
Communications 7.11 Line seizure problems Affected unit: Gigaset C350, C355 Diagnosis code IRIS: 93000 (FUNCTIONALITY / CALLING PROBLEMS) Repair level: Level 2.5 Components: Philips IC PHC2300 or alternative component Needed equipment: Hot air blower, soldering iron, multimeter Working material: Flux, solder Diagnosis: Line seizure is not possible or connection can not be released. -
Page 40: J. Junggebauer Version 1.0 July
Communications Repair: Desolder the IC and solder a new component with a hot air blower. Put some flux on the joints and resolder them with a soldering iron. If necessary put additional solder on the joints. Test: Assemble the base station and connect it to a PBX or PSTN line. Pick up the handset and dial the extension of another phone connected to the PBX or PSTN.
Need help?
Do you have a question about the gigaset C350 and is the answer not in the manual?
Questions and answers