Siemens Gigaset C385 User Manual
Siemens gigaset c385: user guide
Hide thumbs
Also See for Gigaset C385:
- Instruction manual (61 pages) ,
- Quick start manual (1 page) ,
- User manual (71 pages)
Table of Contents
Advertisement
Advertisement
Table of Contents

Related Manuals for Siemens Gigaset C385


Summary of Contents for Siemens Gigaset C385
- Page 1 Gigaset C385 Issued by Gigaset Communications GmbH Schlavenhorst 66, D-46395 Bocholt Gigaset Communications GmbH is a trademark licensee of Siemens AG © Gigaset Communications GmbH 2008 All rights reserved. Subject to availability. Rights of modifications reserved. Gigaset www.gigaset.com...
-
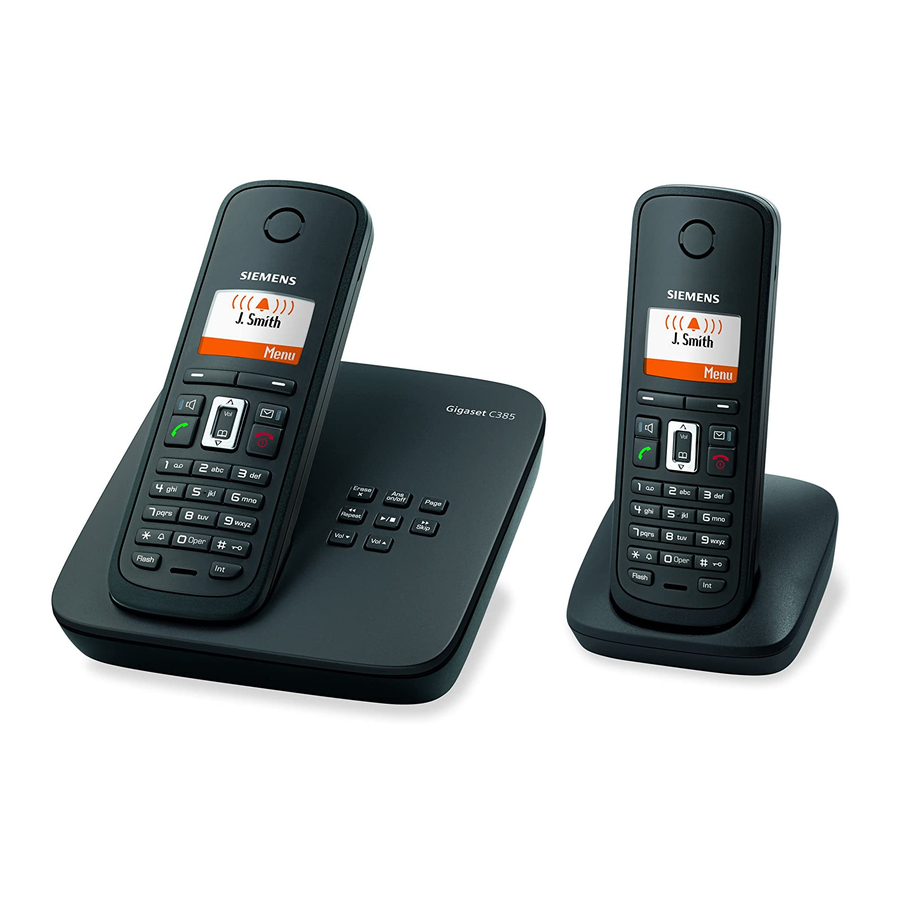
Page 2: The Handset At A Glance
The handset at a glance Ð × 01.10.08 07:15 Þ Menu 1 Display in idle status (example) ¢ 2 Charge status of the batteries( page 11) ¢ 3 Display keys ( page 17) ¢ 4 Message key ( page 27) Access to calls and message lists;... -
Page 3: The Base Station At A Glance
You can use the keys on the base station to register handsets to the base station, search for handsets (paging), and operate the integrated answer machine (Gigaset C385 only). Gigaset C385 base station 1 Registration/paging key: Press briefly: Search for handsets (paging), ¢... -
Page 4: Table Of Contents
Contents Contents The handset at a glance ........1 The base station at a glance . - Page 5 Operating the answer machine of the Gigaset C385 base station ....... 35 Operation via the handset .
- Page 6 Contents Appendix ..........52 Care .
-
Page 7: Safety Precautions
Warning Read the safety precautions and the user guide before use. Explain their contents and the potential hazards associated with using the telephone to your children. Only use the mains adapter supplied, as indicated on the underside of the base station or charging cradle. -
Page 8: First Steps
First steps Check the package contents one Gigaset C380/C385 base station, one mains adapter, one Gigaset C38H handset, one phone cord, two batteries, one battery cover, one belt clip, one user guide. If you have purchased a model with multiple handsets the package should contain two batter- ies, a battery cover, a belt... -
Page 9: Setting Up The Base Station And Charging Cradle (If Included)
Instructions on how to mount the base station and charging cradle to a wall, ¢ page 58. Please note: Never expose the telephone to the influence of heat sources, direct sunlight or other electrical devices. Protect your Gigaset from moisture, dust, corrosive liquids and vapours. Connecting the base station ¤... -
Page 10: Connecting The Charging Cradle (If Included)
Connecting the charging cradle (if included) If you need to disconnect the plug from the charging cradle, press the release button and disconnect the plug 2. ¤ Connect the flat plug of the mains adapter 1. ¤ Plug the mains adapter into the plug socket 2. -
Page 11: Setting Up The Handset For Use
For example, the batteries could explode. The phone could also malfunction or be damaged as a result of using batteries that are not of the recommended type. * Gigaset Communications GmbH is a trademark licensee of Siemens AG. ¤ Insert the batter- ies the right way round. - Page 12 Attaching the belt clip The handset has notches on each side to accommodate the belt clip. ¤ Press the belt clip onto the back of the handset so that the notches on the belt clip click into position. Placing the handset in the base station and registering Place handset into base Menu...
- Page 13 First steps Please note Each key press interrupts the automatic registration. If automatic registration does not work, the handset will have to be registered manually ( To charge the batteries, leave the handset in the charging cradle. Please note Only place the handset in the base station or charging cradle that is intended for it.
- Page 14 Setting the date and time Set the date and time so that the correct date and time can be assigned to incoming calls, and so that the alarm can be used. Þ Menu Settings Ç Date/Time Ç ¤ Press the key below §Menu§...
- Page 15 First steps Enter Date: [01.10.2008] Ç Ç Enter Time: [07:15] Ç Saved ¤ The active line is marked [...]. Enter day, month and year as an 8-digit number via the handset, e.g. Q Q2QQN for 01/10/08. If you want to correct an entry, press the top or bottom of the control key to toggle between fields.
-
Page 16: Connecting The Headset
Display in idle status Once the phone is registered and the time set, the idle display is shown as in this exam- ple. If the answer machine is activated, the answer machine icon × will also be dis- played in the header. Your answer machine is set with a pre- recorded announcement. -
Page 17: What Would You Like To Do Next
Setting the handset volume Recording a personal message for the answer machine Setting Eco Mode / Eco Mode+ Operating the telephone on a PABX Registering existing Gigaset handsets to a base station Transferring directory entries from existing Gigaset handsets to the new handset(s) -
Page 18: Using The Phone
Using the phone Control key In the following description the side of the control key you need to press for each operation is indicated accordingly, e.g. t for "press the top of the control key". The control key has a number of different functions: When the handset is in idle status Open the directory. -
Page 19: Keys On The Keypad
(flashing) when entering the time and date etc. Menu guidance Your telephone's functions are accessed using a menu that has a number of levels. Main menu (first menu level) ¤... -
Page 20: Activating/Deactivating The Handset
Activating/deactivating the handset With the phone in idle status, press and hold the end call key (con- firmation tone) to switch off the handset. Press and hold the end call key again to switch the handset on. Activating/deactivating the keypad lock The keypad lock prevents any inadvertent use of the phone. -
Page 21: Illustration Of Operating Steps In The User Guide
Using the phone Illustration of operating steps in the user guide The operating steps are shown in abbreviated form. Example: The illustration: ¢ Settings §Menu§ means: Þ Settings Ç Handset Ç Auto Answer Ç ¢ ¢ Handset Auto Answer Menu ¤... -
Page 22: Menu Tree
Instead of scrolling to locate a menu function, you can select a function more quickly by opening the menu and keying in a digit combination (or shortcut). M 2 2 for "Set ringer tone volume". Example: §Menu§ With the telephone in idle status, press î ¢ 1-1 Write Message ¢... - Page 23 Menu tree Settings ¢ 7-1 Date/Time 7-2 Audio Settings 7-3 Handset 7-4 Base page 13 7-2-1 Call Volume 7-2-2 Ringer Volume 7-2-3 Ringer Melody 7-2-4 Advisory Tones 7-2-5 Battery Low 7-3-1 Display 7-3-2 Language 7-3-3 Auto Answer 7-3-4 Register Handset 7-3-5 Reset Handset 7-4-1 Audio Settings (C385 base station...
-
Page 24: Making Calls
Making calls Making an external call External calls are calls using the public tel- ephone network. Enter the number and press the talk key. Press and hold the talk key c and then enter the number. You can cancel the dialling operation with the end call key a. -
Page 25: Handsfree Talking
Switching between earpiece and handsfree mode Press the handsfree key. During a call and when listening to the answer machine (Gigaset C385 only), acti- vate or deactivate handsfree mode. If you wish to place the handset in the charging cradle during a call: ¤... -
Page 26: Using The Directory And Lists
The options are: Directory Last number redial list SMS list Call history Answer machine list (Gigaset C385 only) You can save up to 150 entries in the direc- tory. You can create a personalised directory for your own individual handset. However, you can send the list or individual entries ¢... -
Page 27: Copying A Displayed Number To The Directory
¢ Copy to Directory §Menu§ ¤ Complete the entry Gigaset C385: The message playback is interrupted during the number transfer from the answer machine list. Using a number from the directory In some operating situations you can open the directory to copy a number, for exam- ple. -
Page 28: Last Number Redial List
You can use the message key f to open the following list selection: SMS list Answer machine list (Gigaset C385 only) or network mailbox, if your net- work provider supports this function and the fast access is set for the net- ¢... - Page 29 Press and hold (idle status). The call history entries are retained when you change the list type. Answer machine list (Gigaset C385) You can use the answer machine list to lis- ten to the messages that are on the answer machine.
-
Page 30: Making Cost-Effective Calls
Making cost-effective calls Automatic network provider code (preselection) You can specify a call-by-call number (preselection number) that is automati- cally placed in front of numbers when you dial them. The "with preselection" list contains the "rule" for dialling code numbers or the first digits of dialling code numbers with which you wish the preselection number to be used. -
Page 31: Displaying The Call Duration
Making cost-effective calls Displaying the call duration The duration of a call is displayed during the conversation, until about three seconds after the call has ended if you do not replace the handset in the base station or charging cradle. Please note The actual duration of the call can vary from that shown by a few seconds. -
Page 32: Sms (Text Messages)
SMS (text messages) Your phone is supplied ready for sending SMS messages immediately. Preconditions: Calling Line Identification is enabled for your phone line. Your network provider supports SMS in the fixed line network (information on this can be obtained from your network provider). -
Page 33: Receiving An Sms
SMS (text messages) Reading or deleting individual SMS messages ¤ Open the draft message list. Select SMS. ¢ Read SMS §Menu§ Select and press the SMS. Scroll through the SMS using q. ¢ Delete Entry §Menu§ Select and press the message. Writing/changing an SMS You are reading an SMS in the draft mes- sage list. -
Page 34: Setting Sms Centres
Deleting the incoming message list All new and old SMS messages in the list are deleted. ¤ Open the incoming message list. ¢ Delete List §Menu§ Select and press Press the display key to con- §OK§ firm the delete. The list is cleared. -
Page 35: Activating/Deactivating Sms Function
SMS (text messages) When you send SMS messages, your sender number may be sent without your extension number. In this case the recipient cannot reply to you directly. Sending and receiving SMS messages on ISDN PABXs is only possible via the MSN number assigned to your base station. -
Page 36: Operating The Answer Machine Of The Gigaset C385 Base Station
It activates again automatically when you delete old messages. Operating the answer machine of the Gigaset C385 base station Recording your own announcement ¢ §Menu§ ¢... -
Page 37: Deleting Announcements
Operating the answer machine of the Gigaset C385 base station Deleting announcements ¢ ¢ Voice Mail Announcements § § Menu ¢ Delete Announcement Press the display key to §OK§ confirm the prompt. Press and hold (idle status). The pre-recorded announcement is used again after a personal announcement is deleted. -
Page 38: Activating/Deactivating Call Screening
30 sec press (‰ = on). §OK§ Press and hold (idle status). Operating the answer machine of the Gigaset C385 base station Setting the recording time You can set the maximum recording time of a message. The options are: 3 Minutes ¢... -
Page 39: Operating When On The Move (Remote Operation)
Operating the answer machine of the Gigaset C385 base station Operating when on the move (remote operation) You can check and activate your answer machine from any other telephone (hotel, pay phone etc.). Preconditions: You have set a system PIN other than ¢... -
Page 40: Using The Network Mailbox
Gigaset C380: Fast access is set for the network mailbox. You only need to enter the number of the network mailbox. Gigaset C385: The integrated answer machine is set for fast access. Instead, you can define fast access for the network mailbox, e.g. -
Page 41: Eco Dect
Reduced energy consumption Your telephone has an energy-saving adapter plug and uses less energy. Reduced transmission power The transmission power of your telephone is reduced automatically: The handset's transmission power is reduced depending on the distance to the base station. -
Page 42: Setting The Alarm Clock
Setting the alarm clock Precondition: The date and time have ¢ already been set ( page 13). Activating/deactivating the alarm clock ¢ ¢ Alarm Clock Activation §Menu§ (‰ = on) After you activate the alarm clock, the menu for setting the wake-up time opens ¢... -
Page 43: De-Registering Handsets
Using several handsets Registering other handsets You can register other Gigaset handsets and handsets for other devices with GAP functionality as follows. On the handset ¤ Start to register the handset as described in its user guide. On the base station Press and hold the registration/paging key ¢... -
Page 44: Listening In To An External Call (Conference)
Answering a waiting call If you receive an external call during an internal call, you will hear the call waiting tone (short tone). The caller's number will appear in the display if phone number identification is enabled. Press the end call key to end the internal call. -
Page 45: Setting The Display
Handset settings Setting the display You have a choice of four colour schemes and several different contrasts. You can also set a screensaver and backlight. ¢ ¢ Settings Handset §Menu§ You have the following options: Screensaver The available settings are saver, Globe Digital... -
Page 46: Activating/Deactivating The Ringer
Setting the ringer volume The ringer volume is the same for all types of ring. ¢ ¢ Settings Audio Settings §Menu§ ¢ Ringer Volume Or in idle status: ¢ Ringer Volume. Then: Adjust the volume and press §OK§ Press and hold (idle status). Setting the ringer melody Set different ringer melodies for external calls, internal calls and the alarm clock. -
Page 47: Restoring The Handset To The Factory Settings
Base station settings Restoring the handset to the factory settings You can reset any individual settings and changes that you have made. This will not affect entries in the directory, calls list or SMS lists, or the handset's registration to the base station. -
Page 48: Restoring The Base Station To The Factory Settings
Restoring the base station to the factory settings When restoring factory settings: Handsets are de-registered – When resetting via the menu: all Gigaset handsets – When resetting using the key on the base station: also all handsets of other GAP capable devices Individual settings are reset All lists are deleted The system PIN is reset to the original... -
Page 49: Connecting The Phone To A Pabx
Connecting the phone to a PABX Connecting the phone to a PABX The following settings are only necessary when your PABX requires them; see the PABX user guide. You cannot send or receive SMS messages on PABXs that do not support Calling Line Identification. -
Page 50: Service (Customer Care)
Service (Customer Care) We offer you support that is fast and tai- lored to your specific needs! Our Online Support on the Internet can be reached any time from anywhere. www.gigaset.com/customercare It provides you with 24/7 support for all our products. It also provides a list of FAQs and answers plus user guides and current software updates (if available for the product) for you to download. -
Page 51: Authorisation
You cannot listen to messages on the network mailbox. Your PABX is set for dial pulsing. ¥ Set your PABX to touch tone dialling. Gigaset C385 only: No time is specified for a message in the answer machine history. Date/time is not set. ¥... -
Page 52: Environment
The above provisions does not imply a change in the burden of proof to the detriment of the customer. To invoke this Guarantee, please contact the Gigaset Communications telephone service. The relevant number is to be found in the accompanying user guide. Environment... -
Page 53: Appendix
Appendix Disposal Batteries should not be disposed of in gen- eral household waste. Observe the local waste disposal regulations, details of which can be obtained from your local authority or the dealer you purchased the product from. All electrical and electronic products should be disposed of separately from the municipal waste stream via designated collection facilities appointed by the gov-... -
Page 54: General Specifications
Transmission power 1000 Range Base station power supply Environmental condi- tions in operation Dialling mode Pin connections on the telephone jack Appendix approx. 1.3 W approx. 1.3 W approx. 1.5 W is supported is supported 60 duplex channels Time multiplex,... -
Page 55: Writing And Editing Text
Appendix Writing and editing text The following rules apply when writing text: Use t s to move the cursor to the right or left. Characters are inserted to the left of the cursor. The first letter of the name of directory entries is automatically capitalised, fol- lowed by lower case letters. -
Page 56: Accessories
Accessories Gigaset handsets Upgrade your Gigaset to a cordless PABX: Gigaset C38H handset Illuminated graphical colour display (65k colours) Illuminated keypad Handsfree talking Polyphonic ringer tones Directory for around 150 entries SMS (precondition: CLIP must be enabled) Headset socket www.gigaset.com/gigasetC38H Gigaset A58H handset Illuminated graphic display Illuminated keypad... - Page 57 Accessories Gigaset C47H handset Illuminated graphical colour display (65k colours) Illuminated keypad Handsfree talking Polyphonic ringer tones Directory for around 150 entries SMS (precondition: CLIP must be enabled) Headset socket Room monitor www.gigaset.com/gigasetC47H Gigaset S67H/S68H handset Illuminated graphical colour display (65k colours) Illuminated keypad Handsfree talking Polyphonic ringer tones...
- Page 58 Gigaset SL56 handset Illuminated graphical colour display (65k colours) Illuminated keypad Handsfree talking Polyphonic ringer tones Directory for around 250 entries Picture CLIP SMS (precondition: CLIP must be enabled) Voice dialling PC interface. e.g. for managing directory entries, ringer tones and screensavers Headset socket Bluetooth www.gigaset.com/gigasetSL56...
-
Page 59: Mounting The Base Station To The Wall
Mounting the base station to the wall Mounting the base station to the wall C380: 40 mm C385: 46 mm approx. 2.5 mm Mounting the charging cradle to the wall 21 mm approx. 2.5 mm... -
Page 60: Index
Call screening during recording Call waiting during an internal call Calling external internal Calling Line Identification Cancelling preselection Care of the telephone Changing dialling mode earpiece volume ..handsfree volume pause time system PIN Character set... - Page 61 Index Deactivating advisory tones ....answer machine ....call acceptance ....handset .
- Page 62 Hash key ....Headset socket ....Hearing aids .
- Page 63 Index Network provider preselection, automatic ....Number copying from directory ..copying to directory .
- Page 64 Talk key ..... Telephone jack, pin connections Telephone system setting pauses ....
Need help?
Do you have a question about the Gigaset C385 and is the answer not in the manual?
Questions and answers