ARRI ARRIFLEX 416 Quick Manual
Hide thumbs
Also See for ARRIFLEX 416:
- Brochure & specs (24 pages) ,
- Instruction manual (240 pages) ,
- Quick manual (20 pages)

Related Manuals for ARRI ARRIFLEX 416


Summary of Contents for ARRI ARRIFLEX 416
-
Page 1: Table Of Contents
ARRIFLEX 416 Quick Guide About, Software, Tools, Safety Camera Left & Front Camera Right & Back Quick Specs Power On, Camera RUN, Inching, Camera Display Loading the Magazine Mounting the Magazine Camera Display – Fps & Shutter Angle Camera Display – Options... - Page 2 This page is left blank intentionally. ARRIFLEX 416 Quick Guide 04/2007, Page 2...
-
Page 3: About, Software, Tools, Safety
About, Software, Tools, Safety About the ARRIFLEX 416 Quick Guide This Quick Guide (order number K5.40076.0) provides a short introduction to the ARRIFLEX 416. This guide does not replace the ARRIFLEX 416 Instruction Manual (K5.66324.0). It is essential that you acquaint yourself with the instruction manual before operating the equipment. -
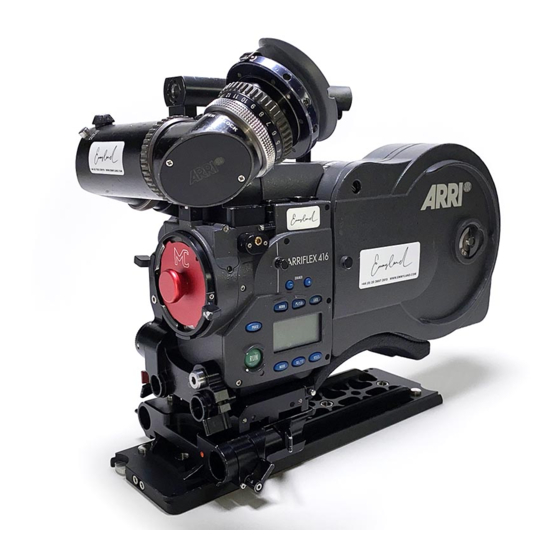
Page 4: Camera Left & Front
SET/ V PHASE button Display 416 Shoulder Magazine 120/400 RUN button RUN Indicator Image rotation knob Image rotation unlock button Tape hook PL lens port (Super 16 only) Front 3/8 – 16 mounting point ARRIFLEX 416 Quick Guide 04/2007, Page 4... -
Page 5: Camera Right & Back
Film transport indicator pitch adjust button Eyepiece rotation friction IVS ground fault indicator MINI MONITOR connectors BNC connectors Magazine fi lm Power connector reserve counter (BAT) REMOTE connector REMOTE connector status indicator ARRIFLEX 416 Quick Guide 04/2007, Page 5... -
Page 6: Quick Specs
Plates, 416 Steadicam Plate, S-4 Shoulder Set, 16SR 3 fi bre screens, HE-3, 4 & 5 heated eyecups, ARRI On-board Monitors, FF-3 (with bridge plate), FF-4 & 5 (on lightweight support rods or bridge plate), 15 mm & 19 mm support rod matte boxes (with bridge plate), ARRI/Zeiss Ultra 16 lenses, ARRI/Zeiss Lightweight Zoom LWZ-1, ARRI/Zeiss Ultra Prime lenses, ARRI/Zeiss Master Prime lenses, Cooke S-4 lenses. -
Page 7: Power On, Camera Run, Inching, Camera Display
Turning Camera Power On The Power On button for the ARRIFLEX 416 is located above the RUN button on the camera right side. To turn the camera On, briefly press the Power On button. When a battery is connected to the camera and the power switch is turned on, you should see characters appear on the Display on the camera left side. -
Page 8: Loading The Magazine
• Flip the magazine over lengthways so the take-up door is uppermost and the top of the magazine is facing you. The ‘ARRI’ on the door will be upside down. • Open the take-up side magazine door and latch back the lay-on roller arm. Fit an empty film core to the take-up core holder. - Page 9 • If using timecode, set the sensitivity switch according to the table on page 19 of this guide. The switch is located at the top left corner of the feed side door. Incorrect ARRIFLEX 416 Quick Guide 04/2007, Page 9...
-
Page 10: Mounting The Magazine
Note: After a new magazine has been attached or after camera power has been turned on, you should always push the PHASE button to perform a loop check (the display shows ‘loop’). This takes about 2 seconds and will engage the pull-down claw, check loop size and centre the loop properly. ARRIFLEX 416 Quick Guide 04/2007, Page 10... -
Page 11: Camera Display - Fps & Shutter Angle
• Turn the 416 Shutter Tool until the desired Mirror Shutter preset angle is reached. Angle presets are: 180º, 172.8º, 150º, 144º, 416 Shutter Tool 135º, 90º & 45º. Turning counter-clockwise reduces the angle. ARRIFLEX 416 Quick Guide 04/2007, Page 11... -
Page 12: Camera Display - Options
SEL button will now cycle through the red (r), green (G) and blue (b) values of the user colour. Pushing the SET button changes the flashing colour value from 0 (no colour) up to 16 (maximum colour). No confirmation is necessary. ARRIFLEX 416 Quick Guide 04/2007, Page 12... -
Page 13: On-Board Battery Obb-2
(in hours). The remaining running time is calculated from the load on the camera since it was powered-up and assumes the loading from accessories will not change. Note: The new 416 power connector on the camera remains compatible with standard ARRI 24 volt power cables. Mounting the OBB-2 •... -
Page 14: Integrated Video System
Open the video lens IRIS fully and use either Automatic Gain Control or Manual Gain Control to control the image brightness. Only close the video lens IRIS if the brightness exceeds the electronic control range. ARRIFLEX 416 Quick Guide 04/2007, Page 14... - Page 15 To assist in setting up attached video monitors, the 416 IVS has the option to generate colour bars. • Press and hold the ENTER/INSERT button for 3 seconds to enter the on-screen menu. • In the WB/GAIN/BARS sub-menu, set COLOR BARS to ON. ARRIFLEX 416 Quick Guide 04/2007, Page 15...
-
Page 16: Accessories
The 416 Left Rod Bracket attaches to the Accessory Carrier for the fitting of a single 19 mm rod for use with the Lightweight Follow Focus or a lens motor. It also has an Accessory Rosette for use with a left hand grip. ARRIFLEX 416 Quick Guide 04/2007, Page 16... - Page 17 Because the LWS-5 projects below the line of the camera base a riser plate needs to be added when the 416 is top mounted on a Steadicam. The 416 Steadicam Plate adds the necessary distance and offers numerous 3/8 - 16 mounting holes. ARRIFLEX 416 Quick Guide 04/2007, Page 17...
-
Page 18: Timecode Operation
Timecode Operation Note: To write SMTPE timecode to film, ARRIFLEX 416 magazines must have the 416 Timecode Module fitted. Note: Timecode recording is only possible at the 5 Standard Speeds of 23.976, 24, 25, 29.97 & 30 fps. Turning Timecode Recording On and Off. - Page 19 (Color Negative) TCS 4 Kodak 7231 (B/W Negative) TCS 8 Fuji 8673 (Color Negative) TCS 5 Fuji 8682 (Color Negative) TCS 6 Fuji 8683 (Color Negative) TCS 6 Fuji 8692 (Color Negative) TCS 4 ARRIFLEX 416 Quick Guide 04/2007, Page 19...
-
Page 20: Arri Group Addresses
ARRI Group Addresses Australia ARRI Australia PTY Limited (Sales, Service & Rental) Unit 6C, 5 Talavera Road, Macquarie Park, Sydney. NSW 2113, Australia Voice phone: +61 (2) 9855 4300, FAX: +61 (2) 9855 4301 Email: info@arri.com.au Canada ARRI Canada Limited (Sales & Service) 415 Horner Ave.
Need help?
Do you have a question about the ARRIFLEX 416 and is the answer not in the manual?
Questions and answers