Advertisement
Table of Contents
- 1 Quick Start Guide
- 2 A Quick Look
- 3 Package Contents
- 4 Installing Your Router
- 5 Position Your Wireless Router
- 6 Quick Internet Setup (QIS) with Auto-Detection
- 7 Connect to the Wireless Network
- 8 Frequently Asked Questions (Faqs)
- 9 Safety Information
- 10 Networks Global Hotline Information
- Download this manual
See also:
User Manual
Advertisement
Table of Contents

Subscribe to Our Youtube Channel
Related Manuals for Asus RT-AC3100


Summary of Contents for Asus RT-AC3100
-
Page 1: Quick Start Guide
¨ RT-AC3100 Wireless-AC3100 Dual Band Gigabit Router Quick Start Guide E10547 / First Edition / June 2015 E10547_RT-AC3100_QSG.indd 1 6/17/2015 12:55:31 PM... -
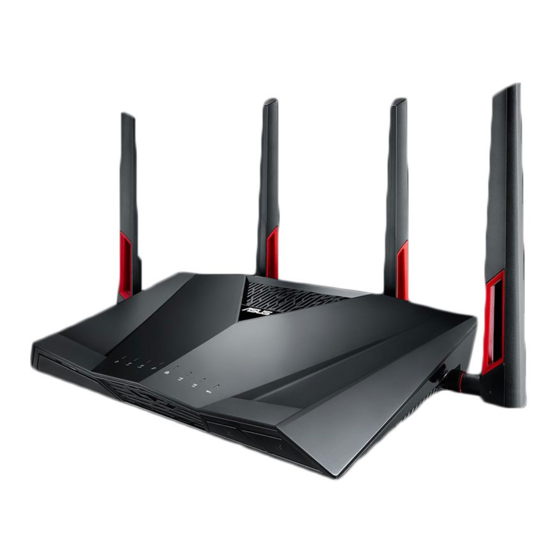
Page 2: A Quick Look
A quick look WiFi USB 3.0 port Wi-Fi On/Off button Power LED Reset button 5GHz LED / 2.4GHz LED WPS button WAN (Internet) LED Red: No IP or no physical connection. USB 2.0 port On: Has physical connection to a wide area network (WAN). -
Page 3: Package Contents
• USB External HDD/Flash disk: • T he wireless router works with most USB HDDs/Flash disks up to 4TB and supports read-write access for FAT16, FAT32, NTFS, and HFS+. • T o safely remove the USB disk, launch the web GUI (http://router. asus.com), then in the Network Map page's upper right corner, click the USB icon and click Eject USB 3.0 / USB 2.0. • Incorrect removal of the USB disk may cause data corruption. • F or the list of file system and hard disk partitions that the wireless router supports, visit http://event.asus.com/networks/ disksupport • F or the list of printers that the wireless router supports, visit... -
Page 4: Installing Your Router
1. Position your wireless router. For optimal wireless transmission between the wireless router and connected wireless devices, ensure that you: • Place the wireless router in a centralized area for a maximum wireless coverage for the network devices. • Keep the wireless router away from metal obstructions and away from direct sunlight. • Keep the wireless router away from 802.11g or 20MHz only Wi-Fi devices, 2.4GHz computer peripherals, Bluetooth devices, cordless phones, transformers, heavy-duty motors, fluorescent lights, microwave ovens, refrigerators, and other industrial equipment to prevent signal interference or loss. • Always update to the latest firmware. Visit the ASUS website at http://www.asus.com to get the latest firmware updates. • To ensure the best wireless signal, orient the four detachable antennas as shown in the drawing below. 45 ° 45 ° WiFi E10547_RT-AC3100_QSG.indd 4 6/17/2015 12:55:32 PM... - Page 5 2. Prepare your modem. a. U nplug the AC adapter from the power outlet and disconnect it from your cable/ADSL modem. b. Disconnect the network cable from your cable/ADSL modem. c. Reboot your computer (recommended). WARNING! Before disconnecting the wires/cables, ensure that your cable/ADSL modem has been turned off for at least two minutes. If your modem has a backup battery, remove it as well. E10547_RT-AC3100_QSG.indd 5 6/17/2015 12:55:32 PM...
- Page 6 3. Set up your wireless environment. Wall Power Outlet RT-AC3100 Power Computer a. I nsert your wireless router’s AC adapter to the DC-IN port and plug it to a power outlet. b. U sing another network cable, connect your modem to your wireless router’s WAN port. c. I nsert your modem’s AC adapter to the the DC-IN port and plug it to a power outlet. d. Using the bundled network cable, connect your computer to your wireless router’s LAN port. Ensure that the WAN and LAN LEDs are blinking. 4. Disable some settings on your computer. a. Disable the proxy server, if enabled.
-
Page 7: Quick Internet Setup (Qis) With Auto-Detection
Quick Internet Setup (QIS) with Auto-detection The Quick Internet Setup (QIS) function guides you in quickly setting up your Internet connection. NOTE: When setting the Internet connection for the first time, press the Reset button on your wireless router to reset it to its factory default settings. To use QIS with auto-detection: 1. Log into the Web GUI. The QIS page launches automatically. NOTES: • By default, the login username and password for your wireless router's Web GUI is admin. • The wireless router's login username and password is different from the 2.4GHz/5GHz network name (SSID) and security key. The wireless router's login username and password allows you to log into your wireless router's Web GUI to configure your wireless router's settings. The 2.4GHz/5GHz network name (SSID) and security key allows Wi-Fi devices to log in and connect to your 2.4GHz/5GHz network. E10547_RT-AC3100_QSG.indd 7 6/17/2015 12:55:32 PM... - Page 8 2. The wireless router automatically detects if your ISP connection type is Dy- namic IP, PPPoE, PPTP and L2TP. Key in the necessary information for your ISP connection type. IMPORTANT! Obtain the necessary information from your ISP about the Internet connection type. for Automatic IP (DHCP) for PPPoE, PPTP and L2TP E10547_RT-AC3100_QSG.indd 8 6/17/2015 12:55:32 PM...
- Page 9 NOTES: • The auto-detection of your ISP connection type takes place when you configure the wireless router for the first time or when your wireless router is reset to its default settings. • If QIS failed to detect your Internet connection type, click Skip to manual setting and manually configure your connection settings. 3. Assign the wireless network name (SSID) and security key for your 2.4GHz and 5 GHz wireless connection. Click Apply when done. 4. Your Internet and wireless settings are displayed. Click Next to continue. 5. Read the wireless network connection tutorial. When done, click Finish. E10547_RT-AC3100_QSG.indd 9 6/17/2015 12:55:33 PM...
-
Page 10: Connect To The Wireless Network
2. Select the SSID or network name that you assigned to your RT-AC3100’s network. 3. Enter the password and click Connect. Connect to the wireless network through WPS RT-AC3100 has a WPS (Wi-Fi Protected Setup) button for you to connect your wireless client to RT-AC3100s network without entering password. To connect to the wireless network through WPS: 1. Press the WPS button at the back of RT-AC3100. Refer to the section A quick look for the location of the WPS button). 2. Press the WPS button of your wireless client within two minutes or follow the WPS instructions that came with the wireless client. When connecting via WPS, the WPS LED on your router blinks fast. 3. Wait until your router’s WPS LED turns into a solid light indicating a success- fully connection between your router and your wireless client. E10547_RT-AC3100_QSG.indd 10... - Page 11 Managing the router via the ASUSWRT web GUI Your wireless router comes with the intuitive ASUSWRT web graphical user interface. ASUSWRT allows you to easily configure its various features through a web browser such as Internet Explorer, Firefox, Safari, or Google Chrome. NOTE: Use the search bar on the bottom of the interface to get more information from ASUS technical support site http://support.asus.com. IMPORTANT: • For more details on using your router's Web GUI, refer to the user manual. • Alway check and upgrade firmware to the latest version for better experience. • Visit ASUS Networking video channel for tutorial videos on featured functions. E10547_RT-AC3100_QSG.indd 11 6/17/2015 12:55:33 PM...
- Page 12 AiCloud ASUS AiCloud app provides you with access to your data wherever and when- ever you have an Internet connection. It also allows you to access your ASUS WebStorage account via the AiCloud mobile app on your iOS or Android device, or via a web browser. To install AiCloud: 1. Ensure that your router’s firmware version is the latest one and supports AiCloud. 2. Download AiCloud app from Google Play or App Store. 3. Install your USB storage device to your router. Refer to section A quick look for the location of the USB ports. 4. Connect your iOS or Android devices to the router through Wi-Fi. The Ai- Cloud app will automatically guide you through the setup process. 5. You can now access, stream and share to all files in your USB storage. Search ASUS AiCloud for more information. Watch tutorial videos for step-by-step guide. Google Play App Store E10547_RT-AC3100_QSG.indd 12 6/17/2015 12:55:33 PM...
-
Page 13: Frequently Asked Questions (Faqs)
After following the steps, I still cannot access the wireless router’s web graphics user interface (web GUI) to configure the wireless router settings. Ensure that your PC's proxy settings are disabled and your PC'S IP address is obtained from the DHCP server automatically. for details on disabling the proxy settings, visit the ASUS Support site at http://support.asus.com. For details on using the DHCP server to obtain IP addresses automatically, refer to your Windows® or Mac operating system's help feature. The client cannot establish a wireless connection with the router. - Page 14 SSID: SSID: admin / admin 192.168.1.1 ASUS ASUS_5G Where can I find more information about the wireless router? • User Manual in the support CD http://support.asus.com/faq • Online FAQ site: • Technical Support site: http://support.asus.com • Customer Hotline: Refer to the Support Hotline in this Quick Start Guide ASUS Recycling/Takeback Services ASUS recycling and takeback programs come from our commitment to the highest standards for protecting our environment. We believe in providing solutions for you to be able to responsibly recycle our products, batteries, other components, as well as the packaging materials. Please go to http://csr.asus.com/english/Takeback.htm for the detailed recycling information in different regions. E10547_RT-AC3100_QSG.indd 14 6/17/2015 12:55:33 PM...
- Page 15 REACH Complying with the REACH (Registration, Evaluation, Authorisation, and Restriction of Chemicals) regulatory framework, we published the chemical substances in our products at ASUS REACH website at http://csr.asus.com/english/index.aspx Federal Communications Commission Statement This device complies with Part 15 of the FCC Rules. Operation is subject to the following two conditions: • This device may not cause harmful interference. • This device must accept any interference received, including interference that may cause undesired operation. This equipment has been tested and found to comply with the limits for a class B digital device, pursuant to part 15 of the FCC Rules. These limits are designed to provide reason- able protection against harmful interference in a residential installation. This equipment generates, uses and can radiate radio frequency energy and, if not installed and used in accordance with the instructions, may cause harmful interference to radio communications. However, there is no guarantee that interference will not occur in a particular installation. If this equipment does cause harmful interference to radio...
-
Page 16: Safety Information
WARNING! Any changes or modifications not expressly approved by the party responsible for compliance could void the user’s authority to operate the equipment. WARNING! • Users must not modify this device. Modifications by anyone other than the party responsible for compliance with the rules of the Federal Communications Commission (FCC) may void the authority granted under FCC regulations to operate this device. • For product available in the USA/Canada market, only channel 1~11 can be operated. Selection of other channels is not possible. Prohibition of Co-location This device and its antenna(s) must not be co-located or operating in conjunction with any other antenna or transmitter except in accordance with FCC multi-transmitter prod- uct procedures. Safety Information To maintain compliance with FCC’s RF exposure guidelines, this equipment should be in- stalled and operated with minimum distance 25cm between the radiator and your body. Use on the supplied antenna. Declaration of Conformity for R&TTE directive 1999/5/EC Essential requirements – Article 3 Protection requirements for health and safety – Article 3.1a Testing for electric safety according to EN 60950-1 has been conducted. These are con- sidered relevant and sufficient. - Page 17 ference, in which case the user may be required to take adequate measures. This equipment may be operated in AT, BE, CY, CZ, DK, EE, FI, FR, DE, GR, HU, IE, IT, LU, MT, NL, PL, PT, SK, SL, ES, SE, GB, IS, LI, NO, CH, BG, RO, RT. Canada, Industry Canada (IC) Notices This device complies with Industry Canada license-exempt RSS standard(s). Operation is subject to the following two conditions: (1) this device may not cause inter- ference, and (2) this device must accept any interference, including interference that may cause undesired operation of the device. Radio Frequency (RF) Exposure Information This equipment complies with IC RSS-102 radiation exposure limits set forth for an uncontrolled environment. This equipment should be installed and operated with mini- mum distance 25cm between the radiator & your body. Cet équipement est conforme aux limites d’exposition aux rayonnements IC établies pour un environnement non contrôlé. Cet équipement doit être installé et utilisé avec un minimum de 25 cm de distance entre la source de rayonnement et votre corps. Canada, avis d’Industry Canada (IC) Le présent appareil est conforme aux CNR d’Industrie Canada applicables aux appareils radio exempts de licence. L’exploitation est autorisée aux deux conditions suivantes : (1) l’appareil ne doit pas produire de brouillage, et (2) l’utilisateur de l’appareil doit accepter tout brouillage radioélectrique subi, même si le brouillage est susceptible d’en compro- mettre le fonctionnement. WARNING! • For product available in the USA/Canada market, only channel 1~11 can be operated. Selection of other channels is not possible. • Pour les produits disponibles aux États-Unis / Canada du marché, seul le canal 1 à 11 peuvent être exploités. Sélection d'autres canaux n'est pas possible.
- Page 18 WARNING! • Under Industry Canada regulations, this radio transmitter may only operate using an antenna of a type and maximum (or lesser) gain approved for the transmitter by Industry Canada. To reduce potential radio interference to other users, the antenna type should be chosen so that the equivalent isotropically radiated power (e.i.r.p) is not more than that necessary for successful communication. • Conformément à la réglementation d'Industrie Canada, le présent émetteur radio peut fonctionner avec une antenne d'un type et d'un gain maximal (ou inférieur) approuvé pour l'émetteur par Industrie Canada. Dans le but de réduire les risques de brouillage radioélectrique à l'intention des autres utilisateurs, il faut choisir le type d'antenne et son gain de sorte que la puissance isotrope rayonnée équivalente (p.i.r.e.) ne dépasse pas l'intensité nécessaire à l'établissement d'une communication satisfaisante. • This radio transmitter (3568A-RTGW00) has been approved by Industry Canada to operate with the antenna types listed below with the maximum permissible gain and required antenna impedance for each antenna type indicated. Antenna types not included in this list, having a gain greater than the maximum gain indicated for that type, are strictly prohibited for use with this device. • Le présent émetteur radio (3568A-RTGW00) a été approuvé par Industrie Canada pour fonctionner avec les types d'antenne énumérés ci-dessous et ayant un gain admissible maximal et l'impédance requise pour chaque type d'antenne. Les types d'antenne non inclus dans cette liste, ou dont le gain est supérieur au gain maximal indiqué, sont strictement interdits pour l'exploitation de l'émetteur. E10547_RT-AC3100_QSG.indd 18 6/17/2015 12:55:33 PM...
- Page 19 WARNING! • The device for the band 5150-5250 MHz is only for indoor usage to reduce potential for harmful interference to co-channel mobile satellite systems. • Les dispositifs fonctionnant dans la bande 5150-5250 MHz sont réservés uniquement pour une utilisation à l’intérieur afin de réduire les risques de brouillage préjudiciable aux systèmes de satellites mobiles utilisant les mêmes canaux. 警語 經型式認證合格之低功率射頻電機,非經許可,公司、商號或使用者均不得 擅自變更頻率、加大功率或變更原設計之特性及功能。低功率射頻電機之使 用不得影響飛航安全及干擾合法通信;經發現有干擾現象時,應立即停用, 並改善至無干擾時方得繼續使用。前項合法通信,指依電信法規定作業之無 線電通信。低功率射頻電機須忍受合法通信或工業、科學及醫療用電波輻射 性電機設備之干擾。 E10547_RT-AC3100_QSG.indd 19 6/17/2015 12:55:33 PM...
-
Page 20: Networks Global Hotline Information
Portugal 00351-707500310 09:00-18:00 Mon-Fri Slovak Republic 00421-232162621 08:00-17:00 Mon-Fri Czech Republic 00420-596766888 08:00-17:00 Mon-Fri Switzerland-German 0041-848111010 09:00-18:00 Mon-Fri Switzerland-French 0041-848111014 09:00-18:00 Mon-Fri Switzerland-Italian 0041-848111012 09:00-18:00 Mon-Fri United Kingdom 0044-8448008340 09:00-17:00 Mon-Fri Ireland 0035-31890719918 09:00-17:00 Mon-Fri Russia and CIS 008-800-100-ASUS 09:00-18:00 Mon-Fri Ukraine 0038-0445457727 09:00-18:00 Mon-Fri E10547_RT-AC3100_QSG.indd 20 6/17/2015 12:55:33 PM... - Page 21 Region Country Hotline Numbers Service Hours Australia 1300-278788 09:00-18:00 Mon-Fri New Zealand 0800-278788 09:00-18:00 Mon-Fri 09:00-18:00 Mon-Fri 0800-1232787 09:00-17:00 Sat-Sun Japan 09:00-18:00 Mon-Fri 0081-570783886 (Non-Toll Free) 09:00-17:00 Sat-Sun Korea 0082-215666868 09:30-17:00 Mon-Fri Thailand 0066-24011717 09:00-18:00 Mon-Fri 1800-8525201 0065-64157917 11:00-19:00 Mon-Fri Asia-Pacific Singapore 0065-67203835 11:00-19:00 Mon-Fri (Repair Status Only) 11:00-13:00 Sat Malaysia 0060-320535077 10:00-19:00 Mon-Fri...
- Page 22 09:30-18:30 Mon-Fri 00359-29889170 09:30-18:00 Mon-Fri Balkan Countries Croatia 00385-16401111 09:00-17:00 Mon-Fri Montenegro 00382-20608251 09:00-17:00 Mon-Fri Serbia 00381-112070677 09:00-17:00 Mon-Fri Slovenia 00368-59045400 08:00-16:00 Mon-Fri 00368-59045401 Estonia 00372-6671796 09:00-18:00 Mon-Fri Latvia 00371-67408838 09:00-18:00 Mon-Fri Lithuania-Kaunas 00370-37329000 09:00-18:00 Mon-Fri Lithuania-Vilnius 00370-522101160 09:00-18:00 Mon-Fri NOTE: For more information, visit the ASUS support site at: http://support.asus.com E10547_RT-AC3100_QSG.indd 22 6/17/2015 12:55:33 PM...
- Page 23 VIP Member Warranty Notice VIP會員保固登錄通知 Global Site: http://www.asus.com VIP Registration: http://vip.asus.com Dearest Customer, Thank you for purchasing an ASUS product! Register online* immediately and: (1) Enjoy total warranty and protection for your ASUS product (2) Receive exclusive VIP Member privileges like: T he latest ASUS product news, promotional activities, benefits and discounts • exclusive to VIP Members only Software / firmware upgrade reminders • * F or more inquiries and details regarding guarantee and warranty matters, please visit the official website at http://www.asus.com. 親愛的客戶您好,感謝您購買華碩產品! 現在就上網登錄立即晉升為華碩VIP會員 (1) 享有完整保固權益之保障 (2) 尊爵VIP會員服務: • 最新的華碩產品訊息、第一手的促銷優惠、VIP會員獨享的專屬折扣 • 軟體/韌體更新即時提醒 • 不同於一般保固均自出場日起為起始日計算,上網註冊成功後,您的保固日期 將以「購買當日」為起始日期(請保留蓋有經銷商店章受或單據或發票影本,於機 台維修時出示,始享有此獨享服務)...
- Page 24 Product Model 產品型號: _____________________________ Product Number (P/N) 產品序號: _______________________ Date of Purchase 購買日期: ________dd_______mm______yy Dealer name/shop seal 經銷商名稱/店章 Paste product barcode 黏貼產品條碼處 Retail sales representative name 門市業務姓名: _______________ * T o ensure the validity of the warranty, please fill in the shop name, name of servicing personnel, date of purchase and other information accurately. * 為保障您的權益,請確實填寫店名、承辦業務人員、購買日期等資料 * P lease mail back this form to your local ASUS sales representative for ASUS Advantage mileage program point accumulation (dependent on local sales policies / web availability). * 本收執聯與經銷商活動積點辦法實際執行,由各區華碩人員公告之 E10547_RT-AC3100_QSG.indd 24 6/17/2015 12:55:34 PM...
Need help?
Do you have a question about the RT-AC3100 and is the answer not in the manual?
Questions and answers