Table of Contents
Advertisement
Quick Links
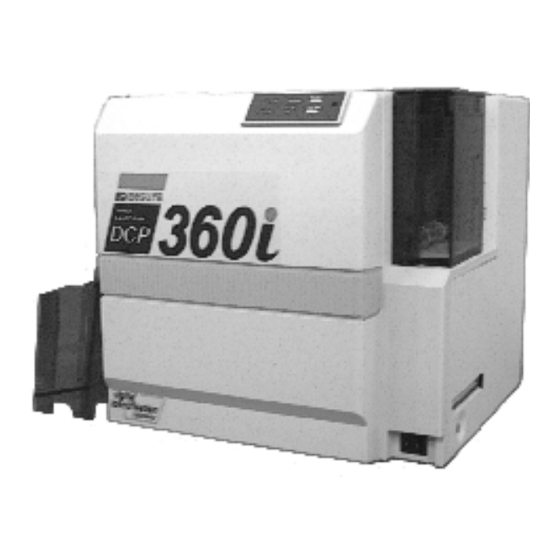
Direct Dye Sublimation Printer
DCP360i
Read Me First
Notes for Safe Operation
Before Use
Setup
Setting Up the Printer
Installation of Software
Connecting to the Host Computer
Installation of DCP360i software
Checking Connection with the Host Computer
How to Read the Instruction Manual
(Electronic Manual)
Thank for purchasing this product.
Please read this manual carefully before use to ensure correct operation.
It is particularly important to read the Notes for safe operation. After reading, retain this
manual carefully for future reference.
The product number is important for quality control. Upon purchase, check the back of
the unit to make sure that the product number is correctly displayed.
Notes about this manual
(1) This manual may not be reprinted in any way without permission.
(2) The contents of this manual, as well as the specifications and design of this product,
may change without notice.
(3) The illustrations used in this manual may differ slightly from the actual product.
See pages 5 to 8
See pages 10 to 17
See pages 18 to 19
See page 20
Startup Guide
Setup and Basic Usage of the Printer
Changing of Ink Ribbon
Setting / Replacement of Card
Maintenance
Troubleshooting
See pages 12 to 13
See pages 14 to 16
See pages 21 to 24
See pages 25 to 28
KAT- T189-007
Advertisement
Table of Contents

Related Manuals for EDISecure DCP360i


Summary of Contents for EDISecure DCP360i
- Page 1 See pages 14 to 16 Installation of Software Maintenance Connecting to the Host Computer Installation of DCP360i software Checking Connection with the Host Computer See pages 18 to 19 See pages 21 to 24 How to Read the Instruction Manual...
-
Page 2: Declaration Of Conformity
Declaration of Conformity Model Number: DCP360iyyyyy(y=A-Z,0-9 or blank) Product name: Card Printer We herewith declare that the above mentioned product complies with the following council directives and harmonized standards. Council Directives: 1999/5/EC relating to radio equipment and telecommunications terminal equipment. 89/336/EEC relating to electromagnetic compatibility. - Page 3 For USA only NOTE: This equipment has been tested and found to comply with the limits for a Class B digital device, pursu- ant to part 15 the FCC Rules. These limits are designed to provide reasonable protection against harmful interference in a residential installation. This equipment generates, uses and can radiate radio frequency energy and, if not installed and used in accordance with the instructions, may cause harmful interference to radio communications.
-
Page 4: Table Of Contents
Memo ............ 34~35 Connecting Multiple Printers........ 17 Softwar use permission contract Installation of Software ........ 18 Connecting to the Host Computer ....... 18 Software Licensing Agreement ......18 About software ..........18 Operation Environment ........18 Installation of DCP360i Software ......18... -
Page 5: Notes For Safe Operation
Notes for safe operation Before you use Read these notes on safety thoroughly before operating your printer in order to use the unit properly. To use the software, you will need to accept terms in the Software Licensing Agreement. Please read through the “Software Licensing Agreement”... - Page 6 Notes for safe operation (continued) Ground the machine with the attached electric cord Do not use the machine while it has a fault. when connecting it to the utility outlet. • Do not use the machine while it has a fault, as this may cause a fire or electric shock.
-
Page 7: Before Use
DCP360i Status Monitor(Printer Monitoring/Setup Tool) DCP360i Printer Driver Instruction Manual DCP360i Status Monitor Software Instruction Manual Protection of Color Part Be sure to carry out protective layer (OP) printing or laminating in order to protect the print part that performs... -
Page 8: Storage And Handling Of Card After Printing
The following defects may occur as a result of the ver for the product names. sion upgrade for the firmware of the printer, the printer driver and the DCP360i status monitor • The operation of the printer or application software be- CAUTION comes unstable. -
Page 9: Part Names
Part Names (Front / Right) Control Panel Card Cassette (Accessory) Printer Door NG Card Outlet Power Switch (Rear / Left) Head Exchange Door USB Cable Connection Terminal Card Stacker (Accessory) Power Input Terminal Filter Cover Laminator Connection Terminal (When Printer Door is Open) Ink Ribbon Cassette (Accessory) Cleaning Unit (Accessory) -
Page 10: Setup
Additionally, ensure that there is at least Printer an allowance of 10 cm between the right end of the printer (DCP360i) and the wall so that cards can be discharged from the NG Laminator Card Outlet. Do not place any object above the printer. -
Page 11: Connecting The Power Cord
AVR is recommended when there LAMINATOR is possibility of momentary power interruption. PRINTER Mounting the Card Stacker Pull the tab of the Card stacker at the stacker mount of Printer the printer. (DCP360i) Laminator (ILU) Card Outlet Card Stacker (Accessory) Printer (DCP360i) -
Page 12: Setting The Ink Ribbon
Setup (continued) Knob Setting the Ink Ribbon CAUTION Do not touch the inked surface with your hands. Remove ribbon sags Place your fingers on top of the printer door and open towards you. Open slowly while supporting with your hands. Remove ink ribbon cassette CAUTION When the ink ribbon is installed, be... - Page 13 Setup (continued) Insert ink ribbon into the ink ribbon cassette Close printer door. With the inked surface facing the outside (inner side rolled Shut the printer door tightly by pressing on the top right into the bobbin holder), stretch along the 3 shafts and section of the printer door.
-
Page 14: Adjusting Card Thickness
Setup (continued) During printing, when the card is not discharged from the Adjusting Card Thickness card cassette, adjust the Card separator adjustment position clockwise, one scale at a time. If 2 cards are discharged, This printer can print cards with thickness between 0.25 adjust the Card separator adjustment position anti- mm to 1.00 mm. - Page 15 Setup (continued) Insert card Covering the card cassette cover Card cassette can hold about 100 cards of 0.76mm in Mount from the top, following the cassette guide. thickness. CAUTION Cover cannot be closed if too many cards are inserted. Check to ensure that they are kept below the MAX line.
-
Page 16: When Using A Magnetic Card
Setup (continued) When Using a Magnetic Card Supply of Card When using a magnetic stripe card, set to any of the Supply of card can be performed when the READY LED following according to the layout. (green) on the control panel, or when the CARD LED (red) is illuminated. -
Page 17: Connecting The Usb Cable
Light off CAUTION Printer In order to connect to multiple printers, (DCP360i) setting will be required for the printer driver in use as well as for the card issuance software. Do so by referring to the respective manuals. CAUTION Adjust orientation of the USB cable according to the terminal, and insert it all the way in. -
Page 18: Installation Of Software
DCP360i Status Monitor Software that carries out various settings and indicates the status of DCP360i. Install into the host computer that connects to DCP360i. Installation of DCP360i Printer Driver Refer to the electronic file “Printer Driver Install Manual”... -
Page 19: Checking Connection With The Host Computer
Checking Connection with the Host Computer Check the printer and software operation after installing the USB driver and DCP360i status monitor. Check to ensure that the printer is connected to the Select B to display others screens and carry out host computer. -
Page 20: How To Read The Instruction Manual (Electronic Manual)
How to read the Instructi o n manual (el e ctroni c manual ) An instruction manual (electronic manual) is included in the attached CD-ROM. To view the manual, you need to install Adobe Reader (Ver6.0 and above) on the host computer. Adobe Reader can be downloaded free-of-charge from Adobe’s website. -
Page 21: Maintenance
Maintenance Ensure that maintenance is carried out when power switch of the printer is off. (Clean the card cleaning roller and magnetic head when power is ON.) To keep Printer in its best condition at all times, be sure to check each part before use and clean it whenever there is any dirt or dust. -
Page 22: Cleaning The Thermal Head
We recommend cleaning to be carried out every time when the Thermal Head Counter on the Media Status Screen(DCP360i) Status Monitor), displays a value Remove the filter cover exceeding 50000 or 100000. And the thermal head is a Hold the upper and lower ends of the filter cover at consumable item and has a limited life span. -
Page 23: Cleaning The Card Transport Roller
Maintenance (continued) (to the next page) Card outlet Cleaning the Card Transport Roller In most cases, card jams are caused by dirty card transport rollers. It is recommended that you clean it after every 1,000 pieces. Check to ensure that the power of the printer is turned off. Open the printer door, remove the ink ribbon cassette, and lock by lowering the release lever. -
Page 24: Cleaning The Magnetic Head
Maintenance (continued) Cleaning the Magnetic Head Dirty magnetic heads will result in writing / reading error. It is Set the magnetic head cleaning card into card- recommended that cleaning be performed after every 1,000 loading slot as shown in the picture below. cards. -
Page 25: Troubleshooting (Simplified Version)
Below errors cord list is the representative error messages and actions in the printer or laminator. Refer to Troubleshooting (detailed version) of the instruction manual (electronic manual) recorded in the CD-ROM for error messages that are not mentioned here. Error Code Message on the DCP360i Status Monitor Action No Printer is found. -
Page 26: Removing Jammed Card
Troubleshooting (continued) Error Code Message on the DCP360i Status Monitor Action 01043681 Ink mark is not found. Please open the printer door and make Check if there is any ink ribbon defect. Downloaded data is incorrect. Check the file. sure the ink ribbon is set correctly. -
Page 27: When Card Is At The Right (Near Inverter)
Troubleshooting (continued) A. When card is at the right (near Turnover unit) Turnover unit Open the jog cover behind the card cassette, and turn the JOG dial. Refer to page 26 of this manual (Feed Jam) on how to open the jog cover. Push with your hand if the card does not move. -
Page 28: When Card Is At The Left (Near Printing Unit)
Troubleshooting (continued) B. When card is at the left (near printing unit) Adjust the direction of the tilted card with your hand Turn the jog dial clockwise (down) to move card from such that it is parallel with the card guide. the encoding unit to the Turnover unit, followed by removing it with your hand. -
Page 29: Procedures For Changing Thermal Head
Procedures for Changing Thermal Head Release CAUTION Lever Static electricity in our bodies discharged to the thermal head may cause it to break down. Before exchange, touch metal parts of the printer such as the screw to release the static electricity. Do not touch the heating unit of the thermal head with your hand. - Page 30 Procedures for Changing Thermal Head (continued) Open the door for head exchange Remove the 2 fastening screws on the left of the printer’s head exchange door using a – (flathead) driver. Remove the thermal head. To remove the thermal head from the shaft, hold and move it to the left while pulling forward.
- Page 31 Procedures for Changing Thermal Head (continued) Check if the guide bearing of the thermal head is inside Hold the part that is directly above the cable connector the guiding slot. and insert them slowly and securely one by one. Guiding Groove Guide Bearing Push the fastening bearing at the head fastening unit forward and insert to the right to lock it securely.
-
Page 32: Checking After Changing Thermal Head
Procedures for using may damage the device. the DCP360i status monitor can be found in the instruction manual (electronic manual) recorded in the attached CD- ROM. -
Page 33: Consumable/Optional Items/Factory Defalt
Consumable/Optional Items/Factory default Consult your dealer for additional purchase of consumables or optional items. If various types of cards are used frequently, it is recommended that you purchase a card cassette according to the thickness of the cards to be used. Consumable Items •... -
Page 34: Memo
MEMO... - Page 35 MEMO...
- Page 36 Software License Agreement The software covered by this document is the computer program developed by Victor Conpany of Japan, Limited a Japanese company, for certain card printer products (“Products”), and is composed of the “USB Driver”, “Status Monitor” and “Printer Driver”. The foregoing software, including the attached documentation such as its startup guide, user’s manual, etc.
- Page 37 2. You may make the minimum number of copies necessary from this Software solely for backup or archival purposes, besides implementing the Initiation. In all such copies, you shall reproduce and keep the copyright notices and other legends as originally included in the media of this Software provided by our Company.
- Page 38 when used in combination with any and all PC models. It is recommended that you first check the functioning of this Software in the environment where you use it, according to the Documentation immediately after its delivery. 3. This Software is provided “As Is” with no warranties except the limited warranty expressed in this Article.
- Page 39 country, territory, organization or individual, the shipping to which is prohibited or restricted by Japan and the respective countries concerned. Article 8 Others 1. Any modification, addition, deletion or other changes to this Agreement shall be invalid unless such changes are made in writing and affixed with the name and seal of or signed by the authorized representative of our Company.
- Page 40 Digital Identification Solutions Group of Companies Teckstraße 52, D73734 Esslingen, Germany Phone : +49 711 341 689 - 0 Facsimile : +49 711 341 689 - 550 Printed in Japan KAT-T189-007 2006 Digital Identifcation Solutions Group of Companies 0606 (VP)
Need help?
Do you have a question about the DCP360i and is the answer not in the manual?
Questions and answers