Table of Contents
Advertisement
Advertisement
Table of Contents

Subscribe to Our Youtube Channel
Related Manuals for EDISecure DCP 350


Summary of Contents for EDISecure DCP 350
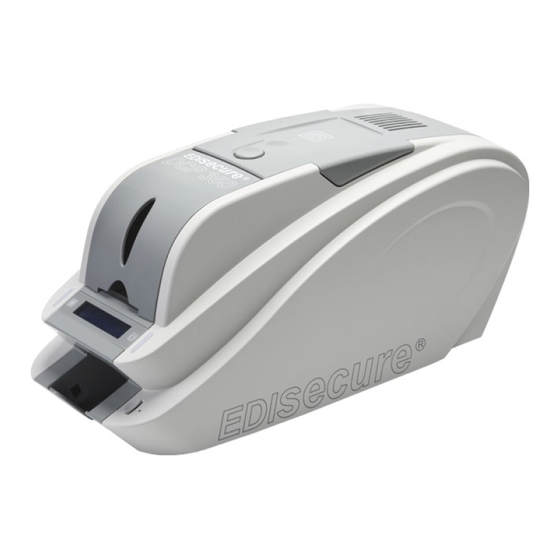
- Page 1 DCP 350 Direct Card Printer User Manual Version 1.0...
- Page 2 ® EDIsecure DCP 350 User Manual Liability Statement This product has been built to the high standards of Digital Identification Solutions Group. Please do not attempt to operate or repair this equipment without adequate training. Any use, operation, or repair in contravention of this document is strictly forbidden.
-
Page 3: Table Of Contents
® EDIsecure DCP 350 User Manual Table of Contents 1 Introduction..............................4 1.1 Printer outside features......................... 4 1.2 Ribbon cartridge features........................7 1.3 LCD panel display & button operation ....................8 2 Printer installation ........................... 12 2.1 Fitting the ribbon ..........................12 2.2 Loading the cards .......................... -
Page 4: Introduction
LED buttons. It takes a power via the 24V adaptor provided with the printer. Using USB and Network port, it is communicated with the user’s PC. ® The following shows the outside functional features found on your EDIsecure DCP 350 printer. ②... - Page 5 EDIsecure DCP 350 User Manual ® The EDIsecure DCP 350 (Pic.3) is the standard card printer. It can print in single side with the encoding. ® This manual is prepared based on EDIsecure DCP 350 standard. With its modular concept the standard single-side printer is easily upgradable to a dual-side printer at any time.
- Page 6 DCP 350 User Manual 1.2 Printer outside features ® In the EDIsecure DCP 350 printer the ribbon is installed by a ribbon cartridge which can be used semi ® permanently. The following shows the inside functional features found on your EDIsecure DCP 350 printer.
-
Page 7: Ribbon Cartridge Features
® EDIsecure DCP 350 User Manual 1.3 Ribbon cartridge features ① Ribbon cartridge ④ ② ③ ② Take up parts ③ Supply parts ① ④ Disposable cleaning roller Pic.6 Ribbon cartridge features ① Ribbon cartridge Install a ribbon and a disposable cleaning roller provided with the ribbon. -
Page 8: Lcd Panel Display & Button Operation
® EDIsecure DCP 350 User Manual 1.4 LCD panel display & button operation The DCP 350 printer can show the real-time process status to user. Please refer to the LCD display and the button operation. Button LCD Display State Description... - Page 9 ® EDIsecure DCP 350 User Manual Ribbon Balance Display the ribbon type Display the installed ribbon’s type and the remains. It can be shown Card out and remains by pressing the left LED button on the system ready mode. Type / Remains...
- Page 10 ® EDIsecure DCP 350 User Manual Fail to move the card out Card Out Error Cancel & After an error occurs in printing, the error card is not come out Blinking Blinking Repeat (Check the card in the Initialize even though "Replay" or "Cancel" button is pressed.
- Page 11 ® EDIsecure DCP 350 User Manual Description of error code Error code Description Card in error Card move center error Card out error Card move magnetic error Card move contact encoder error Card move contactless encoder error Card move error from the printer to the flipper...
-
Page 12: Printer Installation
® EDIsecure DCP 350 User Manual 2 Printer installation 2.1 Fitting the ribbon Before printing, prepare the related items such as a card, a ribbon and a cleaning roller. In this section we invite you to know the proper method of installing the ribbon and the cleaning roller into the printer. - Page 13 ® EDIsecure DCP 350 User Manual 2.1.4. Install a ribbon into the ribbon cartridge as shown left on Pic. 9. Pic.9 Loading the ribbon 1 2.1.5. ① ③ Insert the supply side of the ribbon to no.1 hole and press the opposite (No.2). Insert the take-up side of the ribbon same method to No.3 and No.4.
- Page 14 ® EDIsecure DCP 350 User Manual 2.1.8. Install the ribbon cartridge into the printer after installing the ribbon with a cleaning roller to the cartridge. Pic.12 Installing the ribbon cartridge 2.1.9. Close the top cover (If it is not closed properly, check the installation state of the ribbon cartridge.)
-
Page 15: Loading The Cards
® EDIsecure DCP 350 User Manual 2.2 Loading the cards This section shows how to load the plastic cards. 2.2.1. Open the input hopper cover. 2.2.2. Adjust the card thickness with the card thickness control lever. (Caution! If the adjustment is not correct, it will make some error. - Page 16 ® EDIsecure DCP 350 User Manual 2.2.5. Stand the stack of cards vertically after separating. Pic.17 Loading the cards 1 2.2.6. Load the cards on the input hopper properly and close the hopper cover. Pic.18 Loading the cards 2 2.2.7.
-
Page 17: Driver Installation (Windows Xp, 2000, 2003)
® EDIsecure DCP 350 User Manual 2.3 Driver installation (Windows XP, 2000, 2003) 2.3.1. Insert the installation CD provided with the printer. 2.3.2. Choose the language and click “Driver Install”. Pic.21 Install XP printer driver 1 2.3.3. STEP 1: If the printer is connected to the PC and turned on, turn off the power of the printer. - Page 18 ® EDIsecure DCP 350 User Manual 2.3.5. If there is a pop-up window for the software installation, click “Continue Anyway”. Pic.24 Install XP print driver 6 2.3.6. STEP 3: Click “Next” to use USB port. Click “TCP/IP Network port” to use the printer as network printer and choose the printer as shown on the Pic.27.
- Page 19 ® EDIsecure DCP 350 User Manual 2.3.7. Please connect a power supply to the printer. (For the network printer, refer to “2.5 Network Printer” section.) Pic.27 Install XP printer driver 9 2.3.8. Please connect USB cable provided with the printer to PC and the printer.
- Page 20 ® EDIsecure DCP 350 User Manual 2.3.10. Select “Install the software automatically (Recommended)”and click “Next”. Pic.30 Install XP printer driver 12 2.3.11. Click “Continue Anyway” in Software Installation Window 2.3.12. Click “Finish” in Completing the Found New Hardware Wizard window..
- Page 21 Check “EDIsecure DCP350” is generated in Printers and Faxes window. 2.3.14. ® After selecting the icon of “EDIsecure DCP 350” click the right mouse button and select the “Properties”. Pic.32 Install XP printer driver 14 2.3.15. Select “General” tap and click “Print Test Page”...
-
Page 22: Driver Installation (Windows Vista, 7)
® EDIsecure DCP 350 User Manual 2.4 Driver installation (Windows Vista, 7) 2.4.1. Please insert the installation CD. 2.4.2. Please choose language and click “Driver Install”. Pic.34 Install Win7 driver 1 2.4.3. When “User Account Control” window is opened, click “Yes”... - Page 23 ® EDIsecure DCP 350 User Manual 2.4.5. STEP 2: When you click “Next”, the driver installation will be ready. Pic.37 Install Win7 driver 4 2.4.6. Please click “Install this driver software anyway” in case “Windows Security” window comes out. Pic.38 Install Win7 driver 5 2.4.7.
- Page 24 ® EDIsecure DCP 350 User Manual 2.4.8. Please connect a power supply to the printer. (If your printer is for network, please refer “2.5 Network Configuration”.) Pic.41 Install Win7 driver 8 2.4.9. Please connect USB cable to the printer. (If your printer is for network, please refer “2.5 Network Configuration”.)
- Page 25 “Close”. Pic.44 Install Win7 driver 11 2.4.12. Please open “Devices and Printers” from ® “Hardware and Sound”. Please check if “EDIsecure DCP 350 Printer” is created. 2.4.13. Please click the right mouse button after cursor is ® placed on “EDIsecure DCP 350 Printer”...
-
Page 26: Network Configuration
® Pic.47 Rear view of EDIsecure DCP 350 printer Please connect network cable (RJ45) to the printer. (Network cable is not supplied. Please ask network administrator for more questions.) Pic.48 Rear view of DCP 350 printer User Manual Page 26... - Page 27 ® DHCP (Dynamic Host Configuration Protocol) which automatically assigns IP address to the EDIsecure DCP 350 network printer on the same network is default for IP configuration. If you don’t have DHCP server, you need to set static IP. ®...
- Page 28 ® EDIsecure DCP 350 User Manual If you are unable to find printer in local network, please connect printer by USB. You can setup network by USB. When you click Refresh, you can find a printer connected by USB as shown in the Pic.51.
- Page 29 If you setup network automatically, please choose DHCP. Please select DHCP and click “Set Configuration”. ® “DHCP” is default for EDIsecure DCP 350 printer. DHCP server should be in local network to use DHCP function. Static IP is recommended. DHCP server...
- Page 30 DCP 350 User Manual You can change Service Configuration. ® EDIsecure DCP 350 network printer provides 3 kinds of service (change “USB Spool”, “Network Spool” and “Network SDK”). You can select and change the service according to the need.
- Page 31 ® EDIsecure DCP 350 User Manual 2.5.3 Network module management “USB port state” shows USB device status connected on network module. Network module has 4 USB ports. Network module supports PC/SC. When you install the encoders that support PC/SC on network module, you can recognize the status of encoders.
- Page 32 ® EDIsecure DCP 350 User Manual “Reset to default” resets to default and reboot network module. Please click “Yes” when pop-up window comes out for reset. It takes 1 minute to reboot. Please click “Refresh” after reboot. When proper printer shown, please connect printer by clicking “Connect”.
- Page 33 ® EDIsecure DCP 350 User Manual Warning box will be shown during firmware upgrade for network module. It is recommended not to do other work during firmware upgrade for system reliability. Please do not turn off the printer until the upgrade is completed.
-
Page 34: Driver Configuration
To check printer properties, you need to open printer driver. Please open “Drivers and Printers” ® and right-click “EDIsecure DCP 350 Card Printer”. Click “Properties”. For Windows 7, please click “Printer Properties”. When you click “Printer Properties” as like Pic.63, a ®... - Page 35 ® EDIsecure DCP 350 User Manual 3.2.1.1. Layout You can select either horizontal or vertical printing direction. To apply your selection, click “OK”. Pic.65 Layout 3.2.1.2. Advanced setup Reset Default Values: Reset to default. Color Correction: You can correct gamma for colors.
- Page 36 Ribbon Ribbon ® It shows the type of installed ribbon. You don’t need to select this option as the EDIsecure DCP 350 recognizes ribbon automatically with RF Tag. Resin You can set the method to extract resin black when you use design programs. It will be set automatically.
-
Page 37: Other Settings
® EDIsecure DCP 350 3.2.1.4. Side / Media To set printing side and printing mask. - Print Side You can select one side printing or both sides printing (It is possible only when you have a flipper.) - Front / Back You can use a predefined mask or user defined mask (white card, smartcard, Magnetic stripe card, etc.) on... - Page 38 DCP 350. The EDIsecure DCP 350 has a connection with the USB Virtual printer port as ® shown in Pic.70 because the EDIsecure DCP 350 uses USB connection to a PC. (Caution! This port is selected automatically. It is recommended to maintain default.) Pic.70 Ports...
- Page 39 In the “Color management” tab, you can select color management profile fit to the printer. ® The EDIsecure DCP 350 uses color profile to express optimal color. The driver selects color profile automatically to fit each ribbon. (It is recommended to maintain default.) Pic.72 Color Management...
-
Page 40: Utilities
4.1 Card Printer Setup ® The EDIsecure DCP 350 is produced with optimized setting. You need to adjust setting value if required or spare parts are replaced using CardPrinterSetup in our Installation CD. You can adjust following settings with the CardPrinterSetup. - Page 41 ® EDIsecure DCP 350 When you are successful logged-in, you can set values shown as Pic.75. Pic.75 CardPrinterSetup start User Manual Page 41...
- Page 42 Pic.76 Basic setup of CardPrinterSetup ① To show connected printers ® Device: You can select a printer using pull-down menu. “EDIsecure DCP 350 Card Printer” is a name of printer. “DCP350228” is printer ID, “USB001” is connected port. ② To set administrator password and user password.
- Page 43 DCP 350 ® ⑤ To set print area. Please set it properly to print on an entire card because the EDIsecure 350 is a direct thermal card printer. When you click “⑦ Print”, a card is printed as like “④...
- Page 44 ® EDIsecure DCP 350 Black Density: To set resin black density. In Pic.104, barcode is printed to express density. When density is too strong, barcode is printed too thick. When density is too weak, barcode is too thin. Please adjust resin black density to express clear barcode. Please refer to the following pictures.
-
Page 45: Advanced Setup
® EDIsecure DCP 350 printer regardless of whether it is connected by USB or what the IP address is. It is useful to connect and use several printers. Default is “DCP350”. Set PC Serial: One of security function. You can use a printer with specific PC. - Page 46 EDIsecure DCP 350, so you need to adjust it to be tuned in the horizontal. “Rotate Top” is a value when the card of top side is in line. “Rotate Bottom” is a value when card of bottom side is in line.
-
Page 47: Card Printer Test
⑤ ⑥ ⑦ Pic.81 CardPrinterTest ® ① Select Printer: select printer to test. In the Pic.107, “EDIsecure DCP 350” is the Printer Name, DCP350228 is the Printer ID, and USB001 is the connected port. ② Control : To execute each step to test ③... - Page 48 ® the EDIsecure DCP 350 printer connected to USB has higher priority. Other printers could be selected by pull-down menu. You can test all functions with connected printer. Control is consisted by SBS (Step by Step), Move, Rotate, etc. section and you can control printer by each step.
- Page 49 ® EDIsecure DCP 350 4.2.4 Batch Batch is to repeat encoding/decoding test continuously. In the Repeat, you input the number of repeat and click “Batch Start”, then the test is run as many times as the number of set. When you check “Include Card In/Out”, each time the printer brings a card from input hopper and performs an encoding test and ejects the...
- Page 50 ® The EDIsecure DCP 350 printer supports the contact smartcard encoder in the printer inside and the SIM encoder on the right of front side. “IC(PC/SC)” is to test a contact smartcard and SIM encoding. “Batch” is applied only to the contact smartcard encoding because SIM encoder is installed outside and can’t move a card automatically.
-
Page 51: Printer Status
® EDIsecure DCP 350 printer has the internal and external contactless smartcard encoder. RF(PC/SC) is to read and write the contactless smartcard. Using internal encoder, the printer brings a card into the printer from input hopper and encodes a smartcard. Using external encoder, after putting a card on the top cover, you can encode because the antenna installed under the top cover is used. -
Page 52: Error Code
® EDIsecure DCP 350 Status Code #define SMSC_M_CARDIN 0x0000000000000001 // Card In #define SMSC_M_CARDOUT 0x0000000000000002 // Card Out #define SMSC_M_MOVE_PRINT 0x0000000000000004 // Move to print #define SMSC_M_MOVE_PRN2ROT 0x0000000000000008 // Move from printer to flipper #define SMSC_M_MOVE_ROT2PRN 0x0000000000000010 // Move from flipper to printer... -
Page 53: Firmware Upgrade
® EDIsecure DCP 350 4.3 Firmware upgrade When you run the CardPrinterFirmware, you can see the pop-up window as shown in Pic.85. Device: To select the printer that you want to upgrade. Device Version: To display the current firmware version of selected printer. - Page 54 ® EDIsecure DCP 350 Pic.86 Upgrading the printer firmware 2 In case there are some problems in the automatic upgrade, you click “Manual Update” and can see the pop- up widow as shown in Pic.87. It shows the procedure to manual upgrade. You can upgrade manually according to this procedure.
-
Page 55: Optional Device Driver Installation
® In the EDIsecure DCP 350 printer, you can install the two types of optional devices which are contact smartcard reader and mobile SIM smartcard reader. If you have one or more smartcard reader devices on your printer, you should install the smartcard device driver as described in the following, and connect ®... - Page 56 ® EDIsecure DCP 350 5.1.2. License agreement The license agreement window is shown (see Pic. 89). Check at the agreement and click “Next”. Pic.89 License agreement 5.1.3. Installation The installation message is shown as shown in Pic.90. Click “Install” to install driver.
- Page 57 ® EDIsecure DCP 350 5.1.4. Complete installation When the installation is completed, the following window (see Pic.91) is shown. Click “Finish” to complete the installation steps. Pic.91 Completing the smartcard reader driver installation User Manual Page 57...
- Page 58 ® In the EDIsecure DCP 350 printer, you can install the two types of smartcard reader which are the internal contactless smartcard reader and the external contactless smartcard reader. If you have one or more contactless smartcard reader devices on your printer, you should install the ®...
- Page 59 ® EDIsecure DCP 350 5.2.3. Driver location Insert the smartcard installation CD and find “\Options\ Omnikey 5121” directory on your CD. Find the right directory which is installed OS version on your PC, and select the directory as shown in Pic.94, and click “Next”.
-
Page 60: Troubleshooting
Pic.96 Exclusive cleaning card for EDIsecure DCP 350 printer ® If the exclusive cleaning card is ready, click “Clean Printer” in the service tab of EDIsecure DCP 350 printer driver as shown on Pic.97. After click, Clean Printer program to clean the printer is run. - Page 61 DCP 350 ® Step 1. Connect the EDIsecure DCP 350 printer to the PC and turn it on, and prepare the exclusive cleaning card. Pic.98 Printer cleaning Step 1 Step 2. Open the hopper and top cover and remove the card and ribbon cartridge.
- Page 62 ® EDIsecure DCP 350 Step 3. Insert the exclusive cleaning card into the printer through input hopper as shown in Pic.100. When the exclusive cleaning card is inserted to the cleaning roller, it will be move automatically. It is normal that the exclusive cleaning card is inserted to the ends and rollers are moving to clean.
- Page 63 ® EDIsecure DCP 350 Step 5. Wait until the cleaning is completed. When the cleaning is completed, the exclusive cleaning card will be ejected automatically as shown in Pic.102. Pic.102 Printer cleaning Step 5 Step 6. Remove the exclusive cleaning card and install ribbon cartridge into the printer.
-
Page 64: Tph (Thermal Print Head) Replacement
® EDIsecure DCP 350 6.2 TPH (Thermal Print Head) replacement 1. Check the serial number and the resistance of new Thermal Print Head as shown on Pic. 130 TPH type: A = KEE, B = KPE Serial No.: see the red box. -
Page 65: Card Movement
6.3.2 Card Transfer Error occurs when the ribbon is coiled around the transfer roller or the printing roller. ® Open the top cover and remove the card and the coiled ribbon from EDIsecure DCP 350 printer using front LED buttons. If this problem occurrs frequently, check the below things. -
Page 66: Printing Quality
® EDIsecure DCP 350 Non-standard cards or bad cards. Change the cards. You can use only ISO CR-80 card (54mm x 86mm). The transfer roller or the printing roller is contaminated with the dust and dirt Remove the dust and dirt with the cleaning kit as section 6.1 ... - Page 67 ® EDIsecure DCP 350 6.4.3 Unclear or not uniform print. Uneven or bad card surface. Change the card. Too high or low setting of the color density. Please contact the local supplier. The color density default of your printer needs to be changed.
-
Page 68: Magnetic Stripe Encoding
® EDIsecure DCP 350 6.5 Magnetic stripe encoding 6.5.1 Magnetic encoding error. First of all, Please press left LED button to retry. The magnetic head is contaminated with dust and dirt. Clean the magnetic head with the cleaning kit. - Page 69 The printing is operated with another printer driver. ® Select the correct EDIsecure DCP 350 printer driver again. Wrong USB port setting of the printer driver. Check the port setting of the printer driver and change the port setting.
-
Page 70: Printer Specification
® EDIsecure DCP 350 7 Printer specification Card Feeding Automatic ISO CR-80 (54mm x 86mm / 2.12" x 3.38") Card Size 0.38mm (15mil) ~ 1.0mm (40mil) Card Thickness PVC, Composit PVC, PET Card Type Print Speed(Max.) Monochrome 5 sec. (720 cards/hour) YMCKO 25 sec. - Page 71 EDIsecure® DCP 350 Flipper Module Order # Description DIC10570 EDIsecure® DCP 350 Color Pro Ribbon, 5 Panel (Y,M,C,K,OP);250 c/r DIC10571 EDIsecure® DCP 350 Color Pro Ribbon, 6 Panel (Y,M,C,K,OP,K);200 c/r DIC10572 EDIsecure® DCP 350 Color Pro Ribbon, 5 Half Panel (Y,M,C,K,OP);350c/r DIC10573 EDIsecure®...
- Page 72 Copyright 2012 Digital Identification Solutions Group. All rights reserved. Information in this document is subject to change without prior notice. ® IDExpert and EDIsecure® are registered trademarks of Digital Identification Solutions AG. All other trademarks, tradenames, service names are trademarks or registered trademarks of their respective owners.
Need help?
Do you have a question about the DCP 350 and is the answer not in the manual?
Questions and answers