Table of Contents
Advertisement
TM
GRAB SOME SUN
Published by Chongqing
Huansong Industries
(Group) Co., Ltd and
Hisun Motors Corp USA.
Chongqing Huansong
Industries (Group) Co., Ltd
and Hisun Motors Corp USA
holds the copy right.
No publishing and reprinting
without permission.
READ THIS
MANUAL CAREFULLY
For questions regarding this
UTV, please contact HISUN at:
(972)446-0760
hisunmotors.com
Rev. 07231501
No one under the age of 16
should operate this vehicle.
Provincial / Municipal
governments have different
regulations pertaining to
owning and operating an
off-road vehicle; learn the
regulations in your area.
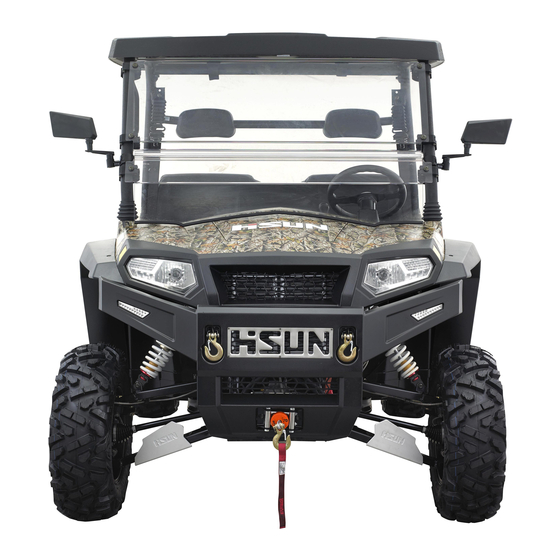
SECTOR 1000
OWNER'S MANUAL
Advertisement
Table of Contents
Troubleshooting

Related Manuals for Hisun SECTOR 1000


Summary of Contents for Hisun SECTOR 1000
- Page 1 Published by Chongqing Huansong Industries (Group) Co., Ltd and Hisun Motors Corp USA. Chongqing Huansong Industries (Group) Co., Ltd and Hisun Motors Corp USA holds the copy right. No publishing and reprinting without permission. READ THIS MANUAL CAREFULLY For questions regarding this...
-
Page 2: Introduction
Introduction HS 1000 INTRODUCTION Congratulations on your purchase of the HS 1000 UTV. This Owner’s / Operator’s manual will provide you information regarding safe operation, operational instructions, maintenance and care. Fully understanding and following all of the instructions in this manual will provide the knowledge needed to have safe operation and longevity of the UTV. -
Page 3: Important Manual Information
Introduction HS 1000 IMPORTANT MANUAL INFORMATION FAILURE TO FOLLOW THE WARNINGS CONTAINED IN THIS MANUAL CAN RESULT IN SERIOUS INJURY OR DEATH. Particularly important information is distinguished in this manual by the following notations: The Safety Alert Symbol means ATTENTION! YOUR SAFETY IS INVOLVED! Failure to follow WARNING instructions could result in severe injury or death to the machine operator, bystander or a person inspecting or repairing the... -
Page 4: Important Notice
Introduction HS 1000 IMPORTANT NOTICE This UTV is designed and manufactured for OFF - ROAD use only. It is illegal and unsafe to operate this UTV on any public street, road or highway. This UTV complies with all applicable OFF - ROAD noise level and spark arrester laws and regulations in effect at the time of manufacture. -
Page 5: Table Of Contents
Introduction HS 1000 Table of Contents Subject Page Subject Page Introduction Wheel bolt torque Warnings Cautions and Notes Cleaning the air filter Important Notice Evacuator valve Table of Contents Battery condition Part Locations Battery Charging Part Locations Storage instructions 6-10 Part Locations Adjusting Toe-In 6-10... -
Page 6: Part Locations
General Instrument Panel and Controls LOCATION OF PARTS... -
Page 7: Part Locations
General LOCATION OF PARTS... - Page 8 General ILLUSTRATED CONTENTS...
-
Page 9: Safe Operation
General SAFE OPERATION All operators, including experienced, should should always wear protective carefully read and fully understand this Users equipment, such as helmet, boots, eye Manual. Operation as directed in this manual protection, ear protection, and gloves etc. should be strictly adhered to in order to achieve the best performance and avoid accidents. -
Page 10: Operation
General 10. Never drive over terrain such as a ditch, a 2. Operation hole, dams, excessive mud, or the vehicle can get stuck because of the vehicles Start the engine only in an open ventilated weight. area. Carbon monoxide is colorless, odorless and is emitted from the engine and can 11. -
Page 11: Parking
General No smoking when adding electrolyte or Parking refueling. Fuel tank and battery should be kept away from sparks. Battery produces Set the gear shift to the “N” position and pull hydrogen and oxygen in charging and this the braking brake to the top position to park could accelerate the risk of explosion. -
Page 12: Warning And Caution Labels
General Warning and caution labels (1) (2) (3) (4) (5) (6) (7) (8) (9)... - Page 13 General (10) (11) (12) (13) (14)
-
Page 14: Identification Numbers
Identification Numbers Your dealer is interested in your new vehicle and has the desire to help you get the most value from it. After reading this manual thoroughly, you will find you can do some of the regular maintenance by yourself. However, when in need of parts or major service, be sure to see your dealer. - Page 15 Maintenance CAUTION: To avoid personal injury and vehicle damage: Be sure you have sufficient knowledge, experience, the proper replacement parts and tools before you attempt any vehicle maintenance task. If you don’t have the knowledge and equipment which are necessary to perform the maintenance task, consult your local dealer.
- Page 16 Maintenance Indication of After Items 700 hrs 50 100 150 200 250 300 350 400 450 500 550 600 650 700 Every ○ ○ ○ ○ ○ ○ ○ Check *Fuel filter 100 hrs element Every ○ Replace 100 hrs Every ○...
- Page 17 Maintenance Indication of After Items 700 hrs 50 100 150 200 250 300 350 400 450 500 550 600 650 700 Every 2 Cooling system Flush years Every 2 Coolant Change years Service as Fuel system Bleed required Service as Fuse Replace required...
-
Page 18: Pre-Operation Check
Operating the Vehicle Pre-Operation Check DAILY CHECK To better prevent troubles, it is important to know the condition of the vehicle, before operating. Check it before starting. CAUTION: To avoid personal injury: Be sure to check and service the vehicle on a level surface with the engine shut off, the parking brake “ON”, and implements lowered to the ground if equipped. -
Page 19: Starting The Engine
Operating the Vehicle STARTING THE ENGINE CAUTION: To avoid personal injury: 1. Make sure the parking brake is set. Read "SAFE OPERATION" in front of this manual. Read the danger, warning and caution labels located on the vehicle. ... - Page 20 Operating the Vehicle 2. Set gear shift lever to the “NEUTRAL” position. 1. Insert the key into the key switch and turn it to “START”. ① Gear shift range lever. (L) Low Range (Engines stop) (H) High Range (Engine run or headlight on) (N) “Neutral”...
- Page 21 Operating the Vehicle IMPORTANT : Allow the engine to warm up for 5 minutes Relying on the engine warning lights is never without applying any load. This is to allow oil to enough. Never fail to conduct daily checks reach every engine part. If a load is applied to carefully by referring to Pre Operation Check “...
- Page 22 Operating the Vehicle OPERATING NEW VEHICLE ■ Changing Lubricating Oil for New Vehicles How a new vehicle is handled and maintained The lubricating oil is especially important for a new vehicle. Various parts are not “broken-in” determines the life of vehicle. A new vehicle just off the factory production line and are not mated to each other.
-
Page 23: Headlight Switch
Operating the Vehicle vehicle) Lamp built in the coolant temperature gauge Lamp built in the fuel gauge Lamp built in the speedometer ■ Hazard Light Switch [if equipped] Press the top half of the hazard light switch, the 1. Buckle 2. -
Page 24: Brake Pedal
Operating the Vehicle ① Brake pedal ■ Gear Shift Range Lever CAUTION: To avoid personal injury: Avoid changing gear shift range lever when ascending or descending a slope. Before ascending or descending a slope, shift to the “L” range to control the vehicle speed. -
Page 25: Parking Brake
Operating the Vehicle speed and engage front wheel drive. An accident may occur if the vehicle is suddenly braked with heavy loads shifting forward causing loss of control. The braking characteristics are different between two and four wheel drive. Be aware differences carefully. -
Page 26: Fuel Gauge
Operating the Vehicle STOPPING ■ STOPPING Release the accelerator pedal Step on the brake pedal. CHECK DURING DRIVING ■ Immediately Stop the Engine if: The engine suddenly slows down or accelerates. ① Fuel gauge Unusual noises are suddenly heard. ■... - Page 27 Operating the Vehicle The hourmeter indicates in five digits the hours The speedometer indicates the traveling speed. the vehicle has been used; the last digit indicates 1/10 of an hour. ① Speedometer ① Hourmeter The speedometer indicates the traveling speed. 4-10...
-
Page 28: Periodic Service
Periodic Service CAUTION: To avoid personal injury: HOW TO OPEN THE HOOD AND TILT THE SEAT CAUTION To avoid personal injury from contact with moving parts: Never open operator’s seat while the ① Operator’s seat engine is running. Support hood with the other hand while HOW TO RAISE THE CARGO BED unlocking support link. - Page 29 Periodic Service JACK-UP POINT ◆ To lower the cargo bed 1. Start the engine and then lift the bed slightly by WARNING To avoid personal injury, death operating the lever. or vehicle damage: Remove the safety support and store it in the ...
-
Page 30: Daily Check
Periodic Service DAILY CHECK IMPORTANT: For your own safety and maximum service life of If the oil level is low, do not run the engine. the vehicle, make a thorough daily inspection Checking the engine oil level. before operating the vehicle to start the engine. Park the vehicle on a flat surface, raise the cargo bed, mount the safety support and shut CAUTION... - Page 31 Avoid contamination of the brake fluid recovery tank. thoroughly clean before removing the filler If water should leak, consult your local HISUN cap. Do not open the brake fluid reservoir Dealer. cap unless absolutely necessary. ■ Cleaning radiator screen ...
- Page 32 Periodic Service ■ Checking parking brake NOTE Make sure the parking brake warning lamp on the display goes off when parking brake lever is down. ① Brake Fluid Reservoir ② Minimum level mark ■ Checking brake pedal ① Parking hand-bar CAUTION TO avoid personal injury: ■...
-
Page 33: Checking Cv Boots
Periodic Service EVERY 50 HOURS ■ Checking CV boots ■ Greasing Check to see if the CV boots are damaged or not. Apply a small amount of multi-purpose grease to If the boots are cut, gashed or show signs of the following points every 50 hours. -
Page 34: Wheel Bolt Torque
Periodic Service ■ Checking engine start system CAUTION TO avoid personal injury Do not allow anyone near the vehicle while testing. If the vehicle does not pass the test, do not operate the vehicle. ◆ Preparation before testing ①... -
Page 35: Evacuator Valve
Periodic Service Remove the connecting rubber tube between The air cleaner uses a dry element never apply oil. air cleaner and throttle valve and the screws Do not run the engine with filter element attaching the air cleaner, and then remove the air cleaner. -
Page 36: Battery Condition
Periodic Service IMPORTANT CAUTION When the fuel line is disconnected for maintenance To avoid personal injury or repair, close both ends of the fuel line with a Never remove the battery while the engine piece of clean cloth or paper to prevent dust and is running. -
Page 37: Adjusting Toe-In
Periodic Service ■ Adjusting toe-in Proper toe-in 0 to12 mm (0 to 0.47 in) Park vehicle on flat place. Turn steering wheel so front wheels are in the straight ahead position. Lock the park brake and stop the engine. Measure distance between tire beads at rear of tire at hub height. -
Page 38: Changing Engine Oil
Periodic Service ■ Cleaning Muffler Do not operate the vehicle with a damaged muffler. CAUTION To avoid personal injury: Before touching any part of an exhaust system, be absolutely sure that it has sufficient time to cool! Always wear safety goggles and face mask. -
Page 39: Checking The Brake
Periodic Service If brake pedal stroke is outside of the specifications, contact your local dealer for adjusting the brake. ① Oil Level ③ Dipstick ④ Cap ■ Checking Brake Pedal CAUTION ① Brake pedal Stop the engine and chock the wheels before ②... -
Page 40: Checking Intake Air Line
Periodic Service Replace hoses and tighten Installation points points are tight and not damaged. securely, if radiator hoses are swollen, If hoses and Installation points are found to be hardened or cracked. Replace hoses and worn or damaged, replace or repair them at hose clamps every 2 years or earlier, if once. -
Page 41: Every Year Check
Periodic Service EVERY 400 HOURS completely into the oil pan. ■ Changing Transmission Fluid Fill with the new oil up to the upper notch on the dipstick. CAUTION (See “LUBRICANTS, FUEL AND COOLANT” in To avoid personal injury: “MAINTENANCE” section.) ... -
Page 42: Every 2 Years Check
Periodic Service EVERY 2 YEARS 10. Check coolant level of recovery tank and add ■ Changing Brake Fluid coolant if necessary. Consult your local Dealer for this service. Coolant capacity 4.0L (4.2U.S.qts.) (See “Checking Brake Fluid Level” in “DAILY CHECK” in “PERIODIC SERVICE” section. ■... - Page 43 Periodic Service Do not mix different types of Antifreeze. Freezing Boiling VOL% The mixture can produce chemical reaction point point Anti-freeze causing harmful substances. ℃ ° ℃ ° Antifreeze extremely flammable explosive under certain conditions. Keep fire and children away from antifreeze. ...
-
Page 44: Every 4 Years Check
Periodic Service ◆ Replacing procedure When coolant level drops evaporation, add water only to keep the Disconnect the negative cable of the battery. antifreeze mixing ratio less than 50%. In case Open the mini fuse box cover. of leakage, add antifreeze and water in the Pull out the mini fuse. -
Page 45: Specification Table
Specifications SPECIFICATION TABLE Model Specifications Make Type 2 cylinders, 4-cycle, gasoline, OHV, liquid cool Displacement L(cc) 1.0(998) Engine Horsepower Kw(HP) 41.5(56.46) Rated revolution rpm 7500 Low idling revolution rpm 1350 to 1500 Fuel Capacity L(U.S.gal) 34(8.9) Transmission Wheels, Drive system 4, Rear 2WD or 4WD Differential lock Electric control: switch... -
Page 46: Traveling Speeds
Specifications Model Specifications Width mm (in.) 1257 (49.5) Length mm (in.) 939.5(37.0) Depth mm (in.) 279(11.0) Volume (cu.ft.) 0.51(18) Cargo bed Bed height mm (in.) 914(36.0) (unloaded) Cargo bed capacity kg (lbs.) 500(1102) Sound level, operator ear db (A) Front 27×09X14 6PR 27×09X14 6PR Tire... -
Page 47: Vehicle Limitations
Specifications VEHICLE LIMITATIONS The Vehicle has been thoroughly tested for proper performance with implements sold or approved by. Use with implements which are not sold or approved and which exceed the maximum specifications listed below, or which are otherwise unfit for use, vehicle may result in malfunction or failures of the vehicle damage to other property and injury to the operator or others, [Any malfunctions or failures of the vehicle resulting from use with improper implements are not covered by the warranty]. -
Page 48: Storage
Storage STORAGE Remove the battery from the vehicle. Store the battery following the battery storage CAUTION procedures. To avoid personal injury: Keep the vehicle in a dry place where the Do not clean the vehicle when the engine vehicle is sheltered from the elements. is running. -
Page 49: Removing The Vehicle
Storage REMOVING THE VEHICLE FROM STORAGE Check the tire air pressure and inflate the tires if they are low. Before installing the battery, be sure it is fully charged. Check to see if the fan works. Check fluid levels (engine oil, transmission oil,... -
Page 50: Troubleshooting
Troubleshooting ENGINE TROUBLESHOOTING If something is wrong with the engine, refer to the table below for the cause and its corrective countermeasure. Trouble Cause Countermeasure Check the fuel tank and fuel filter。 Check the electric fuel pump. Check the injector. - Page 51 Troubleshooting Check malf code meaning by reading the below table. Mt05 Malf Code Table:23 Malf code in MT05 Description P0107 MAP Circuit Low Voltage or Open P0108 MAP Circuit High Voltage P0112 IAT Circuit Low Voltage P0113 IAT Circuit High Voltage or Open P0117 Coolant/Oil Temperature Sensor Circuit Low Voltage P0118...
-
Page 52: Battery Troubleshooting
Troubleshooting BATTERY TROUBLESHOOTING Trouble Cause Countermeasure Preventive measure Battery overused until lights are dim. Charge the battery Charge the battery sufficiently. properly. Battery has not been recharged. Keep the terminal Starter does not function Clean the terminal ... -
Page 53: Machine Troubleshooting
Troubleshooting MACHINE TROUBLESHOOTING Trouble Cause Countermeasure Replace throttle cable; High idling speed of engine Replace throttle petal Replace the throttle High rotary speed for clutch Replace the junior clutch spring; connection. Replace the primary clutch. ... - Page 54 UTV. of up to 90%. 2) Hisun’s EPS system starts the motor only Please carefully read this chapter before when it needs to generate power without operating or driving and understand the increasing fuel consumption.
- Page 55 Electronic Power Steering System Typical parts of the EPS system The Meter is an important part of the UTV. The Meter works together with the EPS system In general, EPS system has the following and monitors working condition of the EPS system. parts: Faults can be displayed by a fault indicator light ...
- Page 56 3) The power of Hisun’s EPS system is UTV with the EPS system, and also controlled by software, so that the UTV characteristics, functions and limits of can be operated with power steering at UTV.
- Page 57 Electric Power Steering System the EPS system at regular intervals. Correct Battery voltage sensor operation and driving skills will ensure the Mechanical reduction transmission security and reliability of UTV. mechanism(Reducer) Gear/rack type steering gear To make sure your EPS system will be ...
- Page 58 Electric Power Steering System 2. Steering Torque Sensor: Install sensor on the reducer. ① Upper housing ② ECU unit ③ Seal ring ④ Lower housing ① Sensor Installation position of ECU and reducer Do not change the position of the Senor. The Sensor assembly position is fixed and cannot be changed, if the sensor position is found changed, caused by a loose bolt, please tighten the...
- Page 59 Electric Power Steering System On the housing of ECU unit, there are sets of 5. Gear/rack type steering gear electric plugs which function as follows: UTV use gear/rack type steering gear to perform ○ • P1:positive pole ( + pole) for EPS motor steering function.
- Page 60 Electric Power Steering System 7. Meter: CAUTION The Meter is an important part of the UTV. The Meter works together with the EPS system If main switch is not turned off, the ECU can and monitors working condition of the EPS system. be destroyed by battery power in on-off Faults can be displayed by a fault indicator light condition during the following connection with...
- Page 61 Electric Power Steering System The EPS systems can supply different power Check the meter. If fault indicator light of EPS torque depending on the speed and steering system is not lit, ECU is ready for regular use. angle. If fault indicator light of EPS system is lit, that means EPS system found a fault during the ECU self-checking process, then you should...
- Page 62 Electric Power Steering System EPS SYSTEM’S INSPECTION, Fault alarm and protection function MAINTENANCE, REPAIR: In order to ensure the EPS system can supply a The EPS system has already been inspected by long life of reliability, a variety of detection and strict quality restriction before delivery, so it has alarm functions are set in the ECU software high reliability.
- Page 63 Electric Power Steering System Between input and output shaft’s reducer Meanwhile, EPS system fault indicator light will be on. whether had idle running. When ECU detected motor is not working The steering system checking in steering through sensor, it will indicate fault code of process: dynamic motor without power warning to Turn the steering wheel from left to right and...
- Page 64 Electric Power Steering System ■ Solutions for common fault: 1. Open the main switch, no auxiliary power of left and right steering. FAULT PHENOMENON FAULT POINT SOLUTION Meter warning fault Special fuses of ECU is blown in Replace fuses. Bring the code:F00010 fuses box (see figure 1), Or ECU is UTV to dealer for repair...
- Page 65 Electric Power Steering System 2. Open the main switch, only steering left or right is power-assisted. Fault phenomenon Fault point Solution Bring the UTV to dealer for No meter alarm ECU damaged repair Sensor damaged, sensor’s Meter warning fault Bring the UTV to dealer for connector with bad contact or code:F00001 or F00002 repair...
- Page 66 Electric Power Steering System 5. All have power-assisted to turn left or right,but steering becomes heavy. Fault phenomenon Fault point Solution radiator overheat, Remove dirt or another reduce the power of the motor‘s Meter warning fault covering on shell of ECU. output torque automatically, or code:F00006 Bring the UTV to dealer...
- Page 67 Electric Power Steering System If a malfunction leads to the interruption of motor ■ Maintenance and repair’s supplemental control, the ECU then closes the function of EPS description: system. 1. Restart initialization to ECU parameter: Shutting down the EPS system’s will cause the Park UTV on the flat ground and keep the front wheels pointed forward always.
- Page 68 Electric Power Steering System ■ Motor assy basic parameters In addition, it can also reduce the steering system’s mechanical and electrical components’ Type: DC permanent magnet control motor load, which helps in obtaining reliable function Rated working time: 3 min/per time ...
-
Page 69: Options
Options OPTIONS Consult your local dealer for further details. Head rest; Plastic Canopy; Rear Trailer Hitch & Pin(2〞); Windshield; Steel Cab; Motor Scan KF90121; 11-1... -
Page 70: Winch Mount Plate
Winch Mount Plate WINCH MOUNT PLATE WINCH MOUNT PLATE Mounting the optional winch always requires you to read the instruction manual attached to the winch thoroughly before using it. ① Winch mount plate ■ Transporting Vehicle Pay attention to the following points when transporting the vehicle. - Page 71 Where a warrantable condition exists, HISUN will repair your vehicle at no cost to you, including diagnosis, parts and labor. If an emission-related part on your vehicle is defective, the part will be repaired or replaced by HISUN. This is your EMISSION CONTROL SYSTEM WARRANTY.
- Page 72 Warranty defects shall be remedied during customary business hours at any authorized HISUN dealer located within the United States of America in compliance with the Clean Air Act and applicable regulations of the United States Environmental Protection Agency. Any part or parts replaced under this warranty shall become the property of HISUN.
- Page 73 ADDITIONAL INFORMATION. Any replacement part that is equivalent in performance and durability may be used in the performance of any maintenance or repairs by the owner. However, HISUN is not liable for these parts. The owner is responsible for the performance of all required maintenance.
- Page 75 HISUN MOTORS 310 East University Dr McKinney, Texas 75069 PH (972) 446-0760 TF (877) 838-6188 hisunmotors.com...
Need help?
Do you have a question about the SECTOR 1000 and is the answer not in the manual?
Questions and answers
Where is oil drain plug located on a 2020 sector 1000.
The exact location of the oil drain plug on a Hisun Sector 1000 2020 is not specified in the provided context. However, oil is drained by removing the drain plug, and it is generally located at the bottom of the engine or oil pan. For precise location, refer to the vehicle’s service manual or consult a dealer.
This answer is automatically generated