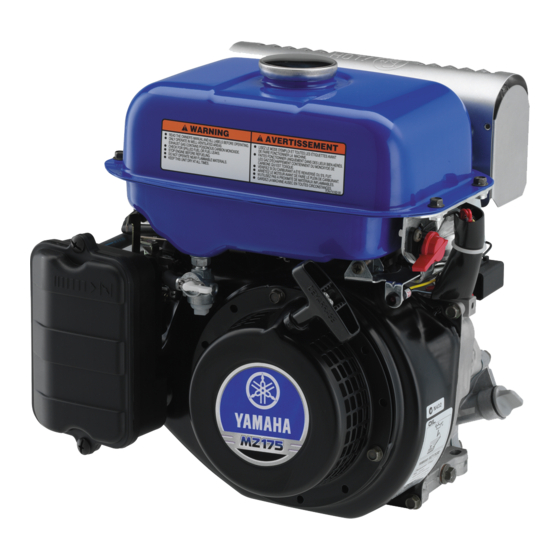
Yamaha MZ175 Owner's Manual
Hide thumbs
Also See for MZ175:
- Owner's manual (62 pages) ,
- Service manual (65 pages) ,
- Service manual (22 pages)

Related Manuals for Yamaha MZ175


Summary of Contents for Yamaha MZ175
- Page 1 OWNER’S MANUAL Read this manual carefully before operating this machine. MZ175 MZ200 MZ250 MZ300 MZ360 MX360 LIT-19626-02-32 7HC-F8199-70...
- Page 2 Les gaz d’échappement du moteur de ce produit contiennent des substances chimiques connues dans l’État de Californie pour provoquer le cancer, des anomalies congénitales et des troubles de la reproduction. Read this manual carefully before operating this machine. This manual should stay with this machine if it is sold.
- Page 3 INTRODUCTION Congratulations on your purchase of your new Yamaha. This manual will provide you with a good basic understanding of the operation and maintenance of this machine. If you have any questions regarding the operation or maintenance of your machine, please consult a Yamaha dealer.
- Page 4 OPERATING THE MACHINE. A WARNING indicates a hazardous sit- uation which, if not avoided, could result in death or serious injury. 9 Yamaha continually seeks advance- ments in product design and quality. Therefore, while this manual contains NOTICE the most current product information...
-
Page 5: Table Of Contents
SAFETY INFORMATION ....... 1 Fuel cock ........... 43 Exhaust fumes are poisonous .... 1 Fuel tank filter (For models equipped with a Yamaha fuel tank) ... 44 Fuel is highly flammable and poisonous ..........1 Fuse replacement (For electric starting model) ....44 Engine and muffler may be hot ... -
Page 6: Safety Information
SAFETY INFORMATION 9 Do not allow children to operate the multi-purpose engine. 9 Do not place any obstacles on the multi-purpose engine. Exhaust fumes are poisonous 9 Using a multi-purpose engine indoors CAN KILL YOU IN MINUTES. Multi-purpose engine exhaust contains carbon monoxide. -
Page 7: Engine And Muffler May Be Hot
9 Do not leave the multi-purpose engine inside the vehicle or in the trunk. 9 If you swallow any fuel, inhale fuel vapor, or allow any to get in your eye(s), see your doctor immedi- ately. If any fuel spills on your skin or clothing, immediately wash with soap and water and change your clothes. -
Page 8: Electric Shock Prevention
9 Avoid placing any flammable materials near the exhaust outlet during operation. 9 In order to prevent overheating, ensure adequate airflow by keeping the machine at least 1 m (3 ft) from objects or other equipment. 9 Do not operate the engine with a dust cover or other objects covering it. - Page 9 – 4 –...
-
Page 10: Location Of Important Labels
LOCATION OF IMPORTANT LABELS Please read the following labels carefully before oper- ating this machine. Maintain or replace safety and instruction labels, as necessary. (MZ175) 2 (with fuel tank model) (without fuel tank model) – 5 –... - Page 11 LISEZ LE MANUEL DU PROPRIÉTAIRE ET TOUTES LES ÉTIQUETTES AVANT L'UTILISATION. NE FAITES FONCTIONNER QUE DANS DES LIEUX BIEN AÉRÉS. LES GAZ D'ÉCHAPPEMENT CONTIENNENT DU MONOXYDE DE CARBONE NOCIF. VÉRIFIEZ QU'IL N'Y A PAS DE FUITES DE CARBURANT OU DE CARBURANT RENVERSÉ.
- Page 12 (MZ200) 1 (with fuel tank model) (without fuel tank model) – 7 –...
- Page 13 7CN-F4162-40 LISEZ LE MANUEL DU PROPRIÉTAIRE ET TOUTES LES ÉTIQUETTES AVANT L'UTILISATION. NE FAITES FONCTIONNER QUE DANS DES LIEUX BIEN AÉRÉS. LES GAZ D'ÉCHAPPEMENT CONTIENNENT DU MONOXYDE DE CARBONE NOCIF. VÉRIFIEZ QU'IL N'Y A PAS DE FUITES DE CARBURANT OU DE CARBURANT RENVERSÉ.
- Page 14 (MZ250, MZ300 (7VB)) 1 (with fuel tank model) (without fuel tank model) – 9 –...
- Page 15 7CN-F4162-40 LISEZ LE MANUEL DU PROPRIÉTAIRE ET TOUTES LES ÉTIQUETTES AVANT L'UTILISATION. NE FAITES FONCTIONNER QUE DANS DES LIEUX BIEN AÉRÉS. LES GAZ D'ÉCHAPPEMENT CONTIENNENT DU MONOXYDE DE CARBONE NOCIF. VÉRIFIEZ QU'IL N'Y A PAS DE FUITES DE CARBURANT OU DE CARBURANT RENVERSÉ.
- Page 16 (MZ300 (7CS), MZ360) 2 (with fuel tank model) (without fuel tank model) – 11 –...
- Page 17 7CN-F4162-40 LISEZ LE MANUEL DU PROPRIÉTAIRE ET TOUTES LES ÉTIQUETTES AVANT L'UTILISATION. NE FAITES FONCTIONNER QUE DANS DES LIEUX BIEN AÉRÉS. LES GAZ D'ÉCHAPPEMENT CONTIENNENT DU MONOXYDE DE CARBONE NOCIF. VÉRIFIEZ QU'IL N'Y A PAS DE FUITES DE CARBURANT OU DE CARBURANT RENVERSÉ.
- Page 18 (MX360) LISEZ LE MANUEL DU PROPRIÉTAIRE ET TOUTES LES ÉTIQUETTES AVANT L'UTILISATION. NE FAITES FONCTIONNER QUE DANS DES LIEUX BIEN AÉRÉS. LES GAZ D'ÉCHAPPEMENT CONTIENNENT DU MONOXYDE DE CARBONE NOCIF. VÉRIFIEZ QU'IL N'Y A PAS DE FUITES DE CARBURANT OU DE CARBURANT RENVERSÉ.
- Page 19 – 14 –...
-
Page 20: Description
DESCRIPTION (MZ175, MZ200, MZ360) (MZ250, MZ300 (7VB)) – 15 –... - Page 21 1 Fuel tank cap (For models (MZ300 (7CS)) equipped with a Yamaha fuel tank) 2 Fuel tank (For models equipped with a Yamaha fuel tank) 3 Throttle lever 4 Recoil starter handle 5 Fuel cock lever 6 Fuel cock cup...
- Page 22 1 Fuel tank cap (MX360) 2 Air filter case cover 3 Carburetor 4 Oil drain bolt 5 Oil filler cap 6 Spark plug 7 Muffler 8 Fuel tank 9 Oil warning light (Red) 0 Engine switch q Recoil starter handle w Throttle lever e Fuel cock cup r Fuel cock lever...
-
Page 23: Control Function
CONTROL FUNCTION Engine switch The engine switch controls the ignition system. 1 “ON”/“7” (ON) Ignition circuit is switched on. The engine can be started. 2 “OFF”/“5” (STOP) Ignition circuit is switched off. The engine will not run. 3 “6” (START) Starting circuit is switched on. -
Page 24: Fuel Tank Cap (For Models Equipped With A Yamaha Fuel Tank)
Fuel tank cap (For models equipped with a Yamaha fuel tank) Remove the fuel tank cap by turning it counterclock- wise. Fuel cock lever The fuel cock supplies fuel from the fuel tank to the carburetor. The fuel cock has two positions. -
Page 25: Choke Lever
Choke lever Starting a cold engine requires a richer air-fuel mix- ture, which is supplied by the choke lever. 1 Choke lever A B C Functions and specification differs depending on the models. 701-025c 701-033b Throttle lever Throttle lever controls the engine speed. 1 “... -
Page 26: Preparation
PREPARATION Fuel (For models equipped with a Yamaha fuel tank) WARNING 9 Fuel is highly flammable and poisonous. Check “SAFETY INFORMATION” (See page 1) carefully before filling. 9 Carefully fill the fuel tank in order to avoid fuel from spilling out of the fuel tank. - Page 27 6.1 L (1.61 US gal, 1.34 Imp gal) MX360 6.1 L (1.61 US gal, 1.34 Imp gal) Your Yamaha engine has been designed to use regu- lar unleaded gasoline with a pump octane number ((R + M)/2) of 86 or higher, or research octane number of 91 or higher.
-
Page 28: Engine Oil
Engine oil NOTICE The multi-purpose engine has been shipped with- out engine oil. Do not start the engine until you have filled it with the sufficient engine oil. 1. Place the multi-purpose engine on a level surface. 2. Remove the oil filler cap. 1 Oil filler cap 3. -
Page 29: Connecting The Battery (For Models Equipped With Electric Starter)
32˚F 80˚F Recommended engine oil grade: API Service SE type or higher Engine oil quantity: MZ175 0.6 L (0.63 US qt, 0.53 Imp qt) MZ200 0.6 L (0.63 US qt, 0.53 Imp qt) MZ250 1.0 L (1.06 US qt, 0.88 Imp qt) MZ300 (7VB) 1.0 L (1.06 US qt, 0.88 Imp qt) -
Page 30: Pre-Operation Check
Pre-operation checks should be made each time the multi-purpose engine is used. Pre-operation check Fuel (See page 21 for Yamaha fuel tank instructions) 9 Check fuel level in fuel tank. 9 Refuel if necessary. Fuel line 9 Check fuel hose for cracks or damage. -
Page 31: Operation
OPERATION WARNING Never operate the engine in a closed area or it may cause unconsciousness and death within a short time. Operate the engine in a well ventilated area. NOTICE The multi-purpose engine has been shipped with- out engine oil. Do not start the engine until you have filled it with the sufficient engine oil. - Page 32 3. Move the throttle lever slightly in the arrow direc- tion. 3 Throttle lever A B C Functions and specification differs depending on the models. 4. Turn the engine switch to “ON”/“7” (ON). 4 “ON”/“7” (ON) A Manual starting model B Electric starting model 763-127h 5.
- Page 33 6. (Electric starting model) Turn the engine switch to “6” (START). Take your hand off the switch immediately after the engine starts. 5 “6” (START) 763-120a NOTICE If the engine fails to start, release the switch, wait a few seconds, then try again. Each attempt should be as short as possible to preserve the battery.
-
Page 34: Stopping The Engine
8. Set the throttle lever in desired position. 7 “ ” Decrease engine speed 8 “ ” Increase engine speed A B C Functions and specification differs depending on the models. Stopping the engine 1. Move the throttle lever fully in the arrow direction. 1 Throttle lever A B C Functions and specification differs depending on the models. - Page 35 2. Turn the engine switch to “OFF”/“5” (STOP). 2 “OFF”/“5” (STOP) A Manual starting model B Electric starting model 763-120b 3. Turn the fuel cock lever to OFF. 3 OFF – 30 –...
-
Page 36: High Altitude Operation
4000 ft. (1219 meters). If you operate your engine at altitudes above 4000 ft. (1219 meters) consistently, have your local Yamaha dealer perform the necessary carburetor modification. This engine should be operated in its original config- uration below 4000 ft. -
Page 37: Periodic Maintenance
WARNING If you are not familiar with maintenance work, have a Yamaha dealer do it for you. Maintenance chart WARNING Stop the engine before starting maintenance work. - Page 38 *1·····The air filter element needs to be cleaned more frequently when using in unusually wet or dusty areas. ·····Since these items require special tools, data and technical skills, have a Yamaha dealer per- form the service. – 33 –...
-
Page 39: Spark Plug Inspection
2. Check for discoloration and remove the carbon. The porcelain insulator around the center elec- trode of spark plug should be a medium-to-light tan color. A MZ175, MZ200 B MZ250, MZ300, MZ360 C MX360 3. Check the spark plug type and gap. -
Page 40: Carburetor Adjustment
Carburetor adjustment The carburetor is a vital part of the engine. Adjusting should be left to a Yamaha dealer with the professional knowledge, specialized data, and equipment to do so properly. Engine oil replacement WARNING Avoid draining the engine oil immediately after stopping the engine. - Page 41 32˚F 80˚F Recommended engine oil grade: API Service SE type or higher Engine oil quantity: MZ175 0.6 L (0.63 US qt, 0.53 Imp qt) MZ200 0.6 L (0.63 US qt, 0.53 Imp qt) MZ250 1.0 L (1.06 US qt, 0.88 Imp qt) MZ300 (7VB) 1.0 L (1.06 US qt, 0.88 Imp qt)
-
Page 42: Air Filter (Except For Mx360)
The engine should never run without the foam ele- ment; excessive piston and cylinder wear may result. 6. Install the air filter case cover and tighten the screws. A MZ175, MZ200, MZ300 (7CS), MZ360 B MZ250, MZ300 (7VB) – 37 –... -
Page 43: Air Filter (For Mx360)
Air filter (For MX360) 1. Remove the air filter case cover nut and then remove the air filter case cover. 1 Air filter case cover nut 2 Air filter case cover 2. Remove the wing nut and then remove the air fil- ter assembly. - Page 44 6. Install the foam element onto the air filter. Be sure the foam element sealing surface matches the air filter so there is no air leak. NOTICE The engine should never run without the foam ele- ment; excessive piston and cylinder wear may result.
-
Page 45: Spark Arrester
Spark arrester WARNING The engine and muffler will be very hot after the engine has been run. Avoid touching the engine and muffler while they are still hot with any part of your body or clothing during inspection or repair. (For MZ250, MZ300 (7VB), MX360) 1. - Page 46 3 Spark arrester lump 4 Hole 6. Install the screw, and then tighten the screw. (For MZ175, MZ200, MZ360) 1. Loosen the muffler cap bolt and then remove the muffler cap and muffler screen. 1 Muffler cap bolt...
- Page 47 4. Check the muffler screen and spark arrester. Replace them if damaged. 5. Install the spark arrester. Align the spark arrester lump with the hole in the muf- fler pipe. 5 Spark arrester lump 6 Hole 6. Install the muffler screen to the muffler cap, then install the muffler cap to the muffler.
-
Page 48: Fuel Cock
Fuel cock WARNING Never use the gasoline while smoking or in the vicinity of an open flame. 1. Stop the engine. 2. Turn the fuel cock lever to OFF. 1 OFF 3. Remove the fuel cock cup, gasket and fuel strain- 2 Fuel cock cup 3 Gasket 4 Fuel strainer... -
Page 49: Fuel Tank Filter (For Models Equipped With A Yamaha Fuel Tank)
Fuel tank filter (For models equipped with a Yamaha fuel tank) WARNING Never use the gasoline while smoking or in the vicinity of an open flame. 1. Remove the fuel tank cap and fuel tank filter. 1 Fuel tank cap 2 Fuel tank filter 2. - Page 50 2. Replace the blown fuse with one of proper amper- age. 3 Fuse Specified fuse: 779-042 10 A If the fuse immediately blows again, consult a Yamaha dealer. 3. Install the cover and then tighten the screws. – 45 –...
-
Page 51: Storage
STORAGE Long term storage of your machine will require some preventive procedures to guard against deterioration. Drain the fuel 1. Turn the engine switch to “OFF”/“5” (STOP). 1 “OFF”/“5” (STOP) A Manual starting model B Electric starting model 2. Remove the fuel tank cap and fuel tank filter. Extract the fuel from the fuel tank into an approved gasoline container using a commercially available hand siphon. - Page 52 4. Turn the fuel cock lever to ON. 3 ON 5. Start the engine and leave it run until it stops. The engine stops in approximately 20 minutes time by running out of fuel. Duration of the running engine depends on the amount of the fuel left in the tank.
-
Page 53: Engine
Engine Perform the following steps to protect the cylinder, pis- ton ring, etc. from corrosion. 1. Remove the spark plug, pour about one table- spoon of engine oil (See page 36) into the spark plug hole and reinstall the spark plug. Recoil start the engine by turning over several times (with igni- tion off) to coat the cylinder walls with oil. -
Page 54: Troubleshooting
TROUBLESHOOTING Engine won’t start 1. Fuel systems No fuel supplied to combustion chamber. 2 No fuel in tank ..Supply fuel. 2 Fuel in tank ..Fuel cock lever to ON. 1 ON 2 Clogged fuel line ..Clean fuel line. 2 Foreign matter in fuel cock .. - Page 55 Poor spark 2 Spark plug dirty with carbon or wet ..Remove carbon or wipe spark plug dry. 2 Faulty ignition system ..Consult a Yamaha deal- – 50 –...
- Page 56 Clean the spark hand while testing. adjust gap. plug. Does not spark Clean Check the following. O Clogged 9 Fuel line clogging replace. S Engine does not start. 9 Air filter element clogging. Consult a Yamaha dealer. – 51 –...
- Page 57 – 52 –...
- Page 58 9 To prevent ELECTRIC SHOCK do not hold spark plug lead with hand while testing. Does not spark. Clean Check the following Clogged 9 Fuel line clogging replace W Engine does not start. 9 Air filter element clogging. Consult a Yamaha dealer. – 53 –...
- Page 59 E Faulty battery and/or starter motor. Consult a Yamaha dealer. Check engine oil level. Level low Consult a Add engine oil. Yamaha dealer. O Check the spark plug. 9 Type: BPR4ES 9 Gap: 0.7–0.8 mm (0.028–0.031 in) Incorrect Replace or Clean the spark adjust gap.
-
Page 60: Specifications
SPECIFICATIONS Dimensions MZ175 MZ175 Unit With fuel tank model Without fuel tank model Overall length mm (in) 343 (13.50) 298 (11.73) Overall width mm (in) 353 (13.90) 352 (13.86) Overall height mm (in) 407 (16.02) 238 (9.37) Dry weight kg (lb) 13–20 (29–44) - Page 61 MZ360 MZ360 Unit With fuel tank model Without fuel tank model Overall length mm (in) 425 (16.73) 443 (17.44) Overall width mm (in) 451 (17.76) 452 (17.80) Overall height mm (in) 485 (19.09) 306 (12.05) Dry weight kg (lb) 31–40 (68–88) 31–40 (68–88) MZ360 MZ360...
-
Page 62: Engine
Engine MZ175 MZ175 Unit With fuel tank model Without fuel tank model Type Air cooled 4-stroke gasoline Air cooled 4-stroke gasoline Cylinder arrangement Inclined, 1 cylinder Inclined, 1 cylinder Displacement Bore × stroke mm (in) 66.0 × 50.0 66.0 × 50.0 (2.60 ×... - Page 63 MZ200 MZ250 Unit Without fuel tank model With fuel tank model Type Air cooled 4-stroke gasoline Air cooled 4-stroke gasoline Cylinder arrangement Inclined, 1 cylinder Inclined, 1 cylinder Displacement Bore × stroke mm (in) 70.0 × 50.0 74.0 × 59.0 (2.76 ×...
- Page 64 MZ300 MZ300 Unit Without fuel tank model Without fuel tank model Type Air cooled 4-stroke gasoline Air cooled 4-stroke gasoline Cylinder arrangement Inclined, 1 cylinder Inclined, 1 cylinder Displacement Bore × stroke mm (in) 80.0 × 59.0 78.0 × 63.0 (3.15 ×...
- Page 65 MZ360 MZ360 Unit Without fuel tank model With fuel tank model Type Air cooled 4-stroke gasoline Air cooled 4-stroke gasoline Cylinder arrangement Inclined, 1 cylinder Inclined, 1 cylinder Displacement Bore × stroke mm (in) 85.0 × 63.0 85.0 × 63.0 (3.35 ×...
- Page 66 MZ360 MX360 Unit Without fuel tank model With fuel tank model Type Air cooled 4-stroke gasoline Air cooled 4-stroke gasoline Cylinder arrangement Inclined, 1 cylinder Inclined, 1 cylinder Displacement Bore × stroke mm (in) 85.0 × 63.2 85.0 × 63.2 (3.35 ×...
-
Page 67: Consumer Information
The first four digits of these numbers are for model identification; the remaining dig- its are the unit production number. Keep a record of these numbers for reference when ordering parts from a Yamaha dealer. Identification number records PRI-I.D. NUMBER: Record your Primary I.D., and serial num-... -
Page 68: Exhaust Emission Control System And Components
ROAD ENGINES. The acronyms conform to the latest version of the SAE’s recommended practice docu- ment J1930, “Diagnostic Acronyms, Terms, and Definitions For Electrical/Electronic System”. It is recommended that these items be serviced by a Yamaha dealer. – 63 –... - Page 70 PRINTED IN CHINA 2015906×1 ! 7HC-F8199-70-E0...
- Page 71 MANUEL D’UTILISATION Il convient de lire attentivement ce manuel avant la première utilisation de la machine. MZ175 MZ200 MZ250 MZ300 MZ360 MX360 LIT-19626-02-32 7HC-F8199-70...
- Page 72 Les gaz d’échappement du moteur de ce produit contiennent des substances chimiques connues dans l’État de Californie pour provoquer le cancer, des anomalies congénitales et des troubles de la reproduction. Il convient de lire attentivement ce manuel avant la première utilisation de la machine.
- Page 73 INTRODUCTION Nous vous félicitons d’avoir acheté votre nouveau Yamaha. Ce manuel vous donnera les renseignements nécessaires à une bonne compréhension de base du fonctionnement et de l’entretien de cette machine. Si vous avez des questions relatives au fonctionnement ou à l’entretien de votre machine, veuillez prendre contact avec un concessionnaire Yamaha.
- Page 74 AVERTISSEMENT Un AVERTISSEMENT signale un dan- N.B. ger qui, s’il n’est pas évité, peut provo- 9 Yamaha s’efforce en permanence quer la mort ou des blessures graves. d’améliorer la conception et la qualité de ses produits. Par conséquent, même si ce manuel contient les ATTENTION toutes dernières informations sur les...
- Page 75 Prévention des chocs électriques ..3 Filtre du réservoir de carburant EMPLACEMENT DES ÉTIQUETTES (pour les modèles équipés d’un IMPORTANTES ........5 réservoir de carburant Yamaha) ..44 DESCRIPTION ........15 Remplacement de fusible FONCTION DE COMMANDE ....18 (pour modèle à démarrage Contacteur du moteur .......
-
Page 76: Informations De Sécurité
INFORMATIONS DE SÉCURITÉ 9 Ne laissez aucun enfant utiliser le moteur polyva- lent. 9 Ne placez aucun obstacle sur le moteur polyva- lent. Les fumées d’échappement sont toxiques 9 L’utilisation d’un moteur polyvalent en intérieur PEUT VOUS TUER EN QUELQUES MINUTES. Les gaz d’échappement du moteur polyvalent contiennent du monoxyde de carbone. -
Page 77: Le Moteur Et Le Silencieux Peuvent Être Chauds
9 Ne laissez pas le moteur polyvalent à l’intérieur du véhicule ou dans le coffre. 9 En cas d’ingestion de carburant, d’inhalation de vapeurs de carburant ou de contact du carburant avec vos yeux, prenez immédiatement contact avec un médecin. Si du carburant est renversé sur votre peau ou vos vêtements, lavez immédiate- ment votre peau avec du savon et de l’eau, et changez de vêtements. -
Page 78: Prévention Des Chocs Électriques
9 Évitez de placer une matière inflammable quel- conque près de la sortie d’échappement lors du fonctionnement. 9 Pour éviter toute surchauffe, veillez à ce que le débit d’air soit adéquat en maintenant la machine à au moins 1 m (3 ft) de tout objet ou autre équi- pement. - Page 79 – 4 –...
-
Page 80: Emplacement Des Étiquettes Importantes
Veuillez vous assurer de bien lire les étiquettes sui- vantes avant d’utiliser la machine. N.B. Maintenez ou remplacez les étiquettes de sécurité et d’instructions, selon les besoins. (MZ175) 2 (avec modèle de réservoir de carburant) (sans modèle de réservoir de carburant) – 5 –... - Page 81 LISEZ LE MANUEL DU PROPRIÉTAIRE ET TOUTES LES ÉTIQUETTES AVANT L'UTILISATION. NE FAITES FONCTIONNER QUE DANS DES LIEUX BIEN AÉRÉS. LES GAZ D'ÉCHAPPEMENT CONTIENNENT DU MONOXYDE DE CARBONE NOCIF. VÉRIFIEZ QU'IL N'Y A PAS DE FUITES DE CARBURANT OU DE CARBURANT RENVERSÉ.
- Page 82 (MZ200) 1 (avec modèle de réservoir de carburant) (sans modèle de réservoir de carburant) – 7 –...
- Page 83 7CN-F4162-40 LISEZ LE MANUEL DU PROPRIÉTAIRE ET TOUTES LES ÉTIQUETTES AVANT L'UTILISATION. NE FAITES FONCTIONNER QUE DANS DES LIEUX BIEN AÉRÉS. LES GAZ D'ÉCHAPPEMENT CONTIENNENT DU MONOXYDE DE CARBONE NOCIF. VÉRIFIEZ QU'IL N'Y A PAS DE FUITES DE CARBURANT OU DE CARBURANT RENVERSÉ.
- Page 84 (MZ250, MZ300 (7VB)) 1 (avec modèle de réservoir de carburant) (sans modèle de réservoir de carburant) – 9 –...
- Page 85 7CN-F4162-40 LISEZ LE MANUEL DU PROPRIÉTAIRE ET TOUTES LES ÉTIQUETTES AVANT L'UTILISATION. NE FAITES FONCTIONNER QUE DANS DES LIEUX BIEN AÉRÉS. LES GAZ D'ÉCHAPPEMENT CONTIENNENT DU MONOXYDE DE CARBONE NOCIF. VÉRIFIEZ QU'IL N'Y A PAS DE FUITES DE CARBURANT OU DE CARBURANT RENVERSÉ.
- Page 86 (MZ300 (7CS), MZ360) 2 (avec modèle de réservoir de carburant) (sans modèle de réservoir de carburant) – 11 –...
- Page 87 7CN-F4162-40 LISEZ LE MANUEL DU PROPRIÉTAIRE ET TOUTES LES ÉTIQUETTES AVANT L'UTILISATION. NE FAITES FONCTIONNER QUE DANS DES LIEUX BIEN AÉRÉS. LES GAZ D'ÉCHAPPEMENT CONTIENNENT DU MONOXYDE DE CARBONE NOCIF. VÉRIFIEZ QU'IL N'Y A PAS DE FUITES DE CARBURANT OU DE CARBURANT RENVERSÉ.
- Page 88 (MX360) LISEZ LE MANUEL DU PROPRIÉTAIRE ET TOUTES LES ÉTIQUETTES AVANT L'UTILISATION. NE FAITES FONCTIONNER QUE DANS DES LIEUX BIEN AÉRÉS. LES GAZ D'ÉCHAPPEMENT CONTIENNENT DU MONOXYDE DE CARBONE NOCIF. VÉRIFIEZ QU'IL N'Y A PAS DE FUITES DE CARBURANT OU DE CARBURANT RENVERSÉ.
- Page 89 – 14 –...
-
Page 90: Description
DESCRIPTION (MZ175, MZ200, MZ360) (MZ250, MZ300 (7VB)) – 15 –... - Page 91 1 Bouchon du réservoir de car- (MZ300 (7CS)) burant (pour les modèles équipés d’un réservoir de car- burant Yamaha) 2 Réservoir de carburant (pour les modèles équipés d’un réservoir de carburant Yamaha) 3 Levier d’accélérateur 4 Poignée du lanceur à rappel...
- Page 92 1 Bouchon du réservoir de car- (MX360) burant 2 Couvercle du boîtier de filtre à 3 Carburateur 4 Boulon de vidange d’huile 5 Bouchon de remplissage d’huile 6 Bougie 7 Silencieux 8 Réservoir de carburant 9 Témoin d’avertissement d’huile (rouge) 0 Contacteur du moteur q Poignée du lanceur à...
-
Page 93: Fonction De Commande
FONCTION DE COMMANDE Contacteur du moteur Le contacteur du moteur commande le système d’allu- mage. 1 « ON » / « 7 » (MARCHE) Le circuit d’allumage est sous tension. Le moteur peut être mis en route. 2 « OFF » / « 5 » (ARRÊT) Le circuit d’allumage est hors tension. -
Page 94: Bouchon Du Réservoir De Carburant (Pour Les Modèles Équipés D'un Réservoir De Carburant Yamaha)
Bouchon du réservoir de carburant (pour les modèles équipés d’un réservoir de carburant Yamaha) Déposez le bouchon du réservoir de carburant en le tournant dans le sens antihoraire. Levier du robinet de carburant Le robinet de carburant fournit du carburant du réser- voir de carburant au carburateur. -
Page 95: Levier Du Starter
Levier du starter Le démarrage d’un moteur froid requiert un mélange air-carburant plus riche, qui est fourni par le levier du starter. 1 Levier du starter A B C Les fonctions et caractéristiques varient en fonction des modèles. 701-025c 701-033b Levier d’accélérateur Le levier d’accélérateur commande le régime du moteur. -
Page 96: Préparation
PRÉPARATION Carburant (pour les modèles équipés d’un réservoir de carburant Yamaha) AVERTISSEMENT 9 Le carburant est très inflammable et toxique. L i s e z a t t e n t i v e m e n t s e c t i o n «... - Page 97 6,1 L (1,61 US gal, 1,34 Imp gal) MX360 6,1 L (1,61 US gal, 1,34 Imp gal) Votre moteur Yamaha a été conçu pour une utilisation avec de l’essence sans plomb régulière avec un indice d’octane à la pompe ((R+M)/2) de 86 ou supérieur, ou un indice d’octane de recherche de 91 ou supérieur.
-
Page 98: Huile Moteur
Huile moteur ATTENTION Le moteur polyvalent est expédié sans huile moteur. Ne mettez pas le moteur en marche avant de l’avoir rempli d’une quantité suffisante d’huile moteur. 1. Placez le moteur polyvalent sur une surface plane. 2. Retirez le bouchon de remplissage d’huile. 1 Bouchon de remplissage d’huile 3. -
Page 99: Connexion De La Batterie (Pour Les Modèles Équipés De Démarreur Électrique)
32˚F 80˚F Qualité d’huile moteur recommandée : Type API Service SE ou supérieur Quantité d’huile moteur : MZ175 0,6 L (0,63 US qt, 0,53 Imp qt) MZ200 0,6 L (0,63 US qt, 0,53 Imp qt) MZ250 1,0 L (1,06 US qt, 0,88 Imp qt) -
Page 100: Contrôle Préalable À L'utilisation
Contrôle préalable à l’utilisation Carburant (voir page 21 pour les instructions sur le réservoir de carburant Yamaha) 9 Contrôlez le niveau de carburant dans le réservoir de carburant. 9 Faites le plein si nécessaire. -
Page 101: Fonctionnement
FONCTIONNEMENT AVERTISSEMENT Ne faites jamais fonctionner le moteur dans un endroit fermé, car cela risque de provoquer des pertes de connaissance et la mort en peu de temps. Faire fonctionner le moteur dans un espace bien aéré. ATTENTION Le moteur polyvalent est expédié sans huile moteur. - Page 102 3. Déplacez légèrement le levier d’accélérateur dans le sens de la flèche. 3 Levier d’accélérateur A B C Les fonctions et caractéristiques varient en fonction des modèles. 4. Tournez le contacteur du moteur sur « ON » / « 7 » (MARCHE). 4 «...
- Page 103 6. (Modèle démarrage électrique) Mettez le contac- teur du moteur sur « 6 » (DÉMARRAGE). Retirez votre main immédiatement du bouton après que le moteur démarre. 5 « 6 » (DÉMARRAGE) 763-120a ATTENTION Si le moteur ne démarre pas, relâchez le contac- teur, attendez quelques secondes, puis essayez à...
-
Page 104: Arrêt Du Moteur
8. Placez le levier d’accélérateur sur la position sou- haitée. 7 « » Diminuez le régime moteur 8 « » Augmentez le régime moteur A B C Les fonctions et caractéristiques varient en fonction des modèles. Arrêt du moteur 1. Déplacez complètement le levier d’accélérateur dans le sens de la flèche. - Page 105 2. Mettez le contacteur du moteur sur « OFF » / « 5 » (ARRÊT). 2 « OFF » / « 5 » (ARRÊT) A Modèle à démarrage manuel B Modèle à démarrage électrique 763-120b 3. Mettez le levier du robinet de carburant sur ARRÊT.
-
Page 106: Fonctionnement En Haute Altitude
à une altitude supérieure à 4000 ft. (1219 mètres). Si vous faites fonctionner votre moteur à une altitude supérieure à 4000 ft. (1219 mètres), demandez à votre concessionnaire Yamaha local d’effectuer les modifications néces- saires sur le carburateur. Ce moteur doit être utilisé dans sa configuration d’origine à... -
Page 107: Entretien Périodique
Si vous n’êtes pas familiarisé avec les opérations d’entretien, faites-les exécuter par un concessionnaire Yamaha. Tableau de périodicité des entretiens AVERTISSEMENT Arrêtez le moteur avant d’entamer des travaux d’entretien. ATTENTION Utilisez exclusivement des pièces de rechange Yamaha d’origine. Consultez votre concessionnaire Yamaha pour plus d’informations. Initial Tous les Contrôle Élément Routine préalable à... - Page 108 *1·····Augmentez la fréquence de nettoyage de l’élément de filtre à air en cas d’utilisation dans des zones particulièrement poussiéreuses ou humides. ·····Étant donné que ces éléments requièrent des outils spéciaux, des données et des compé- tences techniques, faites effectuer la maintenance par un concessionnaire Yamaha. – 33 –...
-
Page 109: Inspection De La Bougie
L’isolateur en porcelaine autour de l’électrode cen- trale de la bougie doit être d’un brun moyen à clair. A MZ175, MZ200 B MZ250, MZ300, MZ360 C MX360 3. Contrôlez le type de bougie et l’écartement des électrodes. -
Page 110: Réglage Du Carburateur
Réglage du carburateur Le carburateur est une partie vitale du moteur. Le réglage doit être réalisé par un concessionnaire Yamaha doté des connaissances professionnelles, des données spécialisées et des équipements appro- priés. Remplacement de l’huile moteur AVERTISSEMENT Évitez de vidanger l’huile moteur juste après l’arrêt du moteur. - Page 111 32˚F 80˚F Qualité d’huile moteur recommandée : Type API Service SE ou supérieur Quantité d’huile moteur : MZ175 0,6 L (0,63 US qt, 0,53 Imp qt) MZ200 0,6 L (0,63 US qt, 0,53 Imp qt) MZ250 1,0 L (1,06 US qt, 0,88 Imp qt)
-
Page 112: Filtre À Air (Sauf Pour Mx360)
6. Installez le couvercle du boîtier de filtre à air et serrez les vis. A MZ175, MZ200, MZ300 (7CS), MZ360 B MZ250, MZ300 (7VB) – 37 –... -
Page 113: Filtre À Air (Pour Mx360)
Filtre à air (pour MX360) 1. Retirez l’écrou du couvercle du boîtier de filtre à air puis retirez le couvercle du boîtier de filtre à air. 1 Écrou du couvercle du boîtier de filtre à air 2 Couvercle du boîtier de filtre à air 2. - Page 114 6. Installez l’élément en mousse sur le filtre à air. N.B. Assurez-vous que les plans de joint de l’élément en mousse correspondent au filtre à air de sorte qu’il n’y ait pas de fuites d’air. ATTENTION Le moteur ne doit jamais fonctionner sans l’élé- ment en mousse, sinon cela risque de provoquer une usure excessive des pistons et des cylindres.
-
Page 115: Pare-Étincelles
Pare-étincelles AVERTISSEMENT Le moteur et le silencieux seront très chauds après que le moteur ait fonctionné. Veillez à ne pas toucher le moteur et le silencieux lorsqu’ils sont encore chauds avec une partie de votre corps ou de vos vêtements durant l’inspec- tion ou la réparation. - Page 116 3 Bosse de pare-étincelles 4 Orifice 6. Installez la vis, puis serrez-la. (Pour MZ175, MZ200, MZ360) 1. Desserrez le boulon du capuchon du silencieux, puis retirez le capuchon du silencieux et la grille du silencieux. 1 Boulon du capuchon du silencieux...
- Page 117 4. Vérifiez la grille du silencieux et le pare-étincelles. Remplacez toute pièce endommagée. 5. Installez le pare-étincelles. N.B. Alignez le bosse de pare-étincelles avec l’orifice dans le tuyau du silencieux. 5 Bosse de pare-étincelles 6 Orifice 6. Installez la grille du silencieux sur le capuchon du silencieux, puis installez le capuchon du silen- cieux au silencieux.
-
Page 118: Robinet De Carburant
Robinet de carburant AVERTISSEMENT N’utilisez jamais d’essence à proximité d’une flamme nue ou lorsque vous fumez. 1. Arrêtez le moteur. 2. Mettez le levier du robinet de carburant sur ARRÊT. 1 ARRÊT 3. Retirez le bol du robinet de carburant, le joint et la crépine à... -
Page 119: Filtre Du Réservoir De Carburant (Pour Les Modèles Équipés D'un Réservoir De Carburant Yamaha)
Filtre du réservoir de carburant (pour les modèles équipés d’un réservoir de carburant Yamaha) AVERTISSEMENT N’utilisez jamais d’essence à proximité d’une flamme nue ou lorsque vous fumez. 1. Retirez le bouchon du réservoir de carburant et le filtre du réservoir de carburant. - Page 120 2. Remplacez le fusible grillé par un fusible d’ampé- rage approprié. 3 Fusible Fusible spécifié : 779-042 10 A N.B. Si le fusible grille de nouveau, consultez un conces- sionnaire Yamaha. 3. Installez le couvercle, puis serrez les vis. – 45 –...
-
Page 121: Remisage
REMISAGE Le remisage à long terme de votre machine nécessi- tera la mise en œuvre de procédures préventives contre sa détérioration. Vidange du carburant 1. Mettez le contacteur du moteur sur « OFF » / « 5 » (ARRÊT). 1 « OFF » / « 5 » (ARRÊT) A Modèle à... - Page 122 4. Mettez le levier du robinet de carburant sur MARCHE. 3 MARCHE 5. Mettez le moteur en marche et laissez-le tourner jusqu’à ce qu’il s’arrête. Le moteur s’arrête au bout de 20 minutes environ par manque de carburant. N.B. La durée de fonctionnement du moteur dépend de la quantité...
-
Page 123: Moteur
Moteur Suivez les étapes suivantes pour protéger le cylindre, le segment de piston, etc. de toute corrosion. 1. Retirez la bougie, versez environ une cuillerée à soupe d’huile moteur (voir page 36) dans l’orifice de bougie et réinstallez la bougie. Démarrez le moteur à... -
Page 124: Dépannage
DÉPANNAGE Le moteur ne démarre pas 1. Circuits de carburant Aucun carburant n’est acheminé vers la chambre de combustion. 2 Aucun carburant dans le réservoir ..Faites l’ap- point de carburant. 2 Carburant dans le réservoir ..Levier du robinet de carburant sur MARCHE. - Page 125 Étincelle insuffisante 2 Bougie encrassée de calamine ou mouillée ..Éliminez les dépôts de calamine ou essuyez la bougie pour la sécher. 2 Système d’allumage défectueux ..Consultez un concessionnaire Yamaha. – 50 –...
- Page 126 (voir « AVERTISSEMENT ») Consultez un Ajoutez de l’huile concessionnaire moteur. Yamaha. AVERTISSEMENT 9 P o u r é v i t e r t o u t R I S Q U E Contrôlez la bougie. D’INCENDIE, assurez-vous de 9 Type : BPR4ES l’absence de carburant à...
- Page 127 – 52 –...
- Page 128 Encrassé 9 Encrassement de la Le moteur ne remplacez canalisation de car- démarre pas. burant 9 Encrassement de Correct l’élément de filtre à air. C onsu lte z un c once ssio nn ai re Yamaha. – 53 –...
- Page 129 E Batterie défectueuse et / ou moteur du démarreur. Consultez un concessionnaire Yamaha. Contrôlez le niveau d’huile moteur. Correct Niveau bas Consultez un Ajoutez de l’huile concessionnaire moteur. Yamaha. O Contrôlez la bougie. 9 Type : BPR4ES 9 Écartement : 0,7–0,8 mm (0,028–0,031 in)
-
Page 130: Caractéristiques
CARACTÉRISTIQUES Dimensions MZ175 MZ175 Unité Avec modèle de réservoir de Sans modèle de réservoir de carburant carburant Longueur totale mm (in) 343 (13,50) 298 (11,73) Largeur totale mm (in) 353 (13,90) 352 (13,86) Hauteur totale mm (in) 407 (16,02) 238 (9,37) Poids à... - Page 131 MZ360 MZ360 Unité Avec modèle de réservoir de Sans modèle de réservoir de carburant carburant Longueur totale mm (in) 425 (16,73) 443 (17,44) Largeur totale mm (in) 451 (17,76) 452 (17,80) Hauteur totale mm (in) 485 (19,09) 306 (12,05) Poids à sec kg (lb) 31–40 (68–88) 31–40 (68–88)
-
Page 132: Moteur
Moteur MZ175 MZ175 Unité Avec modèle de réservoir de Sans modèle de réservoir de carburant carburant Type Essence, 4 temps à soupape Essence, 4 temps à soupape en tête, refroidi par air en tête, refroidi par air Disposition des Incliné, monocylindre Incliné, monocylindre... - Page 133 MZ200 MZ250 Unité Sans modèle de réservoir de Avec modèle de réservoir de carburant carburant Type Essence, 4 temps à soupape Essence, 4 temps à soupape en tête, refroidi par air en tête, refroidi par air Disposition des Incliné, monocylindre Incliné, monocylindre cylindres Cylindrée...
- Page 134 MZ300 MZ300 Unité Sans modèle de réservoir de Sans modèle de réservoir de carburant carburant Type Essence, 4 temps à soupape Essence, 4 temps à soupape en tête, refroidi par air en tête, refroidi par air Disposition des Incliné, monocylindre Incliné, monocylindre cylindres Cylindrée...
- Page 135 MZ360 MZ360 Unité Sans modèle de réservoir de Avec modèle de réservoir de carburant carburant Type Essence, 4 temps à soupape Essence, 4 temps à soupape en tête, refroidi par air en tête, refroidi par air Disposition des Incliné, monocylindre Incliné, monocylindre cylindres Cylindrée...
- Page 136 MZ360 MX360 Unité Sans modèle de réservoir de Avec modèle de réservoir de carburant carburant Type Essence, 4 temps à soupape Essence, 4 temps à soupape en tête, refroidi par air en tête, refroidi par air Disposition des Incliné, monocylindre Incliné, monocylindre cylindres Cylindrée...
-
Page 137: Informations Client
; les chiffres restants représentent le numéro de production de l’unité. Consignez ces numéros à des fins de référence pour vos commandes de pièces auprès d’un concessionnaire Yamaha. Registres de numéro d’identifica- PRI-I.D. NUMÉRO : tion Consignez votre identifiant primaire et les MODÈLE... -
Page 138: Système De Contrôle Des Émissions D'échappement Et Composants
Les acronymes sont conformes à la version la plus récente du document des pratiques recommandées SAE J1930 « Acronymes Diagnostiques, Termes et Définitions du sys- tème électrique / électronique ». Il est recommandé que ces éléments soient entretenus par un concessionnaire Yamaha. – 63 –... - Page 140 IMPRIMÉ EN CHINE 2015906×1 ! 7HC-F8199-70-F0...
Need help?
Do you have a question about the MZ175 and is the answer not in the manual?
Questions and answers