Table of Contents
Advertisement
Quick Links
Advertisement
Table of Contents

Subscribe to Our Youtube Channel
Related Manuals for iBall Baton iB-WRT300N


Summary of Contents for iBall Baton iB-WRT300N
- Page 1 300M MIMO Triple Smart Router Model No. iB-WRT300N User Manual Ver.: 1.0.0...
-
Page 2: Fcc Statement
FCC STATEMENT This equipment has been tested and found to comply with the limits for a Class B digital device, pursuant to part 15 of the FCC Rules. These limits are designed to provide reasonable protection against harmful interference in a residential installation. -
Page 3: Ce Mark Warning
CE Mark Warning This is a class B product. In a domestic environment, this product may cause radio interference, in which case the user may be required to take adequate measures. -
Page 4: Table Of Contents
TABLE OF CONTENTS 300M MIMO TRIPLE SMART ROUTER CHAPTER 1 INTRODUCTION CHAPTER 2. EASY SETUP WIZARD UTILITY CHAPTER 3 ROUTER CONFIGURATION PORT FORWARDING SECURITY SETTINGS ADVANCED SETTINGS SYSTEM TOOLS CHAPTER 4 TROUBLESHOOTING APPENDIX A. SPEC SUMMARY TABLE APPENDIX B. GLOSSARY APPENDIX C. -
Page 5: 300M Mimo Triple Smart Router
Chapter 1 . Introduction iBall Baton 300M MIMO Triple smart Router complies with IEEE 802.11 b/g/n wireless standards. MIMO Technology - Wireless Transmission speed up to 300Mbps. Triple Smart Router Supports ADSL Internet (xDSL): 1 - 10/100M RJ11 WAN port... -
Page 6: Hardware Installation
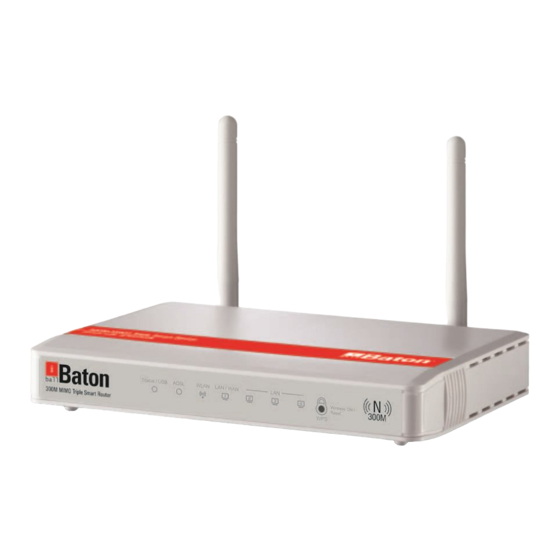
1.2 Hardware Installation Back View Antenna Antenna Power USB Ports RJ-11 Port LAN / WAN RJ45 LAN Ports Front View Status/USB ADSL LED WLAN LED LAN/WAN LEDs WPS/Wireless/ LAN1~LAN4 LEDs Reset Button... - Page 7 B. Installation Steps DO NOT Note: connect the router to power before performing the installation steps below. Locate an optimum location for the router. The best place is usually near the center of the area in which your PC(s) will wirelessly connect. b.
-
Page 8: Led Indicators
1.2.2 LED indicators LED Status Description Green in flash Power is on Green in fast Reset mode Status (USB) flash Green 2G /3G USB modem Green in flash Data access Green in flash xDSL connection is established ADSL Green in fast Data packet transferred via DSL Line flash Green... - Page 9 Step 2. Plug your RJ-11 port into the ADSL port. Plug your Broadband connection on router RJ45 WAN port Step 3. Plug the power jack into it. Step 4. Connect the power adapter one end to the router and other end into an electrical outlet Step 5 Power on your PC and Cable/DSL modem...
-
Page 10: Chapter 2. Easy Setup Wizard Utility
Chapter 2. Easy Setup Wizard There are two methods for you to set up the 300M MIMO easily. Method - I Easy Setup Wizard Method - II Web Based configuration through browser Method - I Easy Setup Wizard Configuring the Router via Easy Setup Wizard (Resource CD) Step1. - Page 11 Step 2. Select Language then click “Next” to continue. Step 3. Then click the “Wizard” to continue. Step 4. Click “Next” to continue.
- Page 12 Step 5. Select Wireless Enable, and then click “Next” to continue. Step 6. Enter SSID, Channel and Security options, and then click “Next” to continue. Step 7. Select Ethernet WAN Service by clicking Ethernet WAN icon to configure Ethernet WAN Connection.
- Page 13 Step 8. Select Ethernet WAN Connection Type by clicking on proper icon to continue Step 9. Select ADSL WAN Service by clicking ADSL WAN icon to configure ADSL WAN Connection. Step 10. a) Select ADSL WAN Connection Type by clicking on proper icon to continue...
- Page 14 b) Select PPPoE ADSL WAN Type and fill the User Name, Password provided by ISP (BSNL/MTNL) c) Select Wireless WAN to Configure 3G Internet Connection d) Default Setting is Auto detection for USB Modem...
- Page 15 Step 11. Click “Next” to save your setting. Step 12. Click “Next” to WAN Networking service. Step 13. Click “Next” to test the Internet connection or you can ignore test.
-
Page 16: Login To The Router
Setup is completed. Method - II Configuring the Router by Web Console Web-based utility, it is easy to configure and manage the iB-WRT300N 300M MIMO Triple Smart Router. Web-based utility can be used on any Windows, Macintosh or UNIX OS with a Web browser, such as Microsoft Internet Explorer, Mozilla Firefox or Apple Safari. - Page 17 Router Configuration with the Quick Setup Default Router Settings IP Address: 192.168.1.1 User Name: admin Password: admin Step 1 Select Quick Setup for Basic settings in a simple way. Step 2 Change System Password. Set up your system password.(Default:admin) Step 3 Select Time Zone...
- Page 18 Step 4 Select WAN Type. Choose Auto-Detecting or Manually to set WAN Type. Step 5 Select WAN Type. Image displays “ADSL” WAN connection type as the main internet access. Step 6 You need to Manually configure the User name & password as per ISP. Step 7 Set up your Wireless Network.
-
Page 19: Chapter 3 Router Configuration
Step 9 Apply your settings to Continue. Step 10 Click finish to Complete it. Chapter 3 Router Configuration Whenever you want to configure your network or this device, you can access the Configuration Menu by opening the web-browser and typing in the IP Address of the device. The default IP Address is: 192.168.1.1. -
Page 20: Basic Network
Basic Network Status Info. Note : You can view the connection status on ‘Status’ page. -
Page 21: Network Setup
3.1.1 LAN & WAN Setup You can enter Network Setting, LAN / WAN / Wi-Fi for LAN and Internet setting as below. 3.1.1.1 Network Setup Internet Setup WAN Interface: You may select the following WAN type for your internet connection ADSL WAN Type: WAN connection type of your ISP. - Page 22 A. Ethernet Over ATM(RFC1483 Bridged) with NAT IP mode: select Dynamic IP address or Static IP address Host Name: input your host name if you have one. Connection Control: you can choose Connect-on-demand, Auto Reconnect (always-on) and manually. Maximum idle time : 600 seconds NAT disable: If you enable this option, it will act with a non-NAT function.
- Page 23 VPI and VCI, Schedule Type: these values depend on your ISP setting. Schedule type: UBR / CBR / VBR / GFR, depend on your ISP setting. 10. Multicast: you may enable as auto mode or select by IGMP v1, IGMP v2 and IGMP v3.
- Page 24 PPPoE Service name and assigned IP address: input the value if necessary. MTU: put all information here. NAT disable: If you enable this option, it will act with a non-NAT function. Bridge mode: If you enable this option, it will act with a bridge mode for ADSL function.
- Page 25 C. PPPoA IPv6 Dual-stack: You can enable / disable the function of IPv4/IPv6 stack. PPPoE Account and Password: The account and password your ISP assigned to you. For security, this field appears blank. If you don't want to change the password, leave it blank. Primary DNS/ Secondary DNS: input the Primary/Secondary DNS if necessary.
- Page 26 Meanwhile, if the device detected Ethernet WAN connection is recovered, your router will switched to use the Ethernet WAN Internet connection service. 2. Host Name: Optional, required by some ISPs, Default : iB-WRT300N. 3. ISP registered MAC Address: Enter MAC address of your ISP. (Optional) 4.
- Page 27 with ISP until the connection is established. Manually mode the device will not make the link until someone clicks the connect-button in the Status-page. 5. NAT disable: If you enable this option, it will act with a non-NAT function. 6. Multicast: you may enable as auto mode or select by IGMP v1, IGMP v2, and IGMP 7.
- Page 28 C. PPP over Ethernet IPv6 Dual-stack: You can enable / disable the function of IPv4/IPv6 stack. PPPoE Account and Password: The account and password your ISP assigned to you. For security, this field appears blank. If you don't want to change the password, leave it blank.
- Page 29 D. PPTP 1. IP Mode: Please check the IP mode your ISP assigned, and select “Static IP Address” or “Dynamic IP Address”. 2. Server IP and Server IP Address/Name: The IP address of the PPTP server and designated Gateway provided by your ISP. 3.
- Page 30 E. L2TP 1. IP Mode: Please check the IP mode your ISP assigned, and select “Static IP Address” or “Dynamic IP Address”. 2. My IP Address and My Subnet Mask: The private IP address and subnet mask your ISP assigned to you. 3.
- Page 31 7. Maximum Transmission Unit (MTU): Most ISP offers MTU value to users. The default MTU value is 0 (auto). 3G+ Wireless Configuration This menu is used to configure 3G Internet Connection. Default setting is Auto Detect. Router will detect your 2G/3G USB modem APN and other settings automatically and connect to your ISP.
- Page 32 3.1.1.3 IPv6 IPv6 setting: Disable or enable the IPv6 settings. IPv6 Connection: you may select the connection of Static IPv6/ DHCPv6/ PPPoE/ PPPoA / 6to4 in IPv4 tunnel. DNS Setting: you may select to obtain DNS server address automatically or use following DNS address.
- Page 33 WAN IPv6 address setting for 6 to 4: you may obtain IPv6 DNS automatically or set DNS address manually for Primary DNS address and secondary DNS address. LAN IPv6 address setting: LAN IPv6 address and LAN IPv6 Link-Local address. Address auto configuration setting: Disable or enable this auto configuration setting.
- Page 34 WAN IPv6 address setting forIPv6 in IPv4 Tunnel: you may add remote / local IPv4 address and local IPv6 address, then set DNS address manually for Primary DNS address and secondary DNS address. LAN IPv6 address setting: LAN IPv6 address and LAN IPv6 Link-Local address.
-
Page 35: Wireless Settings
3.1.1.4 Wireless Settings AP Router Mode “AP Router Mode” With this function user can configure the Internet as per WAN connection type & Access Internet through Wi-Fi as well as wired. AP Mode “AP Only mode” With this function Access point acts as a central transmitter and receiver of WLAN radio signals. -
Page 36: Wds Only Mode
WDS Only Mode “WDS Only mode” With the function Router can bridge two or more WLAN’S. Note: If this checkbox is selected, you better make sure the following settings are correct. 1. Wireless Bridging: You could enable this function by selecting “Enable”. 2. -
Page 37: Universal Repeater Mode
Universal Repeater Mode “Universal Repeater Mode” This function provides to act as AP client and AP at the same time. It can use AP client function to connect to a Root AP and use AP function to service all wireless stations within its coverage. All the stations within the coverage of this access point can be bridged to the Root AP. - Page 38 Open Open system authentication simply consists of two communications. The first is an authentication request by the client that contains the station ID (typically the MAC address). This is followed by an authentication response from the AP/router containing a success or failure message. An example of when a failure may occur is if the client's MAC address is explicitly excluded in the AP/router configuration.
- Page 39 WPS (Wi-Fi Protected Setup) WPS (Wi-Fi Protection Setup) features user to secure Advance Wireless protection for your wireless network. There are 2 modes for Wireless Security PIN Method PBC (Push Button Control) Method WPS:.You can enable this function by selecting “Enable”. WPS offers a safe and easy way to allow the wireless clients connected to your wireless network.
-
Page 40: Virtual Server
3.1.2 Forwarding 3.1.2.1 Virtual Server This product’s NAT firewall filters out unrecognized packets to protect your Intranet, so all hosts behind this product are invisible to the outside world. If you wish, you can make some of them accessible by enabling the Virtual Server Mapping. A virtual server is defined as a Service Port, and all requests to this port will be redirected to the computer specified by the Server IP. -
Page 41: Port Triggering
3.1.2.2 Port Triggering Some applications require multiple connections, like Internet games, Video conferencing, Internet telephony, etc. Because of the firewall function, these applications cannot work with a pure NAT router. The Special Applications feature allows some of these applications to work with this product. If the mechanism of Special Applications fails to make an application work, try setting your computer as the DMZ host instead. - Page 42 1. IP Address of DMZ Host DMZ (Demilitarized Zone) Host is a host without the protection of firewall. It allows a computer to be exposed to unrestricted 2-way communication for Internet games, Video conferencing, Internet telephony and other special applications. 2.
-
Page 43: Static Routing Table
3.1.3 Routing 3.1.3.1 Static Routing Table If you have more than one routers and subnets, you will need to enable routing table to allow packets to find proper routing path and allow different subnets to communicate with each other. The routing table allows you to determine which physical interface addresses are utilized for outgoing IP data grams. -
Page 44: Change Password
3.1.4 Change Password You can change the System Password here. We strongly recommend you to change the system password for security reason. Click on “Save” to store your settings. 3.1.4 DHCP & Dyndns Setting 3.1.4.1 DHCP Server 1. DHCP Server: Choose either Disable or Enable. If you enable the DHCP Server function, the following settings will be effective. - Page 45 Press “More>>” and you can find more settings. 5. Primary DNS/Secondary DNS: Optional. This feature allows you to assign a DNS Servers 6. Primary WINS/Secondary WINS: Optional. This feature allows you to assign a WINS Servers 7. Gateway: Optional. Gateway Address would be the IP address of an alternate Gateway.
-
Page 46: Dynamic Dns
3.1.4.2 Dynamic DNS To host your server on a changing IP address, you have to use dynamic domain name service (DDNS). Therefore, anyone wishing to reach your host only needs to know the name of it. Dynamic DNS will map the name of your host to your current IP address, which changes each time you connect your Internet service provider. -
Page 47: 3.2.1. Security Settings
3.2. Advance Settings 3.2.1. Security Settings 3.2.1.1. IP Filtering Packet Filter includes both outbound filter and inbound filter. And they have same way to setting. It enables you to control what packets are allowed to pass the router. Outbound filter applies on all outbound packets. However, inbound filter applies on packets that destined to Virtual Servers or DMZ host only. - Page 48 For source or destination IP address, you can define a single IP address (192.168.1.10) or a range of IP addresses (192.168.1.10 – 192.168.1.100). An empty field implies all IP addresses. For source or destination port, you can define a single port (80) or a range of ports (1000-1999).
-
Page 49: Domain Filtering
Domain Filtering 3.2.1.2. Domain Filter prevents users under this device from accessing specific URLs. 1. Domain Filter: Check if you want to enable Domain Filter. 2. Log DNS Query: Check if you want to log the action when someone accesses the specific URLs. -
Page 50: Mac Filtering
1. URL Blocking: Check if you want to enable URL Blocking. 2. URL: If any part of the Website's URL matches the pre-defined word, the connection will be blocked. For example, you can use pre-defined word "sex" to block all websites if their URLs contain pre-defined word "sex". - Page 51 1. MAC Address Control: Check “Enable” to enable the “MAC Address Control”. All of the settings in this page will take effect only when “Enable” is checked. 2. Connection control: Check "Connection control" to enable the controlling of which wired and wireless clients can connect with this device. If a client is denied to connect with this device, it means the client can't access to the Internet either.
-
Page 52: Qos Configuration
3.2.2. QoS Quality of service is the ability to provide different priority to different applications, users, or data flows, or to guarantee a certain level of performance to a data flow. 3.2.2.1.1. QoS Configuration QoS : you can select enable/disable the QoS control QoS Mode : you can select Smart-QoS or User defined QoS rule for your own QoS control Bandwidth of upstream / bandwidth of Downstream : you can input the value of... - Page 53 Example for QoS with FBM enable : Mr. David selects Game/ VoIP/ Video 3 applications for higher priority in his system, the system will automatically reserve 10% of minimum rate of bandwidth to other application, and share the rest minimum rate of bandwidth (100-10)/3=30% each to Game/VoIP/Video.
- Page 54 Cross-layer QoS: you can enable/disable this QoS system. QoS Mode : you can select User defined QoS rule for your own QoS control Bandwidth of upstream / bandwidth of Downstream : you can input the value of maximize of upstream and downstream bandwidth from your ISP Advance setting: you can press the button of ‘Add New Rule’...
- Page 55 MINR Minimum bandwidth Rate KBps/MBps SESSION Connection session number DROP Drop packet None Log event None ALERT Alert event None Direction: you can select in bond/ out bond for your direction. Direction in bond out bond BOTH in bond & out bond DSCP setting: you can set your own DSCP value here.
- Page 56 Ex. Please mark CS3 when packet in/ out via UDP port 5060. Once you saved the QoS rule, system will show you the rule as below, you can add another new rule accordingly. System will show you all your QoS rule as below...
- Page 57 3.2.3. VLAN The VLAN function allows you to divide local network into different “virtual LAN”. In some cases, ISP may need the router to support “VLAN tag” for certain kinds of services (e.g. IPTV) to work properly. There are 4 LAN ports with this router, so you can have up to 4 VLAN if required. All 4 LAN ports belong to one VLAN by default.
- Page 58 3.2.4. Management SNMP 3.2.4.1. In brief, SNMP, the Simple Network Management Protocol, is a protocol designed to give a user the capability to remotely manage a computer network by polling and setting terminal values and monitoring network events. 1. Enable SNMP: You must check “Local”, “Remote” or both to enable SNMP function. If “Local”...
-
Page 59: System Tools
TR-069 3.2.4.2. TR-069: Disable or enable the TR-069 settings. ACS setting: you may add ACS URL/ Username/ Password. CPE setting: you may add CPE connection request port/ username /password. Inform setting: you may enable/disable the interval of informing CPE. Interval: you may input seconds for every interval. Note: The TR-069 ISP feature is currently not used in India 3.2.5. -
Page 60: System Information
System Information 3.2.5.1. You can view the System Information WAN Type & Display time in this page. System Log Local Log 3.2.5.2. You can check the entire local log. System Log Remote Log 3.2.5.3. You can check all the Remote / System log. System Log ... -
Page 61: Firmware Upgrade
Maintenance 3.2.5.5. You can change the User name & password for Login to the Router. Firmware Upgrade 3.2.5.6. You can upgrade firmware by clicking “Upgrade” button. System Time 3.2.5.7. You can change the Time Zone. Default is GMT+5:30. Diagnostic Tools & Misc. 3.2.5.8. -
Page 62: Remote Management
Scheduling 3.2.5.9. You can also Schedule the entire Rule as per requirement. Remote Management 3.2.5.10. You can control this Router from Public IP. -
Page 63: Chapter 4 Troubleshooting
Why can’t I configure the router even the cable is plugged and the LED is lit? Note: It is recommended that you use an Ethernet connection to configure it Check Ping test to make sure that the iB-WRT300N Router is responding. Go to Start > Run. Type cmd. Press OK. - Page 64 Right-click on Wireless Card bus Adapter or your specific network adapter. Select Properties to ensure that all drivers are installed properly. Look under Device Status to see if the device is working properly. Click “OK”. What can I do if my Ethernet connection does not work properly? Make sure the RJ45 cable connects with the router.
- Page 65 What can I do if my wireless client can not access the Internet? Out of range: Put the router closer to your client. Wrong SSID or Encryption Key: Check the SSID or Encryption setting. III. Connect with wrong AP: Ensure that the client is connected with the correct Access Point.
-
Page 66: Appendix A. Spec Summary Table
Appendix A. Spec Summary Table Device Interface iB-WRT300N ADSL2+ connector, 1 x RJ-11 port ITU 992.1 (G.dmt) Annex A, ADSL2 /2+ ITU 992.2 (G.lite), ● Standard Module ITU 992.3 ADSL2 (G.dmt.bis), ITU 992.5 ADSL2+ Ethernet WAN 1 xRJ45 port LAN/WAN configurable... - Page 67 SNMP, UPnP IGD, Syslog ● Remote ● Management Web-based UI, remote login, Administration ● backup/restore setting Environment & Certification Package Content iB-WRT300N, Power adapter, Quick ● Installation Guide, CD Device dimension (mm) ● 150x112x20 Temp.: 0~40°C, Operation Temp. ● Humidity 10%~90% non-condensing...
-
Page 68: Appendix B. Glossary
Appendix B: Glossary 802.11b - The 802.11b standard specifies a wireless product networking at 11 Mbps using direct-sequence spread-spectrum (DSSS) technology and operating in the unlicensed radio spectrum at 2.4GHz, and WEP encryption for security. 802.11b networks are also referred to as Wi-Fi networks. ... - Page 69 Infrastructure Network - An infrastructure network is a group of computers or other devices, each with a Wireless N USB Adapter, connected as an 802.11 wireless LAN. In infrastructure mode, the wireless devices communicate with each other and to a wired network by first going through an access point.
-
Page 70: Appendix C. Contact Information
Appendix C: Contact Information COPYRIGHT & TRADEMARKS Specifications are subject to change without notice. iBall Baton is a registered trademark of Best IT World (India) Pvt. Ltd. Other brands and product names are trademarks or registered trademarks of their respective holders.
Need help?
Do you have a question about the iB-WRT300N and is the answer not in the manual?
Questions and answers