
Related Manuals for Waterax Versax


Summary of Contents for Waterax Versax
- Page 1 VERSAX Owner's Manual Publication Date: 11/2015 Publication Number: 701244, Rev. 4...
- Page 2 This document provides information proprietary to WATERAX Inc. and cannot be used or disclosed without WATERAX’s written authorization. WATERAX Inc. reserves the right to make changes without notice in its products or components as research and development or marketing conditions warrant. Changes affecting the operation of any component in this manual will be reflected in a subsequent revision.
-
Page 3: Table Of Contents
Service ..........................15 Parts Breakdown ..........................15 Disassembly and Assembly of the Pump End ................20 Disassembly Procedure for VERSAX Pump End ................17 Assembly Procedure for VERSAX Pump End ................17 VERSAX-9 Wiring ........................... 22 FastWire Wiring Diagrams ......................23 Pump End Technical Data.................... -
Page 4: Important Safety Instructions
READ THIS MANUAL BEFORE OPERATING YOUR PUMP! The improper use of the WATERAX pump could result in serious injuries as well as damage to the pump. Any operator should familiarize himself with the apparatus and its capabilities before trying to operate the equipment in an emergency situation. -
Page 5: Preventing Damage To Equipment
Operating the pump in such a manner can overheat the pump causing damage to seals, or pump internals. It is recommended that all fasteners be replaced with genuine WATERAX parts. When mounting manifolds to the pump, the manifolds must be self-supporting and ®... -
Page 6: Abbreviations And Terms
WATERAX VERSAX Owner's Manual These instructions cover most wildland and municipal pump applications. If the application the pump is being used for does not fall into these general guidelines, consult WATERAX Inc. for any additional safeguards, operating, or maintenance considerations that may be required. -
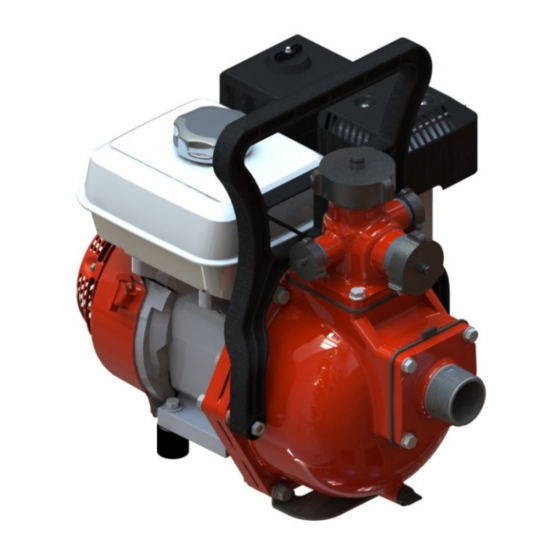
Page 7: About The Versax Series
EPA Certified Configurations The VERSAX series is used for a variety of wildland and municipal firefighting applications. Your model may be configured as a portable, standalone pump equipped with a carry handle, or it may be purchased in the vehicle-mount configuration that can be directly fastened onto a fire apparatus. -
Page 8: Parts Identification
Installation Depending on your model and configuration ordered, you may require additional accessories from WATERAX or from third-party vendors, for example, control panels and batteries. You will also require hoses and nozzles as well as other fire apparatus plumbing which can be purchased through your WATERAX representative. Follow the instructions and heed all warnings in any documentation that you receive with the accessories you purchase. -
Page 9: Installing A Control Panel
WATERAX VERSAX Owner's Manual Installing a Control Panel See User Instructions shipped with the specific model of control panel you ordered for your pump. Using a Battery for Electric Starters and Control Panels The VS2-9EV requires a battery to power electrical and electronic components such as starters, and control panels. -
Page 10: Operating Versax Series Pumps
Before using your pump, follow this verification procedure: 1. Visually inspect product When you first receive your VERSAX pump, inspect the product and check for any damage. Notify the supplier if any damage is found. 2. Check all fluid levels regarding the pump and any related equipment. Before first use, you must prepare the engine which is shipped dry. -
Page 11: Drafting
WATERAX VERSAX Owner's Manual Drafting Before you draft Pumps should not be run dry, and therefore the pump ends require priming prior to operation. Use this procedure if you are drafting water from an open tank or natural water source. -
Page 12: Priming The Pump
WATERAX VERSAX Owner's Manual Drafting connections 1. Connect a suction line to the pump intake. 2. Install a suction strainer on the other end of the suction hose and place in the water source. Note: To provide proper operation of the pump, the suction hose/strainer should be submerged a minimum of 4 to 6 times the hose diameter into the water source. -
Page 13: Startup And Discharge
WATERAX VERSAX Owner's Manual Startup and Discharge 1. Fill fuel tank with recommended fuel grade. Fill tank and securely replace cap. 2. Start the engine. Open fuel valve. Close/engage choke, if engine is cold. Increase throttle past the idle position. -
Page 14: Cold Weather Operation
WATERAX VERSAX Owner's Manual Cold Weather Operation The pump can be run in below freezing temperatures if certain precautions are taken to avoid the formation of ice in the pump. 1. After priming the pump, the unit should be run at low speed for a short period of time to allow all components to warm up before continuing with the remaining operating procedures. -
Page 15: Troubleshooting
Suction Flap Valve Pump Does Not Meet Performance Incompatible Piping size and configuration may be too restrictive. Contact a WATERAX Installation Inc. representative if assistance is needed in evaluating the unit’s piping. Gauge or Check that all gauges are calibrated and that all equipment is in proper Instrument condition. - Page 16 If the pump was purchased used, check that the actual configuration will achieve the desired performance. A WATERAX Inc. representative can be contacted for assistance. Check pump lift. Refer to “Pump Loses Prime or Will Not Prime: Suction Lift Too High”...
-
Page 17: Service
Service This section includes instructions for overhaul and maintenance requiring disassembly of the WATERAX VERSAX series pumps. It does not include engine maintenance. For maintenance instructions regarding the engine, as well as for oil and fuel recommendations, please refer to the engine manufacturer’s manual. - Page 18 WATERAX VERSAX Owner's Manual Figure 2: Exploded view of the VERSAX 9 HP pump end (vehicle configuration). ITEM NO DESCRIPTION ITEM NO DESCRIPTION 800208 VSC124 NUT CASING VERSAX 800220 VSC120 WASHER (SPRING)-IMPELLER VERSAX 800196 VSC138 YOKE SHAFT 1" VERSAX 800207...
-
Page 19: Disassembly And Assembly Of The Pump End
1-1/8" SAE Wrench key: 9/16" Disassembly Procedure for VERSAX Pump End The following steps refer to figure 1 Remove handle #33 by removing the nut-bushings #32. Remove nuts #1 from screws #34. Remove screws #26 from nuts #1. - Page 20 WATERAX VERSAX Owner's Manual Install the rotating part of the mechanical rotary seal #6 onto the stub shaft #7. Ensure the carbide face will face the stationary part of the mechanical rotary seal. The two carbide face must face each other.
- Page 21 WATERAX VERSAX Owner's Manual ITEM NO DESCRIPTION 801145 SCREW M8X1.25X30 HEX CAP ZINC 800548 R-119 LOCWASHER M8 SPLIT ZINC 800539 R-206 WASHER M8 FLAT ZINC 701195 ANTI-VIBRATION MOUNT 30MM X 30MM M8 FEM THREAD Figure 6: Exploded view of the anti-vibration mount and fasteners (on VS2-6P model only).
- Page 22 801285 NUT 5/16-18 HEX NYLON LOCK ZINC 800477 A-7586-2 WASHER 5/16 FLAT ZINC 10 701298 FRAME WHEEL BRACKET ASSEMBLY VERSAX 11 801281 SCREW 5/16-18X2 HEX CAP ZINC 12 801284 NUT 5/8-11 HEX THIN NYLON LOCK ZINC * IS NOT INCLUDED IN THE CART KIT...
- Page 23 WATERAX VERSAX Owner's Manual Installation The following steps refer to figure 10 1. Remove the handle #1 from the base frame. 2. Install the frame extension #3 onto the base frame, ensuring a proper lock between the extension and the quick release buttons.
-
Page 24: Versax-9 Wiring
WATERAX VERSAX Owner's Manual VS2-9EV Wiring Standard WATERAX wiring configuration: The VERSAX-9EV pump is wired from the factory to work with an XCP control panel. To revert to the original engine controls, refer to the next section for instructions. XCP vs. Engine Controls: A WATERAX XCP control panel cannot be operated simultaneously with the original engine controls;... -
Page 25: Fastwire Wiring Diagrams
WATERAX VERSAX Owner's Manual FastWire Wiring Diagrams WIRING FOR GASOLINE PUMPS *Pins 7 & 8 connected on GX630 engine only. 11/2015... -
Page 26: Pump End Technical Data
WATERAX VERSAX Owner's Manual Pump End Technical Data Threads Discharge port 1 1-1/2” [38 mm] NPT male Discharge port 2 1” [25 mm] NPT male Discharge port 3 1” [25 mm] NPT male Suction (intake) port 2” [51 mm] NPT male Priming port 2”... - Page 27 WATERAX VERSAX Owner's Manual Notes 11/2015...
- Page 28 WATERAX VERSAX Owner's Manual 11/2015...
-
Page 29: Warranty
WATERAX, (the “Purchaser”) that its products, including any pump parts products manufactured by WATERAX (the “Products”) sold under Seller’s brands will be free of defects in material and workmanship for the applicable Warranty Period (as set out in full at www.waterax.com/eng/warranty). - Page 30 WATERAX Inc. 6635 Henri-Bourassa W. Montreal, QC H4R 1E1 TF 855-616-1818 T 514-637-1818 F 514-637-3985 info@WATERAX.com www.WATERAX.com All information contained in this document including drawings is proprietary to WATERAX and may not be copied, reproduced or used in whole or in part without our prior written permission.
Need help?
Do you have a question about the Versax and is the answer not in the manual?
Questions and answers