Table of Contents
Advertisement
Quick Links
Advertisement
Table of Contents

Related Manuals for Alecto DVM-190


Summary of Contents for Alecto DVM-190
- Page 1 USERS MANUAL DVM-190 DVM-191...
-
Page 2: Table Of Contents
CONTENTS INTENDED USE ....................4 FUNCTION OVERVIEW PARENT UNIT ....................4 ICONS ON THE DISPLAY OF THE PARENT UNIT .......... 6 BABY UNIT......................6 INSTALLATION BABY UNIT......................8 PARENT UNIT ....................9 SWITCHING ON/OFF ..................13 CONNECTION INDICATOR ................13 PARENT UNIT VOLUME ................. - Page 3 MENU LANGUAGE ..................20 CONTRAST AND BRIGHTNESS ..............20 ALERT TONE ....................20 TEMPERATURE ..................... 21 SOUND ACTIVATION LEVEL ................. 23 SOUND ACTIVATION LEVEL FOR DISPLAY ..........24 VIBRATION FUNCTION .................. 24 5.10 CLOCK ......................25 5.11 (WAKE-UP) ALARM ..................26 BABY UNIT REGISTRATION/DEREGISTRATION REGISTRATION OF NEW BABY UNIT ............
-
Page 4: Intended Use
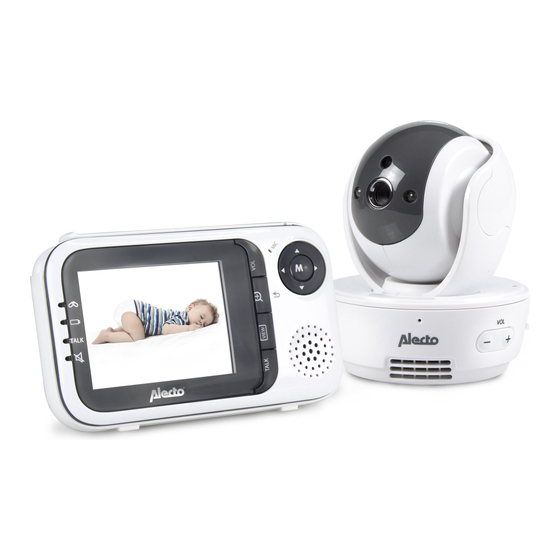
INTENDED USE The Alecto DVM-190 is a wireless audio/video observation system, suitable for private use indoors. By default, the set comes with 1 baby unit, but the parent unit is capable of showing the images of 4 baby units simultaneously or the images of 8 cameras one after the other. - Page 5 turns on while talking back to the baby unit turns on when the speaker is turned off display battery compartment (rear) VOL button (press before you can use the buttons to adjust the volume) push-button ZOOM; also one step back during setup VIEW button (to switch on the display or ‘next camera’...
-
Page 6: Icons On The Display Of The Parent Unit
2.2 ICONS ON THE DISPLAY OF THE PARENT UNIT: While using the system, the following icons can appear in the display: shows the reception strength turns on when zoom mode is enabled turns on while playing lullabies turns on when the acoustic temperature alarm is activated display of the actual temperature at the selected baby unit indication of the sound level at the selected baby unit indication of the sound level while adjusting... - Page 7 7. power switch 8. status indicator: - off when the camera is switched off - flashes when there is no connection with the parent unit - remains lit while connected with the parent unit 9. temperature sensor 10. antenna 11. screw connection for stand (6mm or 1/4”) 12.
-
Page 8: Installation
INSTALLATION 3.1 BABY UNIT: Power supply: 1. Connect the wide plug of the 6V power adaptor to the 6V DC input on the right side of the baby unit. 2. Plug the adaptor into a 230V wall socket. Make sure the baby cannot reach the baby unit or wire. - Page 9 Stand: The bottom of the baby unit is provided with a stand connection point with a screw thread of 6mm (1/4”). Use this connection to attach a stand (not included). Positioning tips: • For use as a baby monitor: place the baby unit at least 2 meters away from your baby and make sure to safely tuck away the adaptor cable.
-
Page 10: Parent Unit
3.2 PARENT UNIT: Power supply: The parent unit can be powered directly by the included rechargeable battery or via the supplied power adaptor with the small plug. As soon as you connect the power adaptor, it will charge the battery allowing for mobile use of the parent unit. Battery: 1. - Page 11 Power adaptor: 1. Connect the 6V power adaptor with the small plug to the 6V DC input at the right side of the baby unit. 2. Plug the adaptor into a 230V wall socket. Make sure nobody can trip or fall over the adaptor cable.
- Page 12 • The charging circuit for the battery is managed electronically and there is no risk of overcharging, this allows you to leave the adaptor connected at all times. • In case you will not use the set for a longer period of time (>3 months), please make sure to disconnect the adaptor from the wall socket and remove the battery from the parent unit.
-
Page 13: Use
4.1 SWITCHING ON/OFF: Parent unit: Press and hold the button for 2 to 3 seconds to switch on the parent unit. Baby unit: Slide the ON/OFF switch to the ON position to switch on the baby unit and back to the OFF position to turn off the baby unit. 4.2 CONNECTION INDICATOR: As soon as you switch on the parent unit, the connection indicator LINK will start flashing while the parent unit is searching for a baby unit. -
Page 14: Baby Unit Volume
4.4 BABY UNIT VOLUME: Repeatedly press the VOL + / - button to increase / decrease the playback volu- me for lullabies and the volume for the talk-back function at the baby unit. A short beep tone will sound when you reach the minimum or maximum level. 4.5 TALKING BACK: Press the TALK button on the parent unit to talk back to the baby unit. -
Page 15: Automatic Nightvision
4.8 AUTOMATIC NIGHTVISION: The baby unit is provided with built-in infra-red LEDs; these LEDs will automa- tically switch on when the baby room becomes darker and they will switch off again when it becomes light. The LEDs can illuminate objects up to a distance of approximately 2 meters. -
Page 16: Switching Off The Display
4.10 SWITCHING OFF THE DISPLAY: By default, the display is switched on continuously. You can turn it off by briefly pressing the button, this will not influence the sound. Press a random button on the parent unit to switch the display back on. –... -
Page 17: Multi-Camera
4.12 MULTI-CAMERA: If you have registered multiple cameras at the parent unit, you can press the VIEW button to switch to the images of the next camera. – The order is ascending (CAM-1, CAM-2, .., CAM-8). – Cameras that are not registered will be skipped. –... -
Page 18: Menu Controlled Functions And Settings
MENU CONTROLLED FUNCTIONS AND SETTINGS 5.1 INTRODUCTION: The DVM-190 provides various user settings you can easily set up via a menu on the display. 1. press the M button to open the menu 2. scroll through the menu options using 3. - Page 19 Only the image shown with an upper and lower dotted line is ‘live’ and all other images are frozen. In this mode, no sound is reproduced and the talk-back function is unavailable. You can view the ‘live’ images on full screen by pressing the VIEW button, after several seconds the multi-display will be automatically restored.
-
Page 20: Menu Language
5.3 MENU LANGUAGE: Use this option to set the language in which the various instructions are shown on the display: 1. press the M button 2. use to select [LANGUAGE] 3. use to select the desired language 4. press the VIEW button to save your selection and leave the menu 5.4 CONTRAST AND BRIGHTNESS: To adjust the display contrast and brightness, follow these steps: 1. -
Page 21: Temperature
[Low Battery Tone]: for the alert tone when the battery is nearly exhausted [No Link Alert]: for the alert tone when the connection is interrupted (this alert will sound 5 short beep tones once) [Sound Alert]: for the alert tone when the baby is crying loudly while the volume is set to 0 5. - Page 22 in [Minimum]: – press the M button – first, use to select the desired baby unit (or select [All Baby units] to set the same minimum temperature for all baby units) – then use to set the lower limit – press the button to go one step back in the menu tree in [Maximum]:...
-
Page 23: Sound Activation Level
6. dpress the VIEW button to save your selection and leave the menu When the temperature alert is activated, will appear in the upper part of the display. The alert tones will sound once when the limit is exceeded, after which a notification appears in the display every minute. -
Page 24: Sound Activation Level For Display
This automatic switching function does not work when you set the sensitivity (see previous paragraph) to ‘Always on’. 5.9 VIBRATION FUNCTION: As an additional notification, you can set the DVM-190 to briefly vibrate when the baby unit detects a sound. 1. press the M button 2. -
Page 25: Clock
[Off]: the vibration function is switched off 5. press the VIEW button to save your selection and leave the menu 5.10 CLOCK: In the upper right corner in the display of the parent unit, the actual time is shown. Set the time by following these steps: 1. -
Page 26: Wake-Up) Alarm
5.11 (WAKE-UP) ALARM: In the parent unit, you can program a (wake-up) alarm to wake you up or to remind you of any appointments. You can program 3 individual alarms. 1. press the M button 2. use to select [ALARM] 3. -
Page 27: Baby Unit Registration/Deregistration
BABY UNIT REGISTRATION/DEREGISTRATION 6.1 REGISTRATION OF NEW BABY UNIT: You can register up to 8 baby units (cameras) on each DVM-190 parent unit. See paragraph 5.2 (Display mode) for display options when using multiple cameras. To register a new baby unit on the parent unit, follow these steps: 1. -
Page 28: Deregistration Of Baby Unit
6.2 DEREGISTRATION OF BABY UNIT: To deregister baby units no longer in use, follow these steps. 1. press the M button on the parent unit 2. use to select [PAIR/UNPAIR] 3. press the M button 4. use to select the option [Unpair] 5. -
Page 29: Installatie
• Only connect or disconnect the power adaptor to/from the baby unit or parent unit when the power adaptor is removed from the wall socket. • Never install the DVM-190/191 during thunder storms. • Never touch any non-isolated adaptor cables, unless the adaptors are removed from the wall socket. -
Page 30: Maintenance
7.5 MAINTENANCE: • Only clean the baby monitor with a moist cloth; never use chemical cleaners. Before any cleaning, you must disconnect the adaptors. 7.6 RANGE: • The baby display monitor has a range of up to 300 meters in an open field and up to 50 meters indoors;... -
Page 31: Problemsolving
Now, switch the parent unit and baby unit back on. • If you still receive no images or sound, please contact the customer service of Alecto via the phone number 073 6411 355 (Netherlands) or 03 238 5666 (Belgium). -
Page 32: Declaration Of Conformity
DECLARATION OF CONFORMITY The Alecto DVM-190 / DVM-191 meets all essential requirements and provisions as described in the European Directive 1999/5/EC. The declaration of conformity is available on the website www.alecto.info The use of this equipment is allowed in all countries in the EU. -
Page 33: Specifications
SPECIFICATIONS Range: up to 50 meters indoors up to 300 meters outdoors Parent unit power supply: 3.7V Lithium Polymer battery (incl.), brand BYD 6VDC 800mA power adaptor (incl.) model: Ten Pao S006MV0600080 Baby unit power supply: 4x 1.5V AA batteries (excl.) 6VDC 1000mA power adaptor (incl.) model: Ten Pao S006MV0600100. -
Page 34: Garantie
GARANTIE For the Alecto DVM-190 / DVM-191 you have a warranty of 24 months from the date of purchase. During this period, we guarantee the free repair of defects caused by material and workmanship errors. All this subjected to the final assess- ment of the importer. - Page 36 WWW.ALECTO.INFO Service SERVICE@ALECTO.NL NL 073 6411 355 (Lokaal tarief) (Lokaal tarief) BE 03 238 5666 (Tarif local) Help DE 0180 503 0085 (Lokale Festnetzkosten) Hesdo, Australiëlaan 1, 5232 BB, The Netherlands ‘s-Hertogenbosch, ver1.1...
Need help?
Do you have a question about the DVM-190 and is the answer not in the manual?
Questions and answers