
Related Manuals for KT&C KNC-HDi47


Summary of Contents for KT&C KNC-HDi47
- Page 1 IP CAMERA Megapixel Network Camera USER MANUAL Before installing and using the camera, please read this manual carefully. Be sure to keep it handy for later reference.
- Page 2 Network Camera User’s Manual A bou t T h i s D ocum e n t T hi s ma n ual is int ended f o r a d m i n i st ra t o rs a n d u se r s of th e I P C A MERA . It i n c lu d e s i n s t ru ct i o n s fo r u s i n g a n d mana gin g t he N etw or k Ca m era on y ou r n e t w or k.
-
Page 3: Notices
Network Camera User’s Manual NoticES This device complies with Part 15 of FCC Rules. Operation is subject to the following two conditions; 1. This device may not cause harmful interference. 2. This device may receive interference that can cause affect the operation of this equipment. Note - This equipment has been tested and found to comply with the limits for a Class A digital device, pursuant to part 15 of the FCC Rules. -
Page 4: For Your Safety
Network Camera User’s Manual FoR yoUR SAFEty All warnings and instructions in this manual should be followed. Save this manual for future reference. Heed all warnings. Follow all instructions. Do not use this apparatus near water. Clean only with a dry cloth. Do not block any ventilation openings. -
Page 5: Table Of Contents
Network Camera User’s Manual tAbLE oF coNtENtS NOTICES FOR YOUR SAFETY OVERVIEW USING THE NETWORK CAMERA CONFIGURING THE NETWORK CAMERA BASIC > NETWORK BASIC > USERS BASIC > VIDEO & AUDIO BASIC > DATE & TIME ADVANCED > CAMERA SETTING ADVANCED >... -
Page 6: Overview
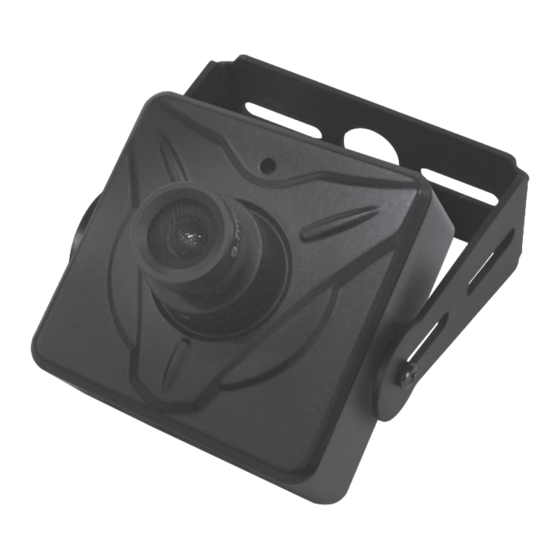
Network Camera User’s Manual ovERviEw Features Thank you for purchasing a network surveillance product. IP SQUARE CAMERA, is a high-performance, Megapixel Network Camera which offers the perfect solution for integrating network-based video surveillance system. Key Features - Onvif Profile S - 2.43 MP, 1/2.8"... - Page 7 Network Camera User’s Manual ovERviEw Description and function IP CAMERA IP MODULE Board Lens Type Pinhole Lens Type Board Lens Type True D/N Type Iris Lens Type (option) Reset Micro SD Reset Micro SD Network Camera User’s Manual...
- Page 8 Network Camera User’s Manual ovERviEw Description and function 1. Reset Button Resets the product to the factory default settings. Press the reset switch for more than 10 seconds, the restore the camera to the function default settings. 2. Service Video Connector Extra video output for convenient installing.
- Page 9 Network Camera User’s Manual ovERviEw Installation IP Camera are designed to be installed using a template as ashown below. Camera Mounting Position Tapping Screw: ø3 x 8(2ea) Machine Screw: M2.6 x 3.5(2ea) CAUTION ! Please start installing in the order shown. Connection 1.
- Page 10 Network Camera User’s Manual ovERviEw Dimensions Unit: mm (inch) IP CAMERA 47.5 47.5 28.3 28.3 Board Lens type Pinhole Lens type IP MODULE 19.4 11.7 22.5 11.7 Board Lens type True D/N Type (Option) (60) 11.7 56.7 Iris Lens Type Network Camera User’s Manual...
-
Page 11: Using The Network Camera
Network Camera User’s Manual USiNg thE NEtwoRk cAMERA The Network Camera can be used with either Internet Explorer or Central Monitoring System (CMS) in Microsoft Windows operating systems. Note: For information on installing the Network Camera, please refer to the Installation Guide. Accessing the Network Camera Start your browser. - Page 12 Network Camera User’s Manual USiNg thE NEtwoRk cAMERA If the Windows Security Alert pop-up window appears, click the “Unblock” Button. After installing the ActiveX Control, a Login page will be displayed. Enter the user ID and password. Note: Default User ID and Password is [ID: admin, Password: admin] Type the user ID and password to connect to the camera.
- Page 13 Network Camera User’s Manual USiNg thE NEtwoRk cAMERA 8. The video image will be displayed in your browser. Important: To view streaming video in Microsoft Internet Explorer, you must set your browser to allow the Web Viewer to be installed on your computer. This ActiveX component will be installed when you access the camera for the first time.
- Page 14 Network Camera User’s Manual USiNg thE NEtwoRk cAMERA Live View page If the Network Camera has been customized on Setup>Advanced>Live View Layout, the buttons and other items shown below may or may not be displayed on the Live View page. The following diagram provides an overview of each available button.
-
Page 15: Configuring The Network Camera
Network Camera User’s Manual coNFigURiNg thE NEtwoRk cAMERA This section describes how to configure the Network Camera and is intended for: • Administrators, who have unrestricted access to the entire Setup menu. • Operators, who have access to the Video & Image, Audio(Option), and Event Configuration settings. The Network Camera is configured from the Setup menu in a standard web browser. -
Page 16: Basic > Network
Network Camera User’s Manual coNFigURiNg thE NEtwoRk cAMERA Basic > Network This section describes the basic network settings and SMTP notification. If the SMTP notification feature is enabled, user can receive an IP change notification by e-mail when the IP address is changed by the DHCP server. -
Page 17: Basic > Users
Network Camera User’s Manual coNFigURiNg thE NEtwoRk cAMERA Basic > Users This section describes the administrator and user account settings. Each user can be configured to different authority levels. 1. Admin Account A. Admin ID – Enter the administrator ID. B. -
Page 18: Basic > Video & Audio
Network Camera User’s Manual coNFigURiNg thE NEtwoRk cAMERA Basic > Video & Audio This section the basic settings for video and audios(Option). Important: These setting values will affect the original video and images. 1. VIDEO STREAM A. Type - Select the video stream type to use for the H.264 and MJPEG image. B. -
Page 19: Text Overlay Settings
Network Camera User’s Manual coNFigURiNg thE NEtwoRk cAMERA Basic > Video & Audio VIDEO Mirror - Provides 4 mode (Normal, ROTATE 90, ROTATE 270, Hor/Ver of image) Maximum video stream time - This feature is used to limit the length of time that the streaming is displayed. - Page 20 Network Camera User’s Manual coNFigURiNg thE NEtwoRk cAMERA Basic > Video & Audio 4. Audio Settings(Option) A. Enable Audio – Select to use for the Audio. Network Camera User’s Manual...
-
Page 21: Basic > Date & Time
Network Camera User’s Manual coNFigURiNg thE NEtwoRk cAMERA Basic > Date & Time This section describes about the date and time settings. 1. Current Server Time A. Date – Displays current date of Network Camera. B. Time – Displays current time of Network Camera. 2. -
Page 22: Advanced > Camera Setting
Network Camera User’s Manual coNFigURiNg thE NEtwoRk cAMERA Advanced > Camera Setting This section describes the advanced settings of the camera. 1. Basic Settings A. Lens Type – The camera lens type. B. Day and Night Mode – The day and night mode can be selected from the drop down list. Auto –... - Page 23 Network Camera User’s Manual coNFigURiNg thE NEtwoRk cAMERA Advanced > Camera Setting 3. Image Adjustment A. Saturation – Select an appropriate level by entering a value in the range between 0-255. Lower values mean less color saturation and the value 255 gives maximum color saturation.
-
Page 24: Advanced > Event Server
Network Camera User’s Manual coNFigURiNg thE NEtwoRk cAMERA Advanced > Event Server This section describes configuring the event server used in the event action section. 1. Select Server A. Select the server type to configure. Configuration is only available for FTP servers. 2. -
Page 25: Advanced > Event Actions
Network Camera User’s Manual coNFigURiNg thE NEtwoRk cAMERA Advanced > Event Actions This section describes how to configure the Network Camera for event handling. Various actions can be configured to run when certain types of event occur. 1. Trigger / Action Type Defines the trigger type or action type. - Page 26 Network Camera User’s Manual coNFigURiNg thE NEtwoRk cAMERA Prepare to configure event action Event Servers are used for receiving uploaded image files and/or notification messages. To set up an Event server for your Network Camera, go to Setup > Advanced > Event Server or Setup > Advanced >...
-
Page 27: Action Configuration For [Motion Detection + Upload Image + Ftp]
Network Camera User’s Manual coNFigURiNg thE NEtwoRk cAMERA Action configuration for [Motion Detection + Upload Image + FTP] 1. Enter a descriptive event name. 2. Select the enable 3. Select the trigger type to motion detection. 4. Select the action type to upload image. 5. -
Page 28: Action Configuration For [Motion Detection + Upload Image + E-Mail]
Network Camera User’s Manual Configuring the Network Camera Action configuration for [Motion Detection + Upload Image + E-mail] 1. Enter a descriptive event name. 2. Select the enable. 3. Select the trigger type to motion detection. 4. Select the action type to upload image. 5. -
Page 29: Action Configuration For [Motion Detection + Upload Image + Sd Card]
Network Camera User’s Manual coNFigURiNg thE NEtwoRk cAMERA Action configuration for [Motion Detection + Upload Image + SD Card] Network Camera User’s Manual... - Page 30 Network Camera User’s Manual coNFigURiNg thE NEtwoRk cAMERA 1. Enter a descriptive event name. 2. Select the enable. 3. Select the trigger type to motion detection. 4. Select the action type to upload image. 5. Select the upload type to SD Card. 6.
-
Page 31: Action Configuration For [Motion Detection + E-Mail Notification]
Network Camera User’s Manual coNFigURiNg thE NEtwoRk cAMERA Action configuration for [Motion Detection + E-mail Notification] 1. Enter a descriptive event name. 2. Select the enable. 3. Select the trigger type to motion detection. 4. Select the action type to e-mail notification. 5. -
Page 32: Action Configuration For [Manual Trigger + Upload Image + Ftp]
Network Camera User’s Manual coNFigURiNg thE NEtwoRk cAMERA Action configuration for [Manual Trigger + Upload Image + FTP] 1. Enter a descriptive event name. 2. Select the enable. 3. Select the trigger type to manual trigger. 4. Select the action type to upload image. 5. -
Page 33: Action Configuration For [Manual Trigger + Upload Image + E-Mail]
Network Camera User’s Manual coNFigURiNg thE NEtwoRk cAMERA Action configuration for [Manual Trigger + Upload Image + E-mail] 1. Enter a descriptive event name. 11. Select pre-trigger buffer. 2. Select the enable. 12. Select post-trigger buffer. 3. Select the trigger type to manual trigger. 13. -
Page 34: Action Configuration For [Manual Trigger + Upload Image + Sd Card]
Network Camera User’s Manual coNFigURiNg thE NEtwoRk cAMERA Action configuration for [Manual Trigger + Upload Image + SD Card ] 1. Enter a descriptive event name. 2. Select the enable. 3. Select the trigger type to Manual Trigger. 4. Select the action typ to upload image. 5. -
Page 35: Action Configuration For [Manual Trigger + E-Mail Notification]
Network Camera User’s Manual coNFigURiNg thE NEtwoRk cAMERA Action configuration for [Manual Trigger + E-mail Notification] 1. Enter a descriptive event name. 2. Select the enable. 3. Select the trigger type to manual trigger. 4. Select the action type to e-mail notification. 5. -
Page 36: Action Configuration For [Network Fail + Upload Image + Sd Card]
Network Camera User’s Manual coNFigURiNg thE NEtwoRk cAMERA Action configuration for [Network Fail + Upload Image + SD Card] 1. Enter a descriptive event name. 2. Select the enable. 3. Select the trigger type to network fail. 4. Select the action type to upload image. 5. -
Page 37: Action Configuration For [Sd Card Scheduling]
Network Camera User’s Manual coNFigURiNg thE NEtwoRk cAMERA Action configuration for [SD Card Scheduling] Note: The avi file is continuously saved as 1 minute files. 1. Select the trigger type to sd card scheduling. 2. Select the enable. 3. Select the enable. 4. -
Page 38: Action Configuration For [Reboot]
Network Camera User’s Manual coNFigURiNg thE NEtwoRk cAMERA Action configuration for [Reboot] 1. Enter a descriptive event name. 2. Select the enable. 3. Select the trigger type to reboot. Note: Action type is pre-selected to e-mail notification. 4. Enter the e-mail address which receives notification. 5. -
Page 39: Advanced > Motion Settings
Network Camera User’s Manual coNFigURiNg thE NEtwoRk cAMERA Advanced > Motion Settings 1. Motion Detection Area A. This screen displays the live video image and users can configure the motion detection field as desired on the screen. 2. Motion Detection Setting A. - Page 40 Network Camera User’s Manual coNFigURiNg thE NEtwoRk cAMERA Configuration of motion detection 1. Enter a descriptive window name. 2. Select the Threshold Value. Note: Higher level – Only very large objects trigger motion detection. Lower level – Even small objects trigger motion detection. (Default values: 20%) 3.
-
Page 41: Advanced > Smtp
Network Camera User’s Manual coNFigURiNg thE NEtwoRk cAMERA Advanced > SMTP This section describes how to configure the SMTP server. 1. SMTP Server A. Server Name – Enter the SMTP server’s Network address or host name. Important: A DNS server must be specified in the Setup>Advanced>Advanced network if you are using a host name. -
Page 42: Advanced > Advanced Network
Network Camera User’s Manual coNFigURiNg thE NEtwoRk cAMERA Advanced > Advanced Network This section describes the advanced network settings. 1. Host Name Setting A. Host Name – The Network Camera can be accessed using a host name instead of an IP address. The host name is usually the same as the assigned DNS name. - Page 43 Network Camera User’s Manual coNFigURiNg thE NEtwoRk cAMERA 3. NTP Setting A. NTP IP Address – Enter the NTP server’s IP address or host name. Important: The DNS server must be specified if you are using a host name. 4. HTTP A.
-
Page 44: Advanced > Https
Network Camera User’s Manual coNFigURiNg thE NEtwoRk cAMERA Advanced > HTTPS This section describes the HTTPS settings. HTTPS provides encryption and secure identification of the server over an insecure network. 1. Create A. Country – Enter a 2 letter code name of the country where the certificate will be used. B. -
Page 45: Advanced > Rtp
Network Camera User’s Manual coNFigURiNg thE NEtwoRk cAMERA Advanced > RTP This section describes the RTP settings. The RTP settings manage the IP addresses and port numbers to use for video streams. 1. Port Range A. The RTP port range defines the range of ports that the video streams will automatically use. Limit the range of ports permitted for RTP unicast or multicast by entering the Start port and End port in the provided fields with the value between 1024 and 65535. -
Page 46: Advanced > Mask
Network Camera User’s Manual coNFigURiNg thE NEtwoRk cAMERA Advanced > Mask This section describes how to configure privacy mask. 1. Privacy Mask Area A. This screen displays the live video image and user can configure a Privacy Mask window as desired on the screen. - Page 47 Network Camera User’s Manual coNFigURiNg thE NEtwoRk cAMERA Configuration of privacy mask Create a Privacy Mask window with the following steps as shown below. 1. Enter a descriptive window name. 2. Check the check box for use. 3. Click the add button to create the new Privacy Mask window. 4.
-
Page 48: Advanced > Live View Layout
Network Camera User’s Manual coNFigURiNg thE NEtwoRk cAMERA Advanced > Live View Layout This section describes the settings of the live view layout. 1. Display Control in the Live View - The live view page can be customized as desired. To enable the control buttons, check the preferred check box. -
Page 49: Advanced > Ip Address Filter
Network Camera User’s Manual coNFigURiNg thE NEtwoRk cAMERA Advanced > IP Address Filter This section describes how to deny access to the Network Camera from a specific IP address. 1. Security Function: Deny A. Enable IP address filter – Checking this option will allow the user to either deny or allow access to the ip address in the list, which can be controlled by clicking on Deny or Allow option. -
Page 50: Advanced > Sd Card
Network Camera User’s Manual coNFigURiNg thE NEtwoRk cAMERA Advanced > SD CARD This section describes how to manage SD Cards and search for recorded files. 1. Information A. Capacity - If shows the total capacity of the SD Card. B. Usage - If shows a usage percentage of the SD Card. Note: When the overwrite setting is configured to disable, image can’t be saved if the available storage size is less than 8 megabytes. -
Page 51: Maintenance > Initialize & Upgrade
Network Camera User’s Manual coNFigURiNg thE NEtwoRk cAMERA Maintenance > Initialize & Upgrade This section describes how to reset the Network Camera and upgrade the firmware. 1. Initialize A. Reboot – Reboot the Network Camera. B. Restore – Reset all setting values, except network setting values. C. -
Page 52: Maintenance > Logs
Network Camera User’s Manual coNFigURiNg thE NEtwoRk cAMERA Maintenance > Logs This section describes the system logs. 1. System Logs The Network Camera records when a particular event occurs in the log record. A. First Page – Go to the first page of the log record. B. -
Page 53: Support > System / Help
Network Camera User’s Manual coNFigURiNg thE NEtwoRk cAMERA Support > System / Help This section describes the system information and help menu. 1. System Information Displays the system information of the Network Camera. 2. Guide for Troubleshooting If you suspect a problem is being caused by incorrect configuration or some other minor problem, consult the troubleshooting guide. -
Page 54: Product Specifications
Network Camera User’s Manual PRodUct SPEciFicAtioNS DESCRIPTION ITEM Module Type Square Type Board TDN Iris Lens Image Device 1/2.8” SONY 2.43M Progressive Scan CMOS Lens f=2.75mm (3MP) / f=3.7mm (3MP) / f=8mm (1.3MP) / f=4.3mmP4 (1.3MP) f=2.8-12mm (2MP, F1.6) Day/Night Electronic D/N True D/N Electronic D/N... -
Page 55: Troubleshooting
Network Camera User’s Manual tRoUbLEShootiNg This section describes the symptoms, possible causes and corrective actions. Symptoms Remedial Actions If the Network Camera and your computer are located on The Network Camera different subnets, you will not be able to set the IP address. is located on a Contact your network administrator for obtaining an IP different subnet. -
Page 56: Glossary
Network Camera User’s Manual gLoSSARy This section provides glossary for understanding the Network Camera. ActiveX: A control (or set of rules) used by a browser. ActiveX controls are often downloaded and installed automatically as required. API: Application Programming Interface. The API can be used for integrating products into other applications. - Page 57 Network Camera User’s Manual gLoSSARy A private network limited to an organization or corporation. Usually closed to external Intranet : traffic. IP: Internet Protocol. IP address: A unique set of numbers used by a computer on the network to allow it to be identified and found.
- Page 58 Network Camera User’s Manual gLoSSARy Transmission Control Protocol/Internet Protocol. A suite of network protocols that determine how data is transmitted. TCP/IP is used on many networks, including the TCP / IP: Internet. TCP keeps track of the individual packets of information and IP contains the rules for how the packets are actually sent and received.
Need help?
Do you have a question about the KNC-HDi47 and is the answer not in the manual?
Questions and answers