Canon MG3500 Series Online Manual
Hide thumbs
Also See for MG3500 Series:
- Online manual (222 pages) ,
- Troubleshooting manual (185 pages) ,
- Setup manual (5 pages)

Related Manuals for Canon MG3500 Series


Summary of Contents for Canon MG3500 Series
-
Page 1: Online Manual
MG3500 series Online Manual Read Me First Useful Functions Available on the Machine Overview of the Machine English... -
Page 2: Table Of Contents
Contents Read Me First........... . 6 How to Use the Online Manual. - Page 3 Loading Paper / Originals..........65 Loading Paper.
- Page 4 Canon IJ Network Tool Screen........
- Page 5 Canon IJ Network Tool Screen........
-
Page 6: Read Me First
In addition, Canon may suspend or stop the disclosure of this guide due to unavoidable reasons. Canon shall not be liable for any damage suffered by customers as a result of changes in or deletion of information in this guide, or suspension/stoppage of disclosure of this guide. -
Page 7: How To Use The Online Manual
How to Use the Online Manual Symbols Used in This Document Warning Instructions that, if ignored, could result in death or serious personal injury caused by incorrect operation of the equipment. These must be observed for safe operation. Caution Instructions that, if ignored, could result in personal injury or material damage caused by incorrect operation of the equipment. -
Page 8: Trademarks And Licenses
• Photo Rag is a trademark of Hahnemühle FineArt GmbH. • Bluetooth is a trademark of Bluetooth SIG, Inc., U.S.A. and licensed to Canon Inc. • All other company names and products mentioned herein may be trademarks or registered trademarks of their respective companies. -
Page 9: Search Tips
Enter keywords in the search window and click (Search). You can search for target pages in this guide. Entry example: "(your product's model name) load paper", "(your product's model name) 1000" Search Tips You can search for target pages by entering keywords in the search window. Note •... - Page 10 Note • The displayed screen varies depending on your product. • Searching for Application Functions You can find target pages easily by entering your application's name and a keyword for the function you want to learn about. Example: When you want to learn how to print collages with My Image Garden Enter "My Image Garden collage"...
-
Page 11: Window Used In Operation Explanation
Window Used in Operation Explanation In this guide, most of the operations are described based on the windows displayed when Windows 8 operating system (called Windows 8 below) is used. -
Page 12: Useful Functions Available On The Machine
Useful Functions Available on the Machine The following useful functions are available on the machine. Enjoy pleasant photography experience by utilizing various functions. Useful Functions Available from Applications and the Main Unit You can create items such as collages easily or download delightful printing materials, and print them. -
Page 13: Useful Functions Available From Applications And The Main Unit
Useful Functions Available from Applications and the Main Unit On the machine, the following useful functions are available from applications and the main unit. • Print Photos Easily • Download Content Materials • Print Photos on Facebook Print Photos Easily Using an Application Organize Images Easily In My Image Garden, you can register the names of people and events to photos. -
Page 14: Download A Variety Of Content Materials
If there is an item you like, you can easily print it in just two steps. 1. In Image Display of Quick Menu, select the item you want to print. 2. Print the item with My Image Garden. Place Photos Automatically Delightful items are created easily as the selected photos are placed automatically according to the theme. - Page 15 PREMIUM Contents can be downloaded easily via My Image Garden. Downloaded PREMIUM Contents can be printed directly with My Image Garden. To download PREMIUM Contents, make sure that genuine Canon ink tanks/ink cartridges are installed for all colors on a supported printer.
-
Page 16: Helpful Functions Available Through The Network
Helpful Functions Available Through the Network The following useful functions are available on the machine. Enjoy even more pleasant photography experience by utilizing various functions. Use App from Various Environments by Using PIXMA Cloud Link Upload scanned images to the web Print web data easily Print by using Google Cloud Print Print directly from your iPad, iPhone, or iPod touch... - Page 17 • Web Template Form Print Canon offers various template forms including seasonal stationery and calendars on the web. You can download and print the template forms you want anytime, as much as you need, by operating the machine only. Print in Various Environments with Google Cloud Print The machine is compatible with Google Cloud Print (Google Cloud Print is a service provided by Google Inc.).
-
Page 18: Printing With Windows Rt
When the connection is complete, the Canon Inkjet Print Utility software, which allows you to specify detailed print settings, is downloaded automatically. By using Canon Inkjet Print Utility, you can check the printer status and specify detailed print settings. (The available functions will differ depending on your usage environment and connection method.) -
Page 19: Online Storage Integration Function
Online Storage Integration Function The machine can integrate with online storage services such as Evernote. Integration with Online Notetaking Service "Evernote" If an Evernote client application is installed on your computer, you can import scanned images into the application and upload them to the Evernote server. The uploaded images can be browsed from other computers, smartphones, etc. -
Page 20: Printing With Google Cloud Print
Printing with Google Cloud Print The machine is compatible with Google Cloud Print™ (Google Cloud Print is a service provided by Google Inc.). By using Google Cloud Print, you can print from anywhere with applications or services supporting Google Cloud Print. Preparations for Printing with Google Cloud Print Printing from Computer or Smartphone with Google Cloud Print Important... -
Page 21: Preparations For Printing With Google Cloud Print
Preparations for Printing with Google Cloud Print To print with Google Cloud Print, you need to get Google account and register the machine with Google Cloud Print in advance. Getting Google Account If you already have Google account, register the machine. Registering the Machine with Google Cloud Print Getting Google Account First, get your Google account in order to register the machine with Google Cloud Print. - Page 22 3. Select Setup. 4. Select Web service setup -> Web service connection setup -> Google Cloud Print setup -> Register with Google Cloud Print. Note • If you have already registered the machine with Google Cloud Print, the confirmation message to re-register the machine is displayed. 5.
- Page 23 Note • If you have already registered the machine with Google Cloud Print, the confirmation message to re-register the machine is displayed. 4. When the confirmation screen to register the machine is displayed, select Yes. 5. In the print setup for Google Cloud Print, select the display language, and then select Authentication.
-
Page 24: Printing From Computer Or Smartphone With Google Cloud Print
Printing from Computer or Smartphone with Google Cloud Print When you send print data with Google Cloud Print, the machine receives the print data and prints it automatically if the machine is turned on. When printing from a computer, smartphone, or other external device with Google Cloud Print, load paper into the machine in advance. - Page 25 the supported paper sizes, go to the Online Manual home page, and refer to the "Cannot Print Properly with Automatic Duplex Printing" for your model.) • If you select plain paper as media type or if you select B5/A5-size as paper size, the print data is printed with border even when you select the borderless print setting.
-
Page 26: Using Remote Ui
This service allows you to check printer information and execute utility functions from your computer or smartphone. You can also use the convenient web services presented by Canon. Checking the printer IP address To use this service, first check the IP address of this machine from the operation panel of the machine. - Page 27 If your printer does not have a LCD monitor 2. Load one sheet of A4 size or Letter size plain paper 3. Hold down the Stop button until the Alarm lamp flashes 15 times 4. Release the button Printing of the network setup information starts. Remote UI startup In the Web browser, directly enter the IPv4 address that you checked from the LCD monitor of the machine.
- Page 28 AirPrint settings This function allows you to specify the Apple AirPrint settings, such as position information. Google Cloud Print setup This function allows you to register this machine to Google Cloud Print or delete the machine. Firmware update This function allows you to update the firmware and check version information. Manual (Online) This function displays the Online Manual.
-
Page 29: Printing From Airprint Compliant Device
Printing from AirPrint Compliant Device This document explains how to use AirPrint to print wirelessly from your iPad, iPhone and iPod touch to a Canon printer. AirPrint enables you to print photos, email, Web pages and documents from your Apple device directly to your printer without installing a driver. - Page 30 3. From the menu options, tap Print. 4. From Printer Options, select the model that you are using. Important • Because some app does not support AirPrint, Printer Options may not be displayed. If an app does not let you use printer options, you cannot print from that app. Note •...
-
Page 31: Paper Size
• Copies: Select the number of print copies. • Duplex Printing: If the model supports duplex printing, you can select On or Off. • Range: The page range can be used only with specific app and file types (such as PDF files). -
Page 32: Deleting A Print Job
Deleting a Print Job To delete a print job with AirPrint, use one of the following two methods: • From the machine: If your printer has a LCD monitor, use the operation panel to cancel the print job. If you printer does not have a LCD monitor, press the Stop button on the machine to cancel the print job. - Page 33 Note • After you turn on the machine, it may take few minutes before the machine can communicate through a wireless LAN connection. Confirm that the machine is connected to the wireless LAN, and then try printing. • If Bonjour on the machine is disabled, AirPrint cannot be used. Check the LAN settings on the machine, and enable Bonjour.
-
Page 34: How To Use Print From E-Mail
You can print simply from outside like a travel destination. Also, your family or friends can print by registering beforehand. You can use Print from E-mail on any Canon printer that supports the service. Checking Your Environment First, check your environment. - Page 35 1. Print the printer registration page's URL and the PIN code 2. Access the URL and enter the owner's e-mail address and other required information 3. Check if an e-mail has been sent to the e-mail address you entered 4. Access the URL provided in the e-mail and complete the printer registration process Note •...
- Page 36 • From the operation panel of this machine, display the home window and select Setup -> Web service setup -> Web service connection setup -> Print from E-mail setup -> Check address for printing. • From the operation panel of this machine, select Web service ->...
- Page 37 the document can be printed normally on the printer. If the document cannot be printed, refer to the on-screen manual (operating instructions) that comes with the printer. • Check that the file attached to the e-mail is a Adobe PDF file or an JPEG file. •...
- Page 38 • If the Print from E-mail information stored on this printer could not be deleted even though the registration information on the service was deleted, delete the registration information from Deregistration of Registered Printer(s) by performing one of the following operations: ◦...
-
Page 39: Preparing To Use Print From E-Mail
Preparing to Use Print from E-mail To use this service to print a photo or document, you need to follow the procedure provided below and register the machine. Print the Printer Registration Page's URL and the PIN Code First, print the printer registration page's URL and the PIN code. Check that there is sufficient amount of ink in the machine, and then print using the machine's operation panel. - Page 40 Important • If you do not select Agree in the use agreement window, you will not able to register as the printer owner. 3. Enter the printer owner's e-mail address, and click Next Important • An e-mail is sent with the required information for completing the registration to the e-mail address entered for the printer's owner.
- Page 41 Enter any name that will allow you to identify the printer. Important • The maximum number of characters that can be entered is 30. 6. In the Confirm Owner Registration window, check the registration information, and then click Register A temporary password will be displayed. Important •...
-
Page 42: Timezone List
Timezone List (UTC-12:00) International Date Line West (UTC-11:00) Midway Island (UTC-10:00) Hawaii (UTC-09:00) Alaska (UTC-08:00) Tijuana, Baja California, Pacific Time (US & Canada) (UTC-07:00) Arizona, Chihuahua, La Paz, Mazatlan, Mountain Time (US & Canada) (UTC-06:00) Guadalajara, Mexico City, Monterrey, Saskatchewan, Central America, Central Time (US & Canada) (UTC-05:00) Indiana (East), Bogota, Lima, Quito, Eastern Time (US &... -
Page 43: Overview Of The Machine
Overview of the Machine Safety Guide Safety Precautions Regulatory and Safety Information Main Components and Basic Operations Main Components About the Power Supply of the Machine Loading Paper / Originals Loading Paper Loading Originals Replacing a FINE Cartridge Replacing a FINE Cartridge Checking the Ink Status Maintenance When Printing Becomes Faint or Colors Are Incorrect... -
Page 44: Safety Guide
Safety Guide Safety Precautions Regulatory and Safety Information... -
Page 45: Safety Precautions
Safety Precautions Choosing a location Do not install the machine in a location that is unstable or subject to excessive vibration. Do not install the machine in locations that are very humid or dusty, in direct sunlight, outdoors, or close to a heating source. -
Page 46: Regulatory And Safety Information
Regulatory and Safety Information ® International ENERGY STAR Program As an ENERGY STAR Partner, Canon Inc. has determined that this product meets the ENERGY STAR guidelines for efficiency. About the disposal of the battery (For models containing lithium battery) Dispose of used batteries according to the local regulations. -
Page 47: Users In Canada
This equipment should be installed and operated with minimum distance at least 20cm between the radiator and persons body (excluding extremities: hands, wrists, feet and ankles) and must not be colocated or operated with any other antenna or transmitter. Canon U.S.A., Inc. One Canon Park Melville, New York 11747... - Page 48 WEEE scheme or your household waste disposal service. For more information regarding return and recycling of WEEE products, please visit www.canon-europe.com/environment. (EEA: Norway, Iceland and Liechtenstein) India only.
-
Page 49: Environmental Information
Save Mode, please consider that this device may then only switch to a lower energy level after a longer period of time or not at all. Canon does not recommend extending the Activation Times from the optimum ones set as default. -
Page 50: Main Components And Basic Operations
Main Components and Basic Operations Main Components About the Power Supply of the Machine... -
Page 51: Main Components
Main Components Front View Rear View Inside View Operation Panel... -
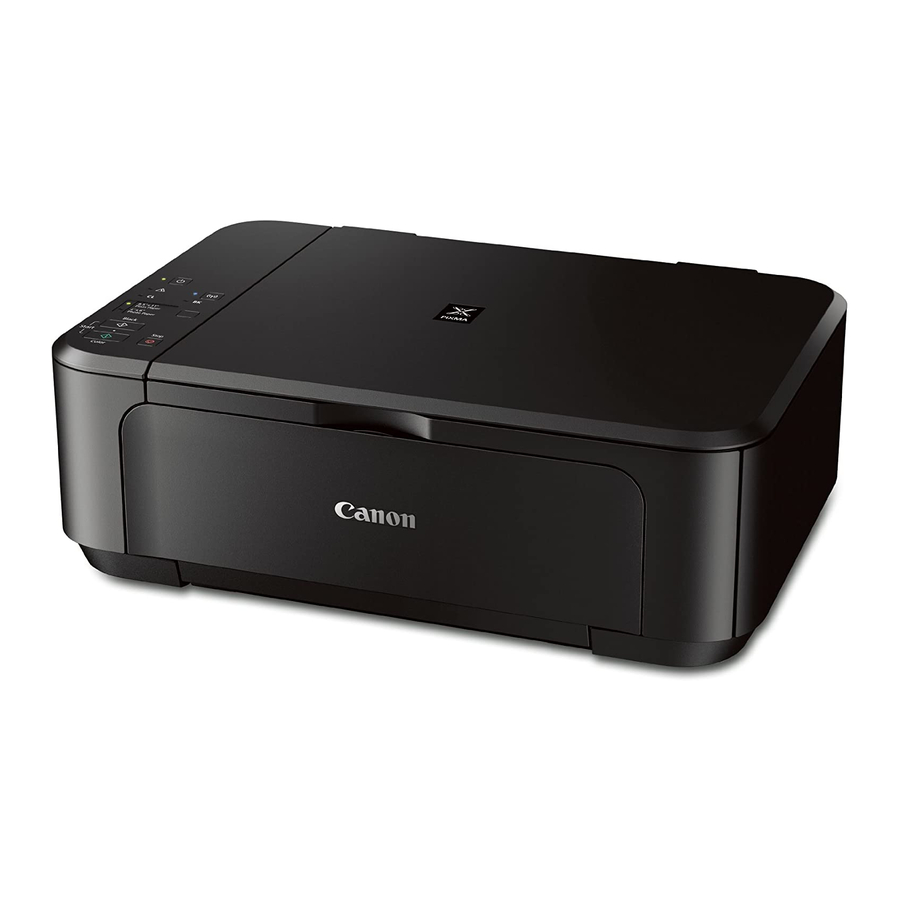
Page 52: Front View
Front View paper output support Extend to support ejected paper. paper output tray Printed paper is ejected. paper output cover Open to replace the FINE cartridge or remove jammed paper inside the machine. document cover Open to load an original on the platen glass. paper guides Slide to align with both sides of the paper stack. - Page 53 output tray extension Open to support ejected paper. (10) operation panel Use to change the settings of the machine or to operate it. Operation Panel (11) platen glass Load an original to copy or scan.
-
Page 54: Rear View
Rear View transport unit Open to remove jammed paper. power cord connector Plug in the supplied power cord. USB port Plug in the USB cable to connect the machine with a computer. Important Do not touch the metal casing. Do not plug in or unplug the USB cable while the machine is printing or scanning originals with the computer. -
Page 55: Inside View
Inside View ink cartridge lock lever Locks the FINE cartridge into place. FINE cartridge (ink cartridges) A replaceable cartridge that integrates print head and ink tank. FINE cartridge holder Install the FINE cartridge. The color FINE cartridge should be installed into the left slot and the black FINE cartridge should be installed into the right slot. -
Page 57: Operation Panel
Operation Panel * The Wi-Fi and Alarm lamps are shown lit in the illustration below for explanatory purposes. ON lamp Lights green after flashing when the power is turned on. Note ON and Alarm lamps You can check the status of the machine by the ON and Alarm lamps. –... - Page 58 Turning the Machine On and Off Wi-Fi lamp Lights or flashes blue to indicate the wireless LAN status. Lights: Wireless LAN connection is enabled. Flashes: Printing or scanning over wireless LAN. Also flashes while configuring the wireless LAN connection. Wi-Fi button Hold down to automatically set up the wireless LAN connection.
-
Page 59: About The Power Supply Of The Machine
About the Power Supply of the Machine Confirming that the Power Is On Turning the Machine On and Off Notice for the Power Plug/Power Cord Notice for Unplugging the Power Cord... -
Page 60: Confirming That The Power Is On
Confirming that the Power Is On The ON lamp is lit green when the machine is turned on. Note It may take a while for the machine to start printing immediately after you turn on the machine. -
Page 61: Turning The Machine On And Off
Turning the Machine On and Off Turning on the machine Press the ON button to turn on the machine. The ON lamp flashes and then remains lit green. Confirming that the Power Is On Note It may take a while for the machine to start printing immediately after you turn on the machine. - Page 62 Important When you unplug the power cord after turning off the machine, be sure to confirm that the ON lamp is off. Notice for Unplugging the Power Cord Note Auto power off feature You can set the machine to automatically turn off when no operations are performed or no print jobs are sent to the machine for a certain interval.
-
Page 63: Notice For The Power Plug/Power Cord
Notice for the Power Plug/Power Cord Unplug the power cord once a month to confirm that the power plug/power cord does not have anything unusual described below. The power plug/power cord is hot. The power plug/power cord is rusty. The power plug/power cord is bent. The power plug/power cord is worn. -
Page 64: Notice For Unplugging The Power Cord
Notice for Unplugging the Power Cord To unplug the power cord, follow the procedure below. Important When you unplug the power cord, press the ON button, then confirm that the ON lamp is off. Unplugging the power cord while the ON lamp is lit or flashing may cause drying or clogging of the print head and print quality may be reduced. -
Page 65: Loading Paper / Originals
Loading Paper / Originals Loading Paper Loading Originals... -
Page 66: Loading Paper
Loading Paper Loading Plain Paper / Photo Paper Loading Envelopes Media Types You Can Use Media Types You Cannot Use Printing Area... -
Page 67: Loading Plain Paper / Photo Paper
If you cut plain paper into small size such as 4" x 6" (10 x 15 cm) or 5" x 7" (13 x 18 cm) to perform trial print, it can cause paper jams. Note We recommend Canon genuine photo paper for printing photos. For details on the Canon genuine paper, see Media Types You Can Use. - Page 68 Use the right paper guide to slide both paper guides all the way out. Load the paper in the center of the front tray WITH THE PRINT SIDE FACING DOWN. Push the paper stack all the way to the back of the front tray. Slide the right paper guide to align the paper guides with both sides of the paper stack.
- Page 69 Note Do not overload paper by stacking until the top of the stack touches the paper guides. Load small size paper, such as 4" x 6" (10 x 15 cm), by pushing it in all the way to the back of the front tray. Open the output tray extension.
- Page 70 Important Be sure to open the paper output tray when printing. If not open, the machine cannot start printing. Note After loading paper Select the size and type of the loaded paper on the print settings screen of the operation panel or printer driver.
-
Page 71: Loading Envelopes
Loading Envelopes You can load Envelope DL and Envelope Com 10. The address is automatically rotated and printed according to the envelope's direction by specifying with the printer driver properly. Important Printing of envelopes from the operation panel is not supported. Do not use the following envelopes. - Page 72 Open the front cover gently, and extend the paper support. Use the right paper guide to slide both paper guides all the way out. Load the envelopes in the center of the front tray WITH THE ADDRESS SIDE FACING DOWN. The folded flap of the envelope will be faced up on the left side.
- Page 73 Note Do not overload envelopes by stacking until the top of the stack touches the paper guides. Open the output tray extension. Open the paper output tray. Open the paper output tray gently, and extend the paper output support. Important Be sure to open the paper output tray when printing.
- Page 74 Note After loading envelopes Select the size and type of the loaded envelopes on the print settings screen of the printer driver.
-
Page 75: Media Types You Can Use
Envelopes Canon genuine papers The Model Number of Canon genuine paper is shown in brackets. Refer to the instruction manual supplied with the paper for detailed information on the printable side and notes on handling paper. For information on the page sizes available for each Canon genuine paper, access our website. -
Page 76: Page Sizes
You can use paper in the following weight range. 17 to 28 lb (64 to 105 g /m ) (except for Canon genuine paper) Do not use heavier or lighter paper (except for Canon genuine paper), as it could jam in the machine. Notes on Storing Paper Take out only the necessary number of paper from the package, just before printing. -
Page 77: Paper Load Limit
Approx. 50 sheets Plain Paper (including recycled paper) Envelopes 5 envelopes Canon Genuine Papers Note We recommend that you remove the previously printed sheet from the paper output tray before continuously printing to avoid blurs and discoloration (except for High Resolution Paper <HR-101N>). - Page 78 Paper for creating your own prints: Media Name <Model No.> Front Tray T-Shirt Transfers <TR-301> 1 sheet Photo Stickers <PS-101> 1 sheet *1 Proper feeding of paper may not be possible at the maximum capacity depending on the type of paper or environmental conditions (either very high or low temperature or humidity). In such cases, reduce the number of paper you load at a time to less than half.
-
Page 79: Media Types You Cannot Use
Paper that is too thin (weighing less than 17 lb (64 g /m Paper that is too thick (weighing more than 28 lb (105 g /m ), except for Canon genuine paper) Paper thinner than a postcard, including plain paper or notepad paper cut to a small... -
Page 80: Printing Area
Printing Area Printing Area Other Sizes than Letter, Legal, Envelopes Letter, Legal Envelopes... -
Page 81: Printing Area
To ensure the best print quality, the machine allows a margin along each edge of media. The actual printable area will be the area inside these margins. Recommended printing area : Canon recommends that you print within this area. Printable area : The area where it is possible to print. -
Page 82: Other Sizes Than Letter, Legal, Envelopes
Other Sizes than Letter, Legal, Envelopes Size Printable Area (width x height) 5.56 x 7.95 inches (141.2 x 202.0 mm) 8.00 x 11.38 inches (203.2 x 289.0 mm) 6.90 x 9.80 inches (175.2 x 249.0 mm) 4" x 6" (10 x 15 cm) 3.73 x 5.69 inches (94.8 x 144.4 mm) 5"... -
Page 83: Letter, Legal
Letter, Legal Size Printable Area (width x height) Letter 8.00 x 10.69 inches (203.2 x 271.4 mm) Legal 8.00 x 13.69 inches (203.2 x 347.6 mm) Recommended printing area 1.28 inches (32.5 mm) 1.32 inches (33.5 mm) Printable area 0.12 inches (3.0 mm) 0.20 inches (5.0 mm) 0.25 inches (6.4 mm) 0.25 inches (6.3 mm) -
Page 84: Envelopes
Envelopes Size Recommended Printing Area (width x height) Envelope DL 3.88 x 7.06 inches (98.8 x 179.5 mm) Envelope Com 10 3.68 x 7.90 inches (93.5 x 200.8 mm) Recommended printing area 0.31 inches (8.0 mm) 1.28 inches (32.5 mm) 0.22 inches (5.6 mm) 0.22 inches (5.6 mm) -
Page 85: Loading Originals
Loading Originals Loading Originals on the Platen Glass Originals You Can Load How to Detach / Attach the Document Cover... -
Page 86: Loading Originals On The Platen Glass
Loading Originals on the Platen Glass You can load originals to copy or scan on the platen glass. Load an original on the platen glass. Open the document cover. Load the original WITH THE SIDE TO SCAN FACING DOWN on the platen glass. - Page 87 Close the document cover gently. Important After loading the original on the platen glass, be sure to close the document cover before starting to copy or scan.
-
Page 88: Originals You Can Load
Originals You Can Load The originals you can load on the platen glass are as follows. Item Details - Text document, magazine, or newspaper Types of originals - Printed photo, postcard, business card, or disc (BD/DVD/CD, etc.) Size (width x height) Max. -
Page 89: How To Detach / Attach The Document Cover
How to Detach / Attach the Document Cover Detaching the document cover: Hold up the document cover vertically and then pull it up. Attaching the document cover: Fit both hinges of the document cover into the holder and insert both hinges of the document cover vertically as illustrated below. -
Page 90: Replacing A Fine Cartridge
Replacing a FINE Cartridge Replacing a FINE Cartridge Checking the Ink Status... -
Page 91: Replacing A Fine Cartridge
Replacing a FINE Cartridge When remaining ink cautions or errors occur, the ink lamps and the Alarm lamp will flash orange to inform you of the error. Count the number of flashes and take appropriate action. If an Error Occurs Note For information on the compatible FINE cartridge, refer to the printed manual: Safety and Important Information. - Page 92 Even when printing with one ink only, print with leaving the empty FINE cartridge installed. If either of the color FINE cartridge or black FINE cartridge is not installed, an error occurs and the machine cannot print. For information on how to configure this setting, see Setting the Ink Cartridge to be Used.
- Page 93 Important The head cover will open automatically after you open the paper output cover. If you have closed the head cover while replacing a FINE cartridge, close the paper output cover, then open it again. Trying to force open the head cover with your hand may cause the machine to malfunction.
- Page 94 Prepare a new FINE cartridge. Take a new FINE cartridge out of its package and remove the protective tape gently. Important If you shake a FINE cartridge, ink may spill out and stain your hands and the surrounding area. Handle a FINE cartridge carefully. Be careful not to stain your hands and the surrounding area with ink on the removed protective tape.
- Page 95 Important Insert the FINE cartridge gently so that it does not hit the electrical contacts on the FINE cartridge holder. Push up the ink cartridge lock lever to lock the FINE cartridge into place. The FINE cartridge is locked into place when the ink cartridge lock lever clicks. Important Check if the FINE cartridge is installed correctly.
- Page 96 The machine cannot print unless both the color FINE cartridge and black FINE cartridge are installed. Be sure to install both cartridges. Close the paper output cover (H). Note If the Alarm lamp lights or flashes orange after the paper output cover is closed, take appropriate action.
-
Page 97: Checking The Ink Status
Checking the Ink Status Checking the Ink Status with the Ink Lamps on the Operation Panel You can also check the ink status on the computer screen. Checking the Ink Status from Your Computer... -
Page 98: Checking The Ink Status With The Ink Lamps On The Operation Panel
Checking the Ink Status with the Ink Lamps on the Operation Panel Note The ink level detector is mounted on the machine to detect the remaining ink level. The machine considers as ink is full when a new FINE cartridge is installed, and then starts to detect a remaining ink level. - Page 99 Checking the Ink Status from Your Computer...
-
Page 100: Maintenance
Maintenance When Printing Becomes Faint or Colors Are Incorrect Performing Maintenance from a Computer Cleaning the Machine... -
Page 101: When Printing Becomes Faint Or Colors Are Incorrect
When Printing Becomes Faint or Colors Are Incorrect Maintenance Procedure Printing the Nozzle Check Pattern Examining the Nozzle Check Pattern Cleaning the Print Head Cleaning the Print Head Deeply Aligning the Print Head... -
Page 102: Maintenance Procedure
Maintenance Procedure If print results are blurred or colors are not printed correctly, the print head nozzle (FINE cartridge) is probably clogged. Follow the procedure below to print the nozzle check pattern, check the print head nozzle condition, then clean the print head. If printed ruled lines are misaligned or print results are otherwise unsatisfactory, aligning the print head may improve print quality. -
Page 103: Clean The Print Head
When the Print Results Are Blurred or Uneven: Step 1 Print the nozzle check pattern. From the machine Printing the Nozzle Check Pattern From the computer Use Your Computer to Print a Nozzle Check Pattern Examine the nozzle check pattern. After cleaning the print head, Examining the Nozzle Check Pattern print and examine the nozzle... - Page 104 Step 4 Replace a FINE cartridge. Replacing a FINE Cartridge Note If the problem is still not resolved after replacing the FINE cartridge, contact the service center. When the Print Results Are Not Even such as the Ruled Lines Are Misaligned: Align the print head.
-
Page 105: Printing The Nozzle Check Pattern
Printing the Nozzle Check Pattern Print the nozzle check pattern to determine whether the ink ejects properly from the print head nozzle. Watch the movie Note If the remaining ink level is low, the nozzle check pattern will not be printed correctly. Replace the FINE cartridge whose ink is low. -
Page 106: Examining The Nozzle Check Pattern
Examining the Nozzle Check Pattern Examine the nozzle check pattern, and clean the print head if necessary. Check if there are missing lines in the pattern or horizontal white streaks in the pattern (B). Number of sheets printed so far If there are missing lines in the pattern (A): Cleaning the print head is required. -
Page 107: Cleaning The Print Head
Cleaning the Print Head Clean the print head if lines are missing or if horizontal white streaks are present in the printed nozzle check pattern. Cleaning unclogs the nozzles and restores the print head condition. Cleaning the print head consumes ink, so clean the print head only when necessary. -
Page 108: Cleaning The Print Head Deeply
Cleaning the Print Head Deeply If print quality does not improve by the standard cleaning of the print head, clean the print head deeply. Cleaning the print head deeply consumes more ink than the standard cleaning of the print head, so clean the print head deeply only when necessary. Make sure that the power is turned on. -
Page 109: Aligning The Print Head
Aligning the Print Head If printed ruled lines are misaligned or print results are otherwise unsatisfactory, adjust the print head position. Note If the remaining ink level is low, the print head alignment sheet will not be printed correctly. Replace the FINE cartridge whose ink is low. Replacing a FINE Cartridge You need to prepare: a sheet of A4 or Letter-sized plain paper (including recycled paper)*... - Page 110 Important Do not touch any printed part on the print head alignment sheet. Be careful not to get the print head alignment sheet dirty. If the sheet is stained or wrinkled, it may not be scanned properly. If the print head alignment sheet was not printed correctly, press the Stop button, then redo this procedure from the beginning.
- Page 111 Close the document cover gently, then press the Color button or the Black button. The machine starts scanning the print head alignment sheet, and the print head position will be adjusted automatically. The print head position adjustment will be complete when the ON lamp lights green after flashing.
-
Page 112: Performing Maintenance From A Computer
Performing Maintenance from a Computer Cleaning the Print Heads from Your Computer Cleaning the Paper Feed Rollers from Your Computer Aligning the Print Head Aligning the Print Head Position Automatically from Your Computer Aligning the Print Head Position from Your Computer Use Your Computer to Print a Nozzle Check Pattern Cleaning Inside the Machine... -
Page 113: Cleaning The Print Heads From Your Computer
Cleaning the Print Heads from Your Computer The print head cleaning function allows you to clear up clogged print head nozzle. Perform print head cleaning if printing is faint or a specific color fails to print, even though there is enough ink. - Page 114 Deep Cleaning Deep Cleaning is more thorough than cleaning. Perform deep cleaning when two Cleaning attempts do not resolve the print head problem. Open the printer driver setup window Click Deep Cleaning on the Maintenance tab When the Deep Cleaning dialog box opens, select the ink group for which deep cleaning is to be performed.
-
Page 115: Cleaning The Paper Feed Rollers From Your Computer
Cleaning the Paper Feed Rollers from Your Computer Cleans the paper feed rollers. Perform feed roller cleaning when there are paper particles sticking to the paper feed rollers and paper is not fed properly. The procedure for performing the feed roller cleaning is as follows: Roller Cleaning Prepare the machine Remove all sheets of paper from the front tray. -
Page 116: Aligning The Print Head
Aligning the Print Head When you perform head position adjustment, errors in the print head adjustment position are corrected and conditions such as color and line streaking are improved. If the print results appear uneven because of line shifts or other conditions, adjust the position of the print head. -
Page 117: Aligning The Print Head Position From Your Computer
Aligning the Print Head Position from Your Computer Print head alignment corrects the installation positions of the print head and improves deviated colors and lines. This machine supports two head alignment methods: automatic head alignment and manual head alignment. The procedure for performing manual print head alignment is as follows: Print Head Alignment Open the printer driver setup window Click Custom Settings on the Maintenance tab... - Page 118 When you have entered all the necessary values, click OK. Note If it is difficult to pick the best pattern, pick the setting that produces the least noticeable vertical streaks. (A) Least noticeable vertical streaks (B) Most noticeable vertical streaks If it is difficult to pick the best pattern, pick the setting that produces the least noticeable horizontal streaks.
- Page 119 When you have entered all the necessary values, click OK. Note If it is difficult to pick the best pattern, pick the setting that produces the least noticeable vertical streaks. (A) Least noticeable vertical streaks (B) Most noticeable vertical streaks Confirm the displayed message and click OK The third pattern is printed.
- Page 120 When you have entered all the necessary values, click OK. Note If it is difficult to pick the best pattern, pick the setting that produces the least noticeable horizontal stripes. (A) Least noticeable horizontal stripes (B) Most noticeable horizontal stripes Note To print and check the current setting, open the Start Print Head Alignment dialog box, and click Print Alignment Value.
-
Page 121: Aligning The Print Head Position Automatically From Your Computer
Aligning the Print Head Position Automatically from Your Computer Print head alignment corrects the installation positions of the print head and improves deviated colors and lines. This machine supports two head alignment methods: automatic head alignment and manual head alignment. Normally, the machine is set for automatic head alignment. If the printing results of automatic print head alignment are not satisfactory, perform manual head alignment. - Page 122 Note To print and check the current setting, open the Start Print Head Alignment dialog box, and click Print Alignment Value.
-
Page 123: Use Your Computer To Print A Nozzle Check Pattern
Use Your Computer to Print a Nozzle Check Pattern The nozzle check function allows you to check whether the print head is working properly by printing a nozzle check pattern. Print the pattern if printing becomes faint, or if a specific color fails to print. -
Page 124: Cleaning Inside The Machine
Cleaning Inside the Machine Perform bottom plate cleaning before you execute duplex printing to prevent smudges on the back side of the paper. Also perform bottom plate cleaning if ink smudges caused by something other than print data appear on the printed page. The procedure for performing bottom plate cleaning is as follows: Bottom Plate Cleaning Open the printer driver setup window... -
Page 125: Cleaning The Machine
Cleaning the Machine Cleaning the Exterior of the Machine Cleaning the Platen Glass and Document Cover Cleaning the Paper Feed Roller Cleaning the Inside of the Machine (Bottom Plate Cleaning) Cleaning the Protrusions inside the Machine... -
Page 126: Cleaning The Exterior Of The Machine
Cleaning the Exterior of the Machine Be sure to use a soft and dry cloth such as eyeglasses cleaning cloth and wipe off dirt on the surface gently. Smooth out wrinkles on the cloth if necessary before cleaning. Important Be sure to turn off the power and disconnect the power plug before cleaning the machine. -
Page 127: Cleaning The Platen Glass And Document Cover
Cleaning the Platen Glass and Document Cover Important Be sure to turn off the power and disconnect the power plug before cleaning the machine. Do not use tissue paper, paper towels, rough-textured cloth, or similar materials for cleaning so as not to scratch the surface. Be sure to use a soft and dry cloth. Never use volatile liquids such as thinners, benzene, acetone, or any other chemical cleaner to clean the machine, as this may cause a malfunction or damage the surface of the machine. -
Page 128: Cleaning The Paper Feed Roller
Cleaning the Paper Feed Roller If the paper feed roller is dirty or paper powder is attached to it, paper may not be fed properly. In this case, clean the paper feed roller. Cleaning will wear out the paper feed roller, so perform this only when necessary. -
Page 129: Cleaning The Inside Of The Machine (Bottom Plate Cleaning)
Cleaning the Inside of the Machine (Bottom Plate Cleaning) Remove stains from the inside of the machine. If the inside of the machine becomes dirty, printed paper may get dirty, so we recommend performing cleaning regularly. You need to prepare: a sheet of A4 or Letter-sized plain paper* * Be sure to use a new piece of paper. - Page 130 Open the output tray extension, open the paper output tray, then extend the paper output support. Clean the inside of the machine. Hold down the Stop button until the Alarm lamp flashes orange eight times, then release it immediately. The paper cleans the inside of the machine as it feeds through the machine. Check the folded parts of the ejected paper.
-
Page 131: Cleaning The Protrusions Inside The Machine
Cleaning the Protrusions inside the Machine Important Be sure to turn off the power and disconnect the power plug before cleaning the machine. You need to prepare: cotton swab If the protrusions inside the machine are stained, wipe off any ink from the protrusions using a cotton swab or the like. -
Page 132: Changing The Machine Settings
Changing the Machine Settings Changing Machine Settings from Your Computer Changing the Machine Settings Using the Operation Panel... -
Page 133: Changing Machine Settings From Your Computer
Changing Machine Settings from Your Computer Changing the Print Options Registering a Frequently Used Printing Profile Setting the Ink Cartridge to be Used Managing the Machine Power Reducing the Machine Noise Changing the Machine Operation Mode... -
Page 134: Changing The Print Options
Changing the Print Options You can change the detailed print driver settings for print data that is sent from an application software. Specify this option if you encounter print failures such as part of an image data being cut off. The procedure for changing the print options is as follows: Open the printer driver setup window Click Print Options... - Page 135 Change the individual settings If necessary, change the setting of each item, and then click OK. The Page Setup tab is displayed again.
-
Page 136: Registering A Frequently Used Printing Profile
Registering a Frequently Used Printing Profile You can register the frequently used printing profile to Commonly Used Settings on the Quick Setup tab. Unnecessary printing profiles can be deleted at any time. The procedure for registering a printing profile is as follows: Registering a Printing Profile Open the printer driver setup window Set the necessary items... - Page 137 Enter a name in the Name field. If necessary, click Options..., set the items, and then click OK. In the Save Commonly Used Settings dialog box, click OK to save the print settings and return to the Quick Setup tab. The name and icon are displayed in Commonly Used Settings.
-
Page 138: Setting The Ink Cartridge To Be Used
Setting the Ink Cartridge to be Used This feature enables you to specify the most appropriate FINE cartridge among installed cartridges according to an intended use. When one of the FINE cartridges becomes empty and cannot be replaced immediately by a new one, you can specify the other FINE cartridge that still has ink and continue printing. -
Page 139: Managing The Machine Power
Managing the Machine Power This function allows you to manage the machine power from the printer driver. The procedure for managing the machine power is as follows: Power Off The Power Off function turns off the machine. When you use this function, you will not be able to turn the machine on from the printer driver. - Page 140 If necessary, complete the following settings: Auto Power On Specifying Enable from the list will turn the machine on upon receipt of print data. Auto Power Off Specify the time from the list. When this time lapses without any operations from the printer driver or the machine, the machine is turned off automatically.
-
Page 141: Reducing The Machine Noise
Reducing the Machine Noise The silent function allows you to reduce the operating noise of this machine. Select when you wish to reduce the operating noise of the printer at night, etc. Using this function may lower the print speed. The procedure for using the quiet mode is as follows: Quiet Settings Open the printer driver setup window... - Page 142 perform operations from the operation panel of the machine or printing and scanning from the computer. If you specify a time for Use quiet mode during specified hours, quiet mode is not applied to operations (copy, direct print, etc.) performed directly from the machine.
-
Page 143: Changing The Machine Operation Mode
Changing the Machine Operation Mode If necessary, switch between various modes of machine operation. The procedure for configuring Custom Settings is as follows: Custom Settings Open the printer driver setup window Make sure that the machine is on, and then click Custom Settings on the Maintenance tab The Custom Settings dialog box opens. - Page 144 Important Using this function slows down the print speed. Rotate 90 degrees left when orientation is [Landscape] On the Page Setup tab, you can change the rotation direction of the Landscape in the Orientation. To rotate the print data 90 degrees to the left during printing, select this item. To rotate the print data 90 degrees to the right during printing, clear this item.
-
Page 145: Changing The Machine Settings Using The Operation Panel
Changing the Machine Settings Using the Operation Panel About Quiet setting Turning on/off the Machine Automatically... -
Page 146: About Quiet Setting
About Quiet setting Enables this function on the machine if you want to reduce the operating noise, such as when printing at night. Follow the procedure below to perform setting. Make sure that the machine is turned on. 2. Press and hold the Stop button until the Alarm lamp flashes 9 times. 3. -
Page 147: Turning On/Off The Machine Automatically
Turning on/off the Machine Automatically You can enable the machine to turn on/off automatically considering the environment Turning on the Machine Automatically Turning off the Machine Automatically Turning on the Machine Automatically You can enable the machine to turn on automatically when a scanning command from a computer or printing data is sent to the machine. -
Page 148: Information About Network Connection
Information about Network Connection Useful Information about Network Connection... -
Page 149: Useful Information About Network Connection
Useful Information about Network Connection Initial Values Set at Factory (Network) Connecting the Machine to the Computer Using a USB Cable When Detecting the Printers Have the Same Name during Setup Connecting to Other Computer with LAN/Changing the Connection Method from USB to LAN Printing Out Network Setting Information... -
Page 150: Initial Values Set At Factory (Network)
Enable/disable WSD (WSD settings) Enable Timeout setting (WSD settings) 1 minute Enable/disable Bonjour (Bonjour settings) Enable Service name (Bonjour settings) Canon MG3500 series LPR protocol setting Enable Wireless LAN DRX Enable ("X" is the last six digits of MAC address.) -
Page 151: Connecting The Machine To The Computer Using A Usb Cable
Connecting the Machine to the Computer Using a USB Cable Connect the machine and the computer using a USB cable as the illustration below. The USB port is located on the rear of the machine. -
Page 152: When Detecting The Printers Have The Same Name During Setup
When Detecting the Printers Have the Same Name during Setup When the printer is detected during setup, you may see multiple printers of the same name on the detection result screen. Select a printer with checking the MAC address set to the printer against the MAC address on detection result screen. -
Page 153: Connecting To Other Computer With Lan/Changing The Connection Method From Usb To Lan
Connecting to Other Computer with LAN/Changing the Connection Method from USB to LAN To add the computer connecting the printer with LAN or to change the connection method between the printer and the computer from USB to LAN, perform setup with the Setup CD-ROM or perform it according to the instructions on our website. -
Page 154: Printing Out Network Setting Information
Printing Out Network Setting Information You can print out the network settings of the machine such as its IP address and SSID. Important • This print out contains valuable information about your computer. Handle it with care. Make sure that the machine is turned on. Load a sheet of A4 or Letter-sized plain paper. - Page 155 Subnet Prefix Length*1 Subnet Prefix Length IPsec*2 IPsec setting Active Security Protocol*2 Method of the Security Protocol ESP/ESP & AH/AH WPS PIN CODE WPS PIN code XXXXXXXX Wireless LAN DRX Discontinuous reception (wireless Enable/Disable LAN) Other Settings Other settings Printer Name Printer name Printer name (Up to 15 characters) WSD setting...
-
Page 156: About Network Communication
About Network Communication Changing and Confirming Network Settings Screens for Network Connection of IJ Network Tool Other Screens of IJ Network Tool Appendix for Network Communication... -
Page 157: Changing And Confirming Network Settings
Changing and Confirming Network Settings IJ Network Tool Changing the Settings in the Wireless LAN Sheet Changing the WEP Detailed Settings Changing the WPA or WPA2 Detailed Settings Changing the Settings in the Wired LAN Sheet Changing the Settings in the Admin Password Sheet Monitoring Wireless Network Status Initializing the Network Settings of the Machine Viewing the Modified Settings... -
Page 158: Ij Network Tool
• Do not print when IJ Network Tool is running. • If the firewall function of your security software is turned on, a message may appear warning that Canon software is attempting to access the network. If the warning message appears, set the security software to always allow access. -
Page 159: Changing The Settings In The Wireless Lan Sheet
Changing the Settings in the Wireless LAN Sheet To change the wireless network settings of the printer, connect the printer and the computer with a USB cable temporarily. If you modify the wireless network settings of the computer over wireless connection without USB connection, your computer may not be able to communicate with the machine after modifying the settings. - Page 160 Note • Enter the same SSID that the access point is configured to use. The SSID is case-sensitive. Encryption Method: Select the encryption method used over the wireless LAN. You can change WEP settings with selecting Use WEP and clicking Configuration..Changing the WEP Detailed Settings You can change WPA or WPA2 settings with selecting Use WPA or Use WPA2 and clicking Configuration..
-
Page 161: Changing The Wep Detailed Settings
Changing the WEP Detailed Settings Note • This screen is not available depending on the printer you are using. To change the wireless network settings of the printer, connect the printer and the computer with a USB cable temporarily. If you modify the wireless network settings of the computer over wireless connection without USB connection, your computer may not be able to communicate with the machine after modifying the settings. - Page 162 Hexadecimal (Hex) 10 digits 26 digits 2. Key Length: Select either 64bit or 128bit. 3. Key Format: Select either ASCII or Hex. 4. Key ID: Select the Key ID (index) set to the access point. 5. Authentication: Select the authentication method to authenticate the printer's access to the access point. Normally, select Auto.
-
Page 163: Changing The Wpa Or Wpa2 Detailed Settings
Changing the WPA or WPA2 Detailed Settings Note • This screen is not available depending on the printer you are using. To change the wireless network settings of the printer, connect the printer and the computer with a USB cable temporarily. If you modify the wireless network settings of the computer over wireless connection without USB connection, your computer may not be able to communicate with the machine after modifying the settings. - Page 164 8. Enter the passphrase, confirm the type of dynamic encryption and click Next>. Enter the passphrase set to the access point. The passphrase should be a string of 8 to 63 alphanumeric characters or a 64-digit hexadecimal value. If you do not know the access point passphrase, refer to the instruction manual provided with the access point or contact its manufacturer.
- Page 165 Important • If the printer cannot communicate with the computer after the encryption type of the printer was switched, make sure that encryption types for the computer and the access point matches that set to the printer. Note • Changing the network settings with the USB cable temporarily may switch the default printer. In this case, reset Set as Default Printer.
-
Page 166: Changing The Settings In The Wired Lan Sheet
Changing the Settings in the Wired LAN Sheet Note • This screen is not available depending on the printer you are using. • Activate the wired LAN setting of the printer to change the settings in the Wired LAN sheet. Start up IJ Network Tool. -
Page 167: Changing The Settings In The Admin Password Sheet
Changing the Settings in the Admin Password Sheet Start up IJ Network Tool. 2. Select the printer in Printers:. 3. Select Configuration... from the Settings menu. 4. Click the Admin Password tab. The Admin Password sheet is displayed. For details on the Admin Password sheet, see Admin Password Sheet. -
Page 168: Monitoring Wireless Network Status
Monitoring Wireless Network Status Note • This screen is not available depending on the printer you are using. • When using the machine over the wired LAN, you cannot monitor network status. Start up IJ Network Tool. 2. Select the printer in Printers:. 3. - Page 169 6. Check the status. When the measurement is complete, the status is displayed. When is displayed in Connection Performance between the Printer and the Access Point:, the printer can communicate with the access point. Otherwise, refer to displayed comments and the following to improve the status of communication link, and click Remeasurement.
- Page 170 still appears even if you have tried the above, finish the measurement, then restart the IJ Network Tool to start over the measurement. 7. Click Finish. Note • If any messages appear on Overall Network Performance:, move the machine and access point as instructed to improve the performance.
-
Page 171: Initializing The Network Settings Of The Machine
Setup CD-ROM or perform setup according to the instructions on our website. Note • You can change the network settings of the printer using IJ Network Tool with USB connection after initializing the LAN settings. To change the network settings using Canon IJ Network Tool, activate wireless LAN in advance. -
Page 172: Viewing The Modified Settings
Viewing the Modified Settings The Confirmation screen is displayed when you modified the printer settings on the Configuration screen. When you click Yes on the Confirmation screen, the following screen is displayed for confirming the modified settings. -
Page 173: Screens For Network Connection Of Ij Network Tool
Screens for Network Connection of IJ Network Tool Canon IJ Network Tool Screen Configuration Screen Wireless LAN Sheet Search Screen WEP Details Screen WPA Details Screen WPA2 Details Screen Authentication Type Confirmation Screen PSK: Passphrase and Dynamic Encryption Setup Screen... -
Page 174: Canon Ij Network Tool Screen
Canon IJ Network Tool Screen This section describes the items and menus displayed on the Canon IJ Network Tool screen. Items on the Canon IJ Network Tool Screen Canon IJ Network Tool Menus Items on the Canon IJ Network Tool Screen The following item is displayed on the Canon IJ Network Tool screen. - Page 175 Status Screen Refresh Updates and displays the contents of Printers: on the Canon IJ Network Tool screen to the latest information. Important • To change the printer's network settings using IJ Network Tool, it must be connected via a LAN.
- Page 176 • If the printer is being used from another computer, a screen is displayed informing you of this condition. Note • This item has the same function as Update in the Canon IJ Network Tool screen. Network Information Displays the Network Information screen to confirm the network settings of the printer and the computer.
-
Page 177: Configuration Screen
Configuration Screen You can change the configuration of the printer selected on the Canon IJ Network Tool screen. Click the tab to select the sheet to change the settings. The following screen is the example to change the setting on the Wireless LAN sheet. -
Page 178: Wireless Lan Sheet
Wireless LAN Sheet Note • This screen is not available depending on the printer you are using. Allows you to set the printer with wireless LAN connection. To display the Wireless LAN sheet, click the Wireless LAN tab on the Configuration screen. 1. - Page 179 Do not use Select to disable encryption. Use WEP Transmission is encrypted using a WEP key you specified. If a WEP key has not been set, the WEP Details screen is displayed automatically. To change WEP settings set before, click Configuration... to display the screen. Changing the WEP Detailed Settings Use WPA/Use WPA2 Transmission is encrypted using a WPA or WPA2 key you specified.
-
Page 180: Search Screen
Search Screen Note • This screen is not available depending on the printer you are using. The access points detected are listed. 1. Detected Access Points: The signal strength from the access point, encryption type, name of access point, and the radio channel can be confirmed. - Page 181 Note • When detecting your target access point, make sure that the access point is turned on. 3. Set Click to set the access point's SSID in SSID: on the Wireless LAN sheet. Note • The WEP Details screen, the WPA Details screen, or the WPA2 Details screen appears if the selected access point is encrypted.
-
Page 182: Wep Details Screen
WEP Details Screen Note • This screen is not available depending on the printer you are using. Specify the printer WEP settings. Note • When changing the password (WEP key) of the printer, the same change must be made to the password (WEP key) of the access point. -
Page 183: Wpa Details Screen
WPA Details Screen Note • This screen is not available depending on the printer you are using. Specify the printer WPA settings. The value displayed on the screen differs depending on the present settings. 1. Authentication Type: Displays the type of authentication used for client authentication. This machine supports the PSK authentication method. -
Page 184: Wpa2 Details Screen
WPA2 Details Screen Note • This screen is not available depending on the printer you are using. Specify the printer WPA2 settings. The value displayed on the screen differs depending on the present settings. 1. Authentication Type: Displays the type of authentication used for client authentication. This machine supports the PSK authentication method. -
Page 185: Authentication Type Confirmation Screen
Authentication Type Confirmation Screen Note • This screen is not available depending on the printer you are using. Type of authentication used for client authentication is displayed. 1. Authentication Type Type of authentication used for client authentication is displayed. This machine supports the PSK authentication method. This authentication type PSK uses a passphrase. -
Page 186: Psk: Passphrase And Dynamic Encryption Setup Screen
PSK: Passphrase and Dynamic Encryption Setup Screen Note • This screen is not available depending on the printer you are using. Enter the passphrase and select the dynamic encryption method. 1. Passphrase: Enter the passphrase set to the access point. The passphrase should be a string of 8 to 63 alphanumeric characters or a 64-digit hexadecimal value. -
Page 187: Setup Information Confirmation Screen
Setup Information Confirmation Screen Note • This screen is not available depending on the printer you are using. Displays the settings used for client authentication. Confirm the settings and click Finish. -
Page 188: Wired Lan Sheet
Wired LAN Sheet Note • This screen is not available depending on the printer you are using. Allows you to set the printer with wired LAN connection. To display the Wired LAN sheet, click the Wired LAN tab on the Configuration screen. 1. -
Page 189: Admin Password Sheet
Admin Password Sheet Set a password for the printer to allow specific people to perform setup and configurations operation. To display the Admin Password sheet, click the Admin Password tab on the Configuration screen. 1. Use admin password Set a password for the administrator with privileges to set up and change detailed options. To use this feature, select this check box and enter a password. -
Page 190: Network Information Screen
Display the network information that is set for the printers and the computers. To display the Network Information screen, select Network Information from the View menu. 1. OK Returns to the Canon IJ Network Tool screen. 2. Copy All Information All network information displayed is copy to the clipboard. -
Page 191: Access Control Sheet
Access Control Sheet Note • This screen is not available depending on the printer you are using. You can register the MAC addresses or the IP addresses of computers or network devices to allow access. To display the Access Control sheet, click the Access Control tab on the Configuration screen. 1. - Page 192 1. Enable printer access control(MAC address) Select to enable access control to the printer by MAC address. Note • The two types of access control (i.e., by MAC address and by IP address) can be enabled at the same time. An access control type is enabled as long as the Enable printer access control check box is selected, regardless of the type currently displayed by selecting in Printer Access Control Type:.
- Page 193 1. Enable printer access control(IP address) Select to enable access control to the printer by IP address. Note • The two types of access control (i.e., by MAC address and by IP address) can be enabled at the same time. An access control type is enabled as long as the Enable printer access control check box is selected, regardless of the type currently displayed by selecting in Printer Access Control Type:.
- Page 194 5. Delete Deletes the selected IP address from the list.
-
Page 195: Edit Accessible Mac Address Screen/Add Accessible Mac Address Screen
Edit Accessible MAC Address Screen/Add Accessible MAC Address Screen Note • This screen is not available depending on the printer you are using. The example screenshots in this section refer to the Add Accessible MAC Address Screen. 1. MAC Address: Enter the MAC address of a computer or a network device to allow access. -
Page 196: Edit Accessible Ip Address Screen/Add Accessible Ip Address Screen
Edit Accessible IP Address Screen/Add Accessible IP Address Screen Note • This screen is not available depending on the printer you are using. The example screenshots in this section refer to the Add Accessible IP Address Screen. 1. Specification Method: Select either Single Address Specification or Range Specification to add the IP address(es). -
Page 197: Other Screens Of Ij Network Tool
Other Screens of IJ Network Tool Canon IJ Network Tool Screen Status Screen Connection Performance Measurement Screen Maintenance Screen Network Setup of the Card Slot Screen Associate Port Screen Network Information Screen... -
Page 198: Canon Ij Network Tool Screen
Canon IJ Network Tool Screen This section describes the items and menus displayed on the Canon IJ Network Tool screen. Items on the Canon IJ Network Tool Screen Canon IJ Network Tool Menus Items on the Canon IJ Network Tool Screen The following item is displayed on the Canon IJ Network Tool screen. - Page 199 Status Screen Refresh Updates and displays the contents of Printers: on the Canon IJ Network Tool screen to the latest information. Important • To change the printer's network settings using IJ Network Tool, it must be connected via a LAN.
- Page 200 • If the printer is being used from another computer, a screen is displayed informing you of this condition. Note • This item has the same function as Update in the Canon IJ Network Tool screen. Network Information Displays the Network Information screen to confirm the network settings of the printer and the computer.
-
Page 201: Status Screen
Status Screen You can check the printer status and connection performance. To display the Status screen, select Status from the View menu. Note • This screen is not available depending on the printer you are using. • When using wired LAN, Signal Strength:, Link Quality: and Advanced Measurement... are not available. -
Page 202: Connection Performance Measurement Screen
Connection Performance Measurement Screen Note • This screen is not available depending on the printer you are using. Displays to execute the connection performance measurement. Connection Performance Measurement Screen (Initial Screen) Connection Performance Measurement Screen (Completion Screen) Connection Performance Measurement Screen (Initial Screen) Click Next>... - Page 203 1. Connection Performance between the Printer and the Access Point: A mark indicates the result of the connection performance measurement between the printer and the access point. : Good connection performance : Unstable connection performance : Cannot connect : Measurement is canceled, or cannot measure 2.
-
Page 204: Maintenance Screen
Maintenance Screen Displays to perform Setting Initialization and Network Setup of the Card Slot. To display the Maintenance screen, select Maintenance... from the Settings menu. 1. Setting Initialization Reverts all the network settings of the printer to factory default. Click Initialize to display the Initialize Settings screen and click Yes to initialize the network settings of the printer. -
Page 205: Network Setup Of The Card Slot Screen
Network Setup of the Card Slot Screen Note • This screen is not available depending on the printer you are using. Displays settings of the card slot and allows you to map a card slot on the network as a network drive on the computer. - Page 206 1. Skip Completes the setup without mapping a network drive to the card slot. 2. Retry Returns to Network Setup of the Card Slot screen and re-executes the network drive mapping. 3. Cancel Cancels the card slot setup. When IJ Network Tool is running over LAN, the Cancel button is displayed grayed out and cannot be clicked.
-
Page 207: Associate Port Screen
Associate Port Screen Allows you to associate a created port with a printer driver. Select the printer for which you want to change the association, then click OK. Note • You cannot print with the printer unless the printer driver is associated with the port. 1. -
Page 208: Network Information Screen
Display the network information that is set for the printers and the computers. To display the Network Information screen, select Network Information from the View menu. 1. OK Returns to the Canon IJ Network Tool screen. 2. Copy All Information All network information displayed is copy to the clipboard. -
Page 209: Appendix For Network Communication
Appendix for Network Communication Using the Card Slot over a Network When the Printer Driver Is Not Associated with a Port About Technical Terms Restrictions About Firewall... -
Page 210: Using The Card Slot Over A Network
Using the Card Slot over a Network Note • This screen is not available depending on the printer you are using. Mounting the Card Slot as the Network Drive Restrictions on Card Slot Use over a Network Mounting the Card Slot as the Network Drive The card slot must be mounted to use it over a network. - Page 211 7. Make sure that the card slot is mounted. When the card slot is mounted, the following icon appears on Computer (or My Computer). Restrictions on Card Slot Use over a Network • The card slot can be shared by multiple computers, if the machine is connected to a network. Multiple computers can read files from a memory card in the card slot at the same time.
-
Page 212: When The Printer Driver Is Not Associated With A Port
When the Printer Driver Is Not Associated with a Port If No Driver is displayed for the printer's name on the Canon IJ Network Tool screen, the printer driver is not associated with a created port. To associate a port with a printer driver, follow the procedure below. -
Page 213: About Technical Terms
About Technical Terms In this section, technical terms used in the manual are explained. • Access Point A wireless transceiver or base station that receives information from wireless clients/the machine and rebroadcasts it. Required in an infrastructure network. • Ad-hoc Client computer and machine setting where wireless communication occurs on a peer-to-peer basis, i.e., all clients in with the same SSID/network name communicate directly with each other. - Page 214 When using WEP as an encryption method, the authentication method is able to fix to Open System or Shared Key. For WPA/WPA2, authentication method is PSK. ◦ Auto The printer automatically changes its authentication method to match the access point. ◦...
- Page 215 • IEEE 802.11b International standard for wireless LAN using the 2.4 GHz frequency range with a throughput of up to 11 Mbps. • IEEE 802.11g International standard for wireless LAN using the 2.4 GHz frequency range with a throughput of up to 54 Mbps.
- Page 216 • Link Quality The status of connection between the access point and the printer excluding noise (interference) is indicated with a value from 0 to 100%. • LPR A platform-independent printing protocol used in TCP/IP networks. It is not supported bidirectional communication.
- Page 217 The printer and all clients on a wireless LAN must use the same SSID in order to communicate with each other. The SSID can be up to 32 characters long, and is made up of alphanumeric characters. The SSID may also be referred to by its network name. •...
- Page 218 This machine is a Wi-Fi authorized product. • Wireless LAN A network that, instead of being connected by physical wires, is connected by a wireless technology, such as Wi-Fi. • WPA Security framework announced by the Wi-Fi Alliance in October 2002. The security has been strengthened more than WEP.
-
Page 219: Restrictions
Restrictions If you use a printer over the wireless LAN, the printer may recognize nearby wireless systems, you should set a network key (WEP, WPA, or WPA2) to the access point to encrypt wireless transmission. Wireless communication with a product that does not comply with the Wi-Fi standard cannot be guaranteed. Connecting with too many computers may affect the printer performance, such as printing speed. -
Page 220: About Firewall
About Firewall A firewall is a function of the security software installed in the computer or operation system for computer, and is a system that is designed to prevent unauthorized access to a network. Precautions When a Firewall Function is Enabled •... -
Page 221: Tips For Ensuring Optimal Printing Quality
Tips for Ensuring Optimal Printing Quality Useful Information about Ink Key Points to Successful Printing Be Sure to Make Paper Settings after Loading Paper Canceling a Print Job Key to Enjoying Consistent Printing Quality Precautions for Safe Transport of the Machine... -
Page 222: Useful Information About Ink
Useful Information about Ink How is ink used for various purposes other than printing? Ink may be used for purposes other than printing. Ink is not only used for printing, but also for cleaning the print head to maintain the optimal printing quality. The machine has the function to automatically clean the ink jet nozzles to prevent clogging. -
Page 223: Key Points To Successful Printing
Key Points to Successful Printing Check the machine status before printing! Is the print head OK? If a print head nozzle is clogged, print will be faint and papers will be wasted. Print the nozzle check pattern to check the print head. Maintenance Procedure Is the inside of the machine smeared with ink? After printing large quantities of paper or performing borderless printing, the area where... -
Page 224: Be Sure To Make Paper Settings After Loading Paper
Be Sure to Make Paper Settings after Loading Paper If the media type setting is not the one for the loaded paper, printing results may not be satisfactory. After loading paper, be sure to select the appropriate media type setting for the loaded paper. -
Page 225: Canceling A Print Job
Canceling a Print Job Never press the ON button! If you press the ON button while printing is in progress, the print data sent from the computer queues in the machine and you may not be able to continue to print. Press the Stop button to cancel printing. -
Page 226: Key To Enjoying Consistent Printing Quality
Key to Enjoying Consistent Printing Quality The key to printing with the optimal printing quality is to prevent the print head from drying or clogging. Always observe the following rules for optimal printing quality. Never disconnect the power plug until the power is turned off! If you press the ON button to turn off the power, the machine caps the print head (nozzles) automatically to prevent from drying. -
Page 227: Precautions For Safe Transport Of The Machine
Precautions for Safe Transport of the Machine When relocating the machine, make sure of the following. Important When sending the machine for repair Pack the machine in a sturdy box so that it is placed with its bottom facing down, using sufficient protective material to ensure safe transport. - Page 228 Use adhesive tape to secure all the covers on the machine to keep them from opening during transportation. Then pack the machine in the plastic bag. Attach the protective material to the machine when packing the machine in the box.
-
Page 229: Legal Limitations On Use Of Your Product And Use Of Images
Legal Limitations on Use of Your Product and Use of Images It may be unlawful to make copies of, scan, print, or use reproductions of the following documents. The list provided is non-exhaustive. When in doubt, check with a legal representative in your jurisdiction. -
Page 230: Specifications
Approx. 449 (W) x 304 (D) x 152 (H) mm * With the Front Cover retracted. Approx. 11.9 lb (Approx. 5.4 kg) Weight * With the FINE Cartridges installed. Canon FINE Cartridge Total 1792 nozzles (BK 640 nozzles, C/M/Y each 384 nozzles) Copy Specifications Multiple copy max. 21 pages... -
Page 231: Scan Specifications
Scan Specifications Windows: TWAIN 1.9 Specification, WIA Scanner driver Mac OS: ICA Maximum scanning size A4/Letter, 8.5" x 11.7"/216 x 297 mm Optical resolution (horizontal x vertical) max: 1200 x 2400 dpi *1 Interpolated resolution max: 19200 x 19200 dpi *2 Scanning resolution *1 Optical Resolution represents the maximum sampling rate based on ISO 14473. -
Page 232: Minimum System Requirements
Display XGA 1024 x 768 Other Supported OS Some functions may not be available with each OS. Refer to the manual or the Canon web site for details on operation with iOS, Android, and Windows RT. Mobile Printing Capability Apple AirPrint Google Cloud Print An internet connection is required to view the Online Manual. - Page 233 Windows: A CD-ROM Drive or internet connection is required during software installation. Windows: Internet Explorer 8, 9 or 10 is required to install Easy-WebPrint EX. Easy-WebPrint EX for Internet Explorer 10 can be downloaded from the Canon web site. Windows: Some functions may not be available with Windows Media Center.
Need help?
Do you have a question about the MG3500 Series and is the answer not in the manual?
Questions and answers
I went to change ink cartridges. The new cartridges won't fit tho they are same brand/model as old ones. Tried to put old ones back in & now they won't fit nor allow door to close? It's as if the bracket holding cartridges moved not allowing them to fit nor close the door covering cartridges?
If the ink cartridges do not fit and the door won't close on the Canon MG3500 Series printer, follow these steps:
1. Make sure the cartridges are installed in the correct positions.
2. Confirm that the orange tape on the ink cartridges has been completely removed.
3. Check that the cartridges are securely installed by pushing up the ink cartridge lock lever.
4. If the cartridges are still not fitting properly, remove and reinstall them.
5. Do not force the door closed; instead, close the paper output cover and then reopen it to allow the head cover to open automatically.
If the issue persists, verify that you are using the correct FINE cartridges for the printer model.
This answer is automatically generated
can I scan a document using a MG3500 printer. ie does it have scanning capabilities
How do I remove a paper jam?