
Related Manuals for Sony DCR-PJ5 Handycam


Summary of Contents for Sony DCR-PJ5 Handycam
-
Page 1: Digital Video Camera
4-290-840-12(2) Digital Video Camera Operating Guide Recorder Guía de operaciones DCR-PJ5/SR21/SX21... - Page 3 Record the serial number operating and maintenance in the space provided below. Refer to these (servicing) instructions in numbers whenever you call your Sony the literature accompanying dealer regarding this product. the appliance. Model No. DCR- Serial No.
-
Page 4: Important Safety Instructions
IMPORTANT SAFETY INSTRUCTIONS SAVE THESE INSTRUCTIONS. DANGER - TO REDUCE THE RISK OF FIRE OR ELECTRIC SHOCK, CAREFULLY FOLLOW THESE INSTRUCTIONS. Read these instructions. Keep these instructions. Heed all warnings. Follow all instructions. Do not use this apparatus near water. ... - Page 5 Representative plug of power supply cord of countries/regions around the world. A Type B Type BF Type B3 Type C Type SE Type O Type (American (British Type) (British Type) (British Type) (CEE Type) (CEE Type) (Ocean Type) Type) The representative supply voltage and plug type are described in this chart. Depend on an area, Different type of plug and supply voltage are used.
- Page 6 Countries/regions Voltage Frequency (Hz) Plug type Vietnam Oceania Countries/regions Voltage Frequency (Hz) Plug type Australia New Zealand 230/240 North America Countries/regions Voltage Frequency (Hz) Plug type Canada Central America Countries/regions Voltage Frequency (Hz) Plug type Bahamas 120/240 Costa Rica Cuba 110/220 Dominican (rep) El Salvador...
-
Page 7: Read This First
1-800-822- 8837, or visit Be sure to charge the battery pack using a http://www.rbrc.org/ genuine Sony battery charger or a device that Caution: Do not handle can charge the battery pack. damaged or leaking Lithium- Keep the battery pack out of the reach of small Ion batteries. - Page 8 Declaration of Conformity Trade Name: SONY UL is an internationally recognized safety Model No.: DCR-SX21 organization. Responsible Party: Sony Electronics Inc. The UL Mark on the product means it has Address: 16530 Via Esprillo, San Diego, been UL Listed. CA 92127 U.S.A.
-
Page 9: Supplied Items
Increase the separation between the Supplied items equipment and receiver. The numbers in ( ) are the supplied Connect the equipment into an outlet on quantity. a circuit different from that to which the receiver is connected. AC Adaptor (1) ... -
Page 10: Everyday As Unforgettable Moment With "Handycam
Everyday as unforgettable moment with “Handycam” Capturing Page 16 (Recording) - Page 11 Sharing Page 25 (Creating a disc) Sharing now Page 22 (Projector) DCR-PJ5 Only...
-
Page 12: Table Of Contents
Table of contents IMPORTANT SAFETY INSTRUCTIONS............. 4 Read this first. -
Page 13: Preparation
Preparation Charging Attach the battery pack. Battery pack To remove the battery pack Close the LCD screen. Slide the BATT (battery) release lever and remove the battery pack. BATT (battery) release lever DCR-SR21 Connect the AC Adaptor to the DC IN jack and the wall outlet (wall socket). -
Page 14: Setting
Setting Open the LCD screen to turn on your camcorder. To turn off the power Close the LCD screen. Set the geographical area and the time using the multi- selector. Access lamp Insert the memory card into the memory card slot. To eject the memory card Lightly push the memory card in once. - Page 15 Changing the recording media (DCR-SR21) In the default setting, both movies and photos are recorded on the internal hard disk. You can change the recording media to Memory card. [Show others] [MEDIA SETTINGS] (under [MANAGE MEDIA] category) [MOVIE MEDIA SET] or [PHOTO MEDIA SET] ...
-
Page 16: Recording/Playback
Recording/Playback Recording Open the lens cover. Select a mode (Movie/Photo). MODE Movie: Photo: Movie: Press START/STOP. Photo: Press PHOTO. Notes If you close the LCD screen while recording movies, the camcorder stops recording. The maximum continuous recordable time of movies is about 13 hours. ... - Page 17 Recording in a dimly-lit place You can turn on the LED VIDEO LIGHT by pressing LIGHT. Zooming You can magnify images up to 67 times the original size with the power zoom lever. Displaying the icons and indicators again You can display the icons and indicators by pressing the multi-selector if they are not shown.
-
Page 18: Playback On The Camcorder
Playback on the camcorder Press (VIEW IMAGES) to (VIEW IMAGES) display the VISUAL INDEX screen. Movie: Select (Movie). Photo: Select (Photo). Select the desired image. -
Page 19: Photo Playback Screen
Movie playback screen Volume adjustment Previous Next OPTION To stop To fast-forward To fast-reverse To pause/play You can adjust the volume. adjust with Photo playback screen To start/stop slide Previous show Next To the VISUAL INDEX OPTION screen... -
Page 20: Deleting Movies And Photos
Deleting movies and photos [Show others] Select [DELETE] (under [EDIT] category). E D I T Movie: DELETE] Select [ DELETE]. Photo: DELETE] Select [ DELETE]. - Page 21 Select the images to be deleted. mark appears. [YES] Select Notes You cannot restore images once they are deleted. Save important movies and photos in advance. Do not remove the battery pack or the AC Adaptor from your camcorder while deleting the images. It ...
-
Page 22: Playing Back Images Through The Built-In Projector (Dcr-Pj5)
Playing back images through the built-in projector (DCR- PJ5) Press PROJECTOR. Adjust the projected image. Select the image you want to project. Notes Be careful of the following operations or situations while using the projector. Make sure not to project images towards the eyes. ... - Page 23 Viewing images recorded on other devices, using the projector [Show others] [PROJECTOR] (under [OTHERS] category) [SOURCE] [PROJECTOR INPUT] Connect your camcorder to the other device with the A/V connecting cable. Output Signal flow VIDEO (Yellow) ...
-
Page 24: Playing Images On A Tv
Playing images on a TV Set the input selector of the TV to the input your camcorder will be connected to. Connect your camcorder to a VCRs TV with the A/V connecting cable (supplied). (Red) AUDIO (White) VIDEO (Yellow) Signal flow Play back movies and photos (VIEW IMAGES) on your camcorder. -
Page 25: Saving Movies And Photos
Saving movies and photos Saving images on a disc Connect the AC Adaptor and the power cord (mains lead) to the DC IN jack of your camcorder and the wall outlet (wall socket). Using DVDirect Express Connect the DVD writer to the (USB) jack of your camcorder with the USB cable of the DVD writer. -
Page 26: Playing Back A Disc On The Dvd Writer
If [Failed.] or [DISC BURN failed.] appears on the screen, insert another disc into the DVD writer and perform the DISC BURN operation again. If the total memory size of movies to be burnt by the DISC BURN operation exceeds that of the disc, disc ... - Page 27 Record images on the connected device. Select [END] [YES] after the operation is completed. Notes Refer also to the instruction manuals supplied with devices to be connected. Sony DVD writer may not be available in some countries/regions. ...
- Page 28 Using a recorder, etc. Insert the recording media into the recording device (a disc recorder, etc.). Connect your camcorder to the recording device with Input the A/V connecting cable (supplied). VIDEO (Yellow) (White) AUDIO (Red) Signal flow Start playback on your camcorder, and record it on (VIEW IMAGES) the recording device.
- Page 29 Notes Since dubbing is performed via analog data transfer, the image quality may deteriorate. You can hide the screen indicators (such as a counter, etc.) on the screen of the monitor device connected. [Show others] [OUTPUT SETTINGS] (under [GENERAL SET] category) ...
-
Page 30: Saving Images In External Media (Direct Copy)
Saving images in external media (DIRECT COPY) Connect the AC Adaptor and the power cord (mains lead) to the DC IN jack of your camcorder and the wall outlet (wall socket). If the external media has the AC power cable, connect it to the wall outlet (wall socket). - Page 31 Viewing images recorded on external media, with your camcorder Select [Play without copying.] in step 4 above. The VISUAL INDEX screen of the external media is displayed. Play back the image. You can also view images on a TV connected to your camcorder.
-
Page 32: Using A Computer
Using a computer Useful functions available if you connect the camcorder to a computer The software PMB stored in the CD-ROM (supplied) includes functions that enable you to do more with the images recorded with the camcorder. (Windows) View Calendar Save on a disc Upload Network services... -
Page 33: Preparing A Computer
Preparing a computer Step 1 Checking the computer When using a Macintosh system The supplied software “PMB” is not Windows supported by Macintosh computers. To import the movies and photos to the computer, please contact Apple Inc.. Microsoft Windows XP SP3 /Windows Vista /Windows 7 SP1 Intel Pentium III 1 GHz or faster... - Page 34 displayed on the screen to make Drive names (such as (E:)) may vary the computer recognize your depending on the computer. camcorder. Click [Install]. USB CONNECT]: Internal hard disk (DCR-SR21) USB CONNECT]: Memory card If the [USB SELECT] screen does not ...
-
Page 35: Starting Pmb (Picture Motion Browser)
Starting PMB (Picture Motion Browser) Double-click the “PMB” short-cut icon on To disconnect your camcorder from the computer the computer screen. Click the icon at the bottom right of the desktop of the computer [Safely remove USB Mass Storage Device]. Notes If the icon is not displayed on the computer ... -
Page 36: Using "Pmb Portable
Using “PMB Portable” “PMB Portable” which allows you to easily upload images to a network service starts up by connecting your camcorder to a computer. You can see the detailed usage when you click the help button in the upper right after starting “PMB Portable. -
Page 37: Customizing Your Camcorder
Customizing your camcorder Using menus Using the menus, you can perform useful functions and change various settings. If you make good use of menu operations, you can enjoy using your camcorder. The camcorder has various menu items under each of eight menu categories. MANUAL SETTINGS (Items to adjust for scene condition) ... - Page 38 Select Select [Show others] on the [MY MENU] screen. Select the menu item to be changed. After changing the setting, select To finish setting the menu, select To return to the previous menu screen, select may not be displayed depending on the menu item. ...
- Page 39 Menu lists (MANUAL SETTINGS) category SCENE SELECTION ....Selects an appropriate recording setting according to the type of scene, such as night view or beach. FADER ........Fades scenes in or out. WHITE BAL......... Adjusts the color balance to the brightness of the recording environment. EXPOSURE .........
- Page 40 DELETE DELETE ......Deletes movies. DELETE ......Deletes photos. PROTECT PROTECT ..... Protects movies to avoid deleting. PROTECT ..... Protects photos to avoid deleting. DIVIDE ........Divides movies. PHOTO CAPTURE ....Captures photos from desired scenes of movies. MOVIE DUB DUB by select ....
- Page 41 (GENERAL SET) category SOUND/DISP SET VOLUME ......Adjusts the volume of playback sound (p. 19). BEEP ........Sets whether the camcorder sounds operation beeps or not. LCD BRIGHT ..... Adjusts the brightness of the LCD screen. LCD BL LEVEL ....Adjusts the backlight of the LCD screen. LCD COLOR ......
-
Page 42: Dividing A Movie
Dividing a movie Getting detailed information from the “Handycam” Handbook [Show others] Select For details on advanced operations, please [ DIVIDE] (under [EDIT] read “Handycam” Handbook, on the CD- category). ROM (supplied) using a computer. To install the “Handycam” Select the movie to be divided. -
Page 43: Additional Information
Additional Information Screen indicators Indicator Meaning Upper left Center Upper right Estimated recording [00min] remaining time FADER Drop sensor off Drop sensor activated Approximate number of 9999 recordable photos and 9999 recording media Bottom Playback folder of Upper left memory card Indicator Meaning Current playing movie or... -
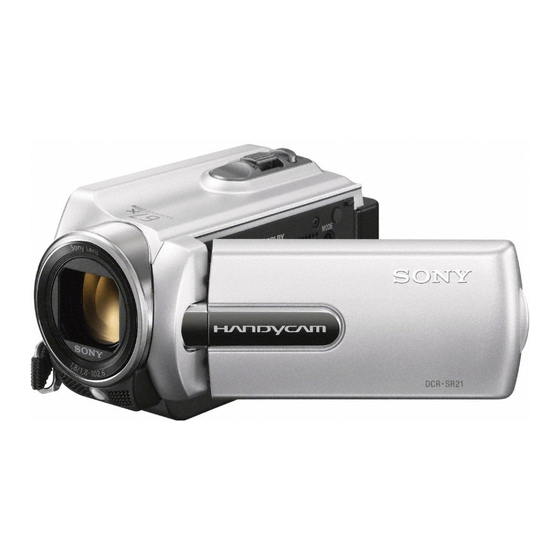
Page 44: Parts And Controls
Parts and controls Figures in ( ) are reference pages. LCD screen LIGHT button (17) Multi-selector (9) (VIEW IMAGES) button (18, 24, 28) Speaker (DCR-PJ5) PROJECTOR button (22) Lens Projector lens LENS COVER switch ... - Page 45 DCR-SR21 DCR-PJ5/SX21 Power zoom lever PHOTO button (16) Power zoom lever POWER lamp PHOTO button (16) CHG (charge) lamp (13) POWER lamp Battery pack (13) START/STOP button (16) START/STOP button (16) ...
-
Page 46: Troubleshooting
Leave the camcorder there for a while, then turn on the camcorder. Contact your Sony dealer or local Your camcorder gets warm. authorized Sony service facility. - Page 47 Turn off your camcorder and leave it in have tried to fix a couple of times, contact a cool place. your Sony dealer or local authorized Sony service facility. In this case, when you contact them, give them all the numbers of The temperature of your camcorder is low.
-
Page 48: Specifications
Specifications System becomes full. Delete unnecessary images Signal format: NTSC color, EIA standards (p. 20), or format the memory card (p. 54) Movie recording format: after storing the images on other media. Video: MPEG-2 PS The Image Database File is damaged. Check ... - Page 49 59 mm × 64.5 mm × 124.5 mm (2 3/8 LCD screen in. × 2 5/8 in. × 5 in.) (w/h/d) including Picture: 6.7 cm (2.7 type, aspect ratio 16:9) the projecting parts, and the supplied Total number of pixels: 230 400 (960 240) ...
- Page 50 Memory Stick Duo” are trademarks or These tables show the approximate registered trademarks of Sony Corporation. available running times when you use a “InfoLITHIUM” is a trademark of Sony fully charged battery pack. Corporation. “DVDirect” is a trademark of Sony ...
-
Page 51: Precautions
Precautions Recording different from images and screen indicators that actually appear on your camcorder. And, the When you use a memory card with your illustrations of your camcorder and its screen camcorder for the first time, formatting the indication are exaggerated or simplified for memory card with your camcorder (p. - Page 52 casing, unplug your camcorder and have it dirty, it is recommended that you use a soft checked by a Sony dealer before operating it cloth to clean it. When you use the LCD any further. Cleaning Kit (sold separately), do not apply the Avoid rough handling, disassembling, cleaning liquid directly to the LCD screen.
-
Page 53: Battery Pack
and sunscreen recommended that you perform [EMPTY] Handling the camcorder with above (See “Getting detailed information from the substances on your hands “Handycam” Handbook” on page 42.) to prevent Leaving the casing in contact with rubber or the recovery of your data. Also, when you dispose ... -
Page 54: When The Camcorder Is Connected To A Computer Or Accessories
memory cards is not assured. under the current recording or playback “Memory Stick PRO Duo” media of up to conditions. 32 GB and SD memory cards of up to 64 GB Save all your recorded image data have been tested and proven to operate with your camcorder. - Page 55 Notes on use Do not do any of the following, otherwise, the recording media may be damaged, recorded images may be impossible to play back or may be lost, or other malfunctions could occur. Eject the memory card when the access lamp ...
-
Page 56: Index
Index Menus ........37, 39 MOVIE MEDIA SET ....15 A/V connecting cable..23, 24, 28 VIDEO LIGHT ......17 Movies ..........16 Altitude ........55 VIEW IMAGES ......18 MY MENU ........37 VISUAL INDEX ......18 MY MENU SETTING ....37 Volume .........19 battery pack .........13 Operation beeps......14 Wall outlet (wall socket) ....13 Care ..........51 OPTION MENU ......38... -
Page 58: Lea Este Apartado En Primer Lugar
No la incinere ni la arroje al fuego. No manipule baterías de iones de litio dañadas o que presenten fugas. Asegúrese de cargar la batería con un cargador de baterías original de Sony o con un dispositivo que pueda cargarla. - Page 59 CD-ROM “Handycam” Application Software (1) Para seleccionar un elemento del MENU “PMB” (software, incluye la “Ayuda de PMB”) Guía práctica de “Handycam” (PDF) Puede utilizar el selector múltiple para “Guía de operaciones” (Este manual) (1) seleccionar/decidir los elementos del MENU. ...
-
Page 60: Cada Día Se Vive Como Un Momento Inolvidable Con "Handycam
Cada día se vive como un momento inolvidable con “Handycam” Captura Página 10 (Grabación) - Page 61 Archivos compartidos Página 19 (Creación de un disco) Compartir ahora Página 16 (Proyector) Solamente para el modelo DCR-PJ5...
- Page 62 Índice Lea este apartado en primer lugar..............2 Cada día se vive como un momento inolvidable con “Handycam”..
-
Page 63: Preparación
Preparación Carga Instale la batería. Batería Para extraer la batería Cierre la pantalla de cristal líquido. Deslice la palanca de liberación de BATT (batería) y extraiga la batería. Palanca de liberación de BATT (batería) DCR-SR21 Conecte el adaptador de alimentación de ca a la toma de entrada de cc ... -
Page 64: Ajuste
Ajuste Abra la pantalla de cristal líquido para encender la videocámara. Para apagar la videocámara Cierre la pantalla de cristal líquido. Ajuste la zona geográfica y la hora mediante el selector múltiple. Indicador de acceso Inserte la tarjeta de memoria en la ranura para tarjetas de memoria. - Page 65 Cambio del soporte de grabación (DCR-SR21) En el ajuste predeterminado, tanto las películas como las fotos se graban en el disco duro interno. Puede cambiar el soporte de grabación a la tarjeta de memoria. [Mostrar otros] [AJUSTES SOPORTE] (en la categoría [GESTIÓN SOPORTE]) ...
-
Page 66: Grabación/Reproducción
Grabación/reproducción Grabación Abra la tapa del objetivo. Seleccione un modo (Película/ MODE Foto). Película: Foto: Película: Presione START/STOP. Foto: Presione PHOTO. Notas Si cierra la pantalla de cristal líquido mientras graba películas, se detendrá la grabación. El tiempo máximo de grabación continua de películas es de aproximadamente 13 hora. ... - Page 67 Grabación en un lugar con luz tenue Puede presionar LIGHT para encender la VIDEO LIGHT de LED. Utilización del zoom Es posible ampliar las imágenes hasta 67 veces su tamaño original con la palanca del zoom motorizado. Visualización de los iconos e indicadores nuevamente Si no se muestran, es posible visualizar los iconos y los indicadores al pulsar el selector múltiple.
-
Page 68: Reproducción En La Videocámara
Reproducción en la videocámara Presione (VISUALIZAR (VISUALIZAR IMÁGENES) IMÁGENES) para mostrar la pantalla VISUAL INDEX. Película: Seleccione (Película). Foto: Seleccione (Foto). Seleccione la imagen deseada. - Page 69 Pantalla de reproducción de películas Ajuste del volumen Anterior Siguiente OPTION Detención Avance rápido Rebobinado rápido Pausa/reproducción Es posible ajustar el volumen. ajústelo con Pantalla de reproducción de fotos Inicio/detención de presentación de Anterior diapositivas Siguiente A la pantalla VISUAL OPTION INDEX...
-
Page 70: Eliminación De Películas Y Fotos
Eliminación de películas y fotos [Mostrar Seleccione otros] [BORRAR] (en la categoría [EDIT]). Película: BORRAR] Seleccione [ BORRAR]. Foto: BORRAR] Seleccione [ BORRAR]. - Page 71 Seleccione las imágenes que desee borrar. Aparece la marca [SÍ] Seleccione Notas Una vez eliminadas, las imágenes no se pueden restaurar. Guarde las películas y fotos importantes de antemano. No extraiga la batería ni el adaptador de alimentación de ca de la videocámara durante la eliminación de ...
-
Page 72: Reproducción De Imágenes A Través Del Proyector Incorporado (Dcr-Pj5)
Reproducción de imágenes a través del proyector incorporado (DCR-PJ5) Presione PROJECTOR. Ajuste la imagen proyectada. Seleccione la imagen que desee proyectar. Notas Tenga cuidado en las operaciones o situaciones siguientes mientras utilice el proyector. Asegúrese de no proyectar imágenes sobre los ojos. ... - Page 73 Visualización a través del proyector de imágenes grabadas en otros dispositivos [Mostrar otros] [PROYECTOR] (en la categoría [OTROS]) [FUENTE] [ENTR. PROYECTOR] Conecte la videocámara al otro dispositivo con el cable de conexión de A/V. Salida Flujo de señales VIDEO...
-
Page 74: Reproducción De Imágenes En Un Televisor
Reproducción de imágenes en un televisor Ajuste el selector de entrada del televisor a la entrada a la que se conectará la videocámara. Conecte la videocámara Televisores Videograbadoras a un televisor con el cable de conexión de A/V (suministrado). (Rojo) AUDIO (Blanco) VIDEO... -
Page 75: Almacenamiento De Películas Y Fotos
Almacenamiento de películas y fotos Almacenamiento de imágenes en un disco Conecte el adaptador de alimentación de ca y el cable de alimentación a la toma de entrada de cc de la videocámara y al tomacorriente de pared. Uso de DVDirect Express Conecte la grabadora de DVD a la toma (USB) de la videocámara con el cable USB... - Page 76 Reproduzca el disco creado para asegurarse de que la copia se realizó correctamente antes de eliminar las películas de la videocámara. Si [Se produjo un error.] o [Error al ejecutar GRABAR EN DISCO.] aparecen en la pantalla, inserte otro ...
- Page 77 Seleccione [FIN] [SÍ] una vez que finalice la operación. Notas Consulte también los manuales de instrucciones suministrados con los dispositivos que desea conectar. Es posible que la grabadora de DVD de Sony no esté disponible en algunos países o regiones. ...
- Page 78 Utilización de una grabadora, etc. Inserte el soporte de grabación en el dispositivo de grabación (una grabadora de discos, etc.). Conecte la videocámara al Entrada dispositivo de grabación con el cable de conexión de A/V (suministrado). VIDEO (Amarillo) (Blanco) AUDIO (Rojo) Flujo de señales Inicie la reproducción en la...
- Page 79 Notas Debido a que la copia se realiza a través de la transferencia de datos analógica, es posible que la calidad de imagen se deteriore. Es posible ocultar los indicadores de la pantalla (como el contador, etc.) en la pantalla del dispositivo ...
-
Page 80: Archivo De Imágenes En Un Soporte Externo (Copia Directa)
Archivo de imágenes en un soporte externo (COPIA DIRECTA) Conecte el adaptador de alimentación de ca y el cable de alimentación a la toma de entrada de cc de la videocámara y al tomacorriente de pared. Si el soporte externo dispone de un cable de alimentación de ca conéctelo Al tomacorriente de pared... - Page 81 El número de escenas que puede guardar en el soporte externo es el siguiente. Películas: 9 999 películas Fotos: 9 999 marcos × 899 carpetas El número de escenas puede ser más pequeño en función del tipo de imágenes grabadas. ...
-
Page 82: Utilización De Una Computadora
Utilización de una computadora Funciones útiles disponibles si conecta la videocámara a una computadora El software PMB almacenado en el CD-ROM (suministrado) incluye funciones que le permitirán hacer más cosas con las imágenes grabadas en la videocámara. (Windows) Calendario Guardar en un Cargar disco Servicios de red... -
Page 83: Preparación De La Computadora
Preparación de la computadora Notas Paso 1 Comprobación del sistema No se asegura el funcionamiento con todos los informático entornos informáticos. Windows Si utiliza un Macintosh Sistema operativo El software “PMB” suministrado no Microsoft Windows XP SP3 /Windows Vista es compatible con las computadoras /Windows 7 SP1 Macintosh. - Page 84 Coloque el CD-ROM suministrado Encienda la videocámara y en la unidad de disco de la conéctela a la computadora computadora. mediante el cable USB suministrado. Aparecerá la pantalla de instalación. Si la pantalla no aparece, haga clic en ...
- Page 85 Reinicie la computadora si fuera necesario Acceda desde la computadora mediante para finalizar la instalación. el “PMB” suministrado. No modifique los archivos ni las carpetas de la videocámara Cuando la instalación haya finalizado, desde la computadora. Los archivos de imagen aparecerán los siguientes iconos.
-
Page 86: Inicio De Pmb (Picture Motion Browser)
Inicio de PMB Uso de “PMB Portable” (Picture Motion Browser) Haga doble clic en el icono de acceso “PMB Portable”, que le permite cargar directo de “PMB” en la pantalla de la imágenes fácilmente a un servicio de red, computadora. se inicia al conectar la videocámara a una computadora. - Page 87 Para obtener más detalles acerca de “PMB Portable”, consulte la ayuda de “PMB Portable”.
-
Page 88: Personalización De La Videocámara
Personalización de la videocámara Uso de los menús Mediante los menús, es posible ejecutar funciones útiles y cambiar diversos ajustes. Si utiliza correctamente los menús, puede disfrutar de la utilización de la videocámara. La videocámara dispone de diversos elementos de menú en cada una de las ocho categorías de menú. - Page 89 : para finalizar el ajuste del menú. : la lista del menú se mueve de categoría a categoría. : la lista del menú se mueve de a 4 elementos por vez. : para volver a [MI MENÚ]. Seleccione Seleccione [Mostrar otros] en la pantalla [MI MENÚ]. ...
- Page 90 Seleccione (OPTION). Seleccione la ficha deseada el elemento cuyo ajuste desee modificar. Tras completar el ajuste, seleccione Notas Los elementos de menú o ajustes atenuados no están disponibles. Si el elemento que desea no aparece en la pantalla, seleccione otra ficha. (Es posible que no haya ninguna ...
- Page 91 Listas de menú Categoría (AJUST.MANUALES) SELEC.ESCENA ......Permite seleccionar un ajuste de grabación apropiado en función del tipo de escena, como una vista nocturna o la playa. DESVANECEDOR....Permite aumentar o desvanecer las escenas. BAL.BLANCOS ......Permite ajustar el balance cromático al brillo del entorno de grabación. EXPOSICIÓN ......
- Page 92 AJUSTES REPROD. CÓDIGO DATOS....Permite visualizar los datos detallados de grabación durante la reproducción. Categoría (EDIT) BORRAR BORRAR ...... Permite eliminar películas. BORRAR ....... Permite eliminar fotos. PROTEGER PROTEGER ....Permite proteger las películas para evitar que se eliminen. PROTEGER ....Permite proteger las fotos para evitar que se eliminen. DIVIDIR ........
- Page 93 INFO SOPORTE ......Permite visualizar información del soporte de grabación, como el espacio libre. FORMAT.SOPORTE ........ Permite eliminar todos los datos del disco duro interno. HDD * TARJ.MEMORIA ....Permite borrar todos los datos de la tarjeta de memoria. REP.ARCH.BD.IM. HDD * ........
-
Page 94: División De Una Película
División de una película Es posible combinar películas divididas mediante el software “PMB” suministrado. [Mostrar Seleccione Consulte la “Ayuda de PMB” (pág. 30) si desea otros] [ DIVIDIR] (en la obtener más información. categoría [EDIT]). Seleccione la película que desee dividir. -
Page 95: Obtención De Información Detallada De La Guía Práctica De "Handycam
Obtención de información detallada de la Guía práctica de Se necesita la aplicación Adobe Reader para “Handycam” leer la Guía práctica de “Handycam”. Si no se encuentra instalada en la computadora, la puede descargar de la página web de Adobe Para obtener más detalles acerca de Systems: las operaciones avanzadas, utilice... -
Page 96: Información Complementaria
Información complementaria Indicadores de la pantalla Indicador Significado Parte superior Parte superior Soporte de grabación/ izquierda Parte central derecha reproducción/edición Contador (hora:minuto: 0:00:00 segundo) Tiempo de grabación [00min] restante previsto DESVANECEDOR Sensor de caídas desactivado Parte inferior Sensor de caídas activado Número aproximado de Parte superior izquierda 9999... -
Page 97: Piezas Y Controles
Piezas y controles Los números entre ( ) corresponden a las Indicador Significado páginas de referencia. Imagen protegida Botón de índice Modo película/modo foto Los indicadores y sus posiciones son aproximados y pueden variar respecto de su apariencia real. Según el modelo de la videocámara, es posible ... - Page 98 DCR-PJ5 DCR-PJ5/SX21 Pantalla de cristal líquido Botón LIGHT (11) Palanca del zoom motorizado Selector múltiple (3) Botón PHOTO (10) Botón (VISUALIZAR IMÁGENES) (12, Indicador POWER 18, 22) Botón START/STOP (10) Botón PROJECTOR (16) ...
-
Page 99: Solución De Problemas
Botón START/STOP (10) Toma de entrada de cc (7) Póngase en contacto con el Correa de sujeción distribuidor Sony o con un centro de Gancho para bandolera servicio técnico local autorizado de Indicador de acceso (tarjeta de Sony. - Page 100 En el ajuste predeterminado, la alimentación interno con el fin de investigar el problema. se apaga automáticamente si no utiliza la No obstante, el distribuidor Sony no copiará ni videocámara durante unos 5 minuto, para conservará los datos. ahorrar energía de la batería ([APAGADO AUTO]).
- Page 101 La batería dispone de poca energía. Si el problema persiste aun después de intentar solucionarlo varias veces, póngase en contacto con su distribuidor Sony o La temperatura de la batería es alta. Cambie la con un centro de servicio técnico local ...
-
Page 102: Especificaciones
Especificaciones Sistema Formato de señal: color NTSC, estándares EIA Formato de grabación de película: La tarjeta de memoria está dañada. Formatee Video: MPEG-2 PS la tarjeta de memoria con la computadora Sistema de grabación de audio: (pág. 53). Dolby Digital de 2 canales Dolby Digital Stereo Creator Formato de archivo de fotografía : compatible con DCF Ver.2,0... - Page 103 DCR-SR21: Pantalla de cristal líquido 59 mm × 64,5 mm × 113,5 mm (an/al/prf) Imagen: 6,7 cm (tipo 2,7; formato 16:9) incluidas las partes salientes Número total de píxeles: 230 400 (960 240) 59 mm × 64,5 mm × 124,5 mm (an/al/prf) incluidas las partes salientes y la batería Proyector (DCR-PJ5) recargable suministrada instalada...
-
Page 104: Marcas Comerciales
Sony Corporation. cuando se utiliza una batería totalmente “InfoLITHIUM” es una marca comercial de cargada. Sony Corporation. “DVDirect” es una marca comercial de Sony DCR-SR21 DCR-SX21 DCR-PJ5 Corporation. Soportes de Disco duro Tarjeta de memoria Dolby y el símbolo de double-D son marcas... -
Page 105: Precauciones
Precauciones Grabación Las películas grabadas en tarjetas de memoria SD no se pueden reproducir en equipos de A/V Cuando use por primera vez una tarjeta de de otro fabricantes. memoria con la videocámara, se recomienda formatear la tarjeta de memoria con la Acerca de las imágenes, ilustraciones videocámara (pág. - Page 106 Mientras utiliza la videocámara, la parte o líquido, desconéctela y haga que la revise un posterior de la pantalla de cristal líquido se distribuidor de Sony antes de volver a utilizarla. puede calentar. No se trata de una falla de funcionamiento.
- Page 107 Para limpiar la pantalla de cristal líquido Cuando el objetivo esté expuesto al aire salado como, por ejemplo, a orillas del mar Si la pantalla de cristal líquido se ensucia de Guárdelo en un lugar bien ventilado donde no ...
- Page 108 Se han probado y se ha demostrado que los Batería “Memory Stick PRO Duo” de hasta 32 GB y Cuando extraiga la batería o desconecte el las tarjetas de memoria SD de hasta 64 GB adaptador de alimentación de ca cierre la funcionan con la videocámara.
- Page 109 Elementos de menú Si no puede grabar o reproducir imágenes, ejecute [FORMAT.SOPORTE] Los elementos de menú que aparezcan atenuados no estarán disponibles en las Si graba o elimina imágenes repetidamente condiciones de grabación o reproducción durante mucho tiempo, los datos del soporte de actuales.
- Page 110 Nota sobre el uso de la videocámara a grandes alturas (DCR-SR21) No encienda la videocámara en áreas de baja presión, de altitud superior a los 5 000 metro. Si lo hace, puede dañarse la unidad de disco duro interno de la videocámara.
-
Page 111: Índice
Índice Grabadora de discos ....22 Trípode .........42 Grabadora de DVD ....21 AJ.SOPORTE FOTO ....9 Guía práctica de “Handycam” ...39 AJ.SOPORTE PEL.......9 VIDEO LIGHT ......11 AJUS.RELOJ ........8 VISUAL INDEX ......12 Ajuste de la fecha y la hora ..8 Indicadores de advertencia ..45 Visualización de autodiagnóstico AJUSTE IDIOMA ......3 ............45... - Page 112 Additional information on this product and answers to frequently asked questions can be found at our Customer Support Website. http://www.sony.net/ 2011 Sony Corporation Printed in China ...
Need help?
Do you have a question about the DCR-PJ5 Handycam and is the answer not in the manual?
Questions and answers
,не могу перейти на меню на русском языке,не знаю других языков.