Advertisement
Quick Links
We are very proud of the design and quality of
the Ab Coaster® Pro. This product has been manufactured
to the highest standards. Should you have any problem
our friendly customer service staff is here to help you
if you have a question.
We are available at:
973-287-5180
8:00am–9:00pm EST Monday –Friday
9:00am–5:00pm EST Saturday & Sunday
www.abcoaster.com
© 2008 TRISTAR PRODUCTS, INC.
ALL RIGHTS RESERVED.
© 2008 Ab Coaster, LLC All Rights Reserved.
U.S. Pat. Nos. 7,611,445 and D565,134 and other Patents Pending
U.S. Trademark Registration Numbers 3407362 and 2632152
Distributed by: Tristar Products, Inc., Fairfield, NJ 07004
AbCPRO_IB_QVC_ENG_V2_101223
Advertisement

Summary of Contents for AbCoaster Pro
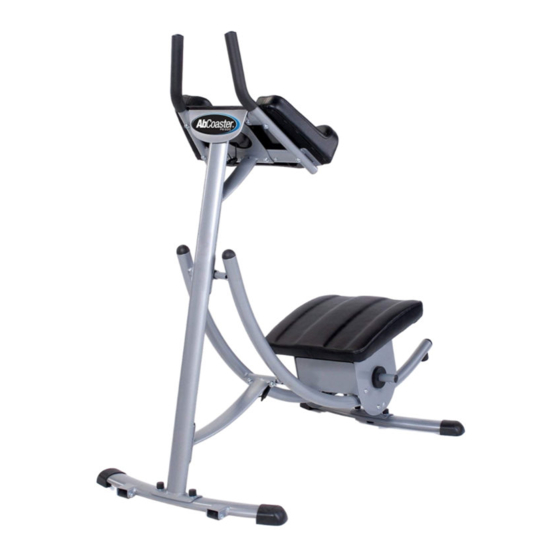
- Page 1 We are very proud of the design and quality of the Ab Coaster® Pro. This product has been manufactured to the highest standards. Should you have any problem our friendly customer service staff is here to help you if you have a question.
- Page 3 CONTENTS 3 I mportant Safety Information 4 Assembly Instructions 6 Adjusting the Seat 6 G etting On and Off the Ab Coaster® Pro 7 Ab Coaster® Pro Exercises a. Forward Lift b. Side Lift (Obliques) c. “Free-Style Motion” Training d. Resistance Training 10 Digital Counter 10 M oving, Storing and Maintaining the Ab Coaster® Pro 11 Parts List and View CAUTION: PIN CAUTION: PINCH POINT SAFETY LABELS CAUTION: PINCH POINT Make sure locking pin is fully engaged before beginning forward and side lift exercises.
- Page 4 PARTS LIST AND VIEW NO. Part Name Specification QTY (PCS) NO. Part Name Specification QTY (PCS) NO. Part Name Specification QTY (PCS) foot grip match 70*35*1.5 elliptical tubing arm cushion nylon bushing ø70*ø40*20 front leg handlebar frame ø38 nylon sleeve ø38*ø25*19 M10*45 screw M10*45(15mm thread) handlebar grip ø29*ø23*220 weight post collar ø70*8 R71 arc washer ø25*d10*2.0_R71...
- Page 5 D. RESISTANCE TRAINING (Weights Not Included) Using Added Weight for Resistance: There are 2 weight posts on the sides of the Ab Coaster® Pro Seat for adding weights (not included) for extra resistance during exercise. CAUTION: Do not add more than 20 lbs. of weight in total to the posts (4 plates of 5 lbs. each). Before adding any weight, ensure that you are able to perform the exercise with proper form without any additional weights.
- Page 6 ON TRACK WHILE SOMEONE IS USING THE UNIT. • KEEP THE Ab Coaster® Pro OUT OF THE REACH OF CHILDREN. The Ab Coaster® Pro is not a toy and is not meant to be used by or near children and pets. Please keep children and pets away from the Ab Coaster® Pro and during use, as well as when the product is left unattended.
- Page 7 ASSEMBLY INSTRUCTIONS Your Ab Coaster® Pro has been thoroughly inspected and partly assembled before shipment. You will need to take a few additional steps as described below to complete assembly. If you have any questions, please call our customer service center at 973-287-5180.
- Page 8 Do not use excessive force when lifting or returning Seat to starting position and avoid banging Seat against the track. CAUTION: DO NOT LEAVE THE Ab Coaster® Pro SEAT “UNLOCKED” IN THE FREE-MOTION SETTING WHEN YOU ARE FINISHED WITH EXERCISE. LOCK THE SEAT INTO A FIXED POSITION AFTER YOU COMPLETE EXERCISE.
- Page 9 B. SIDE LIFT– FOR OBLIQUES (LEFT AND RIGHT) 1. Adjust Seat to the side you want to work (left or right). Make sure Seat pin is in “locked” position and the Seat is not moving freely. 2. Follow Steps 2 - 6 from the Forward Lift exercise above. 3.
- Page 10 Step 3: Attach front post to curved track. The front post is attached to track in 2 locations as shown using the 2 pre-attached Allen head screws for each location. Finger tighten only. Step 4: Attach armrest console to top of front post using the 4 pre-attached Allen head screws.
- Page 11 Getting On and Off the Ab Coaster® Pro When Seat is in “Unlocked” Free-Style Motion Position: Use extra caution when getting on or getting off Ab Coaster® Pro while Seat is “unlocked” in Free-Style Motion setting. Since the Seat is not fixed and locked while in the Free-Style Motion position, make sure you move slowly and grasp handles first to keep your body steady before kneeling on the Seat.
- Page 12 ® How It Works: The Ab Coaster® Pro is designed to help you exercise your abdominal muscles via a leg lift motion. Unlike the popular sit-up or ab crunch exercise, which works your abdominals from the “top down”, the Ab Coaster®...


Need help?
Do you have a question about the Pro and is the answer not in the manual?
Questions and answers
How do you change the batteries on the ab coaster
To change the battery on the AbCoaster Pro:
1. Locate the small notch near the counter.
2. Insert a quarter into the notch and flip it open.
3. Remove the old battery.
4. Insert one new AAA battery.
5. Close the compartment.
This should restore the counter's function.
This answer is automatically generated