Table of Contents
Advertisement
Advertisement
Table of Contents

Related Manuals for NC SW6


Summary of Contents for NC SW6
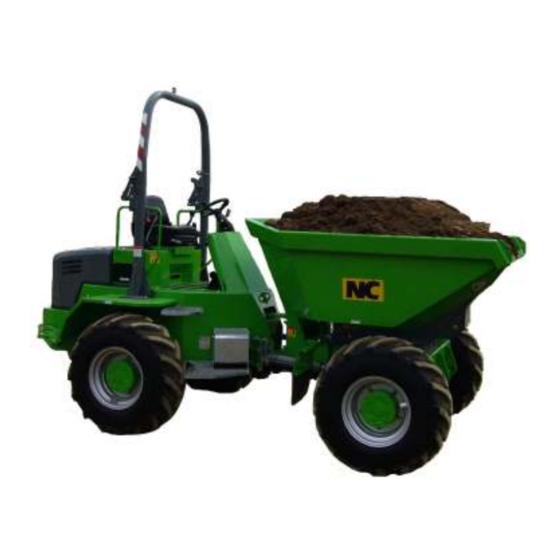
- Page 1 ORGINAL INSTRUCTIONS SW6 Site Dumper MAINTENANCE INSTRUCTION MANUAL NC ENGINEERING (HAMILTONSBAWN) LTD 2 Killyrudden Road, Hamiltonsbawn, Co Armagh, BT61 9SF Tel: 028 38871970 Fax: 028 38870362 sales@nc-engineering.com www.nc-engineering.com email: REVISION-E...
- Page 2 Dear Customer Even if you have operated this type of equipment before, it is very important that your new equipment operations and instructions are explained to you by a Dealer Representative following delivery of your equipment. This will explain the operating controls and enable you to gain maximum productivity from your new dumper.
- Page 3 The procedures in this publication relate specifically to the NC Dumper All information, specifications and illustrations used in this manual are correct at the time of issue. NC reserves the right to make changes in this manual at any time without prior notice. Copyright © 2010 NC Engineering (Hamiltonsbawn) Ltd All rights reserved.
-
Page 4: Table Of Contents
Contents Page No. Declaration of Conformity Noise Level Declaration Vibration Declaration Technical Information Maintenance Decals Descriptions Safety Decals and Descriptions 6T PST Maintenance Manual Service Record Service Schedules Torque Settings Fluids and Lubricants Safety Information Maintenance Battery Air Cleaner Coolant System Engine Oil Check / Change Gearbox Oil Check / Change Towing Procedure... -
Page 5: Declaration Of Conformity
EC – DECLARATION OF CONFORMITY Machine description Site Dumper Make Type Manufactured by NC Engineering (Hamiltonsbawn) Ltd Address: 2 Killyrudden Road, Hamiltonsbawn, Richhill Co. Armagh. BT61 9SF This machinery has been designed and manufactured in accordance with the following European Standards: -... -
Page 6: Noise Level Declaration
Noise Level Declaration The noise levels are measured according to ISO6395:1998 The noise level of this machine is 103dB ( A ) 85dB ( A ) :- A - Weighted sound power level. :- A - Weighted sound pressure level. -
Page 7: Vibration Declaration
Vibration Declaration. The absence of a harmonised test code together with variable conditions under which this equipment may be used allows only representative figures to be quotes. Whole Body Vibration Level : a (m/s²) = 0.25 Hand / Arm : a ( m/s²... - Page 8 Technical Specifications Capacity: Skip: Max. safe load: 6000 kg Hydraulically operated skip tipping to 95º Heaped: 3150L Skip swivels past 180º for easy placement when driving along Struck: 2215L trenches (185º maximum) Water: 1645L Automatic safety lock to hold skip in a central position when Engine: travelling JCB444T 4 cylinder Turbo...
- Page 9 Technical Specifications Basic Engine Data Emission compliance Tier 2 / Stage 2 Rated speed 2200rpm Number of cylinders Nominal bore size 103mm ( 4.055 in ) Stroke 132mm ( 5.16 in ) Cylinder arrangement In line Combustion cycle 4-stroke Firing order (1 at front {crankshaft pulley} end) 1-3-4-2 Displacement 4.40 litres...
- Page 10 Technical Specifications Torque + Angle Explanation Insufficient preload of a bolted joint can cause major problems, such as cylinder head warp, leaking gasket joints etc. There are several methods of achieving an accurate preload of a bolted joint, the two main methods used on the JCB 444 engine are: Torque Control Tightening Angle Control Tightening...
- Page 11 Technical Specifications Engine Torque Figures Item Torque Setting Angle lbf ft Fan belt tensioner retaining bolts 22-26 16-19 Item Torque Setting Angle lbf ft Oil sump retaining bolts A 22-26 16-19 Oil sump plug B 40-60 30-44 Item Torque Setting Angle lbf ft Rocker cover retaining bolts 22-24...
- Page 12 Technical Specifications Engine Torque Figures Item Torque Setting Angle lbf ft Water inlet connector retaining 22-26 16-19 bolts Item Torque Setting Angle lbf ft Water temperature sender / switch 22-26 16-19 Item Torque Setting Angle lbf ft Cold start advance switch 22-24 16-19 Item...
- Page 13 Technical Specifications Engine Torque Figures Item Torque Setting Angle lbf ft Inlet manifold retaining bolts 22-26 16-19 Item Torque Setting Angle lbf ft High pressure fuel pipes 25-29 19-22 Item Torque Setting Angle lbf ft Power take off (PTO) pump bolts - SAE ‘A’...
- Page 14 Technical Specifications Engine Torque Figures Item Torque Setting Angle lbf ft Starter motor retaining bolts 43-51 32-38 Item Torque Setting Angle lbf ft Alternator retaining bolts 34.7 Item Torque Setting Angle lbf ft Oil cooler drain plug 20-25 15-18 Item Torque Setting Angle lbf ft Fuel filter retaining strap bolt...
-
Page 15: Maintenance Decals Descriptions
The decal must be clean and readable at all times. If the decal needs to be replaced it can be obtained from the NC Spares department. Ref No. - Page 16 Maintenance Decal Descriptions Ref No. Symbols Description. Grease Point - Steering Ram. Grease Point - Drive Shafts. Transfer Box Oil Level. Transmission Oil Filter. Oil Pressure Filter. Axle Oil. Engine Oil Filter. Fuel Filter. Check Drive Shaft Bolts. Air Filter Element. Transmission Oil.
-
Page 17: Safety Decals And Descriptions
It is important that before using the machine theses decals are read and un- derstood. The decals must be clean and readable at all times, if they need to be replaced they can be obtained from NC spares department. Part No. - Page 18 Safety Decals and Descriptions Part No. Symbol. Descriptions. DEC~1920-011 Gear locations. DEC~1920-012 Seat belt must be worn. DEC~1920-013 Don’t operate controls until operators manual has been read. DEC~1920-014 Recommended brake fluid. DEC~1920-015 Recommended brake fluid ( Circular ) DEC~1920-016 No repairs to ROPS. DEC~1920-017 Stay clear of pinch points.
-
Page 19: 6T Pst Maintenance Manual
6T PST Maintenance Manual The following maintenance sections are provided to ensure safe working practices. The procedures in this booklet should be followed. No attempt should be made to shortcut any of the steps. You or others could be killed or seriously injured if the machine is not correctly prepared and maintained. -
Page 20: Service Record
Service Record Sheet First 50 Hr. First 5000 Hr. Date……………………. Date……………………. Hour Reading………….. Hour Reading………….. First 100 Hr. First 5500 Hr. Date……………………. Date……………………. Hour Reading………….. Hour Reading………….. First 500 Hr. First 6000 Hr. Date……………………. Date……………………. Hour Reading………….. Hour Reading………….. First 1000 Hr. First 6500 Hr. -
Page 21: Service Schedules
Service Schedules CALENDAR EQUILIVANTS 50 Hours = Weekly 100 Hours = Fortnightly 500 Hours = Six Months 1000 Hours = Yearly 2000 Hours = 2 Years Service checks should be carried out at which ever interval occurs first. Do not use a machine which is due for a service. Make sure any defects found during the regular maintenance are rectified immediately. - Page 22 Service Schedules Operation 1000 2000 AXLE Service Points & Fluid Levels Hubs Check for Leaks ● ● ● ● Axle Oil Level (incl. Hubs when applicable) Check ● ● ● ● Axle Oil Change ● ● ● Tightness of Mounting bolts (Torque to 970Nm / 715lbf ft) ●...
- Page 23 Service Schedules Operation 1000 DUMPER CHASSIS Grease Points Skip Pivot Pins (2 No Pins) ● Slew ring (4 No Points) ● ● Tipping Ram Pins (2 No Pins) ● Slew Rams (2 No Points) ● Skip Stopper Flap (1 No Point) ●...
-
Page 24: Torque Settings
Torque Settings Use these torque settings only where no torque setting has been specified in the text. Values are for dry threads and may be within 3% of the figures stated. For lubricated threads the values should be reduced by one third. UNF Grade “S”... -
Page 25: Fluids And Lubricants
SAE 15W40 NC recommend Fuchs Lubricants, the dumper comes pre-filled with SAE 15W30 oil If you are in any doubt as to the correct grade of oil to use contact NC ENGINE OIL CAPACITY Choose the grade of oil to suit the temperature range as detailed in the table above. The... - Page 26 No warranty liability whatsoever will be accepted for failure of injection equipment where the failure is attributed to the quality and grade of fuel used. Only the following types of fuel are considered acceptable by NC EN590 Diesel fuel types (Auto/C0/C1/C2/C3/C4) •...
-
Page 27: Hydraulic Oil
NC recommend Mobilube HD90 (International Specification API GL5) 1Litre Alternative Suppliers Shell Spirax MB90, Titan Gear HYP SAE90, BP Energear Hypo 90. AXLE OIL NC recommend Mobil 424 (International Specification API GL4, M2C-41B/134D, JD20C) 23 Litres Alternative Suppliers Shell Spirax S4 TXM, BP Tractran 10. - Page 28 Fluids & Lubrication NON-GEARED SLEW RING NC Recommend Fuchs Renolit EP2 grease Alternative Suppliers GENERAL GREASE POINTS Multi purpose grease Do not mix different type of oils / grease as they may react with each other. If topping up use the same type of oil or...
- Page 29 Keep suitable fire extinguishers near by. • Never smoke or leave the engine running when refuelling. • Always use genuine spares from NC Engineering. • Always check and test the machine thoroughly before putting it back to work. Observing these points will help to ensure the repair of the dumper is as safe as...
-
Page 30: Maintenance
Maintenance BEFORE YOU START • Clean the machine before starting any maintenance. • Allow the machine to cool. • Ensure strict cleanliness is observed at all times. • Do not smoke near any fluids. • Beware of scalding from hot oils, check oil temperature before draining. When checking fluid levels on dumper, ensure the machine is switched off, positioned •... -
Page 31: Battery
Maintenance BATTERY LOCATION The battery is located in the left-hand footstep assembly. It is accessed by turning the key lock (A) on the side and then pulling the step (B) upwards and towards the step. BATTERY Always wear safety glasses when working on the •... -
Page 32: Air Cleaner
Maintenance AIR CLEANER SERVICING The air cleaner needs serviced when the red line on the visual indicator line (A) reads 75 kpa, the box on the indicator labelled service when red (B) will also be filled. This should be one of the daily machine checks. Maximum protection for the engine against dust is possible only if the air cleaner is serviced correctly. - Page 33 Maintenance CHECKING COOLANT LEVEL Always check the coolant level when engine is cold This is a pressurised cooling system To prevent scalding NEVER remove the filler cap when the coolant is hot Hot coolant will burn you. Always check the engine is cool before checking the coolant level or draining the system.
-
Page 34: Checking Engine Oil Level
Maintenance CHECKING ENGINE OIL LEVEL Oil is toxic. If you swallow any oil, do not induce vomiting, seek medical advice immediately. Used engine oil contains harmful contaminants which can cause skin cancer. Do not handle used engine oil more than necessary. - Page 35 Turn the filter at least another 3/4 of a turn. NOTE: use only genuine filters from NC. The engine oil filter is designed with a drain down valve. Using non genuine parts may result in loss of engine oil pressure and subsequent engine damage.
- Page 36 To ensure proper lubrication and operating temperatures it is important that the appropriate lubricants are used and the correct oil level maintained. This level should be checked daily. NC recommend Fuchs Titan T04 HD10. GEARBOX OIL LEVEL CHECKING Ensure the engine is stopped and the transmission oil is cool. Ensure the oil cooler is full by running the oil cooler a few seconds prior to checking the oil level.
- Page 37 Maintenance CHANGING GEARBOX OIL When changing the oil it is essential to renew the oil • filter and clean out the suction strainer. Ensure the transmission oil is cool but warm to allow it • to flow easily. Drain the oil by removing the strainer (B). •...
-
Page 38: Towing Procedure
Maintenance TOWING PROCEDURE If there is no transmission damage the dumper may be towed for a distance of approximately 1.5 kilometres (1 mile). Always use a rigid tow bar and ensure the gear lever is in neutral. Restrict the towing speed to 25km/h (15mph) If it is necessary to tow the dumper for distances in excess of 1.5 kilometres (1mile) the drive shafts to each axle must be disconnected... -
Page 39: Brake System
DO NOT USE CONVENTIONAL BRAKE FLUID. This will cause serious damage to the dumper and degrades the brake performance to dangerous levels. NC recommend Fuchs Renoil HVZ15 The brake system is filled via a fluid reservoir which is remotely mounted from the brake master cylinder. -
Page 40: Park Brake
Maintenance TRANSMISSION PARKING BRAKE The parking brake is mounted on the transmission gearbox and can be accessed from the underside of the dumper. Wear can occur either by stretching of the handbrake cable, or wear on the disc pads themselves, causing a reduction in efficiency. - Page 41 Maintenance ADJUSTING THE PARKING BRAKE (continued) On this machine the parking brake when fully engaged disconnects the transmission drive. The machine is prevented from driving with the park brake engaged. To complete the test move the park brake lever fractionally forward until the warning light is extinguished; hold the lever in this position for the duration of the test.
-
Page 42: Check Oil Level
Maintenance AXLES The axles have totally enclosed & sealed multi-plate brakes and compensate automatically for brake wear. As the brakes wear ensure the fluid reservoir is kept topped up to the MAX level. Over a period of time wear may necessitate replacement of the friction discs and / or the slave cylinder seals. -
Page 43: Hydraulic System
Maintenance HYDRAULIC SYSTEM The hydraulic system provides power to the steering, skip swivel and skip tip functions. The hydraulics consists of an engine driven pump drawing oil from a tank. In the tank there is a suction strainer, filter and breather cap fitted, the tank is made from a transparent material and the level of oil can be seen through the side of it, a max and min decal shows the operator the correct level. - Page 44 Maintenance HYDRAULICS During any hydraulic maintenance extreme care should be taken to ensure cleanliness of the hydraulic circuit. By observing strict hydraulic cleanliness the machine will benefit from fewer hydraulic failures through contamination. ALWAYS Thoroughly clean the machine before any maintenance. •...
- Page 45 Replace the filter element and refit the bowl. • REPLACING FILTER ELEMENTS Always use replacement filters supplied by NC other filters may be of lesser quality and lead to increased wear in the hydraulic components resulting in oil leaks.
-
Page 46: Storage
Maintenance STORAGE If the dumper is to be stored for a long period of time the following procedures should be applied. Thoroughly wash down the exterior of the machine and remove any build-up of material. • Grease all greasing points. •... -
Page 47: Electrics
Maintenance ELECTRICS Description Specification Battery 663 Type: 800CCA, 115Ampere-Hour Capacity Alternator 95A Belt driven The alternator is very sensitive to temperature. High temperatures will affect the performance of the alternator and may eventually cause damage to it. Never remove the exhaust lagging as this is a temperature resistant material. -
Page 50: Fault Finding
Fault Finding INTRODUCTION The dumper must be correctly parked and prepared. Maintenance personnel must be suitably qualified and trained. Failure to observe these this notice could result in serious injury of yourself or others The fault finding procedures are given in the form of flow charts each one dedicated to a particular fault category. - Page 51 Fault Finding CHART A1—Dumper will not start or difficult to start (no exhaust smoke) Cause Remedy Electrical isolator not turned on. Turn isolator on. Not in Neutral. Check the FNR lever is in the NEUTRAL position. No fuel in tank. Check the level in the fuel tank and replenish as required.
- Page 52 Fault Finding CHART A2—Dumper will not start or difficult to start (exhaust smoke) Cause Remedy Cold starting aid not working (if fitted). Check for the correct operation of the cold start advance. Intake air insufficient. Visually check the air intake and exhaust intake for blockage or obstruction, remove as required.
- Page 53 Fault Finding CHART A3—Engine will not crank or cranks slowly Cause Remedy Starting electrical connections loose or Clean and tighten connections. corroded. Battery charge low. Check battery voltage, charge the battery or replace as required. Make sure that the alternator is functioning correctly and charging the battery.
- Page 54 Fault Finding CHART A4—Engine starts then stops Cause Remedy No fuel supply in tank. Check the level in the fuel tank and replenish as required. Engine starting under load. Check for added loading form malfunctioning accessories or driven units, brakes dragging and other changes in the vehicle loading.
- Page 55 Fault Finding CHART A5—Engine poor running Cause Remedy Condition occurs only at idle. Refer to Chart A6 for possible poor running at idle faults. Engine is cold. Cold starting aid is not Check for the correct operation of the cold start advance. If the working.
- Page 56 Fault Finding CHART A6—Engine poor running at idle Cause Remedy Engine is cold. Cold starting aid is not Check for the correct operation of the cold start advance. If the working. engine will not reach operating temperature, refer to Chart D3. Idle speed too low for accessories.
- Page 57 Fault Finding CHART A7—Engine excessive noise Cause Remedy Drive belt squeal, insufficient tension or Check the tensioner and inspect the drive belt for deterioration. abnormally high loading. Make sure the water pump, tensioner pulley, fan and alternator turn freely. Check for paint/oil or other materials on the pulleys. Check the tension of the accessory drive belts.
- Page 58 Fault Finding CHART A8—Engine compression knocks Cause Remedy Fuel is aerated. Check the fuel system for loose connections and possible air ingress points. Rectify and bleed the fuel system. Fuel is contaminated or incorrect grade of Refer to Fluids & Lubricants section for recommended diesel diesel used.
- Page 59 Fault Finding CHART A9—Engine reduced power output Cause Remedy No fuel supply in the tank. Check the level in the fuel tank and replenish as required. Oil level incorrect. Check oil level. Engine overloaded. Check for added loading from malfunctioning accessories or driven units, brakes dragging and other changes in vehicle loading.
- Page 60 Fault Finding CHART A9—Engine reduced power output (continued) Cause Remedy Exhaust leak at the manifold or turbocharger. Check/correct leaks in the manifold or turbocharger gaskets. Look for a cracked manifold. Extra injector sealing washer installed under Remove extra injector sealing washer. injector.
- Page 61 Fault Finding CHART A10—Engine will not reach maximum rpm Cause Remedy Tachometer faulty (if fitted). Verify the engine speed with a hand held tachometer. Measure on the fan drive pulley and this will be the engine rpm. Engine overloaded. Verify high idle speed without load. Investigate operation to ensure correct gear is being used.
- Page 62 Fault Finding CHART A11—Engine rpm surges Cause Remedy Fuel level low. Check/fill fuel tank. If the condition occurs at idle, the idle speed Check the engine idle rpm setting. is set too low for the accessories. Throttle adjustment incorrectly set or Check the engine maximum rpm is as specified in the Technical binding.
- Page 63 Fault Finding CHART A12—Engine excessive vibration Cause Remedy Engine not running smoothly/missing. Refer to Chart A5. Oil level over full. Check oil level. If the condition occurs at idle, the idle speed Check the engine idle rpm setting. is set too low for the accessories. Fan damaged or accessories faulty.
- Page 64 Fault Finding CHART A13—Engine exhaust smoke excessive (Black smoke) Cause Remedy Engine being lugged down. Use appropriate gear for the task. Air intake or exhaust system is blocked. Visually check the air intake and exhaust intake for blockage or obstruction-remove as required. Check the air filter elements for signs of blocking-replace as required.
- Page 65 Fault Finding CHART A14—Engine exhaust smoke excessive (White/Blue smoke) Cause Remedy Fuel is contaminated or incorrect grade of Refer to Fluids & Lubricants section for recommended diesel diesel used. fuels. If the fuel is suspect, verify by operating the engine with clean fuel from a temporary tank.
- Page 66 Fault Finding CHART A15—Engine will not shut off Cause Remedy Electrical fuel shut-off solenoid (ESOS) Check for correct operation of the ESOS. valve not functioning properly. Worn or malfunction fuel injection pump Check for operation of the FIP. (FIP). Injection pump not delivering fuel. The FIP must be taken to a local FIE specialist to have the fuel delivery timing checked.
- Page 67 Fault Finding CHART B1—Fuel consumption excessive Cause Remedy Additional load on engine. Check/repair accessories and vehicle components. Operator technique. Review operation for correct gear shifts, deceleration and idling. Fuel Leaks. Check for external leaks and engine lubricating oil dilution. For fuel dilution check for internal leaks at the fuel transfer pump and injection pump.
- Page 68 Fault Finding CHART B2—Fuel/Oil leaking from exhaust manifold Cause Remedy Operating for extended periods under light or Review operation for correct gear shifts, deceleration and idling. no load. Intake air or exhaust leaks. Refer to Charts A13 & A14. Turbocharger lubricating oil drain line Check/clean line.
- Page 69 Fault Finding CHART C1—Lubricating Oil consumption excessive Cause Remedy Oil leaks. Inspect the engine for visible signs of leaks. Pay particular attention to the seals, gaskets, oil cooler and external connections. Oil level over full. Check oil level. Incorrect lubricating oil. (specification of Make sure the correct lubricating oil is being used, Refer to Fluids viscosity).
- Page 70 Fault Finding CHART C2—Lubricating Oil contaminated Cause Remedy Coolant in the lubricating oil, internal engine Refer to Chart D1. component leaks. Lubricating oil sludge excessive. Change oil & filter. Review/reduce the lubricating oil change intervals. If operating in arduous conditions change oil more frequently. Make sure the correct lubricating oil is being used, Refer to Fluids &...
- Page 71 Fault Finding CHART C3—Lubricating Oil pressure low Cause Remedy Incorrect lubricating oil. (specification of Make sure the correct lubricating oil is being used, Refer to Fluids viscosity). & Lubricants section. Look for reduced viscosity from dilution with fuel. Fuel dilution in lubricating oil can originate from fuel injection pump driveshaft seal or fuel transfer pump.
- Page 72 Fault Finding CHART C4—Lubricating Oil pressure high Cause Remedy Incorrect lubricating oil. (specification of Make sure the correct lubricating oil is being used, Refer to Fluids viscosity). & Lubricants section. Look for reduced viscosity from dilution with fuel. Fuel dilution in lubricating oil can originate from fuel injection pump driveshaft seal or fuel transfer pump.
- Page 73 Fault Finding CHART D1—Coolant loss Cause Remedy Incorrect coolant level. Check the level. Coolant leaking from engine radiator. Visually inspect the radiator hoses and connections to locate the leak. If oil is present in the coolant, check for an engine oil cooler leak. External engine coolant leak.
- Page 74 Fault Finding CHART D2—Coolant over temperature Cause Remedy Incorrect coolant level. Check the level. Ensure low level is not a result of a coolant leak. Refer to Chart D1. Radiator matrix blocked with dirt or chaff. Clean radiator matrix. Air flow to the radiator restricted Clean the mesh grill on the bonnet.
- Page 75 Fault Finding CHART D3—Coolant under temperature Cause Remedy Air flow across radiator excessive. Check/repair the mesh grill on the bonnet. Check/repair the fan shroud, anti recirculation sealing. Check fan blades replace if necessary. Temperature gauge sensor faulty. Verify that the gauge and temperature sensor are correct. Thermostat faulty, open (not sealing) Check/replace thermostat.
- Page 76 Fault Finding CHART E1—Dumper gearbox Cause Remedy Dumper will not drive forward/reverse. Check handbrake released. Check FNR lever engaged. Check fuses. Check drive inhibit relay. Check forward & reverse relays Check operation of solenoid valve on top of the gearbox Check selector lever is engaging the gears on the gearbox turret Check handbrake sensor switch Check transmission oil level...
- Page 77 Fault Finding CHART E1—Dumper gearbox (continued) Check Action Does the noise continue when the direction selector is in forward YES: Check 10 or reverse? NO: Check 11 Is the transmission misaligned? YES: Renew mountings and check position. NO: Check “converter out” pressure and flow.
- Page 78 Fault Finding CHART E1—Dumper gearbox (continued) Check Action Is the counter shaft or it bearings worn or damaged? YES: Renew damaged parts. NO: Check 25 Is there excessive backlash in the gears? YES: Adjust by checking shaft end float. NO: Check 26 Is the main shaft pilot bearing worn? YES: Renew.
- Page 79 Fault Finding CHART E1—Dumper gearbox (continued) Check Action Are chips wedged between splines of shaft or gear? YES: Remove chips NO: Ensure that clutch is disengaged when dump pedal is pressed. Are steel chips embedded in the bronze? YES: Continue using, chips will either embed blow bronze or be rejected.