Bosch FW 100 Installation And Operating Instructions Manual
Hide thumbs
Also See for FW 100:
- Operating instructions manual (40 pages) ,
- Installation & user's instructions (84 pages)

Related Manuals for Bosch FW 100


Summary of Contents for Bosch FW 100
- Page 1 Weather-compensated controller with solar control FW 100 for heating appliances with BUS-enabled Heatronic 3 Installation and operating instructions...
- Page 2 2 | Overview of controls and symbols Overview of controls and symbols advance advance menu info 6 720 617 763-01.1O Fig. 1 Standard display 6 720 645 349 (2010/09)
- Page 3 Overview of controls and symbols | 3 Controls Symbols 1 Turning the rotary selector in + direction: Current room temperature Selects menu/information above or increases (only with wall mounting) Flashing segment: setting value Turning the rotary selector in – direction: Current time (13:45 to 14:00) Selects menu/information below or decreases Solid segments:...
-
Page 4: Table Of Contents
4 | Contents Contents 5.1.3 Changing the DHW mode with Chapters against a grey (with time limit) ....20 background are intended for 5.1.4 Changing heating mode permanently . - Page 5 Contents | 5 Menu settings INSTALLER SETTINGS Troubleshooting ....58 (contractors only) ....43 Troubleshooting with display .
-
Page 6: Want To Know How To Operate And Program
... are looking for the safety instructions and a • key to the symbols, refer to chapter 1. You can request these documents from the Bosch ... are looking for a summary of the layout and • Info service. The contact address is printed on function of this accessory, refer to chapter 2. -
Page 7: Key To Symbols And Safety Instructions
Key to symbols and safety instructions | 7 Key to symbols and safety instructions Explanation of symbols Safety instructions B These instructions must be observed to Warnings ensure correct operation. B Install and commission the heating appliance Warnings in this document are framed and all accessories in accordance with the and identified by a warning triangle instructions provided. -
Page 8: Technical Data For The Accessory Item
8 | Technical data for the accessory item Technical data for the accessory item The FW 100 can only be connected Standard delivery to a heating appliance with BUS- enabled Heatronic 3. This controller is used to display appliance •... -
Page 9: Specification
Technical data for the accessory item | 9 Specification Supplementary accessories See also the pricelist. Dimensions Fig. 8, page 14 Rated voltage 10...24 V DC IPM 1: Module for controlling one mixed or • Rated current 6 mA one non-mixed heating circuit. (excluding illumination) ISM 1: Module for controlling solar water •... -
Page 10: Sample System
10 | Technical data for the accessory item Sample system FB 100 FB 10 FW 100 230V AC IPM1 FW 100 S...solar ISM1 230V AC 6 720 613 557-01.2O Fig. 3 Simplified system scheme (see technical guides for installation illustration and further options) - Page 11 Cylinder temperature sensor on the heating water side, bottom Temperature limiter Thermostatic DHW mixer Common flow sensor DHW connection The FW 100 can be mounted in the heat source or on the wall. Either FB 10 or FB 100 6 720 645 349 (2010/09)
-
Page 12: Installation (For Contractors Only)
12 | Installation (for contractors only) Installation (for contractors only) The detailed system scheme for installing the DANGER: Risk of electric shock! hydraulic components and associated control devices can be found in the technical guides or B Prior to the installation of this tender documentation. - Page 13 Installation (for contractors only) | 13 B Click top section into place and mount cover. 6 720 641 933-32.1O Fig. 7 6 720 645 349 (2010/09)
-
Page 14: Wall Mounting
14 | Installation (for contractors only) 3.1.2 Wall mounting The control quality of the controller is dependent B Fit the base. on where it is installed. The installation location (= lead room) must be suitable for controlling the heating. B Select the installation location. 35 mm 134 mm 0,3 m... -
Page 15: Installation Of Outside Temperature Sensor
Installation (for contractors only) | 15 3.1.3 Installation of outside temperature sensor Control quality depends on installation location B Select the installation location. of outside temperature sensor AF. 6 720 645 349-02.1O Fig. 12 6 720 645 349 (2010/09) -
Page 16: Fitting Other Accessories
B Installation of the controller automatically produces BUS connection via the three contacts ( Fig. 6 on page 12). Heatronic 3 FW 100 ST 19 4 B B Fig. 13 6 720 613 557-02.1R Fig. 14 Controller installed via BUS contacts in BUS-enabled Heatronic 3. -
Page 17: Electrical Connection For Wall Mounting
... 1.50 mm radio and television set, amateur radio ≥ 30 m 1.50 mm stations, microwave ovens etc). Tab. 7 Heatronic 3 FW 100 ST 19 4 B B 6 720 613 557-03.1R Fig. 15 Controller connected to BUS-enabled Heatronic 3. -
Page 18: Commissioning (Contractors Only)
18 | Commissioning (contractors only) Commissioning (contractors only) B Set DIP switch at IPM 1 to 1. B Switch ON the system. B Set FB 10 or FB 100 to 1. Description of the controls page 2. During commissioning or after a global reset (resetting all settings), the language selected for the factory settings will be displayed. -
Page 19: Operation
Operation | 19 Operation 5.1.2 Changing the operating mode with The controller provides the option (with time limit) of setting the required room To permanently change the operating mode, temperature for the operating mode chapter 5.1.4 on page 20. concerned. The temperature given is not the actual room temperature. -
Page 20: Changing The Dhw Mode With (With Time Limit)
20 | Operation 5.1.3 Changing the DHW mode with 5.1.4 Changing heating mode permanently (with time limit) DHW is heated independently of the You can use this function if you need position of the operating mode selector hot water outside the programmed in accordance with the DHW program switching times. -
Page 21: Menu Control
Operation | 21 Menu control Main structure of menu prompts: Arrows on the l.h. edge indicate whether there • are more menu points. The titles of variables or submenus are listed • on the left. A flashing variable value can be changed with •... - Page 22 22 | Operation Operation Display Selecting the menu: Turn In this example, highlight menu point "Heating". Turning the rotary selector will show additional menus. 6 720 617 763-04.1O Press Confirm the selected menu point "Heating". 6 720 617 763-05.1O Press In this example, leave the highlighting on menu point "Programme"...
-
Page 23: Details
Operation | 23 Operation Display Setting values: Press In this example, leave the highlight on menu point "P1" and confirm. The switching time and associated segment flash. 6 720 617 763-11.2O Turn In this example, set the switching time to 05:30 h. The associated segments change simultaneously. - Page 24 24 | Operation 5.2.2 Deleting or resetting program details Operation Display Deleting programmed values: Select the value to be deleted, for example the switching time in P1 as described in chapter 5.2.1 from page 21 and overwrite it. -or- Press The deleted switching time flashes, and the associated operating mode is also deleted.
- Page 25 Operation | 25 Operation Display Resetting all settings (for contractors only): This function returns all adjustments of the MAIN MENUand the INSTALLER SETTINGSto their factory settings. Following such a reset, your contractor will need to recommission the system. If the standard display is set: Hold down simultaneously, until the following menu...
-
Page 26: Adjusting The Main Menu
26 | Adjusting the MAIN MENU Adjusting the MAIN MENU Detailed instructions on navigating through the and resetting to the factory settings are provided menu structure, programming, deleting settings in chapter 5.2 starting on page 21. Overview and adjustment of the MAIN MENU The tables set out below provide: A way to locate detailed descriptions regarding •... -
Page 27: Main Menu: Heating
Adjusting the MAIN MENU | 27 6.1.2 MAIN MENU: Heating Personal Description Menu structure Heating Factory setting Setting range setting frompage Programme – – – Activate A:Programme A A:Programme A – (switching ...C:Programme C (program title times of can be changed) program Home all day) Edit... -
Page 28: Main Menu: Domestic Hot Water
28 | Adjusting the MAIN MENU Personal Description Menu structure Heating Factory setting Setting range setting frompage Parameter – – – Heating levels – – – Comfort 21.0 °C 0.0 °C ... 30.0 °C (not lower than °C Economy) Economy 15.0 °C 0.0 °C ... - Page 29 Adjusting the MAIN MENU | 29 Menu structure Factory Personal Description Domestic hot water setting Setting range setting from page DHW circ pump prog – – – Edit – – – All days Table on page 72 P1, P2 ... P6 Mon - Fri P1, P2 ...
-
Page 30: Main Menu: General Settings
30 | Adjusting the MAIN MENU 6.1.4 MAIN MENU: General settings Menu structure Personal Description General settings Factory setting Setting range setting from page Time and date – – – Time – – : – – 00:00 ... 23:59 – (in hour/minute steps) Date 01.01.2005 ... -
Page 31: Holiday Program
Adjusting the MAIN MENU | 31 Holiday program Main menu: Holiday For menu structure and setting ranges page 26. Use this menu if you want to operate a special program for several days without changing your personal settings in the individual programs and parameters. -
Page 32: Heating Program
32 | Adjusting the MAIN MENU Heating program Main menu: Heating Menu: Heating > Programme > Edit For menu structure and setting ranges Setting options: page 27. Up to six switching times per day with three • different operating modes (Comfort Economy / Frost Set the flow temperature controller... -
Page 33: Temperature For The Operating Modes And Heat-Up Rate
Adjusting the MAIN MENU | 33 6.3.2 Temperature for the operating modes If, for example, the programming for and heat-up rate Thursday differs from the other days of the week, the options All Menu: Heating > Parameter days and Mon - Fri show Use this menu to permanently set the ----- from --:-- for all values. -
Page 34: Dhw Program
34 | Adjusting the MAIN MENU DHW program Main menu: Domestic hot water With combi boiler: • For menu structure and setting ranges page 28. – DHW On, if the heating system operates in Comfort mode or has operated in Comfort mode within the last hour. -
Page 35: Time/Temperature Level Program
Adjusting the MAIN MENU | 35 6.4.2 Time/temperature level program for 6.4.3 Time program for DHW with combi boiler DHW via cylinder Menu: Domestic hot water > DHW programme Menu: Domestic hot water > DHW programme Use this menu if you want to use a time program Use this menu if you want to use a DHW program for DHW heating. -
Page 36: Time Program For Dhw Circulation Pump (Only With Dhw Cylinder)
36 | Adjusting the MAIN MENU 6.4.4 Time program for DHW circulation pump 6.4.5 Parameters for DHW (only with DHW cylinder) Menu: Domestic hot water > Parameter > Menu: Domestic hot water > DHW circ pump Cylinder temp at heating level Comf. prog This menu point is only active if Domestic hot Use this menu if you want to use a time program... -
Page 37: Thermal Disinfection Of Dhw
Adjusting the MAIN MENU | 37 Menu: Domestic hot water > Parameter > DHW Operating mode: • circ pump cycles – Auto Thermal disinfection starts This menu point is only active if a DHW circulation automatically in accordance with the set pump is available. -
Page 38: General Settings
38 | Adjusting the MAIN MENU General settings Main menu: General settings 6.5.2 Display formats For menu structure and setting ranges Menu: General settings > Display format page 30. Use this menu if you want to customise the 6.5.1 Time and Date display formats to suit your personal preferences. -
Page 39: Solar Settings
Adjusting the MAIN MENU | 39 Solar settings Main menu: Solar For more information for contractors, see chapter 8.5.3 on page 53. For menu structure and setting ranges page 30. Optimizing influence DHW: Maximum • reduction of set DHW temperature by effect of Use this menu if you want to limit the cylinder solar thermal system. -
Page 40: Viewing Information
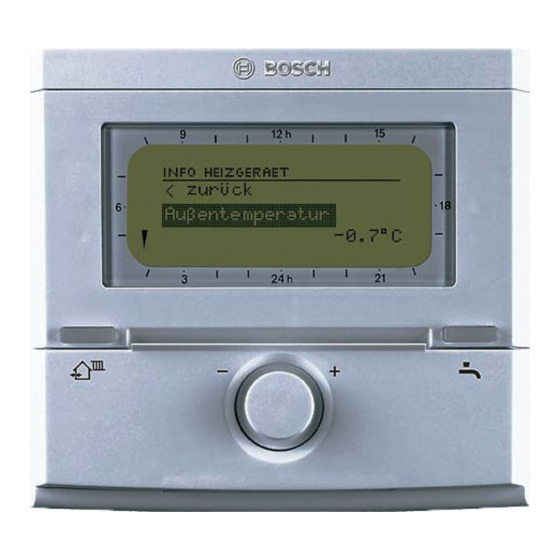
40 | Viewing information Viewing information Menu: INFO INFO menu overview The table below provides: This menu allows you to view various items of An overview of the menu structure (column 1). system information. • The menu depth is identified by various Detailed instructions on navigating through the shades of grey. - Page 41 Viewing information | 41 Variable display Menu structure INFO (examples) Description Heating system – – Operating mode Auto – Comfort | Auto – Current operating mode or special mode for the Economy | Auto – Frost | heating system. Comfort | Economy | Frost | Holiday –...
- Page 42 Only starts 30 days after commissioning. Faults 40 Solar system List of current faults. More detailed information can 03 FW 100 be obtained by selecting with and confirming EA Boiler ... with 6 720 645 349 (2010/09)
-
Page 43: Menu Settings Installer Settings
Menu settings INSTALLER SETTINGS (contractors only) | 43 Menu settings INSTALLER SETTINGS (contractors only) An overview of the factory settings (column 2), • The INSTALLER SETTINGS menu is e.g. for the purposes of resetting individual intended only for contractors. menu point to their factory settings. B To open INSTALLER SETTINGS: An overview of the setting ranges of the •... -
Page 44: Heating Parameters
44 | Menu settings INSTALLER SETTINGS (contractors only) 8.1.2 INSTALLER SETTINGS: Heating parameters Menu structure Factory Personal Description Heating parameters setting Setting range setting from page Heating circuit type Radiators Foot point/End point | Underfloor heating | Radiators | Convectors Foot point 25 °C 10 °C ... -
Page 45: Solar Sys Parameters
Menu settings INSTALLER SETTINGS (contractors only) | 45 8.1.4 INSTALLER SETTINGS: Solar sys parameters Menu structure Factory Personal Description Solar sys parameters setting Setting range setting from page 1. Standard system – – – SP: ON temperature 3 K ... 20 K difference (not lower than "SP: OFF temperature difference"... -
Page 46: Cust Service Address
27.06.2010 (data – – from heating appliance) Controller part number and 7 777 777 777 – – model FW 100 (fixed factory setting) Controller date of manufacture 27.06.2010 (fixed – – factory setting) Controller software version JF11.12 (fixed – –... -
Page 47: Configuring The Heating System
Menu settings INSTALLER SETTINGS (contractors only) | 47 Configuring the heating system Parameters for heating Installer settings: System configuration Installer settings: Heating parameters For menu structure and setting ranges For menu structure and setting ranges page 44. page 43. Set the flow temperature controller For system examples, see the IPM on the heating appliance to the manual. - Page 48 48 | Menu settings INSTALLER SETTINGS (contractors only) 6 720 612 481-30.1R 6 720 612 481-27.1R Fig. 19 Default basic setting of heating curve for Fig. 21 Default setting for heating curve in base point/end point radiator heating system 6 720 612 481-29.1R 6 720 612 481-28.1R Fig.
- Page 49 B Select Sensor(s) used for room influence: maximum set flow temperature. – Lower temperature: Of the temperature – For Radiators e.g. 80 °C maximum set flow sensors fitted in FW 100 and in FB 10, the temperature. one with the lower captured temperature is used.
- Page 50 50 | Menu settings INSTALLER SETTINGS (contractors only) – Sensor on FB10: The temperature sensor Menu: Heating parameters > Freezing risk at fitted inside the remote control FB 10 is outside temperature used. NOTICE: Heating water pipework may freeze if the frost threshold is Menu: Heating parameters >...
-
Page 51: Configuring The Solar Thermal
Menu: Heating parameters > Mixer running time B Set the Mixer running time to the runtime of B Position a precision instrument near FW 100. the fitted mixer servomotor. The precision instrument must not transfer any heat to the FW 100. -
Page 52: Parameters For Solar Thermal
52 | Menu settings INSTALLER SETTINGS (contractors only) Parameters for solar thermal system Menu: Solar sys parameters > 1. Standard Fill and vent the solar thermal system > SP: OFF temperature difference system according to its B Same procedure as for the last menu point SP: documentation and prepare it for ON temperature difference. -
Page 53: Parameters For Thermal
Menu settings INSTALLER SETTINGS (contractors only) | 53 Menu: Solar sys parameters > 1. Standard 8.5.3 Parameters for solar optimisation system > SP: Collector grp 1 pump mode Solar optimisation is performed automatically B Select the operating mode of the solar circuit according to the available solar output. - Page 54 54 | Menu settings INSTALLER SETTINGS (contractors only) Fig. 23 Map with the climate zones If the location where the system is installed cannot be found on the climate zone map Fig. 23): B Do not change the factory-set value for solar optimisation.
-
Page 55: Commissioning The Solar Thermal System
Menu settings INSTALLER SETTINGS (contractors only) | 55 Menu: Solar sys parameters > Solar Fault history optimisation > Optimizing influence DHW Detailed description regarding Optimizing Installer settings: Fault history influence DHW page 39. For menu structure page 45. Menu: Solar sys parameters > Solar Contractors can use this option to view the last optimisation >... -
Page 56: Viewing System Information
56 | Menu settings INSTALLER SETTINGS (contractors only) Viewing system information Screed drying function Installer settings: System info Installer settings: Floor drying For menu structure page 46. For menu structure and setting range page 46. To show various items of system information: NOTICE: Screed destruction! Installation date (automatically activated •... - Page 57 Menu settings INSTALLER SETTINGS (contractors only) | 57 Menu: Floor drying > Total floor drying time The total duration is automatically calculated. For this, the flow temperature increases by no more than 10 K per day. If this temperature rise is incompatible with the specific screed, extend the total duration.
-
Page 58: Troubleshooting
58 | Troubleshooting Troubleshooting BUS device faults are indicated. A heating appliance fault (e.g. EA fault) is displayed with the relevant advice. B Contact your installer. For the contractor: B Remedy the fault in accordance with the heating appliance documentation. Troubleshooting with display 6 720 617 763-17.2O Fig. - Page 59 Fault 03 Room temperature sensor built Identify and replace faulty Room temp sensor faulty into FW 100/FB 100/FB 10 has controller or remote control. suffered a break. Short circuit on room temperature sensor built into FW 100/FB 100/FB 10.
- Page 60 60 | Troubleshooting Information displayed items 1, 3 and 4 in Fig. 25) Text Code Cause Remedy (by contractor) Fault 11 See display text. System configuration: new BUS device New ISM detected. Power up all ISMs simultaneously and start automatic system configuration.
- Page 61 Fault 20 Invalid code in remote control In conjunction with FW 100 System configuration: invalid for heating circuit. only code 1 is possible in the remote control. Fault 21 See display text on remote control.
- Page 62 62 | Troubleshooting Information displayed items 1, 3 and 4 in Fig. 25) Text Code Cause Remedy (by contractor) Fault 29 BUS subscriber configured but Check system structure, check Unable to save parameter settings not available at present. system configuration, adjust as necessary and reset parameters on remote control.
- Page 63 Troubleshooting | 63 Information displayed items 1, 3 and 4 in Fig. 25) Text Code Cause Remedy (by contractor) Fault 51 Collector temperature sensor Use correct type of Incorrect temperature sensor type type used as cylinder temperature sensor. connected temperature sensor (T Specification in ISM Cylinder temperature sensor installation instructions.
-
Page 64: Troubleshooting Without Display
Installation location of FW 100 Select a better installation location for unfavourable, e.g. external wall, close to FW 100 and ask your heating contractor window, in a draught, ... to reposition it. Excessive room temperature Temporary influence of external heat on Arrange for your contractor to increase fluctuations. - Page 65 Troubleshooting | 65 If the fault persists: B Call an authorised contractor or the customer service department and inform them of the fault, quoting the appliance details (from type plate inside flap). Appliance details Type: ................Part number: ................Date of manufacture (FD...): ................
-
Page 66: Energy Saving Tips
66 | Energy saving tips 10 Energy saving tips With weather-compensated control, the flow Don't keep windows slightly open for • • temperature is controlled in accordance with ventilation. This leads to a constant extraction the set heating curve: The colder the outside of heat from the room without noticeably temperature, the higher the flow temperature. -
Page 67: Environmental Protection
Environmental protection | 67 11 Environmental protection Environmental protection is a fundamental corporate strategy of the Bosch Group. The quality of our products, their economy and environmental safety are all of equal importance to us and all environmental protection legislation and regulations are strictly observed. -
Page 68: Individual Time Program Settings
68 | Individual time program settings 12 Individual time program settings The factory settings and personal settings for the time programs are summarised below. 12.1 Heating program How to set the central heating program is described in chapter 6.3 on page 32. Fixed pre-defined heating programs (for copying) AM weekday worker Mo - Th... - Page 69 Individual time program settings | 69 Home all day (factory settings) Mo - Th 06:00 22:00 – – – – – – – – 06:00 23:30 – – – – – – – – 07:00 23:30 – – – – –...
- Page 70 70 | Individual time program settings Personal settings Heating program All days Mon - Fri Sat + Sun Monday Tuesday Wednesday Thursday Friday Saturday Sunday 6 720 645 349 (2010/09)
-
Page 71: Dhw Program
Individual time program settings | 71 12.2 DHW program How to set the DHW program is described in chapter 6.4 on page 34. °C °C °C °C °C °C Factory settings Mo - Th 05:00 23:00 – – – – –... -
Page 72: Dhw Circulation Program
72 | Individual time program settings 12.3 DHW circulation program How to set the DHW circulation program is described in chapter 6.4 on page 34. Factory settings Mo - Th 06:00 23:00 – – – – – – – – 06:00 23:00 –... -
Page 73: Index
Information regarding these instructions ..6 Customer service address ......46 Installation ............12 - Accessories ..........16 - FW 100 in the heating appliance ....12 - FW 100 wall mounting ....... 14 Default settings ..........43 - Outside temperature sensor ..... 15 Deleting ............24... - Page 74 74 | Index Main menu Packaging ............67 - DHW ............28 Power reserve - General settings .........30 - Mains power failure ........8 - Heating ..........27 Product details - Holiday ............26 - Standard package ........8 - Solar ............30 Programming Menu - Deleting .............
- Page 75 Index | 75 Safety precautions ..........7 Technical data ..........9 Screed drying ..........56 Thermal disinfection ......31 Scrolling through menu levels ......21 Thermostatic valves ........66 Set heating level higher/lower ......32 Troubleshooting ..........58 Set heating start ..........32 Set screed drying ..........56 Setting constant economy .......20 Underfloor heating system ......
- Page 76 Australia Robert Bosch (Australia) Pty Ltd 1555 Centre Rd Clayton, VIC 3168 Phone 1300 30 70 37 Fax 1300 30 70 38 www.bosch.com.au/hotwater New Zealand Phone 0800 4 Bosch or 08 543 352 www.bosch.co.nz 067206453498...
Need help?
Do you have a question about the FW 100 and is the answer not in the manual?
Questions and answers