Stanley DL07 Service Manual
Hide thumbs
Also See for DL07:
- User manual (18 pages) ,
- Operation and service manual (23 pages) ,
- User manual (16 pages)
Table of Contents
Advertisement
Quick Links
Advertisement
Table of Contents

Related Manuals for Stanley DL07


Summary of Contents for Stanley DL07
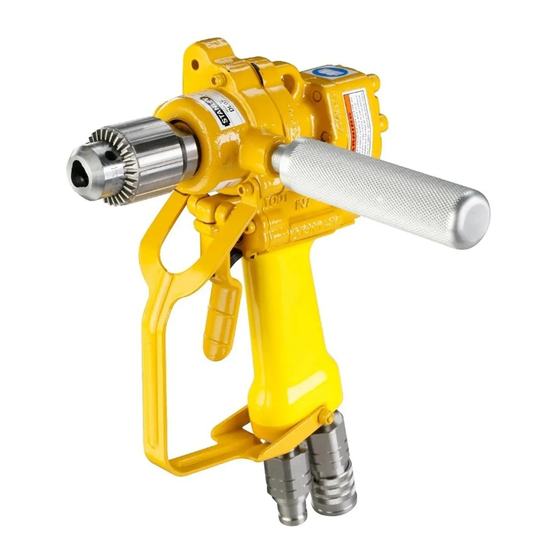
- Page 1 Service Manual ® DL07 Hydraulic Drill DANGER SERIOUS INJURY OR DEATH COULD RESULT FROMTHEIMPROPERREPAIRORSERVICEOF THISTOOL. REPAIRS AND/OR SERVICE TO THIS TOOL MUSTONLYBEDONEBYANAUTHORIZEDAND Copyright©2002TheStanleyWorks CERTIFIEDDEALER. USA&CEVersion 607897/2003 Ver. 1...
-
Page 3: Table Of Contents
Table of Contents DL07 Hydraulic Drill CertificateofConformity SERVICING THE DL07HYDRAULIC DRILL: Specifications ThismanualcontainsSafety, Operation,andTroubleshooting TorqueandDrillSpeeds information.Stanley HydraulicTools recommends that servicingof General SafetyInstructions hydraulictools,otherthanroutine maintenance, mustbeperformedby an authorized andcertifieddealer. Tool DecalsandTags PleasereadtheDANGERwarning on thecoverandtheSAFETY HydraulicHoseRequirements warningbelow. HTMARequirements Operating Instructions Service Instructions... -
Page 4: Certificateofconformity
SurnameandFirstnames/FamiliennnameundVemamen/Nometprénoms/Nombreyapellido/Cognomeenome losottoscritto: herebycertifythattheconstructionplantorequipmentspecifiedhereunder: bestätigthiermit,daßdieKonstruktionundAusrüstungwie folgtspezifiziertist: attestequelebrise-béton: porelpresentecertificoquelafabricaoelequipoespecificadoacontinuacion: certificochel’impiantool’attrezzaturasottospecificata: 1. Category: Drill Kategorie: Catégorie: Categoria: Categoria: 2. Make/Ausführung/Marque/Marca/Fabbricazion: Stanley 3. Type/Typ/Type/Tipo/Tipo:DL0755001 4. Type serialnumberofequipment: TypundSerien-Nr.derAusrüstung: Numérodanslasériedutypedematériel: Numerodeserietipodelequipo: Matricoladell´attrezzatura: 5. Year ofmanufacture/Baujahr/annéedefabrication/Añodefabricacion/Annodifabbricazione: 2003 hasbeenmanufacturedinconformity with-EECTypeexaminationasshown. wurdehergestelltinÜbereinstimmungmit-EECTyp-Prüfungnach. estfabriquéconformément -au(x)type(s)examiné(s)commeindiqué dansletableaudi-après. hasidofabricadodeacuerdocon-tipoexamenEECcomodice. èstatacostruitainconformitácon-lenormeCEEcomeillustrato. Dateofexpiry... -
Page 5: Specifications
Specifications DriveSize______1/2in./1.3cm3-JawAdjustable Width_______________________3-1/2 in./9cm 5/8 - 16THDChuck Motor____________________________ Integral PressureRange______1000- 2000psi/70-140bar DrillTorque___20ftlbs/27Nmat2000psi/140bar FlowRange_____________4-12 gpm/15-45lpm DrillSpeed__________1000rpmat8gpm/30lpm OptimumFlow________________8gpm/30lpm RPM Range______________________350-1500 System Type__openorclosedcenter,HTMATYPEI-III Max. Fluid Temp._____________ ° F / 60° C Porting_______________________-8SAEO-ring HTMAClass II___________ 7-9 gpm @ 2000 psi ConnectSize&Type___3/8 in.NPTMaleAdapter Weight_______________________8 lbs./3.6kg EHTMACategory_____ 30 lpm @ 138 bar 30Lpmat138bar... -
Page 6: General Safetyinstructions
General Safety Instructions Alwaysobservesafetysymbols.They areincluded for your safety andtheprotection ofthetool. WARNING DANGER CAUTION Thissafetysymbolappearsinthese Thissafetysymbolmayappearon This safetysymbolappearsinthese instructionstoidentifyanaction thetool.Itisusedtoalertthe instructions to identify an action or thatcouldcausebodilyinjurytothe operatorof anactionthatcould condition that could result in operatororotherpersonnel. placehim/herorothersinalife damage to the tool or other threateningsituation. - Page 7 Tool Decals & Tags ANameTagStickerisattachedtothetool.Neverexceedtheflowandpressurelevelsspecifiedon thissticker.Theinformationlistedonthenametagstickermustbelegibleatalltimes.Replacethis sticker if it becomes worn or damaged. A replacement is available from your local Stanley distributor. 28788 11207 Manual Sticker CircuitType“D” Decal 30Lpmat138bar BHTMACATEGORY 29149 Rotation Direction Sticker WARNING 28323 C o r r e c t l y c o n n e c t h o s e s t o t o o l p o r t s . D o n o t e x c e e d s p e c i f i e d f l o w o r p r e s s u r e .
-
Page 8: Hydraulichoserequirements
Hydraulic Hose Requirements HOSETYPES HydraulichosetypesauthorizedforusewithStanleyHydraulicToolsareasfollows: Certifiednon-conductive Wire-braided(conductive) Fabric-braided(notcertifiedorlabelednon-conductive) Hose listedaboveistheonlyhoseauthorizedforusenearelectricalconductors. Hoses listedaboveare conductive mustnever benearelectricalconductors. HOSESAFETYTAGS Tohelpensureyour safety,thefollowingDANGERtagsareattachedtoallhosespurchasedfromStanley HydraulicTools.DONOTREMOVETHESETAGS. Iftheinformationinatagisillegible becauseofwearordamage,replacethetagimmediately.Anewtag maybeobtainedatnochargefromyourStanleyDistributor. This Tag attachedto“CertifiedNon-Conductive” hose. (shownsmaller thanactualsize) p/n27987 DANGER DANGER FAILURETOUSEHYDRAULICHOSELABELEDANDCERTIFIEDASNON-CONDUCTIVEWHENUSING HANDLEANDROUTEHOSECAREFULLYTOAVOIDKINKING,ABRASION,CUTTINGORCONTACT HYDRAULICTOOLSONORNEARELECTRICLINESMAYRESULTINDEATHORSERIOUSINJURY. WITHHIGHTEMPERATURESURFACES. DONOT USEIFKINKED. DONOT USEHOSETOPULLOR FORPROPERANDSAFEOPERATION,MAKESURETHATYOUHAVEBEENPROPERLYTRAINEDIN LIFTTOOLS,POWERUNITS,ETC. -
Page 9: Htmarequirements
HTMA Requirements Tool Category 20Lpmat138bar 30Lpmat138bar 40Lpmat138bar Hydraulic System BHTMACATEGORY BHTMACATEGORY EHTMACATEGORY Requirements Type III Type I Type II Flowrate 7-9gpm 10.5-11.6gpm 11-13 gpm (15-23lpm) (26-34lpm) (36-44lpm) (42-49lpm) ToolOperatingPressure 2000psi 2000psi 2000psi 2000psi (atthepowersupplyoutlet) (138bar) (138bar) (138bar) (138bar) Systemreliefvalvesetting 2100-2250psi 2100-2250psi 2100-2250psi 2100-2250psi... -
Page 10: Operating Instructions
Operating Instructions NOTE:Ifuncoupledhosesare left inthe sun, Pre-OperationProcedures pressure increase inside the hose mayresult inmakingthemdifficultto connect. Whenever InstallChuck possible, connectthefreeendsofthehoses together. Screw the chuckontotheoutputshaft.Tightento 50ftlbs/68Nmtorque,lubricated. Drill Operation CAUTION 1. Observeallsafetyprecautions. Usetheflatsontheshafttoholdtheshaftduringtighteningor looseningofthechuck. 2. Placetheselecteddrillbitfullyintothechuck. Center thebitandtightenthechuckusingthe keyprovided.Removethekeyandstoreaway Check Power Source fromthedrill. 1. -
Page 11: Cold Weather Operation
Operating Instructions otherwisethebitmaybreakandendangerthe operator. CAUTION Cold Weather Operation To prevent damagetotheretaining ring, do not attempt to force the Ifthetoolistobeusedduringcoldweather,preheat selector screw counter-clockwise the hydraulicfluidatlowenginespeed.Whenusing beyondthepointofinitialresistance. the normally recommendedfluids,fluid temperature should be a t o r a b o v e 5 0°F/10°C(400ssu/82 centistokes)beforeuse. -
Page 12: Service Instructions
Service Instructions Note: For orientation of partsin thefollowing 5. Removetheplanetgears(26)fromtheoutputshaft. procedures, refer tothepartsdrawinglaterinthis Inspectshafts,gearsandgearborebushings(see manual. CLEANINGANDINSPECTIONprocedure). 6. Spintheballbearing(28)ontheoutputshaft.The Prior to Disassembly bearingshouldturnsmoothly.Toreplacethebearing, supporttheouterraceandpressdownontheoutput 1. Cleantheexteriorofthetoolandplaceonaclean shaftfromthechuckend.Donotreusetheballbearing worksurface. onceithasbeenremovedfromtheoutputshaft. 2. Obtainthe seal kitlistedonthePARTSLISTsoall 7. Removetheoutputshaftseal(30)bypressingit sealsexposedduringdisassemblycanbereplaced. fromthegearhousingbore. 8. Checktheendfacesofthesealnutandoutputshaft for nicksandwar(seeCLEANINGAND Prior to Reassembly INSPECTIONprocedure). - Page 13 Service Instructions ReversingSpool micronfiltertoanoversized10-micronfilter. 16. Removetheretainingrings(67)andendcaps(65). Tool Reassembly 17. Unscrewthesealcaps(64)andslidethereversing spool(68)outofthemainhousing.Makesuretheidler 1. Lubricateandinstallanewo-ring(4)andback-upring shafthasbeenremovedpriortocompletingthisstep. (39)intothemainhousing.Installthesealback-upwasher (44)andretainingring(16). Cleaning and Inspection 2. Slidethereversingspool(68)intothemainhousing assembly.Insertthe spoolwiththeslottowardtheidler Cleaning shaftholeandthenarrowsideofthedepressioninthe Cleanallpartswithade-greasingsolution.Blowdry spoolfacinguptowardthetopofthemainhousing. withcompressedairoruselint-freecloths. 3. Inserttheidlershaft(47)topreventthereversingspool Gear Chamber(MotorCap) fromturning. Thechamberboresandbottomsaroundtheshaft bushingsshouldbepolishedandnotroughorgrooved. 4. Lubricate andinstallanewwiperseal(63),o-ring(10), Ifthebushingboresareyellow-bronze,replacethem back-upring(17)ando-ring(2)intoeachsealcap (64). andinvestigatethe causeofwear.
- Page 14 Service Instructions housing. Installshaftkeeper(24)andbearing keeper(25)beofreinstallingbearing(28)on outputshaft(36).Installplanetgears(26)into outputshaftandinstalltheoutputshaftwith aqttachedpartsintothegearhousing(69).Install the ringgear(27)intothegearhousingandsecure withtherollpin(5).Installthesealgasket(71) aroundtheringgear. 11. Lubricateandinstalltheo-ring(4)onthe outputshaft.Installthesealnut(35),usingthe planetshaftborestopreventtheoutputshaftfrom turning. Installtheplanetshafts(23)andsecure themwithretainingring(29).I n stallthegear chamberandattachedpartstothemainhousing usingcapscrews(31)andlockswashers(32).If the tool hasatriggerguard(80),installguardwith capscrew(34)andnut(20)atthistime. 12. Lubricate theoutputshaftthreadsandinstall the chuck(33).Whileholdingthesealnutsecure withanopenendwrench,torquethechuckto50 ftlbs / 69Nm.
-
Page 15: Troubleshooting
Troubleshooting Thissectiondescribeshowtofindandresolveproblemsusersmayexperience.Ifasituationoccursthatisnotcovered, callyourStanleyCustomerServicerepresentativeforassistance. WARNING Inspectingthetoolorinstallingpartswiththehydraulichosesconnectedcanresultinseverepersonalinjuryoreq uipment damage. Topreventaccidentalstartup, disconnectthehydraulicpowerbeforebeginninganyinspectionorinstallationtask. Ifsymptomsofpoorperformancedevelop,thefollowingchartcanbeusedasaguidetocorrecttheproblem. Whendiagnosingfaultsinoperationofthetool,alwayscheckthatthehydraulicpowersourceissupplyingthecorrect hydraulicflowandpressuretothetoolaslistedinthetable.Useaflowmeterknowntobeaccurate.Checktheflow withthehydraulicoiltemperatureatleast80°F/27°C. Symptom Possible Cause Solution Tool will not start. Power notbeingsupplied. Check to make certainthatboth hosesare connected. Turn hydrauliccircuitcontrolvalve Defectivequick disconnects. Check eachquick disconnect separately. Replaceasnecessary. Low drilling Relief valvesetting toolow. - Page 16 Troubleshooting Symptom Possible Cause Solution Oil getshot, Open center tool onaclosedcenter Usetoolstomatchcircuit. power unit circuit andviceversa. working hard. Circuit relief set toolow. Adjust relief valve to 2100 psi/ 145 bar. Toomuch oil goingthrough tool. Adjust flow for 12gpm/45lpm maximum, or less. Oilleaks at Damaged o-rings.
-
Page 17: Parts Illustration
DL07 Parts Illustration... -
Page 18: Parts List
DL07 Parts List Notes Item Part Description Qty. 00026 O-ring3/16x5/16x1/16-008 00175 O-ring1/2x5/8x1/16-014 00231 Lockwasher5/16"I.D 00354 O-ring1/2x11/16x3/32-112 00563 RollPin3/16O.D.x.375LG. 00713 DowelPin1/4x1 00717 O-ring1/4x3/8x1/16-010 00803 HSHCS10-24x5/8 01262 O-ring1-3/4x1-7/8x1/16-031 01604 O-ring.755x.949x.097-910 02324 Cap&Plug½in. ModelDL07552SUPOnly 03288 Cap&Plug3/8in. ModelDL07552SUPOnly 03364 O-ring.441x.558x.072-905 05206 Bushing 05207 Bushing... -
Page 19: Dl07 Parts List
DL07 Parts List Notes Item Part Qty. Description 56757 EndCap 56758 SpringCap 56764 RetainingRing 56765 ReversingSpool 58403 GearHousingMachining 58462 ReliefCartridgePlugAssembly IncludesItems#7and13 58635 SealGasket 58856 3/8in.Flush-faceCouplerBody-8(½)MaleSAE PartofSet58718-ModelsDL07550,55001,652Only 58857 3/8in.Flush-faceCouplerNose-8(½)MaleSAEPartofSet58718-ModelsDL07550,55001,652Only 58862 WarningSticker - Pressure ModelsDL07550,652,552S,552SUP,572SOnly 58864 WarningSticker - Electrical ModelsDl07550,652,552S,552SUP,572SOnly 59049 MainHousingAssembly... -
Page 20: Accessories
Accessories Part Part Description NOTE: Part Number WoodAugerBits,5/8 in.Hex Description when ordering. 27845 9/16in.diax18in.CarbideTippedAugerBit(22in.oal) 27847 13/16in.diax18in.CarbideTippedAugerBit(22in.oal) WoodAugerBits,7/16in.Hex 27850 9/16in.dia.x8in.CarbideTippedAugerBit(12in.oal) 27851 11/16in.dia.x8in.CarbideTippedAugerBit(12in.oal) 27852 13/16in.dia.x8in.CarbideTippedAugerBit(12in.oal) 27853 15/16in.dia.x8in.CarbideTippedAugerBit(12in.oal) 27854 1-1/16 in.dia.x8in.CarbideTippedAugerBit(12in.oal) 27855 9/16in.dia.x12in.CarbideTippedAugerBit(16in.oal) 27856 11/16in.dia.x12in. CarbideTippedAugerBit(16in.oal) 27857 13/16in.dia.x12in.CarbideTippedAugerBit(16in.oal) 27858 15/16in.dia.x12in.CarbideTippedAugerBit(16in.oal) 27859 1-1/16 in.dia.x12in.CarbideTippedAugerBit(16in.oal) 27860 9/16in.dia.x18in.CarbideTippedAugerBit(22in.oal) 27861... -
Page 21: Warranty
Warranty StanleyHydraulicTools(hereinaftercalled“Stanley”),subjecttotheexceptionscontainedbelow,warrantsnewhydraulictoolsforaperiodofone yearfromthedateofsaletothefirstretailpurchaser,orforaperiodof2yearsfromtheshippingdatefromStanley,w hicheverperiodexpiresfirst,to befreeofdefectsinmaterialand/orworkmanshipatthetimeofdelivery,andwill,atitsoption,repairorreplacean y t o o l o r p a r t o f a t o o l , o r n e w part,whichisfounduponexaminationbyaStanleyauthorizedserviceoutletorbyStanley’sfactoryinMilwaukie,OregontobeDEFECTIVEIN MATERIALAND/ORWORKMANSHIP. EXCEPTIONSFROMWARRANTY NEWPARTS: Newpartswhichareobtainedindividuallyarewarranted,subjecttotheexceptionsherein,tobefreeofdefectsinma terialand/or workmanshipatthetimeofdeliveryandforaperiodof6monthsafterthedateoffirstusage. Sealsanddiaphragmsarewarrantedtobefreeof defectsinmaterialand/orworkmanshipatthetimeofdeliveryandforaperiodof6monthsafterthedateoffirstusage or2yearsafterthedateof delivery,whicheverperiodexpiresfirst. Warrantyfornewpartsislimitedtoreplacementofdefectivepartsonly. Laborisnotcovered. - Page 22 Foradditional Sales&Service information, contact: ® StanleyHydraulicTools Division of the Stanley Works 3810SENaefRoad Milwaukie, OR 97267 USA Tel: (503)659-5660 Fax:(503) 652-1780 www.stanley-hydraulic-tools.com...
Need help?
Do you have a question about the DL07 and is the answer not in the manual?
Questions and answers