
Related Manuals for Elvox 46241.F04


Summary of Contents for Elvox 46241.F04
- Page 1 Manuale per il collegamento e l’uso Installation and operation manual 46241.F04 Manuale per l’uso dell’NVR NVR User Manual...
-
Page 2: Table Of Contents
Indice Introduzione..........................................2 1.1 Introduzione all’NVR........................................ 2 1.2 Funzioni principali........................................2 Installazione dell’hardware......................................3 2.1 Installazione del disco rigido e del masterizzatore DVD............................3 2.2 Descrizione del pannello anteriore.................................... 4 2.3 Descrizione del pannello posteriore..................................4 2.4 Telecomando..........................................5 2.5 Controllo con il mouse....................................... 5 2.5.1 Collegamento del mouse.................................... - Page 3 7.2 Allarme manuale........................................25 7.3 Gestione disco.......................................... 25 7.4 Upgrade............................................ 26 7.5 Logoff ............................................26 Sorveglianza in remoto........................................ 26 8.1 Sorveglianza in remoto da Internet Explorer tramite NAT............................27 8.1.1 Impostazioni NAT......................................26 8.1.2 Accesso NAT........................................26 8.2 Sorveglianza in remoto da Internet Explorer via LAN e WAN ..........................26 8.2.1 Tramite LAN........................................
-
Page 4: Introduzione
• Supporto di Internet Explorer per la visualizzazione in remoto • Scansione QRCODE tramite cellulare client • Impostazione dell'ampiezza di connessione del client • Dual stream Lo streaming in rete è regolabile indipendentemente, per adeguarsi alla larghezza di banda della rete e all'ambiente • Cattura di istantanee e regolazione del colore in remoto • Ricerca in remoto cronologica e per evento con riproduzione del canale • Possibilità di configurare tutti i menu in remoto, con la modifica di tutti i parametri dell'NVR in remoto • Supporta la sorveglianza attraverso dispositivi mobili quali iPhone e su sistemi operativo Android • CVM Elvox per gestire più dispositivi su Internet... -
Page 5: Installazione Dell'hardware
Installazione dell'hardware Al ricevimento dell'apparecchiatura controllare l'unità e gli accessori. Non accendere l'apparecchiatura fino al completamento dell'installazione dei compo- nenti fisici. Installazione del disco rigido Avviso: 1. Questa serie supporta una unità disco rigido SATA . Utilizzare il disco rigido raccomandato dal costruttore per garantire la sicurezza. 2. Calcolare la capacità dell'HDD in base alle impostazioni di registrazione. Fare riferimento all'"Appendice B - Calcolo della capacità di registrazione". 1) Allentare le viti posteriori e laterali del dispositivo per aprire il coperchio superiore. 2) Collocare l'HDD sul fondo del case e collegare i cavi di alimentazione e dati. -
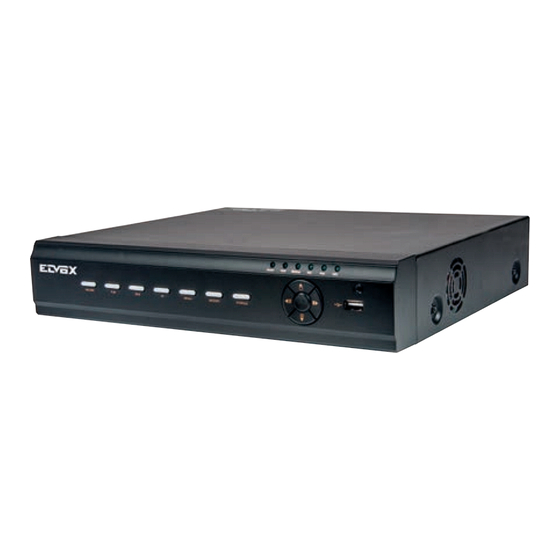
Page 6: Descrizione Del Pannello Anteriore
2.2 Descrizione del pannello anteriore Avvertenza: La descrizione del pannello anteriore ha solo valore indicativo. Far riferimento all'apparecchiatura in dotazione. Pannello anteriore I Nome Descrizione Durante la registrazione la luce è blu Net (Rete) Quando è attivo l'accesso alla rete la luce è blu Power (Alimentazione) Spia di alimentazione, quando è collegata la luce è blu Fn (Funzione) Commuta l'uscita tra VGA/HDMI e BNC Pannello anteriore II... -
Page 7: Telecomando
2.4 Telecomando Pulsante Funzione Consente di attivare manualmente la registrazione. Utilizza due batterie AAA. Search Accede al modo di ricerca. 1. Aprire il coperchio del vano batterie. MENU Accede al menu. 2. Inserire le batterie. Fare attenzione alla polarità (+ e -). Exit Esce dalla schermata corrente. 3. Riposizionare il coperchio del vano batterie. ENTER Conferma la scelta o la configurazione. L'interfaccia del telecomando è illustrata in Telecomando. Pulsanti di direzione Spostano il cursore durante la configurazione. -
Page 8: Istruzioni Per Le Funzioni Base
3 Istruzioni per le funzioni base 3.1 Avvio e spegnimento Assicurarsi che tutti i collegamenti siano eseguiti correttamente prima di accendere l'unità. L'avvio e lo spegnimento corretti sono essenziali per garantire la durata dell'NVR. 3.1.1 Avvio - Collegare all'alimentazione - Il dispositivo si avvia e il LED di alimentazione diventa blu. - Viene visualizzata una finestra con la procedura guidata in cui sono indicate le informazioni sul fuso orario, l'impostazione dell'ora, la configurazione di rete e la gestione del disco. È possibile eseguire la configurazione in questa schermata facendo riferimento alle procedure descritte nei capitoli corrispondenti. Se si preferisce non utilizzare la procedura guidata, fare clic sul pulsante Exit per uscire. Nota: l'uscita predefinita è l'uscita HDMI. Tenere premuto il tasto ESC per commutare la risoluzione dell'uscita tra VGA e HDMI. 3.1.2 Spegnimento È possibile spegnere il dispositivo dal telecomando IR o con il mouse. - Andare a Menu principale e selezionare l'icona "Shut Down" (Spegni). Verrà visualizzata la finestra di spegnimento. - Fare clic su OK. Dopo qualche istante l'unità si spegne. -
Page 9: Riproduzione Live
3.4 Riproduzione live Fare clic sul pulsante Playback (Riproduzione) per riprodurre la registrazione. Fare riferimento alla Figura 3-3. Utilizzare i pulsanti sullo schermo per eseguire le varie funzioni. Fig. 3-3 Riproduzione live 4 Aggiunta di telecamere IP Questo capitolo presenta principalmente come collegare più telecamere IP attraverso NVR. Una volta terminata l’aggiunta di telecamere IP, è possibile vedere le immagini in diretta attraverso il monitor del NVR. Per l’NVR a 4 CH, è sufficiente collegare direttamente le telecamere IP al dispositivo tramite porte di rete PoE. Le immagini in diretta verranno visualizzate dopo il collegamento con successo. Naturalmente, se ci sono i canali disponibili, è possibile collegare il IPC tramite rete WAN / LAN. Per aggiungere le telecamere IP tramite LAN: - Andare a Main Menu scheda IP Camera. - Page 10 Fig. 4-3 Modifica dell’indirizzo IP - Selezionare i dispositivi trovati e fare clic su “OK” per tornare all’interfaccia precedente. Fare clic sul pulsante “Apply” (Applica), i dispositivi aggiunti saranno elencati nell’interfaccia di gestione del dispositivo. Lo stato “Connected” (Collegato) significa che il dispositivo è collegato ed è quindi possibile vedere l’im- magine live. È possibile selezionare il dispositivo aggiunto e fare clic sul pulsante “Setup” (Impostazione) per modificare il canale, l’indirizzo IP. del dispositivo come mostrato nella Fig. 4-5. Fig. 4-4 Ricerca dei dispositivi Fig.
-
Page 11: Guida Alla Configurazione Del Menu Principale
5. Guida alla configurazione del menu principale Fare clic con il pulsante destro del mouse o premere il pulsante ESC sul pannello anteriore per visualizzare la barra del menu principale in fondo alla scher- mata. Fare riferimento alla Fig. 5-1. Fig. 5-1 Barra degli strumenti del menu principale Fare clic sull'icona accanto al modo schermo per visualizzare una finestra di dialogo in cui selezionare i canali. Modo schermo: È possibile scegliere il modo schermo per mostrare le immagini live. PIP: fare clic su questo pulsante per impostare la funzione PIP. Fare clic su questo pulsante per selezionare l'immagine più grande, quindi fare clic sul pulsante piccolo "PIP" accanto alla parola "None" (Nessuna) per impostare l'immagine più piccola. A questo punto è possibile visualizzare un'immagine nell'immagine (Picture In Picture, PIP). Dwell: la funzione Dwell consente di visualizzare immagini live di diverse telecamere in sequenza. Le immagini possono essere visualizzate su canale singolo o come griglia da diverse telecamere. -
Page 12: Configurazione Di Base
5.1 Configurazione di base La configurazione di base comprende tre sottomenu: sistema, data e ora e DST. 5.1.1 Sistema 1 - Andare a Main Menu Setup Basic System. Fare riferimento alla Fig. 5-3. Fig. 5-3 Configurazione di base - Sistema 2 - In questa interfaccia è possibile impostare il nome del dispositivo, l'ID dispositivo, il formato video, il numero massimo di utenti della rete, la risoluzione VGA e la lingua. Le definizioni dei singoli parametri sono le seguenti. Device Name (Nome dispositivo): il nome del dispositivo come viene visualizzato sul lato client o sul CVM: è utile per aiutare l'utente a riconoscere il di- spositivo in remoto. Device ID (ID dispositivo): l'ID dispositivo si utilizza per mappare l'NVR sulle telecamere speed dome. Video Format (Formato video): sono disponibili due modi: PAL e NTSC. È possibile selezionare il formato video in base alla telecamera utilizzata. -
Page 13: Configurazione Live
Fig. 5-5 Configurazione di base - DST 5.2 Configurazione live La configurazione live include tre sottomenu: live, monitor principale e maschera. 5.2.1 Live In questa interfaccia è possibile impostare il nome della telecamera. Per impostare il nome della telecamera: 1 - Andare a Main Menu Setup Live Live. Fare riferimento alla Fig.5-6. Fig. 5-6 Configurazione live 2 - Quando si fa clic sull'area del nome della telecamera viene visualizzata una tastiera virtuale. Selezionare le lettere e/o i numeri sulla tastiera per inserire il nome che si desidera visualizzare sull'immagine live. 3 - Selezionare la casella corrispondente al nome della telecamera nell'area Show name (Mostra nome). Per visualizzare il nome della telecamera per tutti i canali, selezionare la casella "All" (Tutti). -
Page 14: Maschera
Fig. 5-7 Configurazione live - Monitor principale 5.2.3 Maschera Se vi sono elementi che non si desidera siano visibili nell'immagine live, è possibile impostare la maschera. È possibile oscurare fino a tre aree per canale. Se la funzione maschera non è disponibile nell'indirizzo IP aggiunto, la funzione di maschera non avrà effetto. Per impostare l'area da mascherare: 1 - Andare a Main Menu Setup Live interfaccia Mask. Fig. 5-8 Configurazione live - Maschera 2 - Fare clic sul pulsante "Setting" (Impostazioni) per passare all'immagine live. 3.- Premere il pulsante sinistro del mouse e trascinare il cursore per impostare l'area da mascherare, come illustrato sotto. 4 Fare clic con il pulsante destro per uscire dall'interfaccia di impostazione della maschera. 5 - Fare clic sul pulsante "Apply" (Applica) per salvare le impostazioni. Per eliminare l'area della maschera: 1 - Fare clic sul pulsante "Setting" (Impostazioni) nell'interfaccia della maschera. -
Page 15: Bit Rate Di Registrazione
Fig. 5-10 Configurazione della registrazione - Attivazione Parametro Significato Record (Registrazione) Attiva/disattiva la registrazione per il canale selezionato Audio Attiva/disattiva la registrazione audio per il canale selezionato 3 - Selezionare "All" (Tutti) per impostare gli stessi valori per tutti i canali. 5.3.2 Bit rate di registrazione 1 - Andare a Main Menu Setup Record Record Bit rate. -
Page 16: Indicazioni A Video
5.3.4 Indicazioni a video Questa opzione consente di attivare o disattivare la visualizzazione del nome della telecamera e dell'indicazione data/ora sul video. È anche possibile scegliere la posizione del timbro sullo schermo. Per impostare il timbro procedere come segue: 1 - Andare a Main Menu Setup Record interfaccia Stamp. Fare riferimento alla Fig. 5-13. 2 - Selezionare le caselle in Camera Name (nome della telecamera) e Time stamp (data/ora). Fare clic sul pulsante "Setting" (Impostazione) per specificare la posizione del timbro. È possibile trascinare il nome della telecamera e la data/ora nel punto desiderato, come illustrato di seguito. -
Page 17: Programmazione Movimento
2. Selezionare il canale e fare clic sul pulsante per aggiungere la programmazione per un giorno specifico. Fare clic sul pulsante per eliminare la programmazione selezionata. Se si desidera applicare l'impostazione della programmazione di un canale ad altri o tutti i canali, selezionare il canale e fare clic sul pulsante "Copy" (Copia). È possibile impostare la programmazione settimanale facendo doppio clic nell'area della griglia. Verrà visualizzata la finestra di dialogo illustrata nella 5-15. 1 - Selezionare un giorno e fare clic sul pulsante "Add" (Aggiungi) per programmare l'ora di inizio e di fine. Fare clic su per salvare. 2.- Selezionare altri giorni e aggiungere una programmazione oppure copiare le impostazioni da un programma esistente su altri utilizzando la voce "Apply Settings To" (Applica impostazioni a). Fig. 5-15 Programmazione - Programmazione settimanale 5.4.2 Programmazione movimento Questa scheda consente di impostare la programmazione della registrazione attivata dal movimento. La procedura di impostazione è la seguente: - Andare a Main Menu Setup Schedule... -
Page 18: Allarme Sensore
Fig. 5-17 Configurazione allarme - Sensore - Gestione allarme 6 - Andare alla scheda allarme per selezionare le opzioni di gestione dell'allarme. Fig. 5-18 Gestione allarme - Attivazione Buzzer: Se questa opzione è selezionata, in caso di allarme si attiva il segnale acustico locale. Show Full Screen (Mostra a tutto schermo): se questa opzione è selezionata, in caso di allarme il canale pertinente viene visualizzato sul monitor. To Alarm Out (All'uscita allarme): se selezionata, questa opzione attiva l'uscita del relè esterno quando viene rilevato un allarme. -
Page 19: Altri Allarmi
5 - Nell'interfaccia Area è possibile trascinare il cursore sulla barra di scorrimento per impostare il valore della sensibilità (da 1 a 8) A un valore maggiore corrisponde una maggiore sensibilità al movimento. Dal momento che la sensibilità è influenzata dal colore e dall'ora (giorno o notte) è possibile impostare il valore in base alle condizioni locali. Fare clic con il pulsante sinistro sulla griglia e trascinare per eliminare l'area. Fare clic sull'icona per impostare tutta l'area come area di rilevamento. Fare clic sull'icona per cancellare l'area di rilevamento impostata. Fare clic sull'icona per provare la sensibilità in base alle condizioni locali. Quando viene rilevato il movimento, appare un'icona. Fare clic sull'icona per salvare le impostazioni. Fare clic sull'icona per uscire dall'interfaccia corrente. Nota: prima di configurare il campo di rilevamento movimento si consiglia di fare clic sull'icona per cancellare l'impostazione esistente ed eseguire di nuovo la configurazione. 6 - Selezionare "All" (Tutti) per impostare gli stessi valori per tutti i canali. 7 - Fare clic sul pulsante "Apply" (Applica) per salvare le impostazioni. 8 - Andare alla scheda Schedule (Programmazione) La procedura di impostazione dell'allarme attivato dal movimento è analoga a quella di configurazione della programmazione normale (per maggiori informazioni vedere il paragrafo 4.4.1). 5.5.3 Altri allarmi In questa scheda è possibile configurare l'allarme per Disk Full (Disco pieno), IP Conflict (Conflitto IP), un evento Disconnect (Disconnessione) ecc. -
Page 20: Configurazione Di Rete
2 - Inserire il nome del relè e selezionare il tempo di attesa. 3 - A ndare alla scheda Schedule (Programmazione). Viene visualizzata l'interfaccia di impostazione della programmazione. La procedura di impostazione della programmazione dell'uscita allarme è analoga a quella di configurazione della programmazione normale (per informazioni vedere il capitolo 5.4.1). Questo passaggio è molto importante per l'uscita allarme. Anche se l'uscita allarme è stata attivata per l'allarme basato sul movimento o l'allarme su sensore, non sarà possibile vedere il risultato dell'allarme se in questo punto non è stata aggiunta alcuna programmazione. Per configurare il segnale acustico: 1 - Andare a Main Menu Setup Alarm Alarm Out Buzzer. 2 - Selezionare la casella Buzzer (Segnale acustico) e impostare tempo di attesa dell'allarme. Il segnale acustico si attiva quando il sistema va in allarme. 5.6 Configurazione rete La configurazione di rete include cinque sottomenu: rete, email, server, NAT e altre impostazioni. Se si prevede di utilizzare l'NVR per il monitoraggio in rete, è necessario configurare le impostazioni di rete. 5.6.1 Rete Per configurare la rete: 1 - Andare a Main Menu Setup Network... -
Page 21: Server
SMTP Server/Port (ServerSMTP/Porta): il nome e il numero di porta del server SMTP. È possibile impostare il controllo SSL (come ad es. in Gmail) in base alle effettive necessità. 5.6.3 Server Questa funzione viene utilizzata principalmente per connettere il server CVM Elvox. La procedura di impostazione è la seguente: 1 - Nell'interfaccia Server, selezionare "Enable" (Attiva) come indicato nella Fig. 5-25. 2 - Controllare l'indirizzo IP e la porta del server di trasferimento nel server CVM Elvox. La porta di server predefinita per l'auto segnalazione è 2009. Se viene modificata, andare all'interfaccia del server di trasferimento per controllare. 3 - Abilitare l'auto segnalazione nel server CVM Elvox quando viene aggiunto un nuovo dispositivo. Inserire un ID dispositivo e immettere le restanti infor- mazioni relative al dispositivo nel server CVM Elvox. 4 - Inserire l'IP server suddetto, la porta server e l'ID dispositivo nell'interfaccia del server. Fare clic sul pulsante "Apply" (Applica) per salvare le impostazio- ni. Il sistema CVM Elvox ora connetterà automaticamente il dispositivo. - Page 22 ► Registrazione del nome del dominio (in questo esempio www.dvrdydns.com) 1 - Immettere www.dyndns.com nella barra degli indirizzi di Internet Explorer per andare al sito web corrispondente. Fare clic sul pulsante “Registration” per registrarsi, viene visualizzata la schermata seguente. 2 - Creare il nome del dominio 3 - Quando la richiesta del nome di dominio sarà stata finalizzata, il nome di dominio sarà visualizzato nell’elenco. ► Impostazioni NVR Collegare l’NVR al client di rete. 1 - Andare a Main Menu Network Other Settings, selezionare la casella DDNS, selezionare “dvrdydns” nella casella di elenco a discesa DDNS Server e inserire nome utente e password.
-
Page 23: Configurazione Della Gestione Utente
5.7 Configurazione della gestione utente In questa scheda è possibile aggiungere utenti normali o avanzati. Per aggiungere un utente e impostare le autorizzazioni: 1 - Andare a Main Menu Setup Users. Fare riferimento alla Fig. 5-28. Fig. 5.-28 Configurazione gestione utente 1 - Fare clic sul pulsante “Add” (Aggiungi) per visualizzare la finestra di dialogo illustrata nella Fig. 5-29. Fig. 5-29 Aggiungi - Generale 3 - Nella scheda “General” (Generale) inserire nome utente e password e selezionare il tipo di utente. È anche possibile selezionare la casella “Binding PC MAC Address” (Indirizzo MAC vincolante per il PC) e inserire tale indirizzo. 4 - Fare clic sul OK per salvare le impostazioni. -
Page 24: Importazione/Esportazione
5.8.2 Importa/Esporta Consente di esportare i file di dati in dispositivi di archiviazione mobili con funzione di backup e quindi importare i file di dati specificati dal dispositivo di archiviazione mobile all’NVR. 5.8.3 Elenco Blocca/Consenti Fig. 5-31 Elenco Blocca/Consenti In questa schermata un utente autorizzato può impedire o consentire ad altri utenti di computer compresi in uno specifico intervallo di indirizzo IP di accedere all’NVR. Se, ad esempio, un utente amministratore desidera che gli utenti in un intervallo di indirizzo IP compreso tra 192.168.000.002 e 192.168.000.004 non accedano all’NVR, può selezionare l’opzione “Block list” (Elenco bloccati) e immettere tale intervallo di indirizzo IP. Ricerca, riproduzione e backup La configurazione della ricerca comprende quattro sottomenu: ricerca cronologica, evento, gestione file e immagine. 6.1 Ricerca cronologica 1 - Andare a Main Menu Search Time Search. Fare riferimento alla Fig. 6-1. Fig. 6-1 Configurazione della ricerca - Ricerca cronologica 1 - Selezionare data e canali sulla destra e premere il pulsante "Search" (Cerca). Se la data ha il bordo evidenziato significa che sono presenti dei dati. -
Page 25: Gestione File
6.3 Gestione file 1 - Andare a Main Menu Search interfaccia File Management. Fare riferimento alla Fig. 6-3. Fig. 6-3 Configurazione della ricerca - Gestione file 2 Selezionare la data e i canali. Se la data ha il bordo evidenziato significa che sono presenti dei dati. 3 - Fare clic sul pulsante "Search" (Cerca) per visualizzare i file trovati nella casella di riepilogo dei file. 4 - Utilizzare il pulsante "Tutti" per bloccare/sbloccare o eliminare tutti i file nella colonna di gestione dei file. 5 - Fare doppio clic su un elemento sbloccato per riprodurlo. Lock (Blocca): Selezionare un file e fare clic sul pulsante Lock per bloccare il file, in seguito il file non potrà essere eliminato o sovrascritto. Unlock (Sblocca): Selezionare un file bloccato e fare clic sul pulsante "Unlock" per sbloccare il file. Delete (Elimina): Selezionare un file sbloccato e fare clic sul pulsante Delete per eliminare il file. 6.4 Ricerca per immagine 1 - Andare a Main Menu Search scheda Image. -
Page 26: Gestione Dell'nvr
3 - Selezionare un file o selezionare la casella "All" (Tutti) per selezionare tutti i file di dati. Fare clic sul pulsante "Backup" per visualizzare la finestra delle informazioni sul backup. 4 - Nell'interfaccia delle informazioni del backup selezionare le informazioni desiderate per file di backup, tipo di archiviazione, tipo di salvataggio file ecc. Al termine, fare clic sul pulsante Start per avviare il backup. Nota: se i file di backup sono salvati in formato DVR, controllare il lettore utilizzato per il backup. Solo questo lettore è in grado di riprodurre questi file in formato DVR. Se i file di backup vengono salvati nel formato AVI è possibile leggerli in qualsiasi lettore di contenuti multimediali. 7 Gestione dell'NVR 7.1 Controllo delle informazioni di sistema La verifica delle impostazioni di sistema comprende sette sottomenu: sistema, evento, log, rete, utenti online, registrazione e QRCODE. -
Page 27: Allarme Manuale
Instalazione dell’applicazione su smartphone Accedere al market del proprio smartphone, ricercare l’APP SUPERLIVE PRO e installarla. Configurazione Premere il tasto CODICE QR (freccia rossa sulla foto sotto) per entrare nella modalità scansione L’utente può accedere rapidamente al client mobile leggendo il codice QRCODE. Andare a Main Menu / Information, scheda QRCODE. Fare riferimento alla Fig. 7.1.9A Fig. 7-1.9A Infromazioni per la configurazione In questa interfaccia è possibile leggere il codice QRCODE con un telefono cellulare. Fare riferimento alla Fig. 7-1.9B. -
Page 28: Upgrade
7.4 Upgrade È possibile eseguire l’upgrade dell’NVR con l’unità flash USB. Richiedere il software di upgrade al proprio rivenditore quando è disponibile una nuova ver- sione del software. Procedura di upgrade: 1 - Copiare il software di upgrade fornito dal rivenditore nel dispositivo di archiviazione USB. 2 - Collegare l’unità USB alla porta USB. 3 - Andare a Main Menu scheda Upgrade. Il nome del software di upgrade viene visualizzato nella casella di elenco Upgrade. 4 - Selezionare il software, quindi fare clic sul pulsante Upgrade. -
Page 29: Sorveglianza In Remoto Da Internet Explorer Tramite Nat
2. Collegare l’NVR a Internet direttamente tramite PPPoE. 1 - Nell’NVR, andare a Main Menu Setup interfaccia Network per attivare il PPPoE quindi inserire il nome e la password forniti dal proprio ISP. Fare clic su “Apply” (Applica). L’NVR si connette al server e visualizza un messaggio di conferma. 2 - Quando si accede all’interfaccia remota dell’NVR, è possibile inserire l’IP della WAN per accedere direttamente. È possibile andare a Main Menu Informa- tion interfaccia Network per controllare l’indirizzo IP. -
Page 30: Tramite Wan
3 - Prendere nota dell’indirizzo IP, la Subnet Mask ecc., quindi, nell’NVR, andare a Main Menu Setup interfaccia Network per inserire manualmente l’indirizzo IP, la Subnet Mask e il Gateway copiati dalla configurazione del computer. Il segmento di rete deve essere uguale a quello del computer. Se si utilizza il protocollo DHCP, attivarlo sia nell’NVR sia nel router. 4 - Dopo aver inserito le suddette informazioni è possibile inserire l’IP della LAN e la porta HTTP in Safari. Ad esempio, inserire: http://192.168.1.100:81 (nell’esempio 192.168.1.100 è l’IP della LAN dell’NVR, 81 è la porta HTTP dell’NVR). Fare clic sul pulsante “ “. Il browser scarica il controllo ActiveX come illustrato di seguito: 5 - Fare clic sull’icona , quindi selezionare il controllo ActiveX, verrà visualizzata l’interfaccia di benvenuto. Fare clic su “Continua” pulsante “Installa”. Viene visualizzata la seguente finestra. Inserire nome utente e password del computer Apple quindi fare clic su “OK” per installare il controllo ActiveX. 6 - Al termine dell’installazione del controllo ActiveX, uscire da Safari. - Page 31 Nota: fare clic sul pulsante per avviare la registrazione manuale, il file registrato verrà salvato nel PC utente. Modo schermo Modo schermo Scatto di istantanee: quand o si fa clic sull’icona “Snap” il sistema scatta automaticamente un’istantanea e la salva nel computer. Specificare il percorso per il salvataggio delle immagini in Configuration Local configuration. Regolazione del colore Trascinare il cursore sulla barra per regolare luminosità, contrasto, tonalità cromatica e saturazione. Fare clic su Predefinito per ripristinare i valori originali. Pulsanti Descrizione Trascinare il cursore a slitta per regolare la luminosità...
-
Page 32: Riproduzione E Backup In Remoto
Fig. 8-2 Menu attivato con il pulsante destro Menu attivato con il pulsante destro Fare clic con il pulsante destro del mouse nell’interfaccia live per visualizzare un menu a discesa come illustrato di seguito. Stream (Flusso): questo NVR supporta il flusso principale e il flusso secondario. Il flusso principale ha un maggiore frame rate, max 25fps (PAL)/30fps (NTSC) per ogni canale, ma necessita di una maggiore larghezza di banda; il flusso secondario ha un frame rate più basso, max 6fps (PAL)/7fps (NTSC) per ogni canale e richiede meno larghezza di banda rispetto al flusso superiore. Selezionare pertanto il flusso in base alla larghezza di banda disponibile. All to master/sub stream (Tutti su flusso principale/secondario): imposta tutti i canali sul flusso principale o secondario. Enable audio (Attiva audio): attiva o disattiva l’audio. Full screen (Schermo intero): l’immagine di anteprima live viene visualizzata a schermo intero e la barra degli strumenti è nascosta. Fare doppio clic con il pulsante sinistro o fare clic con il pulsante destro per uscire. -
Page 33: Backup In Remoto
Fig. 8-5 Riproduzione della ricerca cronologica Ricerca per evento: 1 - Andare a Search Event Search. Fare riferimento alla Fig. 8-6. Fig. 8-6 interfaccia di ricerca evento 2 - Fare clic sulla data evidenziata e selezionare i canali di registrazione. 3 - Selezionare la casella di controllo del tipo di evento: movimento o sensore 4 - Fare clic sul pulsante “Search”... -
Page 34: Configurazione Del Sistema In Remoto
Fig. 8-8 Interfaccia di backup in remoto 1 - Selezionare i canali, impostare l’ora di inizio e di fine, quindi fare clic sul pulsante “Search” (Cerca) per visualizzare le informazioni sul file nella casella di riepilogo dei file. 2 - Selezionare i file di backup e fare clic sul pulsante “Browse” (Sfoglia) per selezionare il percorso. Fare clic sul pulsante “Backup” per avviare il backup. I file di backup vengono salvati sul computer dell’utente. 8.6 Configurazione del sistema in remoto È possibile configurare il dispositivo in remoto per le seguenti funzioni: configurazione base, configurazione live, configurazione delle registrazioni, configu- razione della programmazione, configurazione dell’allarme, configurazione della rete e configurazione dell’utente. Selezionare un’opzione dall’elenco sulla sinistra, quindi impostare i parametri relativi. La configurazione può essere eseguita da un solo utente per volta. Fare clic sulla scheda Config (Configurazio- ne) per visualizzare l’interfaccia illustrata nella Fig. 8-9. Fig. 8-9 Configurazione del sistema in remoto L’elenco dei sottomenu e le opzioni di ciascun menu sono analoghi a quelli dell’NVR. Per maggiori dettagli, far riferimento alla Guida alla configurazione del menu principale. 8.7 Strumenti Fare clic sulla scheda degli strumenti per accedere allo strumento di gestione del disco. È possibile visualizzare lo stato dell’HDD, modificare/visualizzare le proprietà di lettura/scrittura ed è inoltre possibile formattare l’HDD da remoto. -
Page 35: Appendice A Faq (Domande Frequenti)
Appendice A FAQ (Domande frequenti) D1. Perché l’NVR non si accende anche dopo aver collegato l’alimentazione? a. L’alimentatore potrebbe essere danneggiato. Sostituire con un alimentatore nuovo. b. La potenza dell’alimentatore potrebbe non essere sufficiente per azionare l’NVR. Utilizzare l’alimentatore in dotazione con l’NVR. c. Potrebbe trattarsi di un problema dell’hardware. D2. Non viene visualizzato alcun menu ma solo l’immagine live. Perché? Verificare che il monitor sia collegato all’uscita video principale. Il monitor potrebbe essere collegato alla porta VGA /HDMI mentre l’NVR è impostato per l’uscita tramite BNC o viceversa. Premere a lungo il tasto ESC per passare da una risoluzione dell’uscita all’altra. D3. - Page 36 Fig. 8-11 Fig. 8-12 D9: Sull’NVR è sempre visualizzato il messaggio “please wait...” (attendere). Perché? Come mi comporto? a. Il cavo di alimentazione e il cavo dati dell’HDD potrebbero non essere collegati correttamente. Controllare le connessioni dell’HDD. b. È inoltre possibile che sia stato forzato l’arresto dell’NVR a causa di un settore danneggiato dell’HDD che ha provocato un arresto del sistema. Per verificare utilizzare un HDD del cui corretto funzionamento si è certi, oppure provare a formattare l’HDD esistente. D10: Come si inseriscono la password e i numeri nell’interfaccia? Fare clic sulla casella di inserimento della password per visualizzare una tastiera virtuale. Selezionare i caratteri da inserire (la password preimpostata è...
-
Page 37: Appendice B Calcolo Della Capacità Di Registrazione
Appendice B Calcolo della capacità di registrazione È possibile calcolare la dimensione del disco rigido in base al tempo di salvataggio e alle impostazioni di registrazione dell’NVR. Al massimo frame rate, la formula è la seguente: Spazio utilizzato all’ora (MB/h) = Bit rate(kbps) ÷ 8 × 3600 ÷ 1024. Di seguito sono riportati i dati alle diverse impostazioni. Resolution Frame Rate Bit Rate (kbps) Used Space (MB/h) 1080P 15fps (NTSC) 2700 1800 1575 1125 720P 30fps (NTSC) 2700 1800 La formula per il calcolo è la seguente: Capacità di registrazione totale = spazio utilizzato per ora (MB/h) (velocità di copertura del disco rigido) × tempo di registrazione (ora) ×... - Page 38 2. Elenco HDD compatibili. Marchio Capacità Seagate Barracuda 80G/160G/250G/320G/1.5T/2TB/3TB Seagate SV35.3 Seagate Pipeline HD.2 500G Maxtor Diamondmax 160G HITACHI Deskstar 80G/160G Western Digital 160G/250G/320G/1.5T/2TB/3TB Samsung HD161HJ 160G Appendice D: Specifiche 4-CH Formato compressione H.264 CVBS×1; VGA×1; HDMI×1 Uscita video Ingresso video 4 CH 1080P@15fps 4 CH 720P@30fps; 4 CH D1@30fps 1080P/1280×1024/1024×768/800×600 Risoluzione HDMI/VGA...
- Page 39 Contents Introduction ..........................................39 NVR Introduction ........................................39 Main Features ......................................... 39 Hardware Installation ......................................40 Install Hard Drive ........................................40 Front Panel Descriptions ......................................41 Rear Panel Instructions ......................................41 Remote Controller ........................................42 Control with Mouse ......................................... 42 2.5.1 Connect Mouse ........................................
-
Page 40: Appendice D Specifiche 4-Ch
Remote Surveillance ......................................62 8.1 IE Remote Surveillance by NAT ..................................... 63 8.1.1 NAT Settings .......................................... 63 8.1.2 NAT Access ..........................................63 IE Remote Surveillance via LAN & WAN ................................63 8.2.1 Via LAN ..........................................63 8.2.2 Via WAN ..........................................63 Remote Surveillance through Apple PC ................................64 8.3.1 Via LAN .......................................... -
Page 41: Introduction
Introduction NVR Introduction This series of devices are standard 4 CH real-time 1080P/720P/D1 high resolution PoE NVR, which adopt the most advanced SOC technique to ensure high definition recording in each channel and realize outstanding robustness of the system. The series of product integrates 4 PoE network ports, supporting 4 CH IPC direct connection to NVR, simultaneous 4 CH playback, and HDMI 1080 P high resolution display. All of these features make the device meet different security requirements of home, financial, commerce, enterprise, transportation and government, etc. Main Features COMPRESSION FORMAT • Standard H.264 compression with low bit rate and better image quality LIVE SURVEILLANCE • Support HDMI/CVBS/VGA output • 4 CH NVR supports 4 CH 1080P @15fps or 4 CH 720P@30fps IP video input • Support channel security by hiding live display • Display the local record state and basic information • Support USB to make full control RECORD MEDIA • Support one SATA HDD to record for a longer time without any limitation BACKUP •... -
Page 42: Hardware Installation
Hardware Installation Check the unit and the accessories after getting the device. Please don’t power up the unit till the physical installation is complete. 2.1 Install Hard Drive Notice: 1. This series supports one SATA hard drive. Please use the hard drive the manufacturers recommend specially for security and safe field. 2. Please calculate HDD capacity according to the recording setting. Please refer to “Appendix B Calculate Recording Capacity”. 1. -
Page 43: Front Panel Descriptions
2.2 Front Panel Descriptions Notice: The front panel descriptions are only for reference; please make the object as the standard. Front panel I Name Description When recording, the light is blue When access to network , the light is blue Power Power indicator, when connection , the light is blue Switch the resolution of the VGA & BNC output Front panel II Name Description Power indicator Power Indicator, when connected, the light is blue. HDD indicator The light turns blue when reading/writing HDD. Net indicator The light turns blue when it is able to access the network. Backup indicator The light turns blue when backing up files and data. -
Page 44: Remote Controller
2.4 Remote Controller It uses two AAA size batteries. - Open the battery cover of the remote controller. - Place batteries. Please take care the polarity (+ and -). - Replace the battery cover. The interface of remote controller is shown in Remote Controller. Button Function Record manually Search To enter search mode. MENU To enter menu. Exit To exit the current interface. ENTER To confirm the choice or setup. Direction button To move cursor in setup ZOOM... -
Page 45: Basic Function Instruction
Basic Function Instruction Startup and Shutdown Please make sure all the connections are done properly before you power on the unit. Proper startup and shutdown are crucial to expanding the life of your NVR. 3.1.1 Startup 1. Connect with the power. 2. The device will boot and the power LED would turn blue. 3. A WIZARD window will pop up and show some information about time zone, time setup, network configuration, record configuration and disk management. You can set here and refer to the concrete setup steps from the corresponding chapters. If you don’t want to set Wizard, please click “Exit” button to exit. Note: The default output is HDMI output. Press and hold Exit/Stop key to switch the resolution of the VGA & HDMI output. 3.1.2 Shutdown You can shut down the device by using IR remote controller or mouse. -
Page 46: Live Playback
3.4 Live playback Click Playback button to playback the record. Refer to Figure 3-3. You can do complete operation by clicking the buttons on screen. Fig 3-3 Live Playback 4 Add IP Cameras This chapter mainly introduces how to connect multiple IP cameras through NVR. Once you finish adding IP cameras, you can see the live images through the monitor of the NVR. For 4 CH NVR, you just need to directly connect the IP cameras to the device through PoE network ports. The live images will display after you connect successfully. Of course, if there are free channels, you can connect the IPC via WAN/ LAN network. To add IP cameras via LAN: 1-Please go to Main Menu IP Camera tab. Refer to Fig 4-1. Click “Search” button to search the devices in the same network. (The IPC which supports the Onvif protocol may be added manually.) - Page 47 Fig 4-3 Modify IP Address 3-Checkmark the searched devices and click “OK” button to return to the previous interface. Click “Apply” button and then the added devices will be listed in the device management interface. “Connected” status means connecting the device successfully and you will see the live image. You may select the added device and click “Setup” button to modify channel, IP address of the device as shown in Fig 4-5. Fig 4-4 Search Devices Fig 4-5 Modify Devices To add IP cameras via WAN: 1-Please go to Main Menu IP Camera tab. Refer to Fig 4-1.
-
Page 48: Main Menu Setup Guide
5. Main Menu Setup Guide Click right mouse or press ESC button on the front panel to display the main menu toolbar on the bottom of the screen. Refer to Fig 5-1. Fig 5-1 Main Menu Toolbar Click the icon beside the screen mode to display a channel select dialog. Screen Mode: You can choose a screen display mode to show the live images. PIP: Click this button to set PIP. Click this button to choose the bigger picture and then click the little PIP button beside the word “None” to set the smaller picture. After that, you can see a picture in picture. Dwell: Dwell means to display live images from different cameras in a sequence. The images may be displayed as a single channel or in a grid fashion from different cameras. Dwell mode is enabled only when the chosen display mode is not able to display all the available cameras. -
Page 49: Basic Configuration
5.1 Basic configuration Basic configuration includes three sub menus: system, date & time and DST. 5.1.1 System 1 - Go to Main Menu Setup Basic System. Refer to Fig 5-3. Fig 5-3 Basic Configuration-System 2 - In this interface you can set up the device name, device ID, video format, max network user, VGA resolution and language. The definitions for every pa- rameters display as below. Device Name: The name of the device as it may display on the client end or on CMS, this would help the user to recognize the device remotely. Device ID: This ID is used to map the NVR with speed dome cameras. -
Page 50: Live Configuration
Fig 5-5 Basic Configuration-DST 5.2 Live Configuration Live configuration includes three submenus: live, main monitor and mask. 5.2.1 Live In this interface, you can set up camera name. To set up camera name: 1 - Go to Main Menu Setup Live Live. Refer to Fig 5-6. Fig 5-6 Live Configuration-Live 2 - A software keyboard will pop up by clicking camera name area. Click the letters and (or) digital numbers on the keyboard to input the name you want to display in live image. -
Page 51: Mask
Fig 5-7 Live Configuration-Main Monitor 5.2.3 Mask If there is something you don’t want to display in the live image, you can set mask. For a given channel a maximum of three areas can be masked. If the mask function is not available in the added IP camera, the mask function here will not take effect. To set up mask area: 1 - Go to Main Menu Setup Live Mask interface. Fig 5-8 Live Configuration-Mask 2 - Click “Setting” button to go to live image. 3 - Press and drag the left mouse button to set mask area as shown below. 4 - Right click to exit the mask setting interface. 5 - Click “Apply” button to save the setting. -
Page 52: Record Bitrate
Fig 5-10 Record Configuration-Enable Parameter Meaning Record To enable/disable recording for the channel Audio To enable/disable audio recording for the channel 3 - Select All to set up the same settings for all channels. 5.3.2 Record Bitrate 1 - Go to Main Menu Setup Record Record Bitrate. Refer to Fig 4-11. 2 - Setup rate, resolution and max bit stream. -
Page 53: Stamp
5.3.4 Stamp This provides an option to enable or disable the Camera Name and the Time stamp on the video. The user can also choose a position for the stamp on the screen. To set up stamp as follows: 1 - Go to Main Menu Setup Record Stamp interface. Refer to Fig 5-13. 2 - Checkmark camera name and time stamp. Click “Setting” button to set up the position of the stamp. You can drag the camera name and time stamp at random positions as shown below. 3 - Select “All” to set up all channels with the same parameters. Fig 5-13 Record Configuration-Stamp Before drag After drag... -
Page 54: Motion Schedule
2 - Select channel and click “ ” button to add a certain day schedule. Click “ ” button to delete the selected schedule. If you want to apply the schedule setting of a certain channel to other or all channels, you need to select channel and click “Copy” button. You can also set week schedule by double-clicking in the gridding area. This will take you to see a dialog box as Fig 5-15. 1 - Select a day and click Add button to schedule start & end time. Then click to save. 2 - Select other days and add schedule or copy settings from one schedule to the others under the Apply Settings To item. Fig 5-15 Schedule-Week Schedule 5.4.2 Motion Schedule This tab allows setting schedule for motion based recording. The setting steps are as follows: - Go to Main Menu... -
Page 55: Motion Alarm
Fig 5-17 Alarm Configuration-Sensor-Alarm Handling 6 - Go to alarm tab to select the options to handle alarm. Fig 5-18 Alarm Handling-Trigger Buzzer: If selected, the local buzzer would be activated on an alarm. Show Full Screen: If selected, there will pop up the chosen channel on the monitor on an alarm trigger. To Alarm Out: If selected, this would trigger external relay output on an alarm. Email: If selected, the NVR will send an email alert to the preconfigured email address in case of a sensor based alarm from the particular input. -
Page 56: Other Alarm
5 - In the Area interface, you can drag slide bar to set the sensitivity value (1-8). The higher the value is the more sensitive it is to motion. Since the sensitivity is influenced by color and time (day or night), you can adjust its value according to the practical conditions. Left click the grid and drag to delete area. Click icon to set the whole area as detection area. Click icon to clear the set detection area. Click icon to test the sensitivity as per the local conditions. Once motion is sensed, it displays a figure icon. Click icon, to save the setting. Click icon to exit the current interface. Note: Prior to setting motion detection field it is recommended that you click icon to clear the existing field and set afresh. -
Page 57: Network Configuration
2 - Input relay name and select hold time. 3 - Go to Schedule tab. This will go to schedule setup interface. The setting steps for schedule for alarm out are similar to normal schedule setup (see Chapter 5.4.1 for details). This step is very important for alarm out. Even if you have enabled alarm out in the motion based alarm or sensor based alarm, you will not see the result of alarm out if no schedule is added here. To set up buzzer: 1 - Go to Main Menu Setup Alarm Alarm Out Buzzer. 2 - Checkmark Buzzer and set buzzer alarm hold time. This would trigger the buzzer when the system is on an alarm. 5.6 Network Configuration Network configuration includes five submenus: network, email, server, NAT and other settings. Network settings must be configured if NVR is used for mo- nitoring over network. -
Page 58: Server
SMTP Server/Port: The name and port number of SMTP server. You can set up SSL check (such as Gmail) according to actual needs. 5.6.3 Server This function is mainly used for connecting ECMS/NVMS. The setting steps are as follows: 1 - In the server interface, select “Enable” as shown in the Fig 5-25. 2 - Check the IP address and port of the transfer media server in the ECMS/NVMS. The default server port for auto report is 2009. If it is modified, please go to the transfer media interface to check. 3 - Enable the auto report in the ECMS/NVMS when adding a new device. Then self-define device ID and input the remaining information of the device in the ECMS/NVMS. 4 - Input the above-mentioned server IP, server port and device ID in the server interface. Then click “Apply” button to save the setting. Now, the ECMS/ NVMS system will automatically connect this device. Fig 5-25 Network Configuration-Server 5.6.4 NAT 1 - Go to Main Menu Setup... - Page 59 ► Domain name Registration (Take www.dvrdydns.com for example) 1 - Input www.dvrdydns.com in the IE address bar to visit its website. Then click “Registration” button to register as shown below. 2 - Create domain name. 3 - After you successfully request your domain name, you will see your domain in the list. ► NVR Setting Connect NVR to the Network Client. 1 - Go to Main Menu Network Other Settings, checkmark DDNS, select “dvrdydns” at the DDNS Sever pull down list box and input user name and...
-
Page 60: User Management Configuration
5.7 User Management Configuration This tab allows you to add normal or advanced users. To add user and set user authority: 1 - Go to Main Menu Setup Users. Refer to Fig 5-28. Fig. 5.-28 Configurazione gestione utente 2 - Click “Add” button to display a dialog box as Fig 5-29. Fig. 5-29 Aggiungi - Generale 3 - In General tab, input username, password and select user type. You can also check “Binding PC MAC Address” and input this address. 4 - Click “OK” to save the setting. Note: When the default value of binding PC MAC Address is 0, the user is not bound with the specified computer. If the bind option is used, the user would be able to log into the NVR only through the specific computer (carrying the MAC address). 5 - Select Authority tab and then assign the operation rights for particular user. Refer to Fig 5-30. 6 - Click “OK”... -
Page 61: Import/Export
5.8.2 Import/Export User can export the data files into mobile storage devices as backup function, and then import specified data files from mobile storage device to NVR. 5.8.3 Block/Allow List Fig 5-31 Block/Allow List Here authorized user can prohibit computer users within a certain IP address range from accessing to NVR or allow computer users within a certain IP ad- dress range to access NVR. E.g. if an admin user doesn’t want computer users within IP address range from 192.168.000.002 to 192.168.000.004 to access the NVR, he can check Block list option, and then input such IP address range. Search, Playback & Backup Search configuration includes four submenus: time search, event search, file management and image. 6.1 Time Search 1 - Go to Main Menu Search Time Search. -
Page 62: File Management
Fig 6-3 Search Configuration-File Management 6.3 File Management 1 - Go to Main Menu Search File Management interface. Refer to Fig 6-3. 2 - Select date and channels. The date with highlighted borderline indicates presence of data. 3 - Click Search button to display the searched files in the file list box. 4 - Use “All” button to lock/unlock or delete all files in the file management column. 5 - Double click an unlocked item to play. Lock: Select a file and click Lock button to lock this file, after that, that file will not be deleted or covered. Unlock: Select a locked file and click “Lock” button to unlock this file. Delete: Select an unlocked file and click “Delete” button to delete this file. 6.4 Search by Image 1 - Go to Main Menu Search Image tab. -
Page 63: Manage Nvr
3 - Select a required file or checkmark “All” to select all data files. Click “Backup” button to display Backup information window. 4 - In the backup information interface, you can check the relevant information of backup files, storage type, save file type, etc. Then click Start button to start backup. Note: If the backup files are saved in DVR format, please check backup player. Only this player can play these files in DVR format. If the backup files are saved in AVI format, you can play these files with common media player. 7 Manage NVR 7.1 Check System Information Check system information includes seven submenus: system, event, log, network, online users, record and QRCODE. 7.1.1 System Information In this interface, user can check the hardware version, MCU version, kernel version, device ID, etc. 7.1.2 Event Information In this tab, you can search for events like motion, sensor and video loss. The utility provides an interface to have a date based and a channel based search. This report can further be saved on a USB flash drive as an html file using the export button. 7.1.3 Log Information In this tab, you can search for relevant logs as per the set date and event which includes operation, setup, playback, backup, search, check information and error. This report can further be saved on a USB flash drive as an html file using the export button. -
Page 64: Manual Alarm
Instalation application on smartphone App installation on smartphone search for “SUPERLIVE PRO” App on your mobile market and install It Configuration Press the QR CODE button (red arrow on below picture) to get ready for the scan Go to Main Menu Information QRCODE tab. Refer to Fig 7.1.A. Fig 7.1.A Information Configuration In this interface, you can scan the QRCODE through the mobile phone. Refer to Fig 7.1.B. Fig 7.1.B Information Configuration As soon as the scan is done, the MAC Address of the DVR/NVR appear on the “Server” field on Superlive PRO Input on SUPERLIVE PRO the user and password of the DVR/NVR Default: User: admin Password: 123456 Press the “login” button on SUPERLIVE PRO and the mobile phone is connected to the DVR/NVR 7.2 Manual Alarm In this interface, user can trigger a manual alarm. 7.3 Disk Management 1-Format the disk 2-Go to disk management tab. -
Page 65: Upgrade
7.4 Upgrade The NVR can be upgraded by using USB flash drive. Get the upgrading software from your vendor when there is a new software version. Upgrade Steps: 1 - Copy the upgrade software which gets from vendor into the USB storage device. 2 - Connect the USB flash drive to the USB port. 3 - Go to Main Menu Upgrade tab. Then the upgrade software name would be displayed in the upgrade list box. 4 - Select that software and then click upgrade button. It will upgrade automatically. Note: Please wait for a while when the system reboots. Never cut off power during upgrading. The original configuration will be reserved after upgrade. 7.5 Logoff Go to Main Menu Logoff tab. A log off dialogue box will pop up. The device will log off by clicking “OK” button. If you want to log in again, click “Main Menu” icon to go to user name and password to re-login. 8 Remote Surveillance 8.1 IE Remote Surveillance by NAT 8.1.1 NAT Settings... -
Page 66: Remote Surveillance Through Apple Pc
2. Connect the NVR to internet through PPPoE directly. 1 - Go to the NVR’s Main Menu Setup Network interface to enable PPPoE and then input user name and password received from your ISP. Next, click “Apply”. The NVR will connect to the server and would give a confirmation message. 2 - When accessing the remote interface of NVR, user can input WAN IP to access directly (user can go to Main Menu Information Network interface to check IP address). -
Page 67: Via Wan
3 - After acquiring the IP address, Subnet Mask and so on, please go to the NVR’s Main Menu Setup Network interface to manually input IP address, Subnet Mask and Gateway according to the configuration of PC. The network segment should be the same as the PC. If using DHCP, please enable DHCP in the NVR and router. 4 - After finishing the above information, users can enter LAN IP and HTTP port in the Safari browser. For example: input http://192.168.1.100:81(here 192.168.1.100 is LAN IP of NVR, 81 is the HTTP port of NVR). Click “ ” button, the browser will download Active X control as shown below. 5 - Click , icon and then select the Active X control, the welcome interface will be shown. Click “Continue” “Install” button, the following window will pop up. Input the name and password of Apple PC and then click “OK” to install this ActiveX control. 6 - After finishing installing the Active X control, please quit from the Safari browser. Right click Safari icon on the desktop and select “Quit” button to quit the browser. Then restart Safari browser. Input the IP address and HTTP port to enter the login interface of NVR. - Page 68 Snap pictures: The system will automatically capture pictures and save those pictures in the computer by clicking “Snap” icon, User should set up the path for those pictures in the Configuration Local configuration. Color adjustment: Drag the slide bar to adjust Brightness, Contrast, Hue, and Saturation. Click Default to reset them to original value. Buttons Description Drag the scroll bar to adjust the brightness of channel Drag the scroll bar to adjust the contrast of channel Drag the scroll bar to adjust the saturation of channel Drag the scroll bar to adjust the hue of channel Click this button to recover the default value of brightness, contrast, saturation and hue. Save the adjustment PTZ control Please connect speed dome to the device via RS485 firstly, make sure the protocol of the speed dome is supported by the device and set the relative para- meters manually. User can control the dome up, down, right, left or stop rotating on Control Center, adjust rotation speed, Iris and zoom, focus on the dome, and set the presets, etc. Buttons definition: Buttons Description to rotate the dome upwards to rotate the dome diagonally up-left.
-
Page 69: Remote Playback & Backup
Fig 8-2 Right Key Sub Menu Right-Key Menu Click the right mouse on the live interface to display a pull-down menu as below. Stream: The NVR supports master stream and sub stream. Master stream has higher frame rate, max 25fps (PAL)/30fps (NTSC) for every channel, but it needs higher network bandwidth; second stream has low frame rate, max 6fps (PAL)/7fps (NTSC) for every channel, but it requires low network bandwidth as compared to the master stream. Therefore, users can select the stream according to their bandwidth. All to sub stream: Set all channel to master stream or sub stream. Enable audio: Enable or disenable audio. Full screen: The live preview picture will display in full screen and the tool bar will be hidden; double click left or click right mouse to return. Zoom in: Single channel large screen electronic amplification. Click the channel which needs to be zoomed. Right click to select zoom in button to zoom in the image. Double click or right click to exit. 8.5 Remote Playback & Backup 8.5.1 Remote Playback Click button to go to record playback interface. Refer to Fig 8-3. Select the record date and channels and double-click the file name in the record file list box. Then user can play that file and preview the picture. Fig 8-3 Record File Interface This NVR supports remote time search, event search and file management. -
Page 70: Remote Backup
Fig 8-5 Time Search Playback By Event Search: 1 - Go to Search Event Search. Refer to Fig 8-6. Fig 8-6 Event Search Interface 1. Click the highlight date and select record channels. 2. Checkmark the event type: motion and sensor. 3. The events will be displayed in the event list box by clicking Search button. -
Page 71: Remote System Configuration
Fig 8-8 Remote Backup Interface 1 - Select channels, set the start and end time and then click “Search” button to display the file information in the file list box. 2 - Select backup files and click “Browse” button to set the path. Then click “Backup” button to start backup. The backup files will be saved on user’s PC. 8.6 Remote System Configuration You can do remote setup of the device which includes functions like basic configuration, live configuration, record configuration, schedule configuration, alarm configuration, network configuration and user configuration. You should select an option from the menu list on the left and then set the relative parameters. Only one user can do configuration setup at a given point of time. Click Config tab to go to the below interface as Fig 8-9. Fig 8-9 Remote System Configuration The sub menu list and the options in every menu are similar to that of the NVR. Please refer to Main Menu Setup Guide for more details. 8.7 Tools Click on tool’s tab to access the disk management tool. You can view the status of the HDD, change/view the read/write properties and can also format the HDD remotely. 8.8 Remote Information The Info tab provides a web based interface to access the general information pertaining to the NVR’s settings. It includes five submenus: System, Event, Log, Network and Online users. The sub menu list and the options in every menu are similar to that of the NVR. Please refer to system information for more details. Fig 8-10 Remote Information Search Note: There may be slight differences with respect to functions of remote surveillance between through IE and through Apple PC. Here we only take IE remote access for example. -
Page 72: Appendix A Faq
Appendix A FAQ Q1. Why can’t the NVR turn on even after connecting to the power? a. The power adapter could have gone bad. Please change a new power adapter. b. The power from the adapter may be not enough for operating the NVR. Please use the power adaptor supplied along with the NVR. c. It could be a hardware problem. Q2. There is no menu displayed and only has live image display, why? Check whether the monitor is connected to the main video out. The monitor might be connected to VGA /HDMI port whereas the NVR may be set for output through BNC or vice versa. Long press ESC key to toggle the resolution of the output. Q3. - Page 73 Fig. 8-11 Fig. 8-12 Q9: NVR displays “please wait…”all the time. Why and how can I do? HDD power cable and data cable may not be well connected. Please check the connections for HDD. It is also possible that the NVR was forced to stop because HDD has a bad sector and it may have caused the system to halt. Check with a good known HDD or try formatting the existing HDD. Q10: How to input password and numbers in the interface? Click the password or the input box to pop up a small keyboard. Please select characters to be input (the initial password is 123456), or you can use the digital keys on the front panel, or the digital keys on the remote controller. Q11: A hard disk is being identified as a new device however it was being used with another NVR of same model.
-
Page 74: Appendix B Calculate Recording Capacity
Appendix B Calculate Recording Capacity You can calculate the size of hard disk according to the storage time and NVR recording settings. The formula is as follows in full frame rate condition. Used space per hour (MB/h) = Bitrate(kbps) ÷ 8 × 3600 ÷ 1024. The below are the details at different settings. Resolution Frame Rate Bit Rate (kbps) Used Space(MB/h) 1080P 15fps (NTSC) 2700... -
Page 75: Appendix D 4-Ch Specifications
2. Compatible HDD list Brand Capacity Seagate Barracuda 80G/160G/250G/320G /1.5T/2TB/3TB Seagate SV35.3 Seagate Pipeline HD.2 500G Maxtor Diamondmax 160G HITACHI Deskstar 80G/160G Western Digital 160G/250G/320G /1.5T/2TB/3TB Samsung HD161HJ 160G Appendix D: 4-CH Specifications Compression format H.264 Video output CVBS×1; VGA×1; HDMI×1 IP Input 4 CH 1080P@15fps; 4 CH 720P@30fps; 4 CH D1@30fps HDMI/VGA Resolution 1080P/1280×1024/1024×768/800×600 Record Resolution... - Page 76 Vimar SpA: Viale Vicenza, 14 36063 Marostica VI - Italy Tel. +39 0424 488 600 - Fax (Italia) 0424 488 188 49400821A0 00 15 05 Fax (Export) 0424 488 709 VIMAR - Marostica - Italy www.vimar.com...
Need help?
Do you have a question about the 46241.F04 and is the answer not in the manual?
Questions and answers