Table of Contents
Advertisement
Available languages
Available languages
Advertisement
Chapters
Table of Contents

Related Manuals for Orbit 57894


Summary of Contents for Orbit 57894
- Page 1 Users ManUal ManUel de l’UtilisateUr ManUal del UsUario PROGRAM RAIN DELAY RESET AUTO Models / Modèles / Modelos: 57894, 57896, 57899, 57900, 27894, 27896, 27892, 27999, 91894, 91896, 91892, 91899 PN 57894-24 rA...
-
Page 2: Table Of Contents
Table of Contents Congratulations on selecting your new Orbit timer! With Orbit’s exclusive Easy-Set Logic™, simple programming and setup are Section 1: Get to know your timer . . . . . . . . . . . . . . . . .4 combined with the latest timer technology Section 2: Installation . -
Page 3: Section 1: Get To Know Your Timer
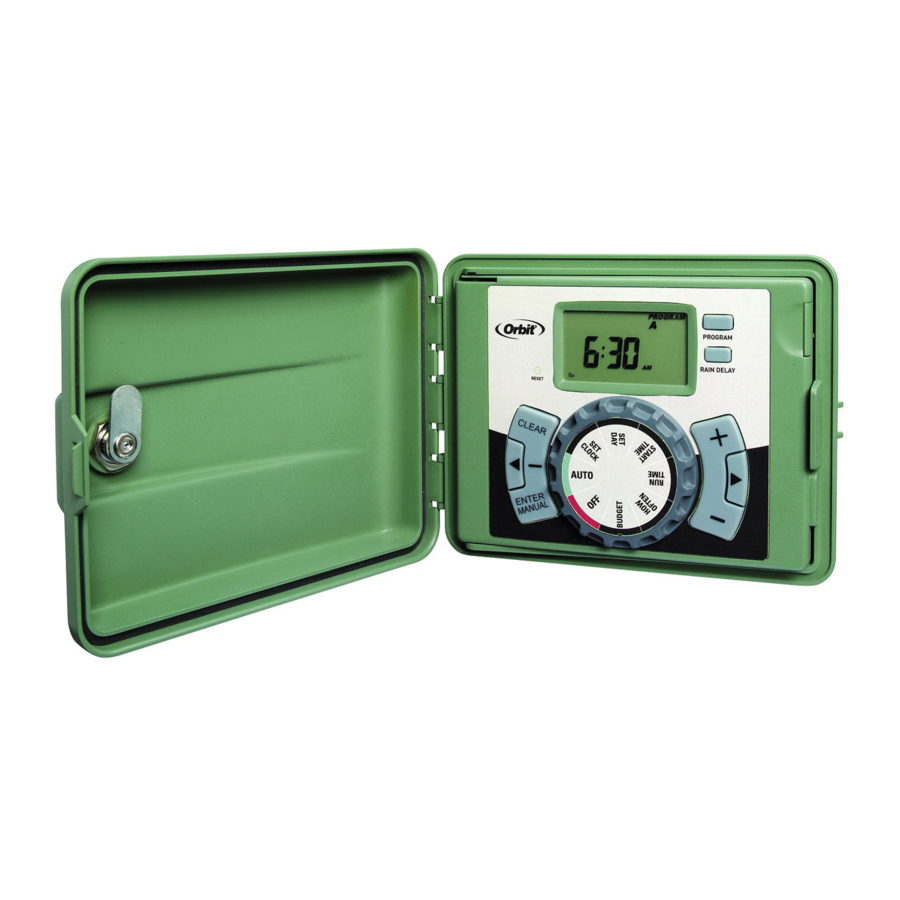
Buttons Function Section 1: Get to know your timer ENTER To confirm a new setting MANUAL To water manually Lock and latch CLEAR To clear a setting Weather Resistant Cover PROGRAM To move to different programs: A, B, and C Dial Digital Display To skip to the next setting / watering station... -
Page 4: Installation
Important: All wires should be joined together using wire nuts, solder, and/or vinyl tape. In wet environments like a valve box it is recommended to use Orbit Grease Caps to prevent corrosion of Wall Pre-formed the connection and for protection from water infiltration. -
Page 5: Section 3: Programming With Easy-Set Logic
4. Connect Electrical Power conduit and electrical fittings be used to connect exterior wall- 5. Activate Battery • Press the [+/–] buttons to set the current time of day mounted equipment to AC power. Please check local codes. Any Indoor Locations – Insert the power cord into an 110V electrical permanent connection should be made by a licensed electrical One Lithium CR2032 battery (included) is required to retain the Tip: To increase or decrease more rapidly, hold down either the... -
Page 6: Section 4: Additional Features
Section 4: Additional Features Example: Bill just planted new grass seed and wants to water Days of the Week • To adjust press [+/–] buttons, press [ENTER] three times per day . he sets START TIME 1 for 5am, START •... -
Page 7: Section 5: Reference
Section 5: Reference Example: To manually water on station 3 for five Pump Start & Master Valve minutes, press the [MANUAL] button then press the This sprinkler timer allows a master valve or pump start [ ] buttons until you see station 3; using the [+/–] relay to operate whenever a station is on . -
Page 8: Troubleshooting
PROBLEM POSSIBLE CAuSE with the limits for a Class B digital device, pursuant to Part Before returning this sprinkler timer to the store, contact Orbit ® Technical Service at: 1-800-488-6156, 1-801-299-5555 Listings 15 of the FCC Rules . These limits are designed to provide reasonable protection against harmful interference in a 1 . - Page 9 ™ Orbit, qui combine la polyvalence de la Section 2 : Installation . . . . . . . . . . . . . . . . . . . . . . . . . .19 minuterie et la plus récente technologie,...
-
Page 10: Section 1 : Connaître Votre Minuterie
Bouton Fonction Section 1: Connaître votre minuterie ENTER Pour confirmer un nouveau réglage MANUAL Pour arroser manuellement Verrou CLEAR Pour effacer un réglage Couvercle résistant aux intempéries PROGRAM Pour changer de programme : A, B et C Cadran de sélection Pour passer à... -
Page 11: Installation (Fr)
Orbit pour prévenir la corrosion de la connexion et la protéger des infiltrations d’eau. Trous de montage Câblage des électrovannes... -
Page 12: Section 3 : Programmation Avec Easy-Set Logic
4. Branchez l’alimentation électrique. • Assurez-vous également d’installer sur la boîte de Remarque : Pour une installation extérieure, nous vous recom- rotatif . En utilisant les programmes pour regrouper les zones jonction un joint d’étanchéité et un couvercle à l’épreuve mandons de faire appel à... -
Page 13: Section 4 : Caractéristiques Supplémentaires
Veuillez noter que l’heure de départ (START TIME) est l’heure Vous pouvez choisir entre trois options : Tournez le cadran de sélection à AUTO pour exécuter votre de pluie, l’arrosage automatique reprend . à laquelle votre arrosage programmé débute . Vous pouvez programme . - Page 14 n’avez pas réglé de durée de l’arrosage, aucun arrosage ne Mise en marche de la pompe et vanne principale débutera et l’écran n’affichera que l’heure courante. Cette minuterie pour arroseur permet à une vanne principale Raccorder un détecteur de pluie ou au relais de démarrage d’une pompe de fonctionner même lors de l’arrosage d’une zone .
-
Page 15: Section 5 : Références
Section 5: Références Dépannage TERME DÉFINITION PROBLÈME CAuSE POSSIBLE hEURE DE DÉPART L’heure à laquelle le programme commence l’arrosage de la première zone programmée . 1 . Un solénoïde est mal connecté . Elle alimente en eau une zone ou un endroit en particulier . L’ouverture et la fermeture 2 . - Page 16 Cet appareil est conforme à l’alinéa 15 du règlement de la FCC . Avant de retourner la minuterie pour arroseur au détaillant, Son utilisation est soumise aux deux conditions suivantes : (1) Cet communiquez avec le soutien technique de Orbit ® appareil ne doit provoquer aucune interférence nuisible; et (2) 1 800 488-6156, 1 801 299-5555 homologation cet appareil doit accepter toute interférence reçue, y compris les...
- Page 17 Índice Felicitaciones por seleccionar su temporizador Orbit . Con el exclusivo Easy- Set Logic de Orbit, la programación y Sección 1: Conozca su temporizador . . . . . . . . . . . . . .34 ™...
- Page 18 Botones Función Section 1: Conozca su temporizador INTRO Confirmar una nueva configuración . MANUAL Regar manualmente . Seguro y pestillo BORRAR Borrar una configuración . Cubierta resistente a la intemperie PROGRAMA Mover a diferentes programas: A, B y C . Selector Pantalla digital Pasar a la siguiente configuración/estación...
-
Page 19: Instalación
Importante: Todos los cables se deben unir con empalmes lengüeta hacia plásticos, soldaduras y/o cinta de vinilo. Se recomienda utilizar arriba para un engrasador Orbit en ambientes húmedos como una caja de liberar el válvulas para evitar la corrosión de la conexión y para protegerla cable . - Page 20 4. Conecte la alimentación eléctrica. • Encienda la alimentación de CA en el interruptor de cir- Nota: Se recomienda que un electricista calificado realice la necesidades de riego similares maximizará la eficiencia de la cuito de CA . instalación para aplicaciones en el exterior, de acuerdo con irrigación .
-
Page 21: Características Adicionales
Tenga en cuenta que la hORA DE INICIO es la hora del día Revisión y cambio de su programa Configurar el suministro: en que comienza su riego programado . Puede configurar Si desea revisar o cambiar las horas de inicio, los tiempos de •... - Page 22 • Para especificar un programa o estaciones específicas, TIMER 24VAC SENSOR COMMON PUMP presione los [ ] botones para seleccionar A, B o C . • Presione [ENTER] para activar. Retirar PROGRAM • Para seleccionar una estación específica, continúe RAIN DELAY presionando los botones de [ ...
- Page 23 Sección 5: Referencia Solución de problemas TÉRMINO DEFINICIÓN PROBLEMA CAuSA POSIBLE hORA DE INICIO La hora en que el programa comienza el riego la primera estación programada . 1 . La conexión del solenoide no es la correcta . Suministra agua a una estación o área específicos . La abertura y el cierre de la válvula se 2 .
- Page 24 Irrigation Products Inc . no será responsable de costos ® ni daños indirectos o incidentales causados por la falla del producto . La responsabilidad de Orbit® bajo esta garantía se limita solamente al reemplazo o la reparación de las piezas defectuosas .
- Page 25 7.25" d: 0" h 8" requirements. Any changes must be approved by the des: spck: colors client and Fluid Studio. printed piece must meet job no: 57894-24 rA color color designated specifications Registration non printing non printing client: on this form.
Need help?
Do you have a question about the 57894 and is the answer not in the manual?
Questions and answers
What does "odd, even day" mean? Define? Odd= ? Even=?
@sharon ODD=odd days of the month (1st, 3rd, etc.) EVEN=even days of the month (2nd, 4th, etc.) No idea why someone would want this, rather than setting a 2 day INT (Interval) but maybe there's a valid reason.
For Orbit part number 57894, "odd, even day" refers to a watering schedule option where watering occurs only on odd-numbered days (1st, 3rd, 5th, etc.) or even-numbered days (2nd, 4th, 6th, etc.) of the month.
This answer is automatically generated
If, for example, on program A, Each station is set for 10 minutes, does each station happen one at a time, or all together? My gardener is telling me that he needs to set it at multiple start times for program A, because of water pressure issues, but won't multiple start times, just cause multiple cycles of the waterings of each station? (I don't live onsite, so can't check what is happening - but the water bill is extreme)
The Orbit 57894 irrigation system runs each station one at a time in sequence when set for 10 minutes on program A.
This answer is automatically generated
why will program a only let me program 4 stations
The Orbit 57894 allows programming of only 4 stations because it is designed to control up to four separate irrigation zones, each operated by its own valve connected to the timer.
This answer is automatically generated
Can’t get number 4 station to shot off
To troubleshoot Orbit 57894 station number 4 that won't shut off, check the following:
1. Faulty valve – Inspect the valve for mechanical failure.
2. Particles of dirt or debris stuck in valve – Clean the valve to remove any obstructions.
3. Valve diaphragm faulty – Examine and replace the diaphragm if it's damaged.
These are common causes for a station staying on and not shutting off.
This answer is automatically generated
The sprinkler does not activate the valves. It is plugged into an outlet that is active. It worked last fall when I reactive the system but not now when I turn it on this spring.
Several possible causes could prevent the Orbit 57894 sprinkler from activating the valves after working last fall:
1. Loose or improperly connected wires: Check that the sprinkler wires from each valve are fully inserted into the terminals. Remove and reinsert the wires, and tighten the screws if applicable. Lightly tug the wires to ensure they are secure.
2. Faulty terminal: If the problem affects only one valve, move its wire to a different terminal and test it to see if it works.
3. Water supply off: Ensure that the water supply is turned on.
4. Master valve or pump issue: If you have a master valve, manually open it and try running the system. If you use a pump, verify that it activates.
5. Corroded or damaged wire connections: In wet environments, use grease caps to prevent corrosion. Check for corrosion or damage in the valve box.
6. Battery issue: The CR2032 battery retains the program during power loss but does not operate the valves. Replace it annually, but note that valve operation requires external power.
These checks can help identify the cause and restore sprinkler function.
This answer is automatically generated
My program is set for program A, station 1 for 20 minutes, station 2 for 20 minutes. When station 1 is done, station 2 goes on. BUT when station 2 is done, station 1 starts over again for 40 minutes. How can I correct this?
The issue may be caused by multiple start times being programmed. To fix it:
1. Check if more than one start time is set. The system runs all programmed stations in sequence for each start time.
2. Remove extra start times if not needed. For example, clear Start Times 2 and 3 if only one watering cycle per day is desired.
3. Ensure the start times are not too close together, as overlapping times will stack and cause repeated cycles.
Adjust start times as needed and verify only the intended number are set.
This answer is automatically generated
Can I only set one time per day to run this? I am use to setting AM and PM in Arizona due to the extreme heat.
Yes, the Orbit 57894 can be set to run at multiple times per day. Each program allows multiple start times, as shown in the example where Program A has start times at 2:30, 3:45, and 5:00.
This answer is automatically generated
s there a battery in my 57899 if so where is it located
Yes, the Orbit 57894 uses one CR2032 lithium battery. It is installed in the controller to maintain the program during power loss. A plastic strip must be removed to activate the factory-installed battery.
This answer is automatically generated
how to activate rain delay
To activate rain delay on the Orbit 57894:
1. Press the [RAIN DELAY] button to automatically delay watering for 24 hours.
2. If a longer delay is needed, use the [+/-] buttons to adjust the duration.
3. Press [ENTER] or wait 10 seconds to start the selected rain delay.
To cancel the delay and resume the watering schedule, press [CLEAR].
This answer is automatically generated
Change/Set Time of day
To set the time of day on the Orbit 57894 timer:
1. Turn the dial to "SET CLOCK."
2. Press the [+/–] buttons to adjust the current time.
- To change the time faster, hold down the [+] or [-] button until the display moves rapidly.
3. Once the correct time is set, turn the dial to the desired position to save the settings.
This answer is automatically generated