Download Print this page

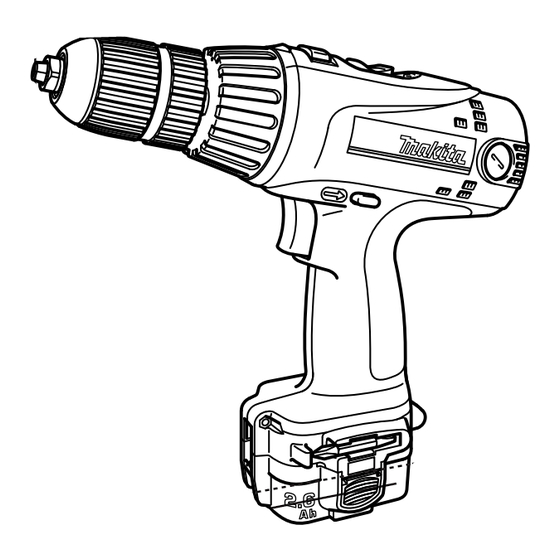
Makita 6207D Series Technical Information

Cordless driver drills 10mm, 13mm
Hide thumbs Also See for 6207D Series:

Advertisement

T
ECHNICAL INFORMATION
Models No.
Description
C
ONCEPT AND MAIN APPLICATIONS
These six tools have been developed as upgraded successors
to the existing Makita tools of Model 6203D series, and features
increased power and enhanced mechanical parts.
One of the remarkable features is the repalceable armature for
reduced repair cost.
Listed below are variations of these new models.
Model No.
6207DWDE 9134 (9.6V, 2.6Ah) / 2pcs
6217DWDE 1234 (12V, 2.6Ah) / 2pcs
6237DWDE 1434 (14.4V, 2.6Ah) / 2pcs
6317DWAE 1222 (12V, 2.0Ah) / 2pcs
6317DWDE 1234 (12V, 2.6Ah) / 2pcs
6317DWFE 1235 (12V, 3.0Ah) / 2pcs
6337DWAE 1422 (14.4V, 2.0Ah) / 2pcs
6337DWDE 1434 (14.4V, 2.6Ah) / 2pcs
6337DWFE 1435 (14.4V, 3.0Ah) / 2pcs
6347DWAE 1822 (18V, 2.0Ah) / 2pcs
6347DWDE 1834 (18V, 2.6Ah) / 2pcs
6347DWFE 1835 (18V, 3.0Ah) / 2pcs
S
pecification
See page 2.
S
tandard equipment
* Battery cover ...................................................................... 2 pcs.
* + - Bit 2-45 ......................................................................... 1 pc.
* Plastic carrying case ........................................................... 1 pc.
< Note > The standard equipment for the tool shown may differ from country to country.
O
ptional accessories
Model No.
6207D
9120, 9122, 9133, 9134, 9135, 9135A
6217D
1220, 1222, 1233, 1234, 1235, 1235A
6237D
1420, 1422, 1433, 1434, 1435
6317D
1220, 1222, 1233, 1234, 1235, 1235A
6337D
1420, 1422, 1433, 1434, 1435
6347D
1822, 1833, 1834, 1835
6207D, 6217D, 6237D
6317D, 6337D, 6347D
9.6V, 12V, 14.4V Cordless Driver Drills 10mm (3/8")
12V, 14.4V, 18V Cordless Driver Drills 13mm (1/2")
Battery
Battery
Ni-MH
Ni-MH
Ni-MH
Ni-Cd
Ni-MH
Ni-MH
Ni-Cd
Ni-MH
Ni-MH
Ni-Cd
Ni-MH
Ni-MH
Battery
Dimensions: mm ( " )
Charger
Type
Model No.
DC1413
DC1413
Length ( L )
DC1413
DC1413
Width ( W )
DC1413
Height ( H )
DC1413
DC1413
DC1413
Model No.
DC1413
Length ( L )
DC1803
DC1803
Width ( W )
DC1803
Height ( H )
DC1413, DC1439, DC1803, DC1822, DC9711
DC1413, DC1439, DC1803, DC1822
DC1803, DC1822
PRODUCT
L
W
10mm (3/8")
6207D
6217D
233
233
(9-1/8)
(9-1/8)
77
94
(3)
(3-11/16)
243
243
(9-9/16)
(9-9/16)
13mm (1/2")
6317D
6337D
243
243
(9-9/16)
(9-9/16)
94
94
(3-11/16)
(3-11/16)
243
247
(9-9/16)
(9-3/4)
Charger
P 1 / 13
H
6237D
233
(9-1/8)
94
(3-11/16)
247
(9-3/4)
6347D
243
(9-9/16)
95
(3-3/4)
251
(9-7/8)

Advertisement

loading

Summary of Contents for Makita 6207D Series

  • Page 1 ONCEPT AND MAIN APPLICATIONS These six tools have been developed as upgraded successors to the existing Makita tools of Model 6203D series, and features increased power and enhanced mechanical parts. One of the remarkable features is the repalceable armature for reduced repair cost.
  • Page 2 P 2 / 13 pecification 10 mm 13 mm Model No. Specification 6217D 6237D 6337D 6347D 6207D 6317D Voltage (V) 14.4 14.4 Chuck capacity (mm [inch]) 1 - 10 [1/32 - 3/8] 1.5 - 13 [1/16 - 1/2] 10 [3/8] 13 [1/2] Steel Drilling capacity...
  • Page 3 P 3 / 13...
  • Page 4 P 4 / 13 omparison of products Time Required for Driving a Screw/ The Number of Screws Driven/ Drilling a Hole Holes Drilled on a Single Full-Charge 9.6V Models (Numbers on the bars below are relative values when the capacities of 6203D are indexed at 100.) Test 1: Drilled holes in 38mm (1-1/2") thick Spruce;...
  • Page 5 P 5 / 13 Time Required for Driving a Screw/ The Number of Screws Driven/ Drilling a Hole Holes Drilled on a Single Full-Charge Test 3: Drilled holes in 38mm (1-1/2") thick Spruce; with 1" Auger bit ; on Low speed drill mode. 5.9sec 6317D 6317D...
  • Page 6 P 6 / 13 The Number of Screws Driven/ Time Required for Driving a Screw/ Drilling a Hole Holes Drilled on a Single Full-Charge Test 3: Drilled holes in 38mm (1-1/2") thick Spruce; with 1" Auger bit ; on Low speed drill mode. 6337D 5.9sec 6337D...
  • Page 7 Please refer to them when selecting torque; they will help you choose an optimum torque-setting number to suit the screw to drive. (The graph and the chart are available to all tools of Model 6207D series.) Note: Actual fastening torque is not on the theoretical line of the graph.
  • Page 8 P 8 / 13 epair < 1 > Disassembling of drill chuck See Fig. 1. For replacing gear assembly, drill chuck has to be disassembled. Take the following steps. 1. Firmly hold No.1R139 "Drill chuck extractor" with vise. And lock spindle with the drill chuck extractor. 2.
  • Page 9 P 9 / 13 epair < 3 > Disassembling gear assembly and motor section See Fig. 3. Lifting up mode change lever, separated change ring, gear assembly, yoke, armature and endbell from housing as a set. Remove as a set without separating from each other. <...
  • Page 10 P 10 / 13 epair < 6 > Assembling speed change lever 1. Before assembling, make sure that 2 compression springs are installed in the speed change lever. See fig. 6. 2. Assemble speed change lever to the boss of gear assembly as illustrated in Fig. 6A. 3.
  • Page 11 P 11 / 13 epair 4. Assemble compression spring 2 to lock lever as illustrated in Fig. 7B. Pulling mode change lever to the another side of housing L along the surface of gear assembly, insert the lock lever into mode change lever as illustrated in Fig 7C.
  • Page 12 P 12 / 13 epair < 8 > Assembling drill chuck See Fig. 8. 1. Firmly hold No.1R139 "Drill chuck extractor" with vise. And lock spindle with the drill chuck extractor. 2. Hold No.1R298 "Hex socket" with the jaws of drill chuck firmly and turn the hex socket with No.1R223 "Torque wrench"...
  • Page 13 P 13 / 13 ircuit diagram Endbell complete Color index of lead wires Switch Black M1 M2 Battery holder iring diagram Yoke Armature fan Endbell Lead wire (red) Lead wire (black) Switch Lead wire (red) Lead wire (black) Battery holder...