Advertisement
Available languages
Available languages
Quick Links
Download this manual
See also:
User Manual
Advertisement

Related Manuals for TrekStor datastation maxi z.ul


Summary of Contents for TrekStor datastation maxi z.ul
- Page 1 QUIck GUIDE DataStation maxi z.ul...
- Page 2 à votre disposition ! Il est très rare que vous soyez dans l'obligation d'emporter ce produit chez votre distributeur. Pour consulter les réponses aux questions les plus fréquemment posées, veuillez vous rendre sur notre site Web www.TrekStor.de à la rubrique « S »...
- Page 3 Вы будете удивлены, насколько быстро мы сможем Вам помочь. Вказівка: В разі проблем з цим виробом компетентна допомога швидко буде під рукою! Лише в найрідкісніших випадках необхідно нести цей виріб в магазин. На нашому сайті www.TrekStor.de в розділі "S " "FAQ"...
-
Page 4: Datastation Maxi Z.ul
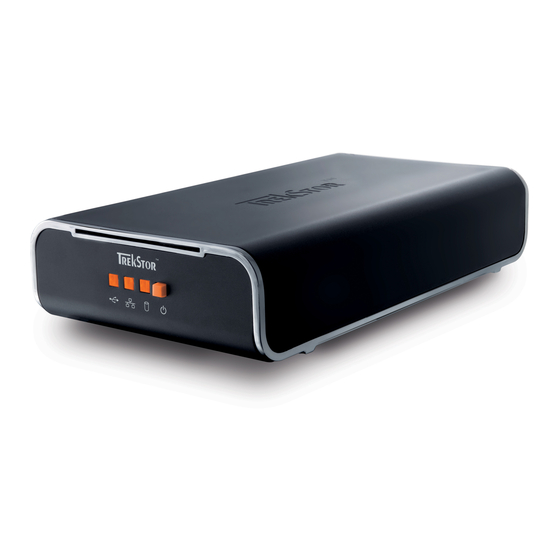
ODER im Netzwerk-Modus betrieben werden, jedoch nicht zeitgleich in beiden Modi. A USB-Verbindung /-Zugriff B LAN-Verbindung /-Zugriff C Power-LED D Ein- /Ausschalter E USB-Anschluss F Power-Anschluss G LAN-Anschluss 1) USB-Modus: Verbinden der TrekStor DataStation maxi z.ul mit einem PC über USB – 4 –... - Page 5 DataStation maxi z.ul • Ihr Betriebssystem fügt die auf dem "A " als lokalen Datenträger ("l ") hinzu. rbeitsPlAtz okAles Aufwerk 2) Netzwerk-Modus: Verbinden der TrekStor DataStation maxi z.ul über das Netzwerk mit einem oder mehreren PCs Hinweis: Beim Betrieb mit nur einem PC wird die USB-Verbindung empfohlen. • Stecken Sie zuerst das mitgelieferte Netzteil in eine Steckdose und schließen Sie das Kabel an den "P "-Anschluss der ower DataStation maxi z.ul an. • Schließen Sie danach das mitgelieferte Netzwerkkabel an den "LAN"- DataStation maxi z.ul...
- Page 6 3) Inbetriebnahme der TrekStor DataStation maxi z.ul im Netzwerkmodus Hinweis: Sie müssen die mitgelieferte NDAS-Software nur installieren, wenn Sie DataStation maxi z.ul den Netzwerkanschluss nutzen, um auf die zuzugreifen. Windows® 2000 / XP / Vista • Legen Sie die mitgelieferte CD in das CD / DVD-Laufwerk Ihres PCs ein. • Wenn die Autostart-Funktion Ihres Systems aktiviert ist, öffnet sich ein Menü mit allen Inhalten der CD. Hinweis: Falls die Autostart-Funktion Ihres Systems deaktiviert ist, können Sie über den "A...
- Page 7 • Folgen Sie den Anweisungen der Installationssoftware zur Ein- DataStation maxi z.ul richtung der Hinweis: Die Identifikationsnummer (ID) und den Schreibschlüssel (KEY) DataStation maxi z.ul finden Sie auf Ihrer und auf der Rückseite des Quick Guides. • Folgen Sie den Anweisungen der Software bei der Einrichtung eines Betriebsmodus. • Wählen Sie nun aus, in welchem der 2 möglichen Modi das Laufwerk gemountet werden soll. Klicken Sie anschließend auf die Schaltfläche "Weiter". • Wenn Sie die Option "J ndAs-g ich möchte dieses erät im chreib ." oder "J...
- Page 8 DataStation maxi z.ul • Ihr Betriebssystem fügt die auf dem "A " als lokalen Datenträger ("l ") hinzu. rbeitsPlAtz okAles Aufwerk DataStation maxi z.ul 4) Benutzen der TrekStor DataStation maxi z.ul Nachdem Sie die erfolgreich registriert und gemountet haben, erscheint diese als "l " im Arbeits- okAler Atenträger platz. Sie können diese nun wie eine im PC befindliche Festplatte benutzen. DataStation maxi z.ul Hinweis: Falls Sie die im reinen Lese-Modus gemountet haben, ist der Datenträger schreibgeschützt.
- Page 9 Hinweise für Benutzer von Mac® OS X ab 10.3 Befolgen Sie abweichend von Kapitel 3) "i nbetriebnAhme der " die folgenden Anweisungen: tAtion mAxi z ul im etzwerkmodus • Legen Sie die mitgelieferte CD in das CD / DVD-Laufwerk Ihres Rechners ein. • Gehen Sie in den Ordner "Mac OS", wählen Sie dort den Ordner mit der Versionsbezeichnung Ihres Betriebssystems aus. Führen Sie im entsprechenden Ordner die Datei " " aus. instAll mPkg • Folgen Sie den Installationsanweisungen. Hinweis: Halten Sie die Anmeldedaten des Administrators bereit. Diese werden während der Installation benötigt. • Nach dem Abschluss der Installation müssen Sie Ihren Rechner neu starten, DataStation maxi z.ul...
- Page 10 DataStation maxi z.ul • Anschließend erscheint die als neuer Datenträger auf dem Desktop. Hinweise für Benutzer von Linux® • Bitte besuchen Sie die Internetseite: http://www.ximeta.com/support/downloads/. • In den erscheinenden Abfragen wählen Sie Ihre Linux® Version aus. • Im folgenden Fenster können Sie den gewünschten Treiber herunter laden. • Folgen Sie anschließend den Anweisungen. – 10 –...
- Page 11 Weiter ist der Hersteller nicht für Beschädigungen oder Verlust von Daten und deren Folgeschäden verantwortlich. Copyright © 2008 TrekStor GmbH & Co. KG. Alle Rechte vorbehalten. Bei weiteren erwähnten Produkt- oder Firmenbezeichnungen handelt es sich möglicherweise um Warenzeichen oder Markennamen der jeweiligen Inhaber.
-
Page 12: Quick Guide
QUIck GUIDE Included in the delivery: DataStation maxi z.ul • TrekStor • Convenient multifunctional mount • High-quality network cable • Hi-Speed USB 2.0 cable • Power supply (100 V – 240 V) • Software CD • Nero BackItUp 2 Essentials • Quick guide • Manual System requirements: • Windows® ME (can only be used in USB mode) • Windows® 2000 / XP / Vista, Mac® OS X 10.3 and up, Linux® • 233 MHz Pentium II or better (500 MHz Pentium III recommended) • 64 MB RAM (256 MB RAM recommended) • USB 1.1 port (Hi-Speed USB 2.0 port recommended) • 10/100Base-T network connection available on your PC, switch or router DataStation maxi z.ul... - Page 13 • Turn on the DataStation maxi z.ul • Your operating system will recognize the and will add a local disk ("l ") under "m ". ocAl rive omPuter 2) Network mode: Via the network, connect the TrekStor DataStation maxi z.ul to one or more PCs. DataStation Note: A USB connection is recommended when the only used with one PC. • First plug the provided power supply into an electrical outlet, and connect the cable to the "P " connection of the ower DataStation maxi z.ul • Then plug the provided network cable into the "LAN" connection of...
- Page 14 DataStation maxi z.ul 3) Starting the TrekStor in network mode Note: You only have to install the provided NDAS software when you use the DataStation maxi z.ul network connection to access the Windows® 2000 / XP / Vista • Insert the provided CD into the CD / DVD drive of your PC. • When the startup function of your system is activated, a menu showing all the contents of the CD will open. Note: If the startup function of your system is deactivated, you can access the CD / DVD drive via "m...
- Page 15 • Follow the instructions of the installation software for setting up the DataStation maxi z.ul Note: The identification number (ID) and the write key (KEY) are on your DataStation maxi z.ul and the back of the quick start instructions. • Follow the software instructions when setting up an operating mode. • Of the two possible modes, select the one that the drive is to be mounted in. Then click the button "n ". • When you select the option "y ndAs wAnt to mount this device As " or "y ndAs...
- Page 16 DataStation maxi z.ul • Your operating system will recognize the and will add a local disk ("l ") under "m ". ocAl rive omPuter DataStation maxi z.ul 4) Using the TrekStor After you have successfully registered and mounted the DataStation maxi z.ul , it appears as a "l " under "m ocAl rive ". You can now use it like a hard drive in your PC. omPuter DataStation maxi z.ul Note: If you mounted the just in read mode, the drive is write-protected.
- Page 17 Instructions for users of Mac® OS X 10.3 and up Follow these instructions instead of the instructions in section 3, "s tArting ": tAtion mAxi z ul in network mode • Insert the provided CD into the CD / DVD drive of your computer. • Go to the "Mac OS" folder and choose the folder corresponding to the version of your operating system. Start the file " " instAll mPkg located there. • Follow the installation instructions. Note: Have the administrator registration data ready. They will be required during installation.
- Page 18 DataStation maxi z.ul • The then appears as a new disk on the desktop. Instructions for users of Linux® • Go to the website at: http://www.ximeta.com/support/downloads/. • Select your Linux® version in the queries that appear. • You can download the desired driver in the following window. • Then follow the instructions. – 18 –...
- Page 19 Copyright © 2008 TrekStor GmbH & Co. KG. All rights retained. Other cited product or company names may be trademarks or brand names of the respective owner.
-
Page 20: Guide De Démarrage Rapide
GUIDE DE DéMARRAGE RAPIDE Accessoires livrés : DataStation maxi z.ul • TrekStor • Support multifonctions pratique • Câble réseau de qualité supérieure • Câble hi-speed USB 2.0 • Bloc d’alimentation (100 V – 240 V) • CD logiciel • Nero BackItUp 2 Essentials • Guide abrégé • Manuel conditions requises pour le système : • Windows® ME (utilisable uniquement en mode USB) • Windows® 2000 / XP / Vista, Mac® OS X à partir de la version 10.3, Linux® • Pentium II 233 MHz ou plus performant (Pentium III 500 MHz recommandé) - Page 21 • Votre système d’exploitation ajoute automatiquement la DataStation maxi z.ul sur le « b » en tant que support ureAu de données local (« d »). isque locAl 2) Mode de réseau : raccordement de la TrekStor DataStation maxi z.ul par le biais du réseau à un ou plusieurs PC Remarque : lors d‘une exploitation avec un seul PC, la connexion USB est recommandée. • Enfichez tout d’abord le bloc d’alimentation livré dans une prise secteur et raccordez le câble au connecteur d’alimentation (« P ») ower DataStation maxi z.ul de la • Raccordez ensuite le câble de réseau fourni au port « LAN » du réseau...
- Page 22 » / « o » et démarrer le ureAu rDinAteur programme « m » dans le répertoire principal du CD. • Le menu TrekStor apparaît dans une boîte de dialogue. • Cliquez sur « t ndAs s » et suivez les instructions d’ i nstallation. oftwAre Remarque : si une requête de sécurité Windows® apparaît, sélectionnez «...
- Page 23 • Suivez les instructions du logiciel d’installation se rapportant à la DataStation maxi z.ul configuration de la Remarque : le numéro d’identification (ID) et la clé (KEY) figurent sur la DataStation maxi z.ul , au dos du guide de démarrage rapide. • Suivez les instructions du logiciel lors de la configuration d’un mode d’exploitation. • Sélectionnez maintenant dans lequel des 2 modes possibles le lecteur doit être monté. Cliquez ensuite sur le bouton « n ». • Si vous avez sélectionné l‘option « y ndAs wAnt to mount this device » ou « y...
- Page 24 • Votre système d’exploitation ajoute automatiquement la DataStation maxi z.ul sur le « b » en tant que support ureAu de données local (« d »). isque locAl DataStation maxi z.ul 4) Utilisation de la TrekStor DataStation Une fois que vous avez enregistré et monté la maxi z.ul avec succès, ce disque dur apparaît comme « d » isque locAl sur votre Bureau. Vous pouvez maintenant l’utiliser comme un disque dur installé dans un PC. DataStation maxi z.ul Remarque : si vous avez monté la en simple mode de lecture, le disque est alors protégé en écriture.
- Page 25 Remarques pour les utilisateurs de Mac® OS X à partir de la version 10.3 De manière divergente au chapitre 3) « m ise en service de lA », suivez les instructions figurant ci-après : tAtion mAxi z ul en mode réseAu • Insérez le CD fourni dans le lecteur de CD / DVD de votre ordinateur. • Cherchez le dossier « m os » et exécutez à cet endroit le fichier « ». instAll mPkg • Suivez les instructions d’installation. Remarque : préparez les données d‘ouverture de session de l’administrateur afin de les avoir à...
- Page 26 DataStation maxi z.ul • La apparaît ensuite comme nouveau support de données sur le bureau. Remarques pour les utilisateurs de Linux® • Veuillez visiter la page Internet : http://www.ximeta.com/support/downloads/. • Dans les requêtes apparaissant à l’écran, sélectionnez votre version de Linux®. • Dans la fenêtre suivante, vous pouvez télécharger le pilote souhaité. • Suivez ensuite les instructions. – 26 –...
- Page 27 Copyright © 2008 TrekStor GmbH & Co. KG. Tous droits réservés. Toutes les autres désignations de produits ou de firmes citées sont dans certains cas des marques déposées ou des noms de marques du propriétaire respectif.
- Page 28 USB o in modalità rete, ma non con entrambe le modalità allo stesso tempo. A Collegamento / Accesso USB B Collegamento / Accesso LAN C LED alimentazione D Pulsante d‘attivazione / disattivazione E Connessione USB F Connessione alimentazione G Connessione LAN 1) Modalità USB: collegamento di TrekStor DataStation maxi z.ul ad un PC attraverso la porta USB – 28 –...
- Page 29 • Il sistema operativo aggiunge alle "r " come disco locale ("P "). isorse del comPuter erifericA locAle 2) Modalità rete: collegamento di TrekStor DataStation maxi z.ul attraverso la rete ad uno o più PC Nota: per il funzionamento con un solo PC si consiglia il collegamento USB. • Inserire innanzitutto il trasformatore fornito in dotazione in una presa di corrente e collegare il cavo alla connessione "P " di ower DataStation maxi z.ul • Successivamente collegare il cavo di rete fornito in dotazione...
- Page 30 DataStation maxi z.ul 3) Attivazione di TrekStor in modalità rete Nota: è necessario installare il software NDAS fornito in dotazione solo se si utilizza DataStation maxi z.ul la connessione di rete per avere accesso a Windows® 2000 / XP / Vista • Inserire il CD fornito in dotazione nella periferica CD / DVD del PC. • Se la funzione di avvio automatico del sistema è attiva, viene visualizzato un menu con tutti i contenuti del CD.
- Page 31 • Seguire le istruzioni del software d‘installazione per la configurazione DataStation maxi z.ul Nota: il numero d‘identificazione (ID) e la chiave (KEY) si trovano su DataStation maxi z.ul fornito in dotazione e sul lato posteriore delle istruzioni per l‘avvio rapido. • Seguire le istruzioni del software durante l‘installazione delle modalità operative. • A questo punto selezionare con quale delle 2 modalità possibili si desidera montare la periferica. Successivamente fare clic sul pulsante "n ". • Se è stata selezionata l‘opzione "y ndAs wAnt to mount this...
- Page 32 DataStation maxi z.ul • Il sistema operativo aggiunge alle "r " come disco locale ("P "). isorse del comPuter erifericA locAle DataStation maxi z.ul 4) Impiego di TrekStor Una volta completata con successo la procedura di registrazione e DataStation maxi z.ul montaggio di , questa periferica viene visualizzata nelle risorse del computer come "d ". A questo punto isco locAle è possibile utilizzarla allo stesso modo dei dischi fissi che si trovano nel PC. DataStation maxi z.ul Nota: se è stato montato nella semplice modalità di lettura, il supporto dati è protetto da eventuali scritture.
- Page 33 Indicazioni per gli utenti di Mac® OS X 10.3 e superiori A differenza del capitolo 3) "A ttivAzione di tAtion mAxi z ul in ", attenersi alle istruzioni riportate di seguito. modAlità rete • Inserire il CD fornito in dotazione nella periferica CD / DVD del computer. • Accedere alla cartella "m os" ed in questa posizione eseguire il file " ". instAll mPkg • Seguire le istruzioni per l‘installazione. Nota: tenere a disposizione i dati di registrazione dell‘amministratore. I dati sono necessari nel corso dell‘installazione.
- Page 34 DataStation maxi z.ul • A questo punto viene visualizzato come nuovo supporto dati sul desktop. Indicazioni per gli utenti Linux® • Visitare l‘indirizzo internet: http://www.ximeta.com/support/downloads/. • Nelle richieste che vengono visualizzate su schermo selezionare la versione Linux® impiegata. • Nelle finestre riportate di seguito è possibile scaricare il driver desiderato. • A questo punto seguire le istruzioni. – 34 –...
- Page 35 Il produttore non è inoltre responsabile di danni o perdite di dati ne‘ di danni secondari da essi derivanti. Copyright © 2008 TrekStor GmbH & Co. KG. Tutti i diritti riservati. Nel caso siano presenti riferimenti ad eventuali prodotti o aziende, si tratta di marchi di fabbrica o dei nomi dei marchi dei rispettivi proprietari.
- Page 36 MANUAL DE INIcIO RáPIDO Volumen de suministro: DataStation maxi z.ul • TrekStor • Práctico soporte multifunción • Cable de red de alta calidad • Cable USB 2.0 de alta velocidad • Fuente de alimentación (100 V - 240 V) • CD de software • Nero BackItUp 2 Essentials • Guía rápida • Manual Requisitos del sistema: • Windows® ME (sólo en modo USB) • Windows® 2000 / XP / Vista, Mac® OS X a partir de 10.3, Linux® • Pentium II 233 MHz o superior (recomendado: Pentium III 500 MHz) • 64 MB RAM (recomendado: 256 MB RAM) • Puerto USB 1.1 (recomendado: puerto USB 2.0 de alta velocidad) • Puerto de red 10/100Base-T libre en el PC, switch o router...
- Page 37 DataStation maxi z.ul • El sistema operativo añadirá la en "m Pc" como un disco extraíble ("u "). nidAd locAl 2) Modo de red: Conexión de la TrekStor DataStation maxi z.ul a uno o varios PC a través de la red Nota: Se recomienda utilizar el modo de conexión USB si sólo se está utilizando un solo PC. • Conecte la fuente de alimentación suministrada a una toma de corriente y enchufe el cable a la toma de alimentación "P " de la ower DataStation maxi z.ul...
- Page 38 3) Puesta en funcionamiento de la TrekStor DataStation maxi z.ul en modo de red Nota: Solamente si utiliza la conexión de red, deberá instalar el software NDAS DataStation maxi z.ul suministrado para poder acceder a la Windows® 2000 / XP / Vista • Introduzca el CD suministrado en la unidad de CD / DVD del PC. • Si está activada la función de inicio automático del sistema, se abrirá un menú con el contenido del CD. Nota: En caso de que esté desactivada la función de inicio automático del sistema, acceda a la unidad de CD / DVD a través de "m...
- Page 39 • Siga las instrucciones del software de instalación para configurar la DataStation maxi z.ul Nota: El número de identificación (ID) y la clave de escritura (KEY) los DataStation maxi z.ul encontrará en la y al dorso del presente Manual de inicio rápido. • Siga las instrucciones del software para configurar del modo de funcionamiento. • A continuación, seleccione en cuál de los dos modos va a configurar la unidad. Después, haga clic en el botón "n ". • Si ha seleccionado la opción "y ndAs wAnt to mount this...
- Page 40 DataStation maxi z.ul • El sistema operativo añadirá la en "m Pc" como un disco extraíble ("u "). nidAd locAl DataStation maxi z.ul 4) Utilización de la TrekStor DataStation Una vez haya registrado y configurado con éxito la maxi z.ul , aparecerá como "d " en Mi PC y podrá utilizarla isco extrAíble como un disco duro del ordenador. DataStation maxi z.ul Nota: En caso de que haya configurado la únicamente modo de lectura, la unidad estará protegida contra escritura.
- Page 41 Nota para usuarios de Mac® OS X a partir de 10.3 Siga las instrucciones a continuación en lugar de las descritas en el capítulo 3) "P uestA en funcionAmiento de lA tAtion z ul en modo ": de red • Introduzca el CD suministrado en la unidad de CD-ROM del PC. • Abra la carpeta "m os" y ejecute el archivo " ". instAll mPkg • Siga las instrucciones de instalación. Nota: Tenga preparados los datos de registro del administrador. Los datos serán necesarios durante la instalación.
- Page 42 DataStation maxi z.ul • A continuación aparecerá la en el escritorio como una nueva unidad. Nota para usuarios de Linux® • Por favor, visite la página web: http://www.ximeta.com/support/downloads/. • Seleccione su versión de Linux® en los mensajes contextuales. • En la siguiente ventana puede descargar los controladores deseados. • Después, siga las instrucciones. – 42 –...
- Page 43 Asimismo, el fabricante no se responsabilizará de los daños o la pérdida de datos, ni de los daños resultantes. Copyright © 2008 TrekStor GmbH & Co. KG. Todos los derechos reservados. Se hace constar que los otros nombres de productos y empresas podrían ser marcas registradas propiedad de sus respectivos fabricantes.
-
Page 44: Manual De Iniciação Rápida
MANUAL DE INIcIAçãO RáPIDA Material fornecido: DataStation maxi z.ul • TrekStor • Suporte prático multifunções • Cabo de rede de elevada qualidade • Cabo Hi-Speed USB 2.0 • Fonte de alimentação (100 V – 240 V) • CD com software • Nero BackItUp 2 Essentials • Breve manual • Manual Requisitos do sistema: • Windows® ME (apenas aplicável no modo USB) • Windows® 2000 / XP / Vista, Mac® OS X a partir de 10.3, Linux® • 233 MHz Pentium II ou superior (recomendado 500 MHz Pentium III) • 64 MB RAM (recomendado 256 MB RAM) • Porta USB 1.1 (recomendada porta Hi-Speed USB 2.0) • Ligação de rede livre 10/100Base-T no PC, switch ou router... - Page 45 DataStation maxi z.ul • O seu sistema operativo adiciona o a "o " como suporte de dados local ("u "). meu comPutAdor nidAde locAl DataStation 2) Modo de rede: Ligue o TrekStor maxi z.ul em rede a um ou mais PCs Nota: no funcionamento com apenas um PC recomenda-se a ligação por USB. • Insira, em primeiro lugar, a fonte de alimentação fornecida numa DataStation tomada e ligue o cabo na porta "P " do ower maxi z.ul • Ligue, em seguida, o cabo de rede fornecido na porta "LAN" do DataStation maxi z.ul...
- Page 46 3) Colocação em funcionamento do TrekStor DataStation maxi z.ul no modo de rede Nota: só deve instalar o software NDAS fornecido, quando utilizar a ligação DataStation maxi z.ul em rede, para aceder ao Windows® 2000 / XP / Vista • Introduza o CD fornecido na unidade de CD / DVD do seu PC. • Quando a função de inicialização automática do seu sistema estiver activa, abre-se um menu com todo o conteúdo do CD. Nota: se a função de inicialização automática do seu sistema estiver desactivada, pode aceder à...
- Page 47 • Siga as instruções do software de instalação para a configuração do DataStation maxi z.ul Nota: o número de identificação (ID) e o código de escrita (KEY) podem DataStation maxi z.ul ser encontrados no seu e no verso do seu manual de inicialização rápida. • Siga as instruções do software ao configurar um modo de funcionamento. • Seleccione agora em qual dos dois modos disponíveis, a unidade deve ser montada (mount). Clique, em seguida, no botão "n ".
- Page 48 DataStation maxi z.ul • O seu sistema operativo adiciona o a "o " como suporte de dados local ("u "). meu comPutAdor nidAde locAl DataStation maxi z.ul 4) Utilização do TrekStor Depois de ter registado e montado (mount) com sucesso o DataStation maxi z.ul , este surge como "s " uPorte de dAdos locAl em O meu computador. Agora pode utilizá-lo como qualquer disco rígido que se encontre no PC. DataStation maxi z.ul Nota: se o estiver “ “ no modo de montADo leitura simples, o suporte de dados fica protegido contra escrita.
- Page 49 Indicações para utilizadores de Mac® OS X superior a 10.3 Proceda de forma diferente da descrita no capítulo 3) "c olocAção em ", seguindo as funcionAmento do tAtion mAxi z ul no modo de rede instruções a seguir. • Introduza o CD fornecido na unidade de CD / DVD do seu computador. • Entre na pasta "m os" e execute o ficheiro " ". instAll mPkg • Siga as instruções de instalação. Nota: tenha os dados de registo do administrador preparados. Estes serão necessários durante a instalação.
- Page 50 DataStation maxi z.ul • Em seguida, o surge como um novo suporte de dados no ambiente de trabalho. Indicações para utilizadores de Linux® • Visite a página da Internet: http://www.ximeta.com/support/downloads/. • Na próxima pergunta exibida, seleccione a versão do seu Linux®. • Na janela seguinte, pode descarregar o controlador desejado. • Em seguida, siga as instruções. – 50 –...
- Page 51 Copyright © 2008 TrekStor GmbH & Co. KG. Todos os direitos reservados. Outros nomes de produtos ou de empresas referem-se, eventualmente, a marcas registadas ou nomes de marcas do respectivo detentor.
-
Page 52: Beknopte Handleiding
BEkNOPTE HANDLEIDING Leveringsomvang: DataStation maxi z.ul • TrekStor • Praktische multifunctionele houder • Hoogwaardige netwerkkabel • Hi-Speed USB 2.0 kabel • Netvoeding (100 V – 240 V) • Software-CD • Nero BackItUp 2 Essentials • Beknopte handleiding • Handleiding Systeemvoorwaarden: • Windows® ME (alleen in USB-modus te gebruiken) • Windows® 2000 / XP / Vista, Mac® OS X vanaf 10.3, Linux® • 233 MHz Pentium II of hoger (500 MHz Pentium III aanbevolen) • 64 MB RAM (256 MB RAM aanbevolen) • USB 1.1-aansluiting (Hi-Speed USB 2.0-aansluiting geadviseerd) • Vrije 10/100Base-T netwerkaansluiting op de pc, Switch of Router DataStation maxi z.ul... - Page 53 DataStation • Uw gebruikssysteem detecteert automatisch de maxi z.ul en voegt automatisch een lokale schijf (" ") lokAAl stAtion aan "d " toe. eze comPuter DataStation 2) Netwerkmodus: De TrekStor maxi z.ul aansluiten op één of meerdere PC‘s middels het netwerk Opmerking: Bij het gebruik van slechts één PC wordt de USB-verbinding geadviseerd. • Sluit eerst de geleverde netvoeding aan op een stopcontact en sluit vervolgens het netsnoer aan op de "P "-aansluiting van de ower DataStation maxi z.ul • Sluit vervolgens de meegeleverde netwerkkabel aan op de "LAN"-...
- Page 54 "D " / "C " uw CD / DVD-station openen en in de omputer omputer hoofddirectory van de CD het programma "m " starten. • In een dialoogvenster verschijnt nu het TrekStor-menu. • Klik op "t ndAs-s " en volg de installatie-instructies. oftwAre Opmerking: Als een Windows®-veiligheidsvraag verschijnt, selecteert u "C ".
- Page 55 • Volg de instructies van de installatiesoftware voor het programmeren DataStation maxi z.ul van de Opmerking: Het identificatienummer (ID) en de schrijfsleutel (KEY) DataStation maxi z.ul vindt u op uw op de achterkant van deze beknopte handleiding. • Volg de software-instructies bij het programmeren van de gebruiksmodus. • Selecteer nu in welke van de 2 beschikbare modi het station moet worden geplaatst. Klik vervolgens op de knop "n ". • Als u de optie "y ndAs ." wAnt to mount this device As rite of "y...
- Page 56 DataStation • Uw gebruikssysteem detecteert automatisch de maxi z.ul en voegt automatisch een lokale schijf ("l ") okAAl stAtion aan "d " toe. eze comPuter DataStation maxi z.ul 4) De TrekStor gebruiken DataStation maxi z.ul Nadat u de met succes hebt geregistreerd en geplaatst, verschijnt deze als "l " ("l ") okAle schiJf okAAl stAtion in "d ". U kunt deze nu als een harde schijf op de PC gebruiken. eze comPuter DataStation maxi z.ul Opmerking: Als u de...
- Page 57 Opmerkingen voor gebruikers van Mac® OS X vanaf 10.3 Volg afwijkend van hoofdstuk 3) "i ngebruiknAme vAn de tAtion " de volgende instructies. mAxi z ul in netwerkmodus • Plaats de meegeleverde CD in het CD / DVD-station van uw PC. • Open de map "m os" en installeer vervolgens het bestand " ". instAll mPkg • Volg de installatie-instructies. Opmerking: Leg de aanmeldingsgegevens van de beheerder binnen handbereik. Deze zult u tijdens de installatie nodig hebben. • Na het beëindigen van de installatie moet u de PC opnieuw opstarten DataStation maxi z.ul...
- Page 58 DataStation maxi z.ul • Nu verschijnt de als nieuw station op uw bureaublad. Opmerkingen voor gebruikers van Linux® • Ga naar de website: http://www.ximeta.com/support/downloads/. • In het geopende venster selecteert u uw Linux® versie. • In het volgende venster kunt u de gewenste driver downloaden. • Volg vervolgens de instructies. – 58 –...
- Page 59 Verder is de fabrikant niet aansprakelijk voor beschadigingen of dataverlies en de bijkomende gevolgschade. Copyright © 2008 TrekStor GmbH & Co. KG. Onder voorbehoud van alle rechten. Bij overige vermelde producten- of bedrijfsaanduidingen gaat het mogelijkerwijs om handelsmerken of merknamen van de desbetreffende eigenaren.
-
Page 60: Sistem Gereksinimleri
, USB modunda VEYA ağ modunda çalıştırılabilir ancak her iki modda aynı anda çalıştırılamaz. A USB bağlantısı / erişimi B LAN bağlantısı / erişimi C Power LED‘i D Açma / kapatma şalteri E USB bağlantısı F Elektrik bağlantısı G LAN bağlantısı DataStation maxi z.ul 1) USB modu: TrekStor ‘yi USB üzerinden PC‘ye bağlama – 60 –... - Page 61 • ‘yi açın. DataStation maxi z.ul • İşletim sisteminiz ‘yi yerel veri ortamı ("y ") olarak "bi " bölümüne ekler. erel ürücü sAyArim DataStation maxi z.ul 2) Ağ modu: TrekStor ‘yi ağ üzerinden bir veya birden çok PC‘ye bağlama Uyarı: Tek bir PC ile kullanıldığında USB bağlantısı önerilir. • Önce aletle birlikte verilmiş olan adaptörü fişe takın ve kabloyu DataStation maxi z.ul ‘nin "P " bağlantı yerine takın. ower DataStation • Ardından aletle birlikte verilmiş olan ağ kablosunu maxi z.ul...
- Page 62 DataStation maxi z.ul 3) TrekStor ‘yi ağ modunda çalıştırma DataStation Uyarı: Aletle birlikte teslim edilen NDAS yazılımını sadece maxi z.ul ‘ye ağ bağlantısını kullanarak eriştiğinizde kurmanız gerekir. Windows® 2000 / XP / Vista • Ürün beraberindeki CD’yi bilgisayarınızın CD / DVD sürücüsüne yerleştirin. • Sisteminizde ‚ otomatik başlatma‘ fonksiyonu etkinleştirilmiş ise, CD‘nin tüm içeriğini gösteren bir menü açılır. Uyarı: Sisteminizde ‚otomatik başlatma‘ fonksiyonu etkin değilse, "bi...
- Page 63 DataStation maxi z.ul • ‘nin kurulumu için kurulum yazılımının talimatlarını izleyin. DataStation Uyarı: Kod numarasını (ID) ve anahtarı (KEY) maxi z.ul ‘nin üzerinde ve Özet Kullanım Kılavuzunun arka sayfasında bulabilirsiniz. DataStation maxi z.ul • ‘nin çalışma modunu ayarlamak için yazılımın talimatlarını izleyin. • Burada, sürücünün hangi modda bağlanacağına ilişkin sunulan iki seçenekten birini seçin. Ardından "n " düğmesini tıklayın. • "y ndAs ." veya "y wAnt to mount this device As rite wAnt...
- Page 64 DataStation maxi z.ul • İşletim sisteminiz ‘yi yerel veri ortamı ("y ") olarak "bi " bölümüne ekler. erel ürücü sAyArim DataStation maxi z.ul 4) TrekStor ‘yi kullanma DataStation maxi z.ul ‘yi başarıyla kaydettikten ve bağladıktan sonra alet "y " olarak "bi " penceresinde görüntülenir. erel rtAmi sAyArim DataStation maxi z.ul Artık ‘yi PC‘nizdeki bir sabit disk gibi kullanabilirsiniz. DataStation maxi z.ul Uyarı: ‘yi salt okunur modda bağladıysanız, veri ortamı...
- Page 65 Mac® OS X ab 10.3 kullanıcıları için bilgiler Bölüm 3) "t ‘ " altında tAtion mAxi z Ağ modundA çAliştirmA belirtilen adımlardan farklı olarak aşağıdaki talimatları izleyin: • Ürün beraberindeki CD’yi bilgisayarınızın CD / DVD sürücüsüne yerleştirin. • "m os" klasörüne gidin ve oradaki " " dosyasını çalıştırın. instAll mPkg • Kurulum adımlarını izleyin. Uyarı: Yöneticinin verdiği kayıt verilerini hazır bulundurun. Bunlar kurulum sırasında lazım olacaktır. DataStation maxi z.ul • Kurulum tamamlandıktan sonra,...
- Page 66 DataStation maxi z.ul • Bunun ardından , yeni veri ortamı olarak masaüstünde görüntülenir. Linux® kullanıcıları için bilgiler • Lütfen şu İnternet adresini ziyaret edin: http://www.ximeta.com/support/downloads/. • Karşınıza çıkan sorgularda Linux® sürümünüzü seçin. • Sonraki pencereden istediğiniz sürücüyü bilgisayarınıza indirebilirsiniz. • Ardından verilen talimatları izleyin. – 66 –...
- Page 67 Copyright © 2008 TrekStor GmbH & Co. Tüm hakları saklıdır. Burada adı geçen diğer ürün ve şirket isimleri, ilgili sahiplerinin ticari markaları ya da ticari isimleri olabilir.
- Page 68 INSTRUkcjA SzyBkIEGO URUcHOMIENIA zakres dostawy: DataStation maxi z.ul • TrekStor • Praktyczny uchwyt wielofunkcyjny • Kabel sieciowy wysokiej jakości • Przewód Hi-Speed USB 2.0 • Zasilacz (100 V – 240 V) • Płyta z oprogramowaniem • Nero BackItUp 2 Essentials • Krótka instrukcja obsługi • Instrukcja obsługi Wymagania systemowe: • Windows® ME (tylko w trybie USB) • Windows® 2000 / XP / Vista, Mac® OS X od wersji 10.3, Linux® • Procesor 233 MHz Pentium II lub szybszy (zalecany procesor Pentium III 500 MHz) • 64 MB RAM (zalecane 256 MB RAM) • Port USB 1.1 (zalecany port Hi-Speed USB 2.0) • Wolne gniazdo sieciowe 10/100Base-T na komputerze, przełącznik lub ruter DataStation maxi z.ul...
- Page 69 • Włączyć DataStation • System operacyjny dodaje automatycznie dysk maxi z.ul w oknie „m ” jako nowy „d ”. óJ komPuter ysk lokAlny DataStation 2) Tryb sieciowy: Podłączanie TrekStor maxi z.ul przez sieć do kilku komputerów Wskazówka: W przypadku współpracy z tylko jednym komputerem zaleca się stosowanie połączenia USB. • Podłączyć najpierw załączony zasilacz do gniazda sieciowego, a następnie podłączyć przewód do gniazda „P ” ower DataStation maxi z.ul • Podłączyć załączony przewód sieciowy do złącza „LAN” dysku...
- Page 70 ” / „k ” można uzyskać dostęp do stacji CD / DVD, a ój komputer omputer następnie w katalogu głównym płyty CD uruchomić program „m ”. • W oknie dialogowym pojawia się menu TrekStor. • Kliknąć „ t ndAs-s ” i postępować zgodnie z dalszymi oftwAre wskazówkami. Wskazówka: Jeżeli pojawi się pytanie o potwierdzenie Windows®, należy wybrać...
- Page 71 • Postępować zgodnie ze wskazówkami programu instalacyjnego DataStation maxi z.ul dotyczącymi konfiguracji Wskazówka: Numer identyfikacyjny (ID) i kod (KEY) umieszczone są na DataStation maxi z.ul oraz na odwrocie instrukcji szybkiego uruchomienia. • Przy konfiguracji trybu pracy należy postępować zgodnie ze wskazówkami programu. • Wybrać jeden z dwóch istniejących trybów podłączenia dysku. Kliknąć następnie na przycisk „n ”. • W przypadku wyboru opcji „y ndAs wAnt to mount this device As .
- Page 72 DataStation • System operacyjny dodaje automatycznie dysk maxi z.ul w oknie „m ” jako nowy „d ”. óJ komPuter ysk lokAlny DataStation maxi z.ul 4) Eksploatacja TrekStor DataStation maxi z.ul Po zarejestrowaniu i podłączeniu dysk pojawia się w oknie „m ” jako „d ”. Można z niego teraz óJ komPuter ysk lokAlny korzystać tak samo jak z twardego dysku komputera. DataStation maxi z.ul Wskazówka: Jeżeli podłączono tylko w trybie do odczytu, to dysk jest chroniony przed zapisem.
- Page 73 Wskazówki dla użytkowników Mac® OS X od wersji 10.3 W odróżnieniu od rozdziału 3) „P ierwsze uruchomienie tAtion ” postępować według następujących wskazówek: mAxi z ul w trybie sieciowym • Włożyć załączoną płytę CD do stacji CD / DVD komputera. • Wybrać folder „m os” uruchomić plik „ ”. instAll mPkg • Postępować według wskazówek instalacyjnych. Wskazówka: Przygotować dane rejestracyjne administratora, gdyż będą konieczne podczas instalacji. • Po zakończeniu instalacji należy ponownie uruchomić komputer, aby DataStation maxi z.ul...
- Page 74 DataStation maxi z.ul • Teraz pojawia się na pulpicie jako nowy dysk. Wskazówki dla użytkowników Linux® • Wejść na stronę: http://www.ximeta.com/support/downloads/. • W wyświetlonym zapytaniu wybrać używaną wersję Linux®. • W kolejnym oknie można pobrać żądany sterownik. • Postępować dalej według wskazówek. – 74 –...
- Page 75 Ponadto producent nie odpowiada za uszkodzenia lub utratę danych oraz za ich skutki. Copyright © 2008 TrekStor GmbH & Co. KG. Wszystkie prawa zastrzeżone. Inne wymienione tu nazwy produktów i firm mogą być znakami towarowymi lub markami ich właścicieli.
- Page 76 ÚTMUTATó A GyORSkEzDéSHEz A doboz tartalma: DataStation maxi z.ul • TrekStor • Praktikus többfunkciós tartó • Magas minőségű adathálózati kábel • Nagy sebességű USB 2.0 kábel • Hálózati adapter (100 V – 240 V) • Szoftvert tartalmazó CD • Nero BackItUp 2 Essentials • Rövid kezelési útmutató • Kézikönyv Rendszerkövetelmények: • Windows® ME (csak USB-módban használható) • Windows® 2000 / XP / Vista, Mac® OS X 10.3-tól, Linux® • 233 MHz Pentium II vagy gyorsabb (500 MHz Pentium III javasolt) • 64 MB RAM (256 MB RAM javasolt) • USB 1.1-illesztés (nagy sebességű USB 2.0-illesztés javasolt) • Szabad 10/100Base-T adathálózati csatlakozás a PC-n, Switch vagy Router DataStation maxi z.ul...
- Page 77 • Kapcsolja be a adattároló eszközt. DataStation maxi z.ul • A PC-jének operációs rendszere a adattároló eszközt a "s " "h " illeszti be. AJát géPen elyi meghAJtóként DataStation 2) Adathálózati –üzemmód: A TrekStor maxi z.ul adattároló eszköz összekötése adathálózaton keresztül egy vagy több PC-vel Megjegyzés: egy PC-vel történő üzemeltetéskor USB-kapcsolat javasolt. • Dugja először a hálózati adaptert egy hálózati aljzatba és csatlakoztassa DataStation maxi z.ul a kábelt a adattároló eszköz "P "- ower csatlakozására.
- Page 78 DataStation maxi z.ul 3) A TrekStor adattároló eszköz üzembe helyezése adathálózati üzemmódban Megjegyzés: A mellékelt NDAS-szoftvert csak abban az esetben kell telepítenie, DataStation maxi z.ul ha adathálózati illesztést használ a adattároló eszköz eléréséhez. Windows® 2000 / XP / Vista • Helyezze be a mellékelt CD-lemezt a PC-jének CD / DVD meghajtójába. • Ha a rendszerének AutoStart-funkciója aktiválva van, megnyílik egy menü a CD teljes tartalmával. Megjegyzés: Ha a rendszerének AutoStart-funkciója nincs aktiválva, a CD / DVD meghajtóhoz "s...
- Page 79 DataStation • Kövesse a telepítő szoftver telepítési utasításait a maxi z.ul . adattároló eszköz berendezéséhez a rendszerébe. Megjegyzés: Az azonosító számot (ID) és a kódkulcsot (KEY) DataStation maxi z.ul adattároló eszközön és az „Útmutató a gyorskezdéshez“ leírás hátoldalán találja. • Kövesse a szoftver utasításait egy üzemmód beállításához. • Jelölje ki, hogy a 2 lehetséges mód közül melyikben kell a meghajtót a rendszerbe berendezni. Kattintson ezután a "Next" gombra. • Ha a "y ndAs ." vagy wAnt to mount this device As rite a "y...
- Page 80 DataStation maxi z.ul • A PC-jének operációs rendszere a adattároló eszközt a "s " "h " illeszti be. AJát géPen elyi meghAJtóként DataStation maxi z.ul 4) A TrekStor adattároló eszköz alkalmazása DataStation maxi z.ul Miután a adattároló eszközt sikeresen regisztrálta és berendezte a saját gépen, az adattároló a saját gépen "h elyi " jelenik meg. Ezt most ugyanúgy használhatja, mint a PC- merevlemezként jében lévő merevlemezt. DataStation maxi z.ul Megjegyzés: Amennyiben a adattároló eszközt csak " "-módban rendezte be a rendszerbe, az adattároló...
- Page 81 Utasítások Mac® OS X ab 10.3 operációs rendszer felhasználói számára Kövesse a "t tAtion mAxi z ul AdAttároló eszköz üzembe helyezése " 3) fejezettől eltérően a következő utasításokat. AdAthálózAti módbAn • Helyezze be a mellékelt CD-lemezt a PC-jének CD / DVD meghajtójába. • Lépjen a "m os" mappába és hajtsa ott végre a " " fájlt. instAll mPkg • Kövesse a telepítési utasításokat. Megjegyzés: tartsa készenlétben az adminisztrátor bejelentkezési adatait. Ezekre a telepítés közben szüksége lesz. • Telepítés befejezése után a számító gépét újra kell indítani, hogy DataStation maxi z.ul...
- Page 82 DataStation maxi z.ul • Ezt követően a tálcán a adattároló eszköz új meghajtóként jelenik meg. Utasítások Linux® operációs rendszer felhasználói számára • Kérjük látogassa meg az alábbi internetes oldalt: http://www.ximeta.com/support/downloads/. • A megjelenő lekérdezéseknél jelölje ki Linux® operációs rendszerének verzióját. • A következő ablakban letöltheti a kívánt szoftver-meghajtót. • Kövesse azután az utasításokat. – 82 –...
- Page 83 Ezen túlmenően a gyártó nem felelős az adatok sérüléséért vagy elvesztéséért, valamint a következménykárokért. Copyright © 2008 TrekStor GmbH & Co. KG. Minden jog fenntartva. Ezentúl említett termék- vagy cégmegnevezések esetében a mindenkori tulajdonos védjegyéről vagy márkanevéről lehet esetleg szó.
- Page 84 λειτουργία USB Ή στη λειτουργία δικτύου, αλλά όχι όμως ταυτόχρονα και στους δύο τρόπους λειτουργίας. Α Σύνδεση / πρόσβαση USB B Σύνδεση / πρόσβαση LAN C Φωτοδίοδος παροχής ισχύος D Διακόπτης ενεργοποίησης / απενεργοποίησης E Σύνδεση USB F Σύνδεση παροχής ισχύος G Σύνδεση LAN 1) Λειτουργία USB Σύνδεση του TrekStor DataStation maxi z.ul με ένα PC μέσω USB – 84 –...
- Page 85 DataStation • Το λειτουργικό σας σύστημα καταχωρεί το maxi z.ul στο "Ο " ένα Τοπικό φορέα δεδομένων υπΟλΟγιστήσ μΟυ ("τ "). Οπική μΟνάδά 2) Λειτουργία δικτύου: Σύνδεση του TrekStor DataStation maxi z.ul μέσω του δικτύου σε ένα ή περισσότερα PC Υπόδειξη: Κατά τη λειτουργία με μόνο ένα PC συνιστάται η σύνδεση USB. • Βάλτε πρώτα το τροφοδοτικό ισχύος που παραδίδεται μαζί σε μία πρίζα και συνδέστε το καλώδιο στο σημείο σύνδεσης "P " του ower DataStation maxi z.ul • Συνδέστε έπειτα το καλώδιο δικτύου που παραδίδεται μαζί στο σημείο...
- Page 86 Ε " να έχετε ωρος ργαςιας πρόσβαση στη μονάδα CD / DVD και να ξεκινήσετε στον κύριο κατάλογο του CD το πρόγραμμα "m ". • Σε ένα παράθυρο διαλόγου εμφανίζεται το μενού TrekStor. • Κάντε κλικ στο "t ndAs-s " και ακολουθήστε τις οδηγίες oftwAre εγκατάστασης. Υπόδειξη: Αν παρουσιαστεί μία ερώτηση ασφαλείας των Windows®...
- Page 87 • Ακολουθήστε τις οδηγίες του λογισμικού εγκατάστασης για τη ρύθμιση DataStation maxi z.ul του Υπόδειξη: Ο αριθμός αναγνώρισης (ID) και ο κωδικός εγγραφής (KEY) DataStation maxi z.ul υπάρχουν στο και συγκεκριμένα στην πίσω πλευρά των οδηγιών ταχείας εκκίνησης. • Ακολουθήστε τις οδηγίες του λογισμικού για τη ρύθμιση του τρόπου λειτουργίας σας. • Επιλέξτε τώρα σε ποιό από τους 2 πιθανούς τρόπους λειτουργίας θα μονταριστεί Η μονάδα. Αμέσως μετά κάντε κλικ στην επιφάνεια ενεργοποίησης "n ". • Αν επιλέξετε την επιλογή "y ndAs wAnt to mount this device As...
- Page 88 DataStation • Το λειτουργικό σας σύστημα καταχωρεί το maxi z.ul στο "Ο " ένα Τοπικό φορέα δεδομένων υπΟλΟγιστήσ μΟυ ("τ "). Οπική μΟνάδά DataStation maxi z.ul 4) Χρήση του TrekStor DataStation Αφού έχετε καταγράψει και μοντάρει με επιτυχία το maxi z.ul , τότε αυτό εμφανίζεται σαν "τ " στο ΟπικΟσ φΟρέάσ δέδΟμένων χώρο εργασίας. Μπορείτε τώρα να τη χρησιμοποιήσετε σαν ένα σκληρό δίσκο που βρίσκεται στον υπολογιστή σας. DataStation maxi z.ul Υπόδειξη: Σε περίπτωση που το έχει μονταριστεί μόνο στη λειτουργία ανάγνωσης, τότε ο φορέας δεδομένων έχει...
- Page 89 Υποδείξεις για τους χρήστες των Mac® OS X από 10.3 Ακολουθήστε αποκλίνοντας από το κεφάλαιο 3) "έ νάρξή λέιτΟυργιάσ τΟυ " τις ακόλουθες οδηγίες. tAtion mAxi z ul στή λέιτΟυργιά δικτυΟυ • Βάλτε το CD που υπάρχει μαζί στη μονάδα CD / DVD του υπολογιστή σας. • Πηγαίνετε στον κατάλογο "m os" και εκτελέστε το αρχείο " ". instAll mPkg • Ακολουθήστε τις οδηγίες εγκατάστασης. Υπόδειξη: Να έχετε έτοιμα τα στοιχεία δήλωσης του διαχειριστή. Αυτά είναι απαραίτητα...
- Page 90 DataStation maxi z.ul • Αμέσως μετά το εμφανίζεται σαν καινούργιος φορέας δεδομένων στο Desktop. Υπόδειξη για τους χρήστες του Linux® • Επικεφτείτε παρακαλώ τη σελίδα στο Ιντερνέτ: http://www.ximeta.com/support/downloads/. • Στις ερωτήσεις που εμφανίζονται μετά επιλέξτε την έκδοσή σας του Linux®. • Στο ακόλουθο παράθυρο μπορείτε να φορτώσετε το επιθυμητό πρόγραμμα οδήγησης. • Ακολουθήστε αμέσως μετά τις οδηγίες. – 90 –...
- Page 91 του προϊόντος. Επιπλέον ο κατασκευαστής δεν είναι υπέυθυνος για ζημιές ή απώλεια των δεδομένων και τις επακόλουθες ζημιές. Copyright © 2008 TrekStor GmbH & Co. KG. Διατηρούμε όλα τα δικαιώματα. Στις ονομασίες προϊόντων ή εταιριών που αναφέρονται επιπλέον πρόκειται πιθανώς για σήματα κατατεθέν ή...
Need help?
Do you have a question about the datastation maxi z.ul and is the answer not in the manual?
Questions and answers