Pentair Pool Products MiniMax NT Series Operation & Installation Manual
Pool & spa heaters
Hide thumbs
Also See for MiniMax NT Series:
- Operation & installation manual (40 pages) ,
- Service manual (52 pages)
Table of Contents
Advertisement
Available languages
Available languages
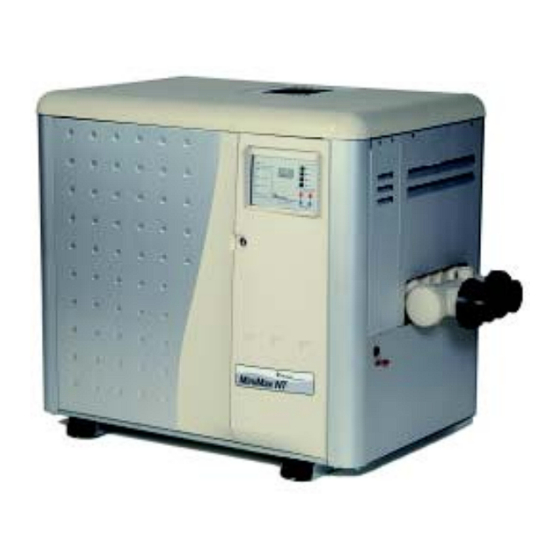
MiniMax
OPERATION & INSTALLATION MANUAL
U.S. Patent Numbers
6,295,980
5,318,007 - 5,228,618
5,201,307 - 4,595,825
FOR YOUR SAFETY - READ BEFORE OPERATING
•
If you do not follow these instructions exactly, a fire or explosion may result,
causing property damage, personal injury or loss of life.
•
Improper installation, adjustment, alteration, service or maintenance can cause
property damage, personal injury or death. Installation and service must be
performed by a qualified installer, service agency or the gas supplier.
•
Do not store or use gasoline or other flammable vapors and liquids in the vicinity
of this heater or other appliances.
•
Do not try to light any appliance.
•
Do not touch any electrical switch; do not use any phone in your building.
•
Immediately call your gas supplier from a neighbor's phone.
Follow the gas supplier's instructions.
•
If you cannot reach your gas supplier, call the fire department.
For additional free copies of this manual; call (800) 831-7133.
Rev. G • Rév. G 5-27-04
NT Pool & Spa Heaters
®
WARNING
WHAT TO DO IF YOU SMELL GAS
Pentair Pool Products, Inc.
1620 Hawkins Ave., Sanford, NC 27330
10951 W. Los Angeles Ave., Moorpark, CA 93021
(919) 774-4151
•
(805) 523-2400
•
1 1
1
To
Consumer
Retain For
Future
Reference
P/N • Réf. 472090
Advertisement
Chapters
Table of Contents
Troubleshooting

Related Manuals for Pentair Pool Products MiniMax NT Series


Summary of Contents for Pentair Pool Products MiniMax NT Series
- Page 1 Follow the gas supplier's instructions. • If you cannot reach your gas supplier, call the fire department. For additional free copies of this manual; call (800) 831-7133. Pentair Pool Products, Inc. 1620 Hawkins Ave., Sanford, NC 27330 (919) 774-4151 •...
-
Page 2: Table Of Contents
Table of Contents Section I. Heater Identification Information ............Section II. Introduction .................... Important Notices ..................................Warranty Information ..................................Code Requirements ..................................Consumer Information and Safety ..............................Section III. Installation ....................Specifications ....................................Plumbing Connections .................................. Valves ......................................Manual By-Pass .................................... Below Pool Installation ................................. -
Page 3: Section I. Heater Identification Information
1) HTR : Heater 2) (200, 250, 300 or 400) : Input rating (Btu/hr) X 1000 3) NT : MiniMax NT Series 4) STD or TSI : Series Character 5) NH : Gas type (Natural gas) and ignition system (Hot Surface Ignition) -
Page 4: Section Ii. Introduction
Be sure to follow the instructions set forth in this manual. If you need any more information, or if you have any questions regarding to this pool heater, please contact Pentair Pool Products, Inc. at (800) 831-7133. WARRANTY INFORMATION The MiniMax NT pool heater is sold with a limited factory warranty. -
Page 5: Code Requirements
Section II. Introduction CODE REQUIREMENTS The installation must conform with local codes or, in the absence of local codes, with the National Fuel Gas Code, ANSI Z223.1/NFPA 54 and/or CSA B149.1, Natural Gas and Propane Installation Codes. The heater, when installed, must be electrically grounded and bonded in accordance with local codes or, in the absence of local codes, in the USA, with the National Electrical Code, ANSI/NFPA 7;... -
Page 6: Section Iii. Installation
Section III. Installation Installation Instructions SPECIFICATIONS These installation instructions are designed for use by qualified personnel only, trained especially for installation of this type of heating equipment and related components. Some states require installation and repair by licensed personnel. If this applies in your state, be sure your contractor bears the appropriate license. -
Page 7: Plumbing Connections
Section III. Installation MANUAL BY-PASS Where the flow rate exceeds the maximum 120 GPM, a manual bypass should be installed and adjusted. After adjustments are made, the valve handle should be removed to avoid tampering. See Figure 2. PUMP POOL POOL FILTER MANUAL... -
Page 8: Water Connections
Section III. Installation WATER CONNECTIONS Reversing Headers — Reversible Inlet/Outlet Connection The MiniMax NT Series heater is factory assembled NOTE with right side inlet/outlet water connections. The Do NOT remove the high-limit and pressure inlet/outlet header can be reversed for left side water switches or the thermistor from the front header connections without removing the heat exchanger. - Page 9 Reversible Inlet/Outlet Connection, cont’d. 9. Install the temperature sensing probe by passing On the MiniMax NT Series heater there is insulation the wires through the hole provided on the left installed by the factory on the return head side of the side of the brace panel.
-
Page 10: Gas Connections
Section III. Installation GAS CONNECTIONS GAS LINE INSTALLATIONS Before installing the gas line, be sure to check which gas the heater has been designed to burn. This is important because different types of gas require different gas pipe sizes. The rating plate on the heater will indicate which gas the heater is designed to burn. -
Page 11: Gas Pipe Sizing
Section III. Installation GAS PIPE SIZING Table 2. ) . t l a r c i b c i b ” 2 ” 4 ” 1 / 1 - ” 4 / 1 - ” 2 ” 2 / 1 - ”... -
Page 12: Testing Gas Pressure/Gas Pressure Requirements
Section III. Installation TESTING GAS PRESSURE Inlet Manifold Inlet Manifold 1. Push the power switch to “OFF”. 2. Turn the gas valve knob to “OFF”. 3. Remove 1/8 in. NPT plug on the outlet side of the valve and screw in the fitting from the Manometer kit. -
Page 13: Indoor Venting-General Requirements
Section III. Installation INDOOR VENTING — General Requirements The vent pipe must be the same size or larger. The MiniMax NT heaters are capable of a 360-degree discharge rotation and operate with a positive vent static pressure and with a vent gas temperature less than 400° F. The total length of the horizontal run must not exceed the length that is listed below in the tables. -
Page 14: Indoor (Usa) / Outdoor (Canada) Installations
Section III. Installation INDOOR INSTALLATION (USA ONLY) Chimney or Gas Vent Vent Cap and Riser Furnished OUTDOOR SHELTER INSTALLATION (CANADA) by Installer page 15 for Vent Adaptors All products of combustion and vent gases must be completely removed to the outside atmosphere through a vent pipe which is connected to the stack adaptor. -
Page 15: Combustion Air Supply
12 inches of the ceiling, the other within 12 inches of the floor. These openings shall directly, or through duct, connect to outdoor air. Pentair Pool Products, Inc. does not recommend c i d o l f indoor installations that do not provide combustion n i l i air from outside the building. -
Page 16: Indoor Installations -Venting Guidelines
Section III. Installation P/N • Réf. 472090 Rev. G • Rév. G 5-27-04... -
Page 17: Outdoor Installations -Venting Guidelines
Section III. Installation OUTDOOR INSTALLATION (Outdoor Shelter Installation in Canada, see page For outdoor installation with an exhaust grill, the heater must be placed in a suitable area on a level, noncombustible surface. Do not install the heater under an overhang with clearances less than 3 feet from the top of the heater. The area under an overhang must be open on three sides. -
Page 18: Electrical Connections
Section III. Installation ELECTRICAL CONNECTIONS Electrical Rating 60 Hz 120 / 240 Volts AC, single phase CAUTION This heater is designed to operate at 120 or 240 VAC. It is not recommended to be connected to OR operate on a 208 VAC. NOTE •... -
Page 19: Wiring Schematic For All Dual Voltage Blowers
Section III. Installation WIRING SCHEMATIC FOR ALL DUAL VOLTAGE BLOWERS 120 VOLTS AC 240 VOLTS AC WHITE LINE # 1 WHITE LINE # 1 YELLOW YELLOW CAP OFF JOINED ORANGE ORANGE JOINED BLACK BLACK LINE # 2 LINE # 2 PURPLE PURPLE BROWN... -
Page 20: Wiring Diagram-Nt Std & Tsi With Ddtc
Section III. Installation WIRING DIAGRAM–NT STD & TSI WITH DDTC THERMISTER 24VAC POOL P/N • Réf. 472090 Rev. G • Rév. G 5-27-04... -
Page 21: Section Iv. Operation
Section IV. Operation Operation Instruction BASIC SYSTEM OPERATION Start pump, make sure the pump is running and is primed, to close the water pressure switch and supply power to heater. Be sure the pool and/or spa is properly filled with water. Follow the Lighting/Operating instructions below. MINIMAX NT HSI ELECTRONIC IGNITION LIGHTING/OPERATION FOR YOUR SAFETY: READ BEFORE LIGHTING WARNING... -
Page 22: Safety Controls
Section IV. Operation SAFETY CONTROLS Figure 21. VACUUM AIR PRESSURE (FAN) SWITCH The air pressure switch, (see Figure 21), is a safety device used to insure that the combustion air blower (fan) is operating and has been designed to monitor the vacuum (negative) pressure within the blower housing. -
Page 23: Safety Controls
Section IV. Operation SAFETY CONTROLS, (cont’d.) Flame Current Diagnostic LED Check Point 1 Flash - Air Flow Fault HIGH LIMITS 2 Flashes - Flame no Call for Heat 3 Flashes - Lock Out A “High Limit”, is a safety device that opens the electrical circuit and shuts off the heater based on a water temperature set point within the “High Limit Device”. -
Page 24: Digital Display Temperature Controller (Ddtc)
Section IV. Operation DIGITAL DISPLAY TEMPERATURE CONTROLLER (DDTC) REMOTE BUTTON POWER REMOTE POOL BUTTON PRESSURE SW POOL SYSTEM SPA BUTTON THERMOSTAT INDICATOR LIGHTS OFF BUTTON HEATING TEMPERATURE SETTING POOL SERVICE TEMP. UP PRESS ANY ARROW ONCE TO CHECK SET TEMPERATURE SPA AND POOL TEMPERATURE SET BUTTONS... - Page 25 Section IV. Operation Figure 27. Rev. G • Rév. G 5-27-04 P/N • Réf. 472090...
- Page 26 Section IV. Operation SET UP The MiniMax NT Heater comes from the factory preset with a pool temperature setting of 78° F. and a preset spa temperature of 100° F., and in the off mode setting. Once the power is turned on, the DDTC board will do a self diagnostic internal check, during this time the display will first read “888”, then the display will switch to three dashes “- - -“, this process takes approximately ten (10) seconds.
- Page 27 Section IV. Operation • HEATING The heating light is on any time the thermostat has signaled a call for heat which initializes the ignition safety circuit — the light comes on indicating successful firing of the main burners and stays on until the pool/spa reach the water temperature setting.
-
Page 28: Section V. Troubleshooting
Section V. Troubleshooting Troubleshooting Instruction TROUBLESHOOTING (DDTC) The DDTC temperature display contains three LED’s with a decimal point between the first and second, this display is also used to display an error code if for some reason there is a failure within the heater control system or a DDTC internal fault. -
Page 29: Troubleshooting (General)
Section V. Troubleshooting TROUBLESHOOTING (GENERAL) Possible Cause Remedy Heater will not come on Check if electrical connections are Automatic ignition system fails correct and securely fastened – If YES, call serviceperson. Pump not running Place pump in operation Pump air locked Check for leaks Filter dirty Clean filter... -
Page 30: Section Vi. Maintenance
1. Examine the venting system. Make sure there are no In some installations, a pressure relief valve (PRV) obstructions in the flow of combustion and is required on the MiniMax NT Series. To install a PRV, ventilation air. remove the access 2. -
Page 31: Spring, Fall And Winter Operation
Section VI. Maintenance SPRING AND FALL OPERATION If the pool is being used occasionally, do not turn the heater completely off. Set the thermostat down to 65° F. This will keep the pool and the surrounding ground warm enough to bring the pool up to a comfortable swimming temperature in a shorter period of time. -
Page 32: Chemical Balance
Table 15. POOL AND SPA WATER If pH becomes too high (over alkaline), it Your Pentair Pool Products pool heater was designed has these effects: specifically for your spa or pool and will give you many 1. -
Page 33: Replacement Parts - Nt Std& Tsi W/Ddtc
REPLACEMENT PARTS — NT STD & TSI w/DDTC FOR STD FOR TSI ONLY ONLY Rev. G • Rév. G 5-27-04 P/N • Réf. 472090... - Page 34 Replacement Parts—NT STD/DDTC Item Description Quantity Exhaust Grill w/Gasket 472352 Gasket, Exhaust Grill 471701 Top Cover w/Posts 472353 472354 472355 472356 Exhaust Assembly 472373 472376 472373 Blower w/Gasket 472361 472362 472374 Gasket, Blower 471610 Flue Collector 472008 472007 472006 472005 Insulation, Header/Hi-Limit 472270 Return Header Assembly...
- Page 35 Replacement Parts—NT TSI/DDTC Item Description Quantity Exhaust Grill w/Gasket 472352 Gasket, Exhaust Grill 471701 Top Cover w/Posts 472353 472354 472355 472356 Exhaust Assembly 472357 472358 472359 472358 Blower w/Gasket 472361 472362 Gasket, Blower 471610 Flue Collector 472008 472007 472006 472005 Insulation, Header/Hi-Limit 472270 Return Header Assembly...
-
Page 36: Save These Instructions
36 40 SAVE THESE INSTRUCTIONS. Pentair Pool Products, Inc. 1620 Hawkins Ave., Sanford, NC 27330 (919) 774-4151 • 10951 W. Los Angeles Ave., Moorpark, CA 93021 (805) 523-2400 • P/N • Réf. 472090 Rev. G • Rév. G 5-27-04... -
Page 37: Chauffe-Eau Pour Piscine Et Spa Minimax
• Si vous ne pouvez communiquer avec votre fournisseur de gaz, appeler les pompiers. Pour des copies supplémentaires gratuites de ce guide, veuillez appeler au (800) 831-7133. Pentair Pool Products, Inc. 1620 Hawkins Ave., Sanford, NC 27330 (919) 774-4151 •... - Page 38 Table des matières Section I. Identification du chauffe-eau ..............39 Section II. Introduction ....................40 Consignes importantes ................................Information sur la garantie ................................. Conformité aux codes ................................Information et recommandations à l'intention du consommateur ....................Section III. Installation ....................42 Spécifications ....................................
-
Page 39: Section I. Identification Du Chauffe-Eau
Section I. Identification du chauffe-eau INFORMATION POUR L'IDENTIFICATION DU CHAUFFE-EAU Pour identifier le chauffe-eau, voir la plaque signalétique à l'intérieur du panneau avant de l'appareil. Il y a deux codes indicateurs pour chaque chauffe-eau, le numéro de modèle et le numéro d'identification (HIN). Numéro d'identification du chauffe-eau (HIH) L'exemple suivant explique le système d'identification : 1) HTR : Chauffe-eau... -
Page 40: Section Ii. Introduction
être annulée si pour quelque raison que ce soit, le chauffe-eau n'est pas installé ou utilisé comme il se doit. Prenez soin de suivre les instructions décrites ci-après dans ce manuel. Pour tout autre information, ou question relative à ce chauffe-eau, veuillez contacter Pentair Pool Products au (800) 831-7133. GARANTIE Le chauffe-eau pour piscine MiniMax NT est couvert par une garantie limitée. -
Page 41: Conformité Aux Codes
Section II. Introduction CONFORMITÉ AUX CODES L'installation doit être conforme aux codes locaux, ou, en leurs absences, au National Fuel Gas Code, ANSI Z 223.1/NFPA 54 et/ou CSA B149.1, Natural Gas and Propane Installations Codes. Le chauffe-eau, une fois installé, doit être raccordé à une prise de terre et fixé selon les codes locaux, ou en l'absence de ces codes, aux États-Unis, avec le National Electrical Code, ANSI/NFPA 7 ;... -
Page 42: Section Iii. Installation
Section III. Installation Consignes d'installations SPÉCIFICATIONS Ces consignes de montage sont destinées à être utilisées exclusivement par du personnel qualifié spécialement formé à l'installation de ce type d'équipement de chauffage et de ses composants. Certaines provinces exigent que l'installation et la réparation soient effectuée par un technicien titulaire d'un permis. Si tel est le cas, veuillez à... -
Page 43: Raccordement De La Plomberie
Section III. Installation DÉRIVATION MANUELLE Là où le débit dépasse le taux maximum de 450 LPM (Litre par Minute), une dérivation manuelle doit être installée et ajustée. Après ces ajustements, la manette de la soupape doit être enlevée pour éviter toute manipulation. Voir Figure VERS POMPE... -
Page 44: Conduites D'eau
Section III. Installation RACCORDEMENTS DES CONDUITES D'EAU Collecteurs réversibles — Raccords d'entrée et de sortie réversibles Le MiniMax NT est assemblé en usine avec des À NOTER raccords d'arrivée et de sortie d'eau sur le côté droit. Ne retirez pas le manostat, commutateurs à limite Les collecteurs d'entrée et de sortie peuvent être supérieure ou le thermisteur du collecteur avant inversées et placées sur le côté... - Page 45 Section III. Installation Raccords d'entrée et de sortie réversibles, suite 9. Installez le capteur thermique en passant les câbles Sur la gamme de chauffe-eau MiniMax NT, il existe un isolant installée par l'usine situé sur le même côté que la par l'orifice prévu situé...
-
Page 46: Raccordements De Gaz
Section III. Installation RACCORDEMENT DES CONDUITES DE GAZ INSTALLATIONS DE LA CONDUITE DE GAZ Avant d'installer la conduite de gaz, vérifier le type de gaz pour lequel le chauffe-eau a été conçu. Ceci est important car différents types de gaz nécessitent des tailles de conduites différentes. La plaque signalétique sur l'appareil vous indique le type de gaz à... -
Page 47: Dimension Des Tuyaux De Gaz
Section III. Installation DIMENSION DES TUYAUX DE GAZ Tableau 2. A ’ É ( n e ê e r t É à l à É RÉGULATION DU GAZ PROPANE EN DEUX PHASES POUR INSTALLATIONS RÉSIDENTIELLES Dans plusieurs installations de conduites de gaz propane résidentielle, le fournisseur de gaz et/ou l'installateur utilisera un procédé de régulation en deux phases qui consiste tout d'abord à... -
Page 48: Vérification De La Pression De Gaz/Exigences En Matière De Pression De Gaz
Section III. Installation VÉRIFICATION DE LA PRESSION DE GAZ Entrée Admission Approvisionnement d'air 1 . Mettre l'interrupteur d'alimentation à la Entrée Admission Approvisionnement d'air position « OFF ». 2. Fermer la soupape de gaz « OFF ». 3. Enlever le bouchon NPT de 1/8 po situé sur le côté... -
Page 49: Ventilation Intérieure - Exigences
Section III. Installation VENTILATION INTÉRIEUR — Exigences Générales Le tuyau de ventilation doit être du même gabarit ou plus grand. Les chauffe-eau MiniMax NT sont capables de rotation de débit à 360 degrés et de fonctionner avec une pression statique à ventilation positive et une température de ventilation du gaz à moins de 400 °F (200 °C). -
Page 50: Installations Intérieures (É-U) Et Extérieures (Canada)
Section III. Installation INSTALLATION INTÉRIEURE (États-Unis Uniquement) Cheminée ou Ventilation de Gaz Bouchon d'Aération INSTALLATION EXTÉRIEUR SOUS ABRIS (Canada) et Colonne de Mise à l'Air Libre Fournit par l'Installateur Se reporter page 51 pour les adaptateurs d'aération Tous les combustibles et gaz de ventilation doivent être entièrement évacués vers l'extérieur par l'intermédiaire d'une conduite de ventilation connectée à... -
Page 51: Admission D'air Pour Combustion
être reliées à l'air extérieur du bâtiment. é u i v n à t u t r Pentair Pool Products, Inc. ne recommande pas les e v i u a ' e r t e v i... -
Page 52: Installation Intérieure - Recommandations Pour La Ventilation
Section III. Installation P/N • Réf. 472090 Rev. G • Rév. G 5-27-04... -
Page 53: Installation Extérieure - Recommandations Pour La Ventilation
Section III. Installation INSTALLATION EXTÉRIEURE (Pour l'installation extérieure sous abris au Canada, voir la page Pour une installation extérieure avec une grille d'échappement, le chauffe-eau doit être placé dans un endroit adéquat et sur un sol incombustible au niveau. Ne pas installer le chauffe-eau sous un surplomb avec des dégagements de moins de 3 pi (90 cm) à partir du sommet du chauffe-eau. -
Page 54: Raccordements Électriques
Section III. Installation RACCORDEMENTS ÉLECTRIQUES Classement électrique 60 Hz 120/240 Volts c.a. monophasé ATTENTION ! This heater is designed to operate at 120 or 240 VAC. It is not recommended to be connected to OR operate on a 208 VAC. À... -
Page 55: Schéma De Câblage Pour Toutes Soufflante Bitension
Section III. Installation SCHEMA DE RACCORDEMENT POUR TOUTES SOUFFLANTE A DOUBLE VOLTAGE 120 VOLTS CA 240 VOLTS CA BLANC LIGNE # 1 BLANC LIGNE # 1 JAUNE JAUNE SANS BOUCHON COMBINÉ ORANGE ORANGE COMBINÉ NOIR NOIR LIGNE # 2 LIGNE # 2 VIOLET VIOLET BRUN... -
Page 56: Schéma De Câblage - Nt Std Et Tsi Avec Thermostat À Affichage Numérique
Section III. Installation SCHÉMA DE CÂBLAGE - NT STD ET TSI AVEC THERMOSTAT À AFFICHAGE NUMÉRIQUE THERMISTER 24VAC POOL P/N • Réf. 472090 Rev. G • Rév. G 5-27-04... -
Page 57: Section Iv. Fonctionnement Général
Section IV. Fonctionnement Consignes de Fonctionnement FONCTIONNEMENT GÉNÉRALE DU SYSTÈME 1. Amorcez la pompe, assurez-vous qu'elle fonctionne et qu'elle a été purgée, pour fermer le manostat et l'alimentation électrique au chauffe-eau. Assurez-vous que la piscine et/ou le spa est rempli à un niveau d'eau adéquat. Suivez les instructions pour l'allumage/Consignes de fonctionnement ci-dessous. -
Page 58: Commandes De Sécurité
Section IV. Fonctionnement CONTRÔLES DE SÉCURITÉ Figure 21. COMMUTATEUR (VENTILATEUR) DE PRESSION DU VIDE D'AIR Le commutateur de pression du vide d'air (voir figure est un outil de sécurité utilisé pour s'assurer que le souffleur de combustion d'air fonctionne, et a été conçu pour contrôler la pression du vide (négative) à... - Page 59 Section IV. Fonctionnement CONTRÔLES DE SÉCURITÉ, (suite) Verification de Témoin DEL de Diagnostic l'alimentation de la Clignote 1 fois : Défaillance de la ventilation flamme Clignote 2 fois : Flamme, aucune HAUTES LIMITES demande de chaleur Clignote 3 fois : Verouillage Une «...
-
Page 60: Thermostat À Affichage Numérique
Section IV. Fonctionnement THERMOSTAT À AFFICHAGE NUMÉRIQUE TOUCHE DE COMMANDE À DISTANCE POWER REMOTE TOUCHE PISCINE PRESSURE SW POOL TÉMOINS TOUCHE SPA THERMOSTAT INDICATEURS DU SYSTÈME TOUCHE HORS TENSION HEATING TEMPERATURE SETTING TOUCHE POUR AUGMENTER POOL SERVICE LA TEMPÉRATURE PRESS ANY ARROW ONCE TO CHECK SET TEMPERATURE TOUCHE DE PRÉ-RÉGLAGES POUR LA PISCINE ET LE SPA... - Page 61 Section IV. Fonctionnement Figure 27. Rev. G • Rév. G 5-27-04 P/N • Réf. 472090...
- Page 62 Section IV. Fonctionnement RÉGLAGE DU THERMOSTAT Le chauffe-eau MiniMax NT est livré avec les réglages d'usine pour piscine à 78 ºF (25 °C), pour spa à 100 ºF (37 °C) et en mode arrêt (OFF). Lorsque l'appareil est mis sous tension, le thermostat procède à une vérification interne de ses circuits.
- Page 63 Section IV. Fonctionnement • CHALEUR (HEAT) Le témoin de la chaleur s'allume à chaque fois que le thermostat est sollicité pour faire remonter la température. Cela initialise le circuit d'allumage — le témoin s'allume pour indiquer que la mise à feu des brûleurs principaux est réussie et restera allumé...
-
Page 64: Section V. Dépannage
Section V. Dépannage CONSIGNES DE DÉPANNAGE DÉPANNAGE (THERMOSTAT A AFFICHAGE NUMERIQUE) L'écran d'affichage du thermostat à affichage numérique possède trois témoins DEL avec un point décimal entre le premier caractère et le second. Cet écran indique également les codes d'erreur dans le cas de défaillance du système de contrôle du chauffe-eau ou d'une défaillance du thermostat. -
Page 65: Dépannage (Général)
Section V. Dépannage CONSIGNES DE DÉPANNAGE CAUSE PROBABLE REMÈDE Le chauffe-eau ne démarre pas Le système automatique d'allumage est défaillant Vérifier que les branchements électriques soient bons et bien fixés. Si OUI, contacter le technicien d'entretien. La pompe ne fonctionne pas Mettre la pompe en marche La pompe à... -
Page 66: Section Vi. Entretien
Section VI. Entretien ATTENTION ! Consignes d'Entretien DÉMONTER LA SOUPAPE DE DÉBIT LORSQUE VOUS PERCEZ UN TROU POUR INSTALLER UNE SOUPAPE DE SURPRESSION, Il est recommande de vérifier les pièces suivantes au moins VOUS RISQUEZ SINON DE PERCER À TRAVERS LA SOUPAPE. tous les six mois et au début de chaque nouvelle saison de baignade. -
Page 67: Utilisation Au Printemps, À L'autonme Et À L'hiver
Section VI. Entretien FONCTIONNEMENT AU PRINTEMPS ET EN AUTOMNE Si la piscine n'est utilisée qu'occasionnellement, ne pas éteindre complètement le chauffe-eau. Mettre le thermostat sur 68°F (20 °C). Cela maintiendra la piscine et la terre environnante à une température assez chaude, et l'on pourra rétablir une température de baignade plus rapidement. -
Page 68: L'équilibre Chimique De L'eau
Si le pH devient trop élevé (alcalin), les effets suivants seront constatés : Le chauffe-eau de Pentair Pool Products a été spécialement conçu pour votre piscine ou votre spa, et vous permettra 1. Réduit la puissance de destruction des bactéries et des d'apprécier des années d'entretien facile, à... -
Page 69: Pièces De Remplacement - Nt Std Et Tsi Avec Thermostat À Affichage Numérique
PIÈCES DE REMPLACEMENT - NT STD ET TSI AVEC THERMOSTAT À AFFHICHAGE NUMÉRIQUE FOR STD Pour Modèle FOR TSI Pour Modèle ONLY STD Seulement TSI Seulement ONLY Rev. G • Rév. G 5-27-04 P/N • Réf. 472090... - Page 70 PIÈCES DE RECHANGE — NT STD/THERMOSTAT À AFFICHAGE NUMÉRIQUE Item Description Quantity Grille d'échappement, avec joint 472352 471701 Joint, Grille d'échappement Couvercle du sommet, avec piquets 472353 472354 472355 472356 472373 472376 472373 Montage de la grille Souffleur, avec joint 472361 472362 472374...
- Page 71 PIÈCES DE RECHANGE—NT TSI/THERMOSTAT À AFFICHAGE NUMÉRIQUE Item Description Quantity 472352 Grille d'échappement, avec joint 471701 Joint, Grille d'échappement 472353 472354 472355 472356 Couvercle du sommet, avec piquets 472357 472358 472359 472358 Montage de la grille 472361 472362 Souffleur, avec joint 471610 Joint, Souffleur 472008...
- Page 72 VEUILLEZ CONCERVER CE GUIDE D'INSTRUCTION. Pentair Pool Products, Inc. 1620 Hawkins Ave., Sanford, NC 27330 (919) 774-4151 • 10951 W. Los Angeles Ave., Moorpark, CA 93021 (805) 523-2400 • P/N • Réf. 472090 Rev. G • Rév. G 5-27-04...
Need help?
Do you have a question about the MiniMax NT Series and is the answer not in the manual?
Questions and answers