SwiftColor SCC-4000D User Manual
Hide thumbs
Also See for SCC-4000D:
- Start manual (52 pages) ,
- Installation procedures manual (17 pages) ,
- User manual (32 pages)
Table of Contents
Advertisement
Quick Links
Advertisement
Table of Contents

Related Manuals for SwiftColor SCC-4000D


Summary of Contents for SwiftColor SCC-4000D
- Page 1 SCC-4000D USER’S GUIDE USER’S GUIDE PUB No. 4Y1-8572-030 / 2014...
-
Page 2: How To Use This Guide & Cd-Rom
How to Use This Guide & CD-ROM Start Guide You should read this start guide first if this is the first time you are using this printer. The Start Guide describes precautions for using the printer safely and shows you how to prepare the printer (software installation, etc.) before you use it. -
Page 3: Table Of Contents
Contents How to Use This Guide & CD-ROM �������������������������i Start Guide ��������������������������������������������������������������������������������������i Printer Software (Provided on the CD-ROM) ��������������������������������i Help Functions ��������������������������������������������������������������������������������i Before You Begin �����������������������������������������������������1 Conventions �����������������������������������������������������������������������������������1 Illustrations and Sample Screens ������������������������������������������������1 Trademarks �������������������������������������������������������������������������������������2 Abbreviations ���������������������������������������������������������������������������������2 Request to the Customer ��������������������������������������������������������������2 Legal Notice �����������������������������������������������������������������������������������3 Legal Limitations on the Usage of Your Product and the Use of Images 3 Product Name .................. - Page 4 Contents 1-2-2. Connecting with LAN Cable............13 1-3 Switching the Printer On and Off ����������������������������������������� 14 1-3-1. Switching the Printer On ............. 14 1-3-2. Switching the Printer Off ............. 15 1-4 Paper Loading Procedure ����������������������������������������������������� 16 1-5 For the use of Plastic Card ���������������������������������������������������24 2�...
- Page 5 Contents 3-2-9.Version Information ..............65 3-3 Using the Color Dialog Box ��������������������������������������������������66 3-3-1.Color Adjustment ................. 67 3-3-2.Set Print Quality ................69 3-3-3.Single Color Setting ..............70 3-4 Using the Detailed Settings Dialog Box ������������������������������72 3-4-1.Color Balance ................72 3-4-2. Brightness .................. 73 3-4-3.
- Page 6 Contents 4� How to Use the Status Monitor ����������������������� 119 4-1 Displaying the Status Monitor �������������������������������������������� 119 4-1-1. Starting the Status Monitor ............119 4-1-2. How to Start and Display the Status Monitor ......121 4-2 Using the Status Monitor ���������������������������������������������������� 124 4-2-1.
- Page 7 Contents 6-4 Print Results Are Unsatisfactory ��������������������������������������� 193 7� Appendix �����������������������������������������������������������201 7-1 Moving The Printer ���������������������������������������������������������������201 7-2 Shipping the Printer �������������������������������������������������������������205 7-3 Software Uninstallation �������������������������������������������������������209 7-4 Network Utility ��������������������������������������������������������������������� 211 7-4-1. Toolbar ..................213 7-4-2. Menu bar ...................213 7-4-3. Settings ..................214 7-4-4.
-
Page 8: Before You Begin
Swiftcolor SCC-4000D in Windows 7. The contents of these printer driver screens and instructions are essentially the same as Windows Vista and Windows XP as well as those for Swiftcolor SCL- 4000P; however,explanations are provided when there are minor differences in screen content or... -
Page 9: Trademarks
Before You Begin Trademarks ● Microsoft and Windows are trademarks of Microsoft Corporation in the United States and/or other countries. ● Adobe and the Adobe logo are trademarks of Adobe Systems, Inc. ● Other brand and product names may be trademarks or registered trademarks of their respective companies. -
Page 10: Legal Notice
Product Name SCC-4000D This equipment conforms with the essential EMC requrements of EC Directive. We declare that this product conforms with the EMC requirements of EC Directive at nominal mains input 230V, 50 Hz although the rated input of the product is 100 to 240 V, 50/60 Hz. -
Page 11: Fcc (Federal Communications Commission)
Before You Begin FCC (Federal Communications Commission) FCC Part 15 Compliance NOTE: This equipment has been tested and found to comply with the limits for a Class B digital device, pursuant to part 15 of the FCC rules. These limits are designed to provide reasonable protection against interference in a residential installation. -
Page 12: 1� Before Using The Printer
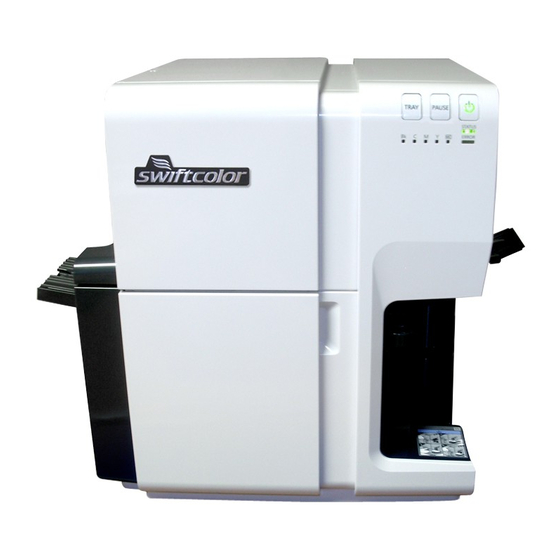
1� Before Using the Printer This section describes how to prepare the printer and procedures you should know before you use the printer� 1-1 Printer Part Names and Functions The name and function of each part is described below� 1-1-1� Front/ Right Side View Operation panel Keys necessary for operation and lamps to indicate the state of printer are provided on this panel. - Page 13 1. Before Using the Printer Side guide Adjust the position of this guide according to the paper width. Power socket Connect the power cord here. Feeder tray Load the paper. Side guide lever Use this lever to move the side guide. Ink tank door Open this door when replacing ink tanks or opening the upper unit.
-
Page 14: Left Side /Rear View
1. Before Using the Printer 1-1-2� Left Side /Rear View Rating plate A serial number for identifying the printer is shown on this plate. (The serial number is required when you ask for repair of the printer.) Paper delivery slot Paper is ejected through this slot. -
Page 15: Inside The Printer
1. Before Using the Printer 1-1-3� Inside the Printer Transport area Transports paper. Clean here for paper dust and ink stains. Upper unit open lever Use this lever to open the upper unit. Ink tank cover Open it, there is Ink Tank inside. -
Page 16: Operation Panel
1. Before Using the Printer 1-1-4� Operation Panel TRAY PAUSE STATUS ERROR TRAY key Use this key to move the feeder tray upward/downward. PAUSE key Printing Pressing this key suspends printing. in pause Pressing this key restarts printing. Power key/lamp Power-on. -
Page 17: Online And Sleep Modes
1. Before Using the Printer Blinking Fatal error.(Please confirm a status monitor.) Normal.(Please confirm a status monitor.) Maintenance Cartridge Warning lamp Full. Blinking Nearly full. Sufficient room to collect ink. Ink warning lamp No ink or tank. Blinking Low ink. Sufficient ink. -
Page 18: Connecting The Printer And Computer
1. Before Using the Printer 1-2 Connecting the Printer and Computer The printer is compatible with Hi-Speed USB and LAN� Important ● You can disconnect the USB cable even while the printer and computer are on, but do not disconnect the USB cable in the cases described below. -
Page 19: Connecting With Usb Cable
1. Before Using the Printer 1-2-1� Connecting with USB Cable Connect the USB cable to the printer and the computer. First, connect the cable to the printer, then connect it to the computer. Note ● If a printer driver has not been installed in the computer to which you want to connect your printer, install it before connecting the USB cable. -
Page 20: Connecting With Lan Cable
1. Before Using the Printer 1-2-2� Connecting with LAN Cable Connect the printer to the network (TCP/IP) using a LAN cable. Note ● Use a category 5 twisted pair cable. ● Please consult your network administrator when connecting to an office LAN. ●... -
Page 21: Switching The Printer On And Off
1. Before Using the Printer 1-3 Switching the Printer On and Off This section explains how to switch the printer on and off� 1-3-1� Switching the Printer On Make sure that the power cable is connected properly, and then turn on the printer. Press the Power key for at least 1 second. -
Page 22: Switching The Printer Off
1. Before Using the Printer 1-3-2� Switching the Printer Off Press the Power key for at least 1 second. The Power lamp blinks at long intervals, and then the printer is turned off. Note ● The Sleep mode can automatically be switched to the power-off state when a predetermined period of time has elapsed without printing. -
Page 23: Paper Loading Procedure
1. Before Using the Printer 1-4 Paper Loading Procedure This section describes how to load paper� Note ● It is recommended that paper exclusively for the color card printer be used. Using nonexclusive paper can cause bled and blurred printing or adversely impact the printer, resulting in troubles. ●... - Page 24 1. Before Using the Printer While raising the side guide lever, move the side guide fully toward you. Load the paper in the feeder tray. Load papers all the way into the point edges of sheets of paper are aligned. →...
- Page 25 1. Before Using the Printer Note ● When loading new paper, flap sheets of paper well and align all edges of sheets of paper. Important ● Do not print on the back of the envelope. A printing failure or other problems may result.
- Page 26 1. Before Using the Printer Note ● When loading envelopes, pull out the auxiliary tray. ● Load envelopes with their outsides (on which an address is printed) up, in such a manner that the sealing portions are closed and pressed against the side guide (rear). →...
- Page 27 1. Before Using the Printer While raising the side guide lever, slowly move the side guide until it stops against paper. Important ● Do not press the side guide against the paper stack too strongly. A paper jam can result.
- Page 28 1. Before Using the Printer Press the TRAY key. The feeder lift tray rises automatically. Wait until it stops rising. Important ● When the feeder lift tray is operating, do not touch it. A failure can result. When the status lamp stays lit in green, the printer is ready for printing.
- Page 29 1. Before Using the Printer Important ● When storing paper, put it in a plastic bag and keep it in a place not exposed to direct sunlight or fluorescent light to prevent discoloration, etc. Once you open the package of paper, it is recommended to use the paper as soon as possible.
- Page 30 1. Before Using the Printer Important ■ To those who use thick paper To use thick paper, set [Paper form] of the printer driver to [Thick paper] and, pull out the thick paper transport lever in the paper delivery slot. ●...
-
Page 31: For The Use Of Plastic Card
1. Before Using the Printer 1-5 For the use of Plastic Card Please follow the following procedure for the plastic card printing� Make sure that printer is switched off� Press the power key for at least 1 second. Auto Stacker lowers automatically. Load Additional tray to the auto stacker. - Page 32 1. Before Using the Printer Note ● When remove Additional Tray, pull and down it as shown in figure. Turn on the printer. Press the power key. Press down Feeder tray lever to [Plastic].
- Page 33 1. Before Using the Printer Note ● When loading paper media, set Feeder tray lever to [Paper]. Open the [Page Setup] sheet in Printer driver and select [Plastic Card] for [Paper Type].
- Page 34 1. Before Using the Printer Press TRAY key. The feeder lift tray lowers automatically. Wait until it stops lowering, and then set the plastic card. → 1-4 Paper Loading Procedure (P.16)
- Page 35 1. Before Using the Printer Important ■ To those who use plastic card To use thick paper or plastic card, set [Page setup] of the printer driver to [Card CR80 plastic 85.6x54.0mm][Card 4.25 x 2.5inch][Card 3.5 x 2.5inch] and, pull out the thick paper transport lever at the paper delivery slot.
- Page 36 1. Before Using the Printer ■ Paper Feed Direction and Image Orientation On this printer, paper is fed from the feeder lift tray located at the right and ejected to the auto stacker located at the left. Note that the paper loading direction and image orientation differ depending on the type of paper.
- Page 37 1. Before Using the Printer...
-
Page 38: 2� How To Print
2� How to Print When the printer is ready to print, create documents using various kinds of application software and print them� 2-1 How to Make of Print Data When a document is created, start printing from the application software� Important ●... - Page 39 “Print” dialog box appears. Check that [Swiftcolor SCC-4000D] has been selected in [Printer Setup]. If any other printer name is displayed, select [Swiftcolor SCC-4000D] in [Printer Setup]. Note ● If your application software supports buttons designed to configure a printer (such as [Advanced Settings] and [Properties]), set the paper type, colors and so on here.
- Page 40 2. How to Print Note ● See “How to Use the Printer Driver” to modify print setting to suit specific purposes. → 3. How to Use the Printer Driver (P.39) ● If the application software and the printer driver share the same setup items, such as paper size, print orientation and number of copies, the settings of the application software may govern.
-
Page 41: Canceling Print Jobs
The print job can be canceled by clicking [Cancel Print] in the status monitor. ■ Click [Cancel Print job] in the [Swiftcolor SCC-4000D Status Monitor] window� The print job is canceled, and the currently printing job and the jobs that are under processing or receiving data in the printer are also abandoned, along with all print data in process in the computer. -
Page 42: Pausing Printing
2. How to Print 2-3 Pausing Printing The pause function is described below� Printing can be paused by pressing the [PAUSE] key on the operation panel. 2-3-1�Pause from the Operation Panel Use this function to view the status of printing in progress or perform cleaning. Press the [PAUSE] key on the operation panel while printing is in progress. -
Page 43: 2-3-2.Cleaning During Pause Stop
2. How to Print 2-3-2�Cleaning During Pause Stop Important ● Cleaning from the “Status Monitor” window is enabled only while the printer pauses. ● The [Utilities] sheet is not available while the printer pauses. Cleaning can be performed while the printer pauses. Click the [Cleaning] menu in the “Status Monitor”... - Page 44 2. How to Print Important ● While cleaning is in progress, do not perform any other operation. ● Cleaning cannot be done during a print job or when an error is occurring. ● If Strong cleaning fails to solve the problem, the printhead may require replacement, or there could be some other problem.
- Page 45 2. How to Print...
-
Page 46: 3� How To Use The Printer Driver
3-1-1�Opening from the Application Software To open [Printing Preferences] from the application software in use, select [Print] and then [Properties]. Open the [File] menu in the application software, and click [Print...]. Select [Swiftcolor SCC-4000D] in [Printer Name] and click [Properties]. - Page 47 3. How to Use the Printer Driver [Swiftcolor SCC-4000D Printing Preferences] window appears. Note ● The method of opening the [Properties] dialog box varies with the kind of application software. For more information, refer to the instruction manual supplied with your application software.
-
Page 48: Opening From The Start Menu
3. How to Use the Printer Driver 3-1-2� Opening from the Start Menu To set up print, open the [Printing Preferences] or [Printer Properties] dialog box from the [Start] menu in Windows. Use this option to register common settings, regardless of the kind of application software used. Click [Start] and then click [Devices and Printers]. - Page 49 3. How to Use the Printer Driver Right-click on the [Swiftcolor SCC-4000D] Printer icon and select [Printing Preferences]. [Swiftcolor SCC-4000D Printing Preferences] dialog box appears. Note ● The [Printing Preferences] dialog box can also be opened by clicking [Preferences] in the [Swiftcolor SCC-4000D Properties] dialog box.
-
Page 50: Using The Page Setup Dialog Box
3. How to Use the Printer Driver 3-2 Using the Page Setup Dialog Box The [Page Setup] sheet is described below� The [Page Setup] sheet in the [Printing Preferences] dialog box allows you to set paper settings, such as the number of copies to print and the orientation of printing. [3]... - Page 51 3. How to Use the Printer Driver [6] Custom Paper Size Set an optional paper size. → 3-2-5. Custom Paper Size Settings (P.56) [7] Paper Type Set a paper type. → 3-2-6.Paper Type (P.61) [8] Copies Set the number of copies to print. [9] Orientation Set the orientation of printing on the paper.
-
Page 52: Registration Of Favorites
3. How to Use the Printer Driver 3-2-1� Registration of Favorites Up to 10 Favorites can be registered. Favorites, once registered, are imported by simply selecting them from a list, so that print jobs can always be executed with the same set of print settings. - Page 53 3. How to Use the Printer Driver Click [Register/Delete]. The [Register and Delete Settings] dialog box appears. Type an optional name in the [Setting File Name] box and, on confirming [setting Contents], click [Register].
- Page 54 3. How to Use the Printer Driver Note ● The entry of a name is required. Space and tab characters are not allowed in the name.The name can be up to 16 single- and double-byte characters long. ● New names cannot be registered at the position in [Current Settings] and [Default Settings]. A new entered name is added.
-
Page 55: Deletion Of Favorites
3. How to Use the Printer Driver Click [Apply] and then click [OK]. The print setting is registered in [Favorites]. Note ● To rename registered print settings, select the name of an item to edit from [Favorites] and click [Register/Delete]. Rename the item in [Set Name] in the [Register and Delete Settings] dialog box and click [Register]. - Page 56 3. How to Use the Printer Driver Select the setting to delete from the [Setting Register List] in the [Register and Delete Settings] dialog box and click [Delete].
- Page 57 3. How to Use the Printer Driver When the confirmation window opens, click [Yes]. The registered setting is deleted from [Setting Register List]. Check that the print setting has been deleted and click [OK].
-
Page 58: Using Print Setting Registered In Favorite
3. How to Use the Printer Driver 3-2-3� Using Print Setting Registered in Favorite Printing can be performed using the print settings registered in [Favorites]. The print settings registered in [Favorites] are imported by simply selecting them from a list, so that print jobs can always be executed with a desired set of print settings. - Page 59 3. How to Use the Printer Driver ● Default Settings Sheet Item Settings Page Setup Favorites Default settings Paper Size Business Card 91.0 × 55.0 mm Paper Type Matte Coated Paper Copies Orientation Portrait 180-degree Color Color Adjustment Photo Set Print Quality Input resolution 1200dpi Single color Settings Selected Color...
-
Page 60: Paper Size
3. How to Use the Printer Driver 3-2-4� Paper Size In [Paper Size], select the size of paper on which to print. [Paper Size] is selectable from the following choices: [Standard label paper] Margins (mm) Shape of Paper Size Paper Size Bottom Left Right... - Page 61 3. How to Use the Printer Driver Card 3.5 x 2.5inch Card 88.9 x 63.5 Card CR100 98.5 x 67mm Card 98.5 x 67.0 Card 3.5 x 5.5inch Card 88.9 x 139.7 Postcard 100.0 × 148.0 mm Postcard 100.0 × 148.0 Envelope No.10 104.8 ×...
- Page 62 3. How to Use the Printer Driver ■ Customize Any paper size of your choice can be set. Unlike user-definable paper sizes, paper sizes can be set temporarily from the [Print Setup] dialog box, though the paper names cannot be changed. Margins (mm) Shape of Paper Size...
-
Page 63: Custom Paper Size Settings
3. How to Use the Printer Driver 3-2-5� Custom Paper Size Settings If the desired paper size is not found in [Paper Size], set a new paper size in [Custom Paper Size Settings]. Up to 50 different paper sizes can be registered in [Custom Paper Size Settings]. In addition, preregistered standard label paper sizes may also be modified as desired and newly registered. - Page 64 3. How to Use the Printer Driver Enter or select the “Name,” “Width,” “Length,” “Margin,” “Display Unit” and “Paper Form” items in the [Custom Paper] field. Enter a new paper name. Name The name can be up to 15 single-byte and double-byte characters long. W x L Enter a numeric value within the allowable range.
- Page 65 3. How to Use the Printer Driver [Acceptable custom paper size range] Paper/Thick paper/Card(20-30mil) Envelope Shape of Media Minimum Maximum Minimum Maximum Paper Width 85.0 120.0 85.0 120.0 (3.2) (4.7) (3.2) (4.7) (inch) Paper Length 49.0 300.0 73.0 270.0 (1.9) (11.8) (2.9) (10.6)
- Page 66 3. How to Use the Printer Driver ■ Paper setup confirmation diagram Paper Length Envelope 73.0~300 mm Card Paper Length Feeding Heavy paper 49.0~300 mm Special heavy paper Direction Paper Width Paper Width 85.0~120.0 mm 85.0~120.0 mm Left margin Top margin Feeding Direction Printable area...
- Page 67 3. How to Use the Printer Driver When entire entry is completed, click [Register]. Click [Yes]. Check that the paper name as entered is displayed in the list in [Paper Size List] and click [OK].
-
Page 68: 3-2-6.Paper Type
3. How to Use the Printer Driver 3-2-6�Paper Type In [Paper Type], select the type of paper to print on. Non-glossy paper that fits into a broad range of applications, such Matte Coated Paper as regular printing. Glossy paper Choose when you select Glossy paper to print. Inkjet postcard Choose when you select Inkjetpostcard to print. -
Page 69: 3-2-7.Orientation
3. How to Use the Printer Driver 3-2-7�Orientation In [Orientation], select the direction in which to print documents. The results of printing of the following kind of document are assumed in the descriptions of the settings that follow. Portrait Select this option to print the document rotated 90 degrees to the right in relation to the direction of paper feeding. - Page 70 3. How to Use the Printer Driver Landscape Select this option to print the document horizontally in relation to the direction of paper feeding. Direction of paper feed 180-degree Rotation Check this check box to print a document set for [Portrait] or [Landscape] rotated 180 degrees. Portrait/rotated 180 degrees Landscape/rotated 180 degrees Direction of paper feed...
-
Page 71: 3-2-8.Check Settings
3. How to Use the Printer Driver Note ● The current printing direction can be identified in a preview. 3-2-8�Check Settings Click [Check Settings] to confirm the current paper settings. Note ● The [Copy] in [Check Settings] is used to copy the current settings to the clipboard in the OS. -
Page 72: 3-2-9.Version Information
3. How to Use the Printer Driver 3-2-9�Version Information Information such as version and copyright on the printer driver can be confirmed. Click [Version Information] to open the [Version Info] dialog box. Click [Obtain Printer Information] to get information on the printer connected. Note ●... -
Page 73: Using The Color Dialog Box
3. How to Use the Printer Driver 3-3 Using the Color Dialog Box The [Color] sheet is described below� The [Color] sheet is used to set print picture quality and colors. [3] [1] [4] [5] [2] [6] Paper Size Preview The currently set paper size is displayed in a preview. -
Page 74: 3-3-1.Color Adjustment
3. How to Use the Printer Driver Single Color Setting Prints color image data in a specified single color. → 3-3-3.Single Color Setting (P.70) Set Special Color Special Color Registration must have been → 3-7-3. Pinpoint Color Matches (P.99) completed in the [Utility] sheet to import. Detailed Setting Set [Color Balance], [Brightness], [Density], →... - Page 75 3. How to Use the Printer Driver Photo Select for printing photographic images. Use ICM Select this option to correct colors using the Windows color correction function of ICM (Image Color Management). No color adjustment No color adjustment. Important ● When [Color Adjustment] is set to [Use ICM], [Set Pinpoint Color Matches] in the [Utility] sheet cannot be used.
-
Page 76: 3-3-2.Set Print Quality
3. How to Use the Printer Driver 3-3-2�Set Print Quality Set the print quality. Prints data after processing it for a resolution Input resolution 1200dpi Prints at 1200X1200dpi of 1200 × 1200 dpi. Prints data after processing it for a resolution Input resolution 600dpi Prints at 600X600dpi of 600 ×... -
Page 77: 3-3-3.Single Color Setting
3. How to Use the Printer Driver 3-3-3�Single Color Setting [Single Color Setting] prints multi-colored documents in a single color. To print in a single color, click the [Single Color Setting] check box and check-select the color to use. To cancel the single color option, uncheck [Single Color Setting]. Zebra Prints in Black and White only. - Page 78 3. How to Use the Printer Driver Important ● If [Use ICM] is selected in ”Color Adjustment” or [Zebra] is selected in ”Single Color Setting”, a warning is displayed and [Register Special Color] cannot be used. To use [Register Special Color], select an option other than [Use ICM] and [Zebra] when setting colors using the printer driver.
-
Page 79: Using The Detailed Settings Dialog Box
3. How to Use the Printer Driver 3-4 Using the Detailed Settings Dialog Box Use the [Detailed Settings] dialog box to enter more detailed settings in the [Color] sheet� 3-4-1�Color Balance [Color Balance] adjusts the density of Cyan, Magenta, Yellow and Black. Either drag the slider or type a value directly to adjust the density. -
Page 80: Brightness
3. How to Use the Printer Driver a lighter image and to the right for a darker image. When the adjustment process is complete, click [OK]. Note ● A value can be also entered by clicking the entry box on the left side of the slide bar.Further, click the buttons at both ends of the slide bar to increment or decrement thecurrent value by one. -
Page 81: Density
3. How to Use the Printer Driver Normal Nears a monitor having a gamma function of 1�8� Prints with regular brightness. Print with this setting first. Then, select [Bright] or [Dark] to suit the print results as needed. Darker Nears a monitor having a gamma function of 2�2� Prints the data dark. -
Page 82: Contrast
3. How to Use the Printer Driver Set the density between -50 and +50. The slider represents the standard density setting (0) at the middle. Drag the slider to the left for a lighter image and to the right for a darker image. When the adjustment process is complete, click [OK]. -
Page 83: Halftone Process
3. How to Use the Printer Driver Note ● Contrast refers to the width (tolerable) from the Black portion of an image to the White portion. ● A value can be entered by clicking the entry box on the left side of the slide bar. ●... -
Page 84: Level Correction
3. How to Use the Printer Driver 3-4-6� Level Correction [Level Correction] enhances the contract of images when they appear to have low contract (lacking clear distinction between darkness and brightness) in the print results. Level correction prints the bright portion of a document brighter and the dark portion darker. To carry out level correct, click-select the [Level Correction] check box. -
Page 85: Sharpness
3. How to Use the Printer Driver 3-4-7� Sharpness [Sharpness] sharpens images when they appear blurred as a whole in the print results. Sharpness is selectable in a pulldown menu from among 0 (No), 1 (Small), 2(Medium) and 3 (Large). The setting is displayed on the left side of the slider. -
Page 86: Using The Overlay Settings Dialog Box
3. How to Use the Printer Driver 3-5 Using the Overlay Settings Dialog Box The [Overlay Settings] sheet is described below� In overlay printing, a background image that has been created as a form file beforehand can be overlaid with a foreground image or text on printing. [1]... - Page 87 3. How to Use the Printer Driver Note ● This function will not work properly if the printer driver of the server is configured for shared use and a client uses that shared printer server to perform printing.
-
Page 88: Create Form
Create a form file (background image) to be used for overlay printing. Select [Print] from the application which image data has been created, select "Swiftcolor SCC-4000D" as a printer name and select [Properties], [Advanced Settings]and so on. Click the [Overlay Settings] tab in the [Swiftcolor SCC-4000D Properties] dialog box in the printer driver to open the [Overlay Settings] sheet. - Page 89 3. How to Use the Printer Driver Next, check [Print the form to the file] in [Print Mode]. Specify [File Name] and location to save the file. Click [Reference] and set a file name and location to save the form file. File Name: Set any name.
- Page 90 3. How to Use the Printer Driver Enter [Comment]. The comment can be up to 31 single-byte and double-byte characters long, but its entry can be safely omitted. When the setup is complete, click [OK]. When the print execution window appears again, click [Print]. Prints data to be used as a form file.
-
Page 91: Overlay Printing
3. How to Use the Printer Driver 3-5-2� Overlay Printing Uses the form file created for overlay printing. Check [Overlay Printing] in [Print Mode]. Click [Reference] to select the form file that has been created. Check the selected form file in [Form File Information] and [Preview]. - Page 92 3. How to Use the Printer Driver Click [OK]. Note ● If a print job is executed with [Print the overlay with simple setting] checked, the form file and print data are overlaid with each other (foundation preserved). Print the overlay with Handling Content simple setting...
- Page 93 3. How to Use the Printer Driver Executes a print job. Print data is printed overlaid with the form file. Note ● Overlay printing would be disabled if the print setup information differs between the print data and the form file. ●...
-
Page 94: Using The Advanced Dialog Box
3. How to Use the Printer Driver 3-6 Using the Advanced Dialog Box The [Advanced Settings] sheet is used to set a print Order, Paper feed interval and so on� [1] [3] [4] [2] [5] Paper Size Preview The currently set paper size is displayed in a preview. Form File Information Display The result of Layout setting and Frame Printing setting is displayed in the preview window. - Page 95 3. How to Use the Printer Driver Important ● The setting of [Print Order] is disabled unless [Enable advanced printing features] is checked in the [Advanced Settings] sheet in the [Swiftcolor SCC-4000D Properties] dialog box.
-
Page 96: Print Order
3. How to Use the Printer Driver 3-6-1� Print Order Decide on whether to start printing from the first or last page. To print from the first page afterwards, select [Ascend]; to print from the last page upward, select [Descend]. 3-6-2�... - Page 97 3. How to Use the Printer Driver Note ● Normally, the slider is at the rightmost position. Three scale marks representing 0 sec, 1 sec, 2 sec, and 3 sec are arranged from right. *When performing high-density printing on glossy paper, increase the paper feed interval.
-
Page 98: Using The Utility Dialog Box
The [Utility] sheet is used to configure settings for the printer maintenance, power saving and so on� Open the [Utility] sheet also when starting the Status Monitor� Select [Devices and Printers] from the Start menu in Windows. Select and right-click on [Swiftcolor SCC-4000D]. Select [Printer Properties] and click the [Utility] tab. [9]... - Page 99 3. How to Use the Printer Driver Print Head Position Adjustment Adjusts the Printhead positions. → 5-2 Adjusting the Printhead Position (P.137) Output Setting Value Prints the current settings of the printer. → 5-4 Check the Output Setting Value (P.162) Sleep Switches the printer to the sleep mode.
- Page 100 3. How to Use the Printer Driver Important ● The printer must be turned on and connected to the computer to set items in the [Utility] sheet. ● To use [Print Head Position Adjustment], [Sleep Timer Setting], [Special Settings], [Register Special Color], [Moving The Printer], or [Shipping The Printer] displayed on the utility sheet, log in with the Administrator privilege.
-
Page 101: Sleep
3. How to Use the Printer Driver 3-7-1� Sleep Click [Sleep] to switch the printer to the sleep mode. Note ● The printer cannot be switched to sleep mode while it is printing. ● The printer enters the sleep mode automatically when it has been left idle for a certain period of time under normal conditions of operation. - Page 102 3. How to Use the Printer Driver The confirmation dialog box appears, then click [Yes]. The printer enters the sleep mode with the power lamp blinking. Note ● The printer would be inoperable if it is turned off. If so, press the [POWER] key to turn on the printer.
-
Page 103: Sleep Timer Setting
3. How to Use the Printer Driver 3-7-2� Sleep Timer Setting [Sleep Timer Setting] allows you to set the time for the printer to enter the sleep mode automatically when the printer has been left idle for a certain period of time or when no print data has been received from the printer, and the time for the printer to be turned off subsequently. - Page 104 3. How to Use the Printer Driver Click [Sleep Timer Setting]. The [Sleep Timer Setting] dialog box appears. Enter time then click [Send]. Enter times for the sleep timer and the off timer from the keyboard or using the buttons to the right of the entry box.
- Page 105 3. How to Use the Printer Driver Setting range Addressable Name Function (min.) resolution (min.) Sleep timer setting 1 - 60 Setting to enter the sleep mode. Setting to enter the power-off state Off timer setting 1 - 720 (Set the time longer than that for the sleep timer).
-
Page 106: Pinpoint Color Matches
3. How to Use the Printer Driver 3-7-3� Pinpoint Color Matches [Pinpoint Color Matches] allows you to create and register colors for special color matching, as for logo marks. This setup method matches the printer colors with the colors in need. Note ●... - Page 107 3. How to Use the Printer Driver Click [Pinpoint Color Matches]. Important ● If [Use ICM] is selected in ”Color Adjustment" or [Zebra] is selected in ”Single Color Setting”, a warning is displayed and [Pinpoint Color Matches] cannot be used. →...
- Page 108 3. How to Use the Printer Driver [Pinpoint Color Matches] window appears. Read the values of R/G/B from the source image.
- Page 109 3. How to Use the Printer Driver Note ● To read the R/G/B values from a source image that is subject to color matching, such as a logo mark, use an image processing program, such as “Paint,” which comes standard with Windows. ■...
- Page 110 3. How to Use the Printer Driver 3� Click the image with the [Eyedropper] tool. 4� Next, click [Edit Colors]. 5� [Color/Pure Color] displays the colors captured with [Eyedropper], with [Red/Green/Blue] serving as R/G/B values. 6� Enter the values of [Red/Green/Blue] into Red, Green and Blue in [Input Colors].
- Page 111 3. How to Use the Printer Driver Enter the values of [Red/Green/Blue] into Red, Green and Blue in [Input Colors].
- Page 112 3. How to Use the Printer Driver Print color pallets to designate color samples that represent approximate values 0 to 24. Click [Print]. R:246 G:27 B:125 R:249 G:27 B:125 R:252 G:27 B:125 R:249 G:30 B:125 R:246 G:30 B:125 R:246 G:33 B:125 R:243 G:30 B:125 R:243 G:27 B:125 R:240 G:27 B:125 R:243 G:24 B:125R:246 G:24 B:125 R:246 G:21 B:125 R:249 G:24 B:125 R:246 G:27 B:128...
- Page 113 3. How to Use the Printer Driver Note ● Before printing a color sample, checking the ”High-density output” check box prints the color sample in deeper color.
- Page 114 3. How to Use the Printer Driver Note ● If the target color is not found, create a color close to it by performing [Reprint]. Enter the number of the color closest to the target color in [Base Color]. Select a color pattern in [Pattern Selection]. Select a color pattern by determining which of RGB needs to be enhanced with regard to the target color.
- Page 115 3. How to Use the Printer Driver Check the printed color pallet and select the number of the color that is closest to "Input Color" from among 0 to 24, enter any name in the "Comment" field and click [Register].
- Page 116 3. How to Use the Printer Driver Displayed in the “Register List.” Click the registered cell to preview it...
- Page 117 3. How to Use the Printer Driver Note ● Use [Import] and [Export] to print created special colors on any other printer and to print special colors that have been created on any other computer. ● To check to see if a color has been registered or not, click [Printing Preferences]→[Color]→[Set Pinpoint Color Matches] and view [List of registered color].
-
Page 118: Special Settings
3. How to Use the Printer Driver 3-7-4� Special Settings [Special Settings] is not nessesary use. Set it when using the printer in an extraordinary environment or fanfold paper and so on. [1] [2] Discharges negligible amounts of inks on the paper surface to keep the Printheads running at all times so that inks will not be stuck in the [1] Ink Pre-fire On The Paper Printheads (nozzles) for unused colors, thereby preserving Printhead... - Page 119 3. How to Use the Printer Driver Reduces stains on the back of paper. (Select this mode when printing a high-density image.) [2] Stain Reduction Check this check box, and then check the “Mode 1” or “Mode 2” check box. By default, this check box is not checked.
- Page 120 3. How to Use the Printer Driver Click [Special Settings]. [Special Settings] dialog box appears. Click the [Special Settings] to use and select or deselect them. Click [Send]. The confirmation dialog box appears. Click [Yes]. The settings are transmitted to the printer to take effect. Click [Close].
-
Page 121: Add Custom Paper Type
3. How to Use the Printer Driver 3-7-5� Add Custom Paper Type Up to 10 custom paper types can be added, and ink jetting amounts can be set for respective paper types. Click [Add Custom Paper Type]. The [Add Custom Paper Type] dialog appears. - Page 122 3. How to Use the Printer Driver Type a desired name in the [Custom Paper Type Name] textbox. For example, type “User 1” as a desired name. After typing a desired name, click [Register]. When a confirmation window appears, click [Yes].
- Page 123 3. How to Use the Printer Driver “User 1” has been registered. Select [User 1], and then select a paper type from [Base Paper Type]. Select from [Matte Coated Paper], [Glossy Paper], [Inkjet Postcard], [Envelope] and [Plastic card].
- Page 124 3. How to Use the Printer Driver After selecting a paper type, set ink jetting amounts for respective colors. Important ● Moving the slide bar to the left decreases the ink jetting amount, and moving the slide bar to the right increases the ink jetting amount.
- Page 125 3. How to Use the Printer Driver Click [Register]. Thus, registration is completed. The registered paper type can be confirmed by selecting [Printing Preferences] → [Paper Type] of the printer driver.
-
Page 126: 4� How To Use The Status Monitor
4� How to Use the Status Monitor Use the Status Monitor to monitor the status of the printer and status of print jobs in progress� 4-1 Displaying the Status Monitor This section describes how to start and display the Status Monitor� 4-1-1�... - Page 127 4. How to Use the Status Monitor Display the [Utility] sheet in the Swiftcolor SCC-4000D Properties dialog box then click Start Status Monitor. The Status Monitor starts.
-
Page 128: How To Start And Display The Status Monitor
4. How to Use the Status Monitor 4-1-2� How to Start and Display the Status Monitor The method to start and display the Status Monitor can be set. ■ Start■Options ■ Use either method described below to set the start method. [Start During Printing] The Status Monitor automatically starts and displays when a print job starts. - Page 129 4. How to Use the Status Monitor ■ View■Options ■ Use one of the methods described below to set the display method. [Start With Popup] Open and display the Status Monitor window. (This is the default setting.) [Minimize at Start] Minimize and store the open Status Monitor window on the taskbar.
- Page 130 4. How to Use the Status Monitor Note ● If you want the window to display always on the top, click Always Show On Top by attach the checkmark at the beginning of the name of this selection. This setting has no connection with the other settings on the View menu.
-
Page 131: Using The Status Monitor
4. How to Use the Status Monitor 4-2 Using the Status Monitor Use the Status Monitor to not only monitor the status of print jobs in progress but also monitor the status of the printer and the level of the ink supply and quantity of ink collection of the maintenance cartridge�... -
Page 132: Viewing The Print Status
4. How to Use the Status Monitor Display the Details of the Selected Status Open a separate window to display more information about the status of the printer. Ink Information ➡ 4-2-3. Viewing Ink Information Display the amount of ink remaining. (P.131) Maintenance Cartridge Information ➡... - Page 133 4. How to Use the Status Monitor For example, If the printing of a three-page document in 10 copies is set, “0001/0010” to “0010/0010” appears while the first page is printed. The progress bar represents the status of printing of the number of copies by page in progress. [Total Copies] A total count of the specified number of copies printed appears.
-
Page 134: Viewing The Printer Status
4. How to Use the Status Monitor 4-2-2� Viewing the Printer Status Use these features to monitor the status of the printer. There are Four types of images to keep you informed about the status of the printer. Displayed to indicate the normal mode� (Background is blue) The printer is in the online mode and ready to print. - Page 135 4. How to Use the Status Monitor Displayed when a error has been issued� (Background is red) An error message is displayed for the Status Information, and printing cannot be done in this status. Troubleshoot the problem as required. Note ●...
- Page 136 4. How to Use the Status Monitor Note ● If several errors occur at the same time, the most important error is displayed on the top of the list. After you read the message displayed in the Status Information, follow the procedure below if you want to open another window to learn more details.
- Page 137 4. How to Use the Status Monitor Note ● You can also double-click the item in the Status Information list to open the same information window.
-
Page 138: Viewing Ink Information
4. How to Use the Status Monitor 4-2-3� Viewing Ink Information Use these features to monitor the level of the ink in the ink tanks. There are four colors of ink tanks; Black (Bk), Cyan (C), Magenta (M), and Yellow (Y) . Icons are used to indicate the level of ink in each ink tank. - Page 139 4. How to Use the Status Monitor Empty ➡ 5-5 Replacing Ink Tanks (P.152) Important ● Do not remove an ink tank unless you must replace it. This could shorten the life of the consumable. ● When replacing an ink tank, do not leave the printer without an ink tank for long periods of time. Note ●...
-
Page 140: Viewing Maintenance Cartridge Information
4. How to Use the Status Monitor 4-2-4� Viewing Maintenance Cartridge Information Use this feature to monitor the amount of the ink collected in the maintenance cartridge. Note ● The maintenance cartridge is used to collect the ink used for printhead cleaning, etc. ●... - Page 141 4. How to Use the Status Monitor [Maintenance cartridge full] When there remains no maintenance cartridge space to collect ink, a message, “Maintenance cartridge full,” is displayed and printing stops after finish printing the on going job. When this message appears, replace the maintenance cartridge with a new one. ➡...
-
Page 142: 5� Printer Maintenance
5� Printer Maintenance This chapter describes how to maintain the printer and keep it in good operating condition� 5-1 Cleaning the Printhead If your prints appear faint, this could mean that dust and paper dust have clogged the printhead. Clean the printhead to clear clogged nozzles. 5-1-1�... - Page 143 5. Printer Maintenance Open the [Utility] sheet in the [Swiftcolor SCC-4000D Properties] dialog box, select [Light Cleaning], [Medium Cleaning] or [Strong Cleaning] and click it. The confirmation dialog box appears. Click [Yes]. The cleaning begins.
-
Page 144: Adjusting The Printhead Position
5. Printer Maintenance 5-2 Adjusting the Printhead Position Although the printer has already been adjusted for optimum performance upon installation, please adjust printhead position if you experience unexpected colors or other problems in your print results. The printhead adjustment procedure consists of printing a Printhead Position Adjustment Pattern, reading the pattern, and then making some simple adjustments to change the position of the printhead. - Page 145 5. Printer Maintenance Opening the [Utility] sheet in the [Swiftcolor SCC-4000D Properties] dialog box and click [Printhead Position Adjustment]. The [Printhead Position Adjustment] dialog box appears.
- Page 146 5. Printer Maintenance Click “The details of the adjustment method are here” to view operating procedures from [Help]. Check that the printer is not running and perform Step 1 “Print the adjustment pattern.” Click [Print].
- Page 147 5. Printer Maintenance When the confirmation window appears, click [Yes]. An adjustment pattern is printed. Reference position of the Black Printhead (frame border) Color registration adjustment pattern (Vertical) Feeding Direction Color registration adjustment pattern (Horizontal) The confirmation window appears for you to check to see if the adjustment pattern has been printed correctly or not.
- Page 148 5. Printer Maintenance On confirming successful printout, click [Proceed to Step 3]. Note ● [Step 2] covers the procedure for adjusting the reference position of the Black Printhead (frame border), but it normally does not require changes. - The reference position can be identified from a frame border drawn in the circumference of the Printhead position adjustment pattern.
- Page 149 5. Printer Maintenance Note ● Step 2 Adjust the reference position of the Black Printhead (frame border) ■ Adjusting the Vertical Direction If the Black border for K (Black) reference position adjustment is shifted upward, set the value to negative (-). If it is shifted downward, set the value to positive (+). Click [A] (Black) in [Vertical Direction] and drag the slider in the middle to increase or decrease the value.
- Page 150 5. Printer Maintenance Step 3. Adjust Black color. Check [B] Vertical Direction and [X] Horizontal Direction in adjustment pattern [K] (Black) and read and enter the value at the point of their intersection with the Magenta line. Note ● If [B] Vertical Position or [X] Horizontal Direction is selected, the visible point in the adjustment pattern in [Head Position Adjustment] dialog box is marked in a Red border.
- Page 151 5. Printer Maintenance ■ Adjust the Vertical Position Read the value of the apparently smoothest (stepless) interconnection of the Magenta and Black lines in the head position adjustment pattern. In the following case, for example, the adjustment value is “0”: Check (B) in [Vertical Direction] in Step 3 in the [Head Position Adjustment] sheet and enter “0.”...
- Page 152 5. Printer Maintenance ■ Adjust the Horizontal Position Read the value of the apparently smoothest (stepless) interconnection of the Magenta and Black lines in the head position adjustment pattern. In the following case, for example, the adjustment value is “+18”: Check (X) in [Horizontal Direction] in Step 3 in the [Head Position Adjustment] sheet and enter “18.”...
- Page 153 5. Printer Maintenance Having entered the adjustment value, click [Proceed to Step 4].
- Page 154 5. Printer Maintenance Step 4. Adjust Cyan and Yellow Check [C] Vertical Direction and [Y] Horizontal Direction in adjustment pattern [C] (Cyan) and read and enter the value at the point of their intersection with the Magenta line. Read adjustment pattern [Y] (Yellow) in the same manner. ([D] Vertical Direction, [Z] Horizontal Direction) Note ●...
- Page 155 5. Printer Maintenance ■ Adjust the Vertical Position With regard to Cyan and Yellow, read the value of the apparently smoothest (stepless) interconnection of the Magenta and other colored lines in the Printhead position adjustment pattern. In the following case, for example, the Cyan adjustment value is “+18”: Adjust Yellow in the same manner.
- Page 156 5. Printer Maintenance ■ Adjust the Horizontal Position With regard to Cyan and Yellow, read the value of the apparently smoothest (stepless) interconnection of the Magenta and other colored lines in the Printhead position adjustment pattern. In the following case, for example, the Cyan adjustment value is “+18”: Adjust Yellow in the same manner.
- Page 157 5. Printer Maintenance When the entry is complete, click [Send]. When the transmission confirmation window appears, click [Yes]. The adjustment value is transmitted to the printer to adjust the head positions.
- Page 158 5. Printer Maintenance Click [OK]. Click [Print] again to print a head position adjustment pattern and check that the head positions have been adjusted correctly. ● Check the adjustment pattern printed. If the line at the “0” position in each color appears smoothly linked, go to Step 14.
- Page 159 5. Printer Maintenance When the head position adjustment process is complete, click [Close]. The head position adjustment completion confirmation message is displayed. Click [Yes].
-
Page 160: Detailed Printhead Position Adjustment
5. Printer Maintenance 5-3 Detailed Printhead Position Adjustment These adjustment procedures are intended for maintenance personnel who have completed regular [Printhead Position Adjustment] but seek more detailed adjustment. Note ● Fine tuning of the printhead cannot be performed for business cards and card-size paper. Apply settings under postcards. - Page 161 5. Printer Maintenance The [Detailed Printhead Position Adjustment] dialog box appears. Click [The details of the adjustment method are here] to view operating procedures from [Help]. Check that the printer is not running, and then click [Print] in Step 1 “Print an Adjustment Pattern.”...
- Page 162 5. Printer Maintenance When the confirmation window appears, click [Yes]. ■ Detailed adjustment pattern (1) Feeding (2) Direction (3)...
- Page 163 5. Printer Maintenance The confirmation window appears to see if the adjustment pattern has been printed correctly or not. Click [Yes]. Clicking [No] prints the adjustment pattern again. Step 2. Adjust Black color. Check [1], [2], and [3] in adjustment pattern [K] (Black) and read and enter the value at the point of their intersection with the Magenta line.
- Page 164 5. Printer Maintenance Note ● Selecting [1], [2], and [3] will show the points to view in Red in the adjustment pattern in the [Detailed Prinhead Position Adjustment] dialog box. ● To review the last setting entered, click [Return to Step 1]. Having entered the adjustment value, click [Proceed to Step 3.]...
- Page 165 5. Printer Maintenance Step 3. Adjust Cyan and Yellow. Check [1], [2] and [3] in adjustment pattern [C] (Cyan) and [1], [2] and [3] in adjustment pattern [Y] (Yellow) and read and enter the value at the point of their intersection with the Magenta line.
- Page 166 5. Printer Maintenance When the entry is complete, click [Send]. The transmission confirmation window appears. Click [Yes]. The adjustment value is transmitted to the printer to adjust the head positions.
- Page 167 5. Printer Maintenance Click [OK]. Click [Print] again to detailed adjustment pattern and check that the head positions have been adjusted correctly. Check the adjustment pattern printed. If the line at the “0” position in each color appears smoothly linked, the adjustment process is completed. If the lines appear out of alignment, retry from Step 1 afterwards.
- Page 168 5. Printer Maintenance Click [Close]. A message is displayed to confirm the completion of the printhead position fine-tuning. Click [Yes].
-
Page 169: Check The Output Setting Value
● Printer settings cannot be printed while printing is in progress or an error persists. Open the [Utility] sheet in the [Swiftcolor SCC-4000D Properties] dialog box and click [Output Setting Value]. The confirmation dialog box appears. - Page 170 5. Printer Maintenance Select [Output to Printer] or [Output to File] and click [Proceed]. Select [Output to Printer] in most situations. The current setting values set in the printer are printed. ■ How to Read Output Setting Value S C C - 4 0 0 0 D No.XXXXX P r i n t e r S e r i a l N u m b e r Ver.00.XX...
-
Page 171: Replacing Ink Tanks
5. Printer Maintenance 5-5 Replacing Ink Tanks When the remaining ink level becomes low, the message “XXXX ink low” is displayed on the Status Monitor to notify you that the corresponding ink tank will soon be out of ink. When the ink tank has become out of ink although printing can be continued, the message “Out of XXXX ink”... - Page 172 ● When the message “XXXX ink low” is displayed, get a new ink tank as soon as possible. For how to get a new ink tank, contact your local dealer. ● To maintain the best printing quality, please use only Swiftcolor SCC-4000D ink tanks. When purchasing ink tanks, check that they bear the following model numbers:...
- Page 173 5. Printer Maintenance Open the ink tank door. Open the ink tank cover.
- Page 174 5. Printer Maintenance Pull out an empty ink tank slowly. Take out a new ink tank from the box.
- Page 175 5. Printer Maintenance Important ● Do not touch the ink outlet and terminal to prevent soiling of the the surrounding work area, damage to the ink tank, and poor printing. ● Never apply excessive force nor drop an ink tank. Ink can stain clothing and the work area.
- Page 176 5. Printer Maintenance Load a new ink tank. Slowly insert the ink tank deeply into the ink tank slot with the correct side up. Caution ● There are sharp pins in ink tank slots. Never put your fingers into this area.
- Page 177 5. Printer Maintenance Close the ink tank cover securely. Close the ink tank door.
-
Page 178: Replacing The Maintenance Cartridge
5. Printer Maintenance 5-6 Replacing the Maintenance Cartridge When the maintenance cartridge is filled with the collected ink, the message “Maintenance cartridge full error” is displayed in the status information area on the Status Monitor, and the printer stops. Get a new maintenance cartridge, and replace it with the old one. Caution ●... - Page 179 5. Printer Maintenance When the maintenance cartridge is filled with collected ink, an error message is displayed on the Status Monitor. Open the maintenance cartridge door.
- Page 180 5. Printer Maintenance Draw out the maintenance cartridge slowly. Important ● When removing the maintenance cartridge full of ink, take care not to incline or drop it. The spilled or scattered ink may stain the floor or clothing. Take out a new maintenance cartridge from the box.
- Page 181 5. Printer Maintenance Insert a new maintenance cartridge. Close the maintenance cartridge door. The error message on the Status Monitor disappears, and printing starts.
- Page 182 5. Printer Maintenance Put the used maintenance cartridge in the plastic bag included with the new maintenance cartridge and properly dispose it.
-
Page 183: Used Ink Tanks
5. Printer Maintenance 5-7 Used Ink Tanks Important ● Dispose the used ink tank in accordance with local laws and regulations. 5-8 Used Maintenance Cartridge Important ● Dispose the used maintenance cartridge in accordance with local laws and regulations. -
Page 184: Cleaning The Printer
5. Printer Maintenance 5-9 Cleaning the Printer As the printer is used, ink and paper dust will be collected inside the printer. If the interior of the printer becomes dirty, this will cause prints to become dirty or interfere with smooth paper feeding. - Page 185 5. Printer Maintenance Open the ink tank door. Press the upper unit release lever to open the upper unit.
- Page 186 5. Printer Maintenance Using a dry cloth, thoroughly remove ink, dust, and paper dust around the transport area. Note ● Do not use paper towels or tissue paper. Cut paper chips or paper dust entering the printer may cause failures. ●...
- Page 187 5. Printer Maintenance After completion of cleaning, close the upper unit, then close the ink tank door.
-
Page 188: 6� Troubleshooting
6� Troubleshooting This section describes how to troubleshoot problems when the printer is not operating correctly� If you cannot solve the problem by following these troubleshooting procedures, please contact the dealer where you purchased the printer or the nearest contact your dealer�... - Page 189 6. Troubleshooting Error Message Problem Solution Paper Length The print data and Check the print data and the length of the paper different 1 to 3. the length of the loaded. paper loaded do not match. Paper Width The width of the If wrong paper is loaded or the side guide is displaced, different.
- Page 190 6. Troubleshooting Error Message Problem Solution Feed error 1 The paper is not fed. Reload the paper and try again. → 1-4 Paper Loading Procedure (P.16) Feed error 2 Paper has been Do not pull out paper during printing. If it is absolutely pulled out of the necessary to pull out paper during printing, press the feeder tray during...
- Page 191 Contact the dealer from whom this printer was operator call has purchased or our contact your dealer. occurred. Connected to a Connected to a Connect to the Swiftcolor SCC-4000D. model other than printer other than Swiftcolor the Swiftcolor SCC- SCC-4000D.
-
Page 192: Warning Messages
6. Troubleshooting ■ Warning Messages Error Message Problem Solution XXXX ink low. The Bk/C/M/Y inks Prepare new ink tanks. are diminishing. (XXXX represents Black, Cyan, Magenta, or Yellow.) Maintenance The maintenance Replace with a new maintenance cartridge. cartridge level low. cartridge will be full with collected waste ink soon. -
Page 193: When Paper Is Jammed
6. Troubleshooting 6-2 When Paper is Jammed If a paper jam occurs during printing, printing is suspended and the error message “Paper jam X” is displayed. Remove the jammed paper following the procedure described below. Open the ink tank door. Press the upper unit open lever to open the upper unit. - Page 194 6. Troubleshooting While turning the jam recovery dial in the direction to eject paper, remove jammed paper from the transport section. If paper cannot be removed in step 3, remove it by turning the dial in the direction to eject paper with pinch roller opened. Pinch roller cover...
- Page 195 6. Troubleshooting After removing paper, return the pinch rollers to their original positions, close the upper unit, and then close the ink tank door. Set paper again. → 1-4 Paper Loading Procedure (P.16) Printing restarts. Note ● To cancel the print job, click [Cancel Print] in the Status Monitor. →...
-
Page 196: Printer Not Operating Correctly
→ 5-5 Replacing Ink Tanks (P.164) The Swiftcolor SCC-4000D printer driver is not Make sure that the Swiftcolor SCC-4000D Printer is selected on the computer. selected when you start the print job. Print data contains an image with a large If you see the STATUS lamp flashing, this means capacity. - Page 197 6. Troubleshooting Check Point Solution The printer has been printing for a long period. If the printer prints for a long period the printhead may overheat. To protect the printhead the Status Monitor will display a printhead overheated messages and stop the print job. Just wait for the printhead to cool down.
- Page 198 6. Troubleshooting Check Point Solution Check if the ink Tank has ink left but still displays Detach the ink Tank and attach it again. [Run Out of Ink]. If the problem persists, contact your dealer. ■ Printing Does Not Stop/ Data is Not Sent/ Settings are Not Sent from Utility/ Status Cannot be Recognized on the Status Monitor�...
- Page 199 6. Troubleshooting ■ Paper is Not Feeding Correctly Check Point Solution Check whether non-exclusive paper is used. Use paper exclusively for the color card printer. Using non-exclusive paper can result in a paper jam or failure. → 3-2-6.Paper Type (P.61) The edge of the paper is folded or curled.
-
Page 200: Print Results Are Unsatisfactory
Check a Interface cable and make sure that it is connected to the printer and the computer. The Swiftcolor SCC-4000D printer driver is not Make sure that the Swiftcolor SCC-4000D Printer is selected on the computer. selected when you start the print job. - Page 201 6. Troubleshooting Check Point Solution Check whether the paper feed interval is set. Open the Advanced Settings sheet of the printer driver and Adjust the Paper feed interval. → 3-6-2. Paper Feed Interval (P.89) ■ Print Quality Is Poor Check Point Solution Streaks appear on the printout.
- Page 202 6. Troubleshooting Check Point Solution The overall print quality is poor. The use of dedicated paper for color card printer is recommended. Using paper that is not dedicated may possibly lower the quality of printing, and further lead to jamming and malfunctions. ■...
- Page 203 6. Troubleshooting Check Point Solution Image is faint. Try setting the sharpness in [Sharpness] in [Detailed Settings] on the Color sheet of Printing Preferences of the printer driver. → 3-4-7. Sharpness (P.78) ■ Printing In One Color Check Point Solution The printer driver is set to print in single color.
- Page 204 ● When printing is performed with the remaining ink level detection function disabled, damage to the printer or a trouble can result. ● Swiftcolor/Kanematsu is not responsible for any failure resulting from the use of an ink tank refilled with ink.
- Page 205 6. Troubleshooting The procedure for disabling the remaining ink level detection function is described below. A warning error message is displayed on the [Status Monitor]. Clicking “Display the details of the selected status” displays the Status Monitor Help.
- Page 206 6. Troubleshooting Press down the [PAUSE] key on the operation panel for at least 5 seconds. The remaining ink sensor function is disabled and the Status Monitor displays [Stopping XXXX ink level detection]. The remaining ink indication in the ink information is grayed out.
- Page 207 6. Troubleshooting Note ● The message on the [Status Monitor] disappears and the corresponding color lamp on the printer goes out when a new ink tank for Swiftcolor SCC-4000D is installed in the printer.
-
Page 208: 7� Appendix
7� Appendix 7-1 Moving The Printer After moving the printer on the same floor or to another floor, install it properly following the procedure described below. Caution ● This product weighs about 25 kg� Two persons standing at the front and back of the printer must lift the printer while holding the left and right handles provided at the bot- tom of the printer�... - Page 209 7. Appendix Click [Moving The Printer]. Important ● If a warning is issued when you press the [Moving the Printer], refer to the following: → <To perform the above-mentioned operation using an authority other than the Administrator privilege.> (P.93)
- Page 210 7. Appendix Click [Yes]. The printer begins preparations for relocation, taking approximately 2 minutes. Note ● This preparation for moving the printer discharges ink inside the purge unit to prevent the ink from taking inside the printer. When the printer has finished preparations, press and hold the power key for at least 1 second to turn off the printer.
- Page 211 7. Appendix Important ● Do not move the printer with the upper unit, ink tank door, or maintenance cartridge door open. The printer can break down or it can be damaged. ● To move the printer on the same floor or within the same building in, the ink tanks need not be removed.
-
Page 212: Shipping The Printer
7. Appendix 7-2 Shipping the Printer When transporting the printer over a long distance, be sure to observe the following precautions. Caution ● Call the Tech support for advice before you ship the printer a long distance or move the printer by car or truck where it may be subjected to shock and vibration� Moving the printer without the proper preparation could subject it to shocks and vibrations which could damage the printer and cause a fire�... - Page 213 7. Appendix Check that the warning message “Maintenance cartridge near full” is not displayed on the Status Monitor. When the warning message is displayed, replace the maintenance cartridge with a new one, and then start the work. Right-click the printer driver icon, select [Printer Properties], and then click the [Utility] tab.
- Page 214 7. Appendix Important ● If a warning is issued when you press the [Shipping the Printer], refer to the following: → <To perform the above-mentioned operation using an authority other than the Administrator privilege.> (P.93) Click [Yes]. The printer begins preparations for relocation, taking approximately twenty minutes. Pack the printer properly following the instructions of the dealer or service technician before transporting it.
- Page 215 7. Appendix Important ● Do not move the printer with the upper unit, ink tank door, or maintenance cartridge door open. The printer can break down or it can be damaged. ● Before transporting the printer, be sure to execute [Shipping The Printer]. If ink tanks are removed before [Shipping The Printer] is executed, ink leaking from the ink tank slots can stain your clothes and surrounding work area.
-
Page 216: Software Uninstallation
This section explains how to uninstall the printer driver that has been installed on the computer. Before uninstalling the printer driver, close all applications running, check that all print jobs have ended. Select [Swiftcolor SCC-4000D]-[Swiftcolor SCC-4000D Printer Driver Uninstall] from [All Programs] or [Programs] on the [Start] menu. - Page 217 7. Appendix Click [Finish]. The [Changing System Settings] dialog box appears. Click [Yes] to restart Windows. Note ● If [No] is clicked, be sure to restart the computer before installing the printer driver again.
-
Page 218: Network Utility
● Install Network Utility in the course of installing the printer driver for network. ● When using Network Utilities, be sure to configure settings as Network Administrator. Select [All programs] dialog box from the [Start] menu in Windows. Click [Swiftcolor SCC-4000D Network IF]. - Page 219 7. Appendix Click [Utility]. Searches for the printer on the network. The [Network Utility] starts.
-
Page 220: Toolbar
7. Appendix 7-4-1� Toolbar Printer setting Opens the Network Settings window for a printer. LAN status Displays communication status of wired LAN. Serch for printers again Searches for a printer again. Environmental setting Configures environmental settings of the Network Utilities. Show utility help Displays the Utility Help screen Utility closed... -
Page 221: Settings
7. Appendix 7-4-3� Settings Click [Settings] on the menu bar and open the pull-down menu. ■ Printer Settings Clicking [Printer Settings] on the pull-down menu opens the password setting dialog. -Default password is [admin]� After entering password, click [OK]. - Page 222 7. Appendix Printer Setting window is displayed. The [Basic settings], [TCP/IP], and [LOG settings] are described. ● [Basic settings] Specify the location Enter the location of printer installed. * The number of characters that can be entered: 0 to 15 characters Set password Change the current password.
- Page 223 7. Appendix ● TCP/IP Get IP address Automatically obtains IP address. automatically Specify IP address Specify IP address. Select this option when IP address is not obtained from the DHCP server. ● Log settings...
- Page 224 7. Appendix Printer log Enter the location for the printer log file to be saved. PC log Check this check box when performing output for logs of the Network Interface Library to a file. Destination Enter save location for computer log. Click [OK].
- Page 225 7. Appendix ■ MAC address filter (Used when more than 2 printers are being used�) Click [MAC address filter] on the pull-down menu. Password Setting dialog appears. Enter the password and Click [OK]. * Default password is “admin”. However, if password is changed in [Basic Settings]of [Settings], that password will be in effect.
- Page 226 7. Appendix When [Mac address filter] window is displayed, check this check box and enter settings. Use MAC address filter Check this check box when using MAC address filter. MAC address Enter MAC address. Add/Delete Adds and deletes MAC address. MAC address list Displays the list of MAC addresses registered to the printer.
- Page 227 7. Appendix ■ Restore the factory default value Click [Restore the factory default value] on the pull-down menu. Password Setting dialog appears. Enter the password and Click [OK]. * Default password is “admin”. However, if password is changed in [Basic Settings] of [Settings], that password will be in effect.
-
Page 228: Display
7. Appendix 7-4-4� Display Click [Display] on the pull-down menu. * The check box is checked by default. If unchecked, the [Tool bar] and [status bar] will be displayed. 7-4-5� Environmental settings Click [Environmental Settings] on the pull-down menu. - Page 229 7. Appendix ■ Utility Environmental settings Click [Utility environmental settings]. ● [Range of seaching] Specify IP address for Check ON: When specifying IP address to search. searching Add/Delete Check OFF: Searching for a printer on the network. List of IP address Add or Delete IP addresses on search list.
- Page 230 7. Appendix ● [Display items] Select setting items to be displayed during start-up. * Printer name is always displayed so it is not included in the selectable items. Click [Environmental Settings] on the menu bar for a pull-down menu and click [Time-out Settings].
- Page 231 7. Appendix ■ Time-out settings Configure setting to extend the duration of network time-out to avoid resending print data. Click [Time-out settings] on the pull-down menu. Check the [Extend Time-out Value] check box and click [OK].
-
Page 232: Help
7. Appendix 7-4-6� Help Click [Help] on the pull-down menu. ■ Utility Help Click to display the Help of this utility. ■ Version information Click to display the version of this utility. After finished with all settings, click [Settings] on the menu bar and click [Utility closed] on the pull-down menu. -
Page 233: Specifications
Specifications ■ Printer ■ Printing method Inkjet Print colors Full color Output resolution 1200dpi×1200dpi Printing speed Business Card, ID-1(Plastic card): 100 sheets/min. Postcard: 45 sheets/min. Envelope: 28 sheets/min. Plastic card(3.5x5.5inch):50 sheets/min Printable area 107.8 mm (W) × 297.0 mm (L) Print margin Top/Bottom: 1.5 mm (in relation to paper... -
Page 234: Index
Index Index Ink Information ........131 Adjusting the Printhead Position ..... 137 LAN port ..........5 Auto stacker ..........7 Level Correction ........77 Light Cleaning ......... 36 Brightness ..........73 Maintenance Cartridge Information ..133 Medium Cleaning ........36 Cleaning .......... - Page 235 Index Index Rating plate ..........7 Sharpness ..........78 Shipping the Printer......... 205 Shipping The Printer ....... 92 Side guide ..........6 Side guide lever ........6 Sleep 94 Sleep Timer ..........96 Special Settings ........111 Status Monitor ......... 124 Strong Cleaning ........
- Page 236 Contact Information Swiftcolor/Kanematsu KANEMATSU USA INC. 100 Randoloph Road Somerset, NJ 08873 USA URL : www.swiftcolor.com E-mail: info@swiftcolor.com Kanematsu G.m.b.H Duesseldorf Head Office Oststrasse 34, D-40211, Duesseldorf, Germany URL : www.swiftcolor.com E-mail: info@swiftcolor.com...
Need help?
Do you have a question about the SCC-4000D and is the answer not in the manual?
Questions and answers
Magenta ink cartridge not recognized. our printer all of a sudden just stopped working and indicated the magenta ink was empty. however, the cartridge is almost full. we even tried three different cartridges and still get the same error. we use and alcohol cleaning swab to clean the needles and electronic contact parts but that didn't help. please what else can we do to fix this?
To fix a SwiftColor SCC-4000D printer that does not recognize the magenta ink cartridge, follow these steps:
1. Remove the magenta ink cartridge.
2. Check for proper orientation and ensure it is not damaged.
3. Slowly insert the ink tank deeply into the correct ink tank slot with the correct side up.
4. Close the ink tank cover securely.
5. Close the ink tank door.
If the issue continues and the printer still does not detect the ink level, press the [PAUSE] key for 5 seconds or longer to continue printing. Note that this disables the remaining ink sensor function, and the disabled state is logged.
This answer is automatically generated