
Related Manuals for Uniden XDECT SSE25 Series


Summary of Contents for Uniden XDECT SSE25 Series
- Page 1 XDECT SSE25 Series For more exciting new products please visit our website: Australia: www.uniden.com.au New Zealand: www.uniden.co.nz...
- Page 2 Important Notice: Under power failure conditions this appliance may not operate. Please ensure that a separate telephone, not dependent on local power, is available for emergency use. General Notices for New Zealand Model: The grant of a NZ Telepermit for any item of terminal equipment indicates only that Telecom has accepted that the item complies with minimum conditions for connection to its network.
- Page 3 5 of each Battery Rechargeable battery pack cover (BT-694n) If any items are missing or damaged, contact your place of purchase. Never use damaged products! Need Help? Get answers at our website: www.uniden.com.au for Australian model or www.uniden.co.nz for New Zealand model.
-
Page 4: Table Of Contents
What's in the manual? Installing Your Phone ......1 Using the Intercom .......15 Charge the Battery .........1 Using Special Features ...... 16 Connect the Telephone Cord ....2 Using Do Not Disturb ......16 Getting to Know Your Phone....3 Adjusting the Base Visual Ringer ..16 Using the Audio Boost ......16 Base Keys and How They Work ....3 Using Text-To-Speech ......16... -
Page 5: Installing Your Phone
Installing Your Phone Charge the Battery 1) Unpack all handsets, battery packs, and battery covers. If any battery cover is already on the handset, press in on the notch and slide the cover down and off. 2) Line up the battery pack connector with the jack inside the handset. -
Page 6: Connect The Telephone Cord
8) Place a handset in the base and any accessory handset(s) in the charger(s) with the display(s) facing forward. The light on the base and each charger CHArGE should all turn on. If... Try... - reseating the handset. CHArGE - checking the AC adapter connection. light does - seeing if the outlet is controlled by a not turn on... -
Page 7: Getting To Know Your Phone
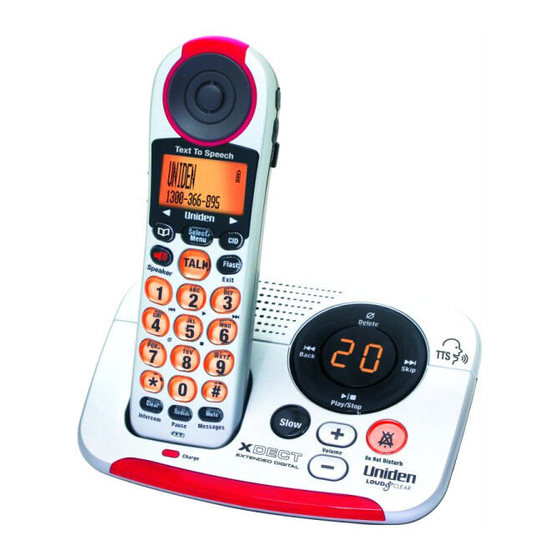
Getting to Know Your Phone Base Keys and How They Work Front view BACK Message counter DELETE Speaker SKIP Record Greeting PLAY/ FIND STOP Find Answering Machine On/Off Cradle DO NOT Slow Ringer DISTURB Select Do Not Disturb Charging contacts Microphone CHARGE Visual... -
Page 8: Parts Of The Handset
Side View Back View GREET ON/OFF RINGER VISUAL RINGER switch Key name What it does - In standby: cycle through the 4 different ringer tones. rINGEr - In standby: turn the answering system on or off. ON/OFF - In standby: record a new greeting or switch greetings. GrEET - In standby: adjust the brightness of the base visual ringer (see VISUAL rINGEr... - Page 9 Handset keys and how they work Key name What it does (and icon) - In standby or during a call: open the phonebook. PHONEBOOK/ - In the menu: go back to the previous screen. LEFT ( - During text entry: move the cursor to the left. SPEAKEr - Switch a normal call to the speakerphone (and back).
-
Page 10: Using The Belt Clip
Reading the handset display Status icons The table below shows the Time possible icons and what they mean. Since the icons appear 12:00A based on what you're doing Handset #1 with the phone, you won't ever Handset see all of these icons at the banner New CID: 5 same time. -
Page 11: Using The Menus
Using the Menus The menus are To open the menu, press SELECT/MENU designed to be as To select the easy as possible. highlighted Handset Setup option, press Some users don't SELECT/MENU even need the Ans. Setup manual once they to move DOWN Day &... -
Page 12: The Ans. Setup Menu
Any Key Turn on Any Key Answer so you can answer the phone by Answer pressing any key on the twelve-key dial pad. Banner Change the name used on the handset's display. Key Touch Have your keypad sound a tone when you press a key. Tone Change the contract of the display to make it easier to read. -
Page 13: Using Your Phone
If you press the key again after the last letter, the phone starts the same letter sequence with small letters. If you press four times in a row, the phone enters a (small letter). Press five times for b, and six times for c. ... -
Page 14: Changing The Volume
Changing the Volume You can set the ringer and speaker volume separately for the base and each handset. You can change the earpiece volume separately for each handset, also. The available volume levels and when you can change them are listed below. -
Page 15: Using Caller Id And Call Waiting
Using Caller ID and Call Waiting you have to subscribe to Caller ID, Call Waiting, and Caller ID on Call Waiting services to use the features described in this section: contact your telephone provider for more information. When a call comes in, the phone displays the caller’s number and name (if available);... -
Page 16: Using The Phonebook
Using Call Waiting If you get a Call Waiting call, the phone sounds a tone and displays any CID information received for the waiting call. For Australia: Press and then press to accept the waiting call. The first caller FlASH/EXIT is put on hold, and you will hear the new caller after a short pause. -
Page 17: Chain Dialing
Using an Optional Headset You can use a standard 2.5 mm telephone headset with your handsets. To purchase headsets, visit our website; www.uniden.com.au for Australia or www.uniden.co.nz for New Zealand.To install a headset, remove the headset jack cover and insert the headset plug into the jack. -
Page 18: Using Multi-Handset Features
(The cordless handset that comes with your base counts as one of the six.) Your phone may be compatible with other Uniden accessory handsets. Please visit our website for a list of compatible handsets for your base. -
Page 19: Using Call Transfer
Using Call Transfer You can transfer an outside call to any other handset. To... Follow these steps 1. Press to put the call on hold. CLEAr/INTErCOM 2. Select the handset you want to transfer the call to transfer a call (select All to page all the handsets). -
Page 20: Using Special Features
Using Special Features Using Do Not Disturb The Do Not Disturb or DND feature turns off the audio ringers of the base and all handsets at the same time. It does not affect any of the visual ringers. With the phone in standby, press and hold on the base. -
Page 21: Using Voice Message Notification
Things to know about TTS: You have to turn on TTS separately for each handset. Open the menu and select Handset Setup. Then, select TTS On/off, and select On or Off for each handset. To make sure it doesn't interrupt a call or an intercom page, the phone only uses TTS when it starts out in standby. -
Page 22: Using The Answering System
Using the Answering System Setting Up Your Answering System Recording your outgoing message Your personal outgoing message or greeting can be between 2 seconds and 30 seconds long. If you don't want to record an outgoing message, the system will use its pre-recorded greeting: Hello, no one is available to take your call. -
Page 23: Getting Your Messages
Ans. Setup menu options You can change the answering system options from any handset. Just open the menu and select Ans. Setup. Enter a 2-digit PIN so you can access your answering Security Code system from any touch-tone phone (see page 21). Set the number of rings (6, 9, or 12) before the answering system answers the phone. -
Page 24: Screening Your Calls
How to operate your answering system From a handset (start remote To... From the base operation first) Press Press PLAY/STOP MUTE/MESSAGES The system announces the number of new and old messages, play new then plays the first new message followed by the day and time messages it was received. -
Page 25: Using The System While You're Away From Home
If you mute the call screen, the system continues taking the message: it just stops playing through the speaker. Only one handset at a time can screen calls. If another handset is screening the call, the handset beeps and returns to standby. Using the System While You're Away from Home You can also operate your answering system from any touch-tone phone. -
Page 26: Solving Problems
Solving Problems If you have any trouble with your phone, try these simple steps first. If you still have a question, visit our website; www.uniden.com.au for Australia or www.uniden.co.nz for New Zealand. If… Try… - Checking the telephone cord connection. -
Page 27: Weak Or Hard To Hear Audio
If… Try… - Making sure the answering system is turned on. The answering system - Making sure the base AC adapter is plugged into a does not work. continuous wall outlet (i.e., not controlled by a wall switch). - Making sure the Record Time is not set to The answering Announce Only. -
Page 28: Noise Or Static On The Line
Noise or Static On The Line Do you use a T-Coil hearing aid? The most common cause of noise or If you have a hearing aid equipped static on a cordless phone is with a telecoil (T-coil) feature, the interference. Here are some interaction between the hearing aid and digital cordless phones can common household sources of... -
Page 29: Resetting And Registering Handsets
your DSL service might have left some filters for you; if not, call your DSL provider or look in any electronics store. Plug the DSL filter into the telephone wall jack and then plug your phone’s base into the filter. Make a test call to make sure the noise is gone. resetting and registering Handsets If you are having trouble with a handset or if you want to replace one, you need to clear the registration information from the base and the handset:... -
Page 30: Handling Liquid Damage
Handling Liquid Damage Moisture and liquid can damage your cordless phone. If the handset or base is exposed to moisture or liquid, but only the exterior plastic housing is affected, wipe off the liquid & use as normal. If moisture or liquid has entered the plastic housing (i.e. liquid can be heard in the phone or liquid has entered the handset battery compartment or vent openings on the base), follow the steps below: Handset... -
Page 31: Important Information
Important Information Terms Used In This Manual Accessory An extra handset that can register to and be used with an expandable phone Handset base. All accessory handsets must be registered to a base. The main part of the phone. It connects to your phone line and lets you make and Base receive calls. -
Page 32: Battery Information
Using another charger may damage the battery or cause it to explode. rechargeable batteries must be recycled or Disposed of properly. Uniden works to reduce lead content in pVC coated cords in our products and accessories. -
Page 33: Using The Wall Mount Bracket
Using the Wall Mount Bracket This accessory wall mount bracket lets you mount the base on any standard telephone wall plate. 1) Thread both the AC adapter cord and telephone cord through the hole in the wall mount bracket. Connect each cord to the proper jack on the base. -
Page 34: Removing The Wall Mount Bracket
4) Connect the telephone cord to the wall jack. Hook the other side of the telephone cord into the notch OR tuck the excess cord into the open space in the bracket. If you don't have a 5) Place the mounting slots over the pins wall plate: on the wall plate, and slide the base - You can mount... -
Page 35: One-Year Limited Warranty
Australia or New Zealand and will expire one (1) year from the date of the original retail sale. If a warranty claim is made, this warranty will not apply if the Product is found by Uniden to be: (A) Damaged or not maintained in a reasonable manner or as recommended in the relevant Uniden Owner’s Manual;... - Page 36 © 2011 Uniden Australia Pty Ltd/Uniden New Zealand Limited Printed in PRC U01UN334BZA(0)
Need help?
Do you have a question about the XDECT SSE25 Series and is the answer not in the manual?
Questions and answers