Table of Contents
Advertisement
Battery:
Variable speed:
Charger:
Charger input:
Charger output:
Weight:
Need Assistance?
Call us on our toll free customer support line:
1-866-349-8665
Technical questions
Replacement parts
Parts missing from package
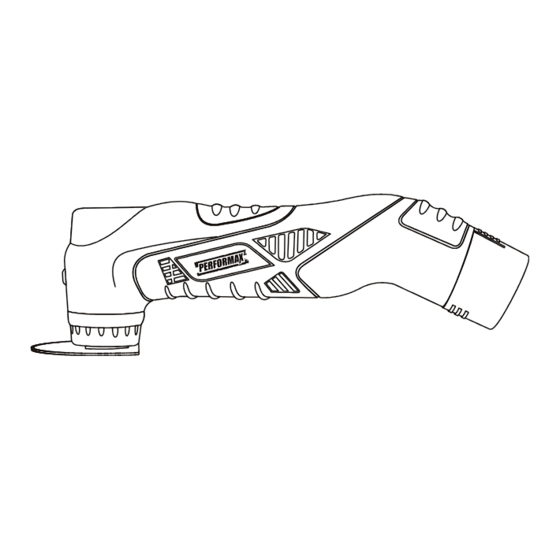
12 V OSCILLATING TOOL
PRODUCT SPECIFICATIONS
12 V, 1.5 Ah Li-ion
0–18,000 OPM (no load)
1 hour diagnostic, Class 2
120 V AC, 60 Hz
12 V DC, 2.2 A (maximum)
2 lb (0.91 kg)
241-0500
Owner's Manual
Advertisement
Table of Contents

Related Manuals for Performax 241-0500


Summary of Contents for Performax 241-0500
-
Page 1: Product Specifications
12 V OSCILLATING TOOL 241-0500 Owner’s Manual PRODUCT SPECIFICATIONS Battery: 12 V, 1.5 Ah Li-ion Variable speed: 0–18,000 OPM (no load) Charger: 1 hour diagnostic, Class 2 Charger input: 120 V AC, 60 Hz Charger output: 12 V DC, 2.2 A (maximum) Weight: 2 lb (0.91 kg) -
Page 2: Table Of Contents
TABLE OF CONTENTS Product specifications ………….……………………………………………………. Table of contents ……………………………………………………………………... General safety warnings …………………………………………………………….. 3–4 Eye, ear & lung protection …………………………………………………………… 3–4 Electrical safety ………………………………………………………………………. Power tool safety ……………………………………………………………………... 5–6 General safety rules ………………………………………………………………….. Work area ………………………………………………………………….………….. Electrical safety ………………………………………………………………………. Personal safety ……………………………………………………………………….. -
Page 3: General Safety Warnings
GENERAL SAFETY WARNINGS CAUTION: Before using this tool or any of its accessories, read this manual and follow all Safety Rules and Operating Instructions. This instruction manual includes the following: General Safety Rules Specific Safety Rules and Symbols ... -
Page 4: Electrical Safety
GENERAL SAFETY WARNINGS WEAR A DUST MASK THAT IS DESIGNED TO BE USED WHEN OPERATING A POWER TOOL IN A DUSTY ENVIRONMENT. WARNING: Dust that is created by power sanding, sawing, grinding, drilling, and other construction activities may contain chemicals that are known to cause cancer, birth defects, or other genetic abnormalities. -
Page 5: Power Tool Safety
POWER TOOL SAFETY GENERAL SAFETY RULES Avoid contact between the operator's body and grounded surfaces such as pipes, WARNING: radiators, ranges, and refrigerators. There Read and understand is an increased risk of electric shock if the all instructions. Failure to follow all operator's body is grounded. -
Page 6: Use And Care Of Power Tools
POWER TOOL SAFETY PERSONAL SAFETY – cont’d Disconnect the plug from the outlet before making any adjustments, changing Avoid accidental start-ups. Verify that the accessories, or storing the tool. Such switch is in the OFF position before preventive safety measures reduce the risk plugging in the tool. -
Page 7: Specific Safety Rules
SPECIFIC SAFETY RULES WARNING: Secure workpiece. Use clamps or a vice to Know your oscillating hold the workpiece. It is safer than using tool. Do not plug in the charger or your hand and it frees both hands to install the battery in the tool until you operate the tool. -
Page 8: Battery & Charger Safety
BATTERY & CHARGER SAFETY WARNING: Do not use an extension cord. Plug the Only use the charger cord directly into an electrical diagnostic charger supplied with this outlet. tool to charge the 12V Li-ion battery. Charging any other batteries may Use the charger only in a standard damage the charger and possibly cause 120 V AC, 60 Hz electrical outlet. -
Page 9: Battery Pack Recycling
BATTERY & CHARGER SAFETY NOTE: See Pages 26 & 27 for detailed information concerning preparation for recycling battery packs and for battery maintenance. BATTERY PACK RECYCLING To preserve our natural resources, please recycle or dispose of batteries properly. The batteries charged by this charger may contain chemicals and metals that are harmful to the environment. -
Page 10: Symbols
SYMBOLS WARNING: Some of the following symbols may appear on the oscillating tool. Study these symbols and learn their meaning. Proper interpretation of these symbols will allow for more efficient and safer operation of this tool. Volts Direct current Amperes No load speed Hertz Alternating or direct... -
Page 11: Know Your Oscillating Tool
KNOW YOUR OSCILLATING TOOL ON/OFF & speed Speed indictor LED’s control buttons Air vents Battery release worklight button Battery status button Battery status LED’s Battery Saw blade Accessory holder ACCESSORIES AVAILABLE ACCESSORIES Before using any accessory, carefully read the instructions or the owner’s manual for WARNING: Use only accessories the accessory. -
Page 12: Contents
CONTENTS CONTENTS Carefully unpack the oscillating tool. Compare the contents against the “OSCILLATING TOOL COMPONENTS” chart below. NOTE: See illustration of the oscillating tool on Page 13. WARNING: To avoid fire or toxic reaction, never use gasoline, naphtha, acetone, lacquer thinner or similar highly volatile solvents to clean the tool. -
Page 13: Contents
CONTENTS... -
Page 14: Assembly And Operating
ASSEMBLY AND OPERATING CHARGING THE BATTERY PACK WARNING: Use only the diagnostic charger supplied with the tool to charge the 12 V Li-ion battery supplied with the tool. Charging any other batteries with this charger may damage the charger, and possibly cause serious injury. -
Page 15: Charger Led Functions
ASSEMBLY AND OPERATING CHARGER LED FUNCTIONS (Fig. 3) Power ON Green The green LED will stay ON when the light light Function charger is plugged into a ”live” power — source. Power Power Battery partially charged The red LED will flash during charging. Battery Flashing Battery fully charged... -
Page 16: Checking The Battery Charge Status
ASSEMBLY AND OPERATING CHECKING THE BATTERY CHARGE STATUS (if your battery is equipped with the charge indicator system) The level of charge remaining in the battery can be checked by using the battery charge indicator system that is contained in the end of the battery. NOTE: The battery charge remaining may be checked while the battery is installed in the tool with the ON/OFF switch turned... -
Page 17: Installing Accessories
ASSEMBLY AND OPERATING ASSEMBLY AND OPERATING ASSEMBLY AND OPERATING INSTALLING A BATTERY IN THE OSCILLATING TOOL – cont’d Slide the fully charged battery into the matching cavity in the tool handle where the discharged battery has been removed. NOTE: Make sure the two keys (3) in the battery stem align with the matching key ways (4) in the handle. -
Page 18: Installing Sandpaper
ASSEMBLY AND OPERATING INSTALLING ACCESSORIES – cont’d NOTES: Make sure the alignment holes (6) in the blade fit over the alignment pins (7) in the accessory holder. The blade can be mounted at various angles left or right of center if required. -
Page 19: On/Off Switch
ASSEMBLY AND OPERATING ON/OFF SWITCH To turn the tool ON, press the ON/OFF switch (1) once (Fig. 10). NOTES: The LED work light will automatically turn ON when the ON/OFF switch is turned ON. Press the “+” button (2) once to start the tool. -
Page 20: Speed Controls
ASSEMBLY AND OPERATING SPEED CONTROLS Once the tool has been turned ON using the ON/OFF switch (1), press the “+” button (2) once to start the tool. The speed can then be adjusted (Fig. 12). NOTES: The tool will automatically start in the slowest speed. - Page 21 ASSEMBLY AND OPERATING Project Accessory Speed Drywall Half circle Maximum blade Restoring Half circle Medium windows blade Door jamb Wood blade Maximum Door casing Wood blade Med / max Wood Wood blade maximum dowels Floor vent Wood blade Med/max PVC pipe Wood blade Medium Glued...
-
Page 22: Flush Cutting A Door Jamb And Casing For Installing Flooring
ASSEMBLY AND OPERATING FLUSH CUTTING A DOOR JAMB AND CASING FOR INSTALLING FLOORING The oscillating tool can be used to flush cut a door jamb and casing to allow space for the new flooring to fit neatly under the door jamb and casing. For the purpose of demonstrating the procedure, floor tile is being used. -
Page 23: Cutting A Hole In Wood Flooring To Install A Heating Vent
ASSEMBLY AND OPERATING FLUSH CUTTING A DOOR JAMB AND CASING FOR INSTALLING FLOORING – cont’d Continue to make several plunge cuts until the bottom of the door jamb and casing are completely cut off and the loose pieces can be easily removed. Follow the same basic procedure for installing carpet, using a thicker spacer that is the same thickness of the carpet... -
Page 24: Cutting A Hole In Drywall For Installing An Electrical Outlet Box
ASSEMBLY AND OPERATING CUTTING A HOLE IN WOOD FLOORING TO INSTALL A HEATING VENT – cont’d While holding the tool tightly, slowly plunge the corner of the blade into the flooring until it cuts through the flooring. Once the plunge cut is complete, set the tool to its highest speed and complete the cut to the corner of the rectangle. - Page 25 ASSEMBLY AND OPERATING CUTTING A HOLE IN DRYWALL FOR INSTALLING AN ELECTRICAL OUTLET BOX – cont’d NOTE: The blade should be centred on the tool housing and NOT installed in the 90° position. Place the outlet box on the drywall and use a soft lead pencil to trace the required rectangular hole (1) on the drywall (Fig.
-
Page 26: Maintenance
MAINTENANCE GENERAL BATTERY PACK REMOVAL AND PREPARATION FOR RECYCLING WARNING: When servicing, use To preserve our natural resources, please only identical replacement parts. The recycle or dispose of batteries properly. use of any other part may create a hazard or cause product damage. The batteries accompanying this tool may contain chemicals and metals that are DO NOT use solvents when cleaning... -
Page 27: Maintenance
MAINTENANCE LITHIUM-ION BATTERY MAINTENANCE Lithium-ion batteries share many characteristics with Nickel-Cadmium batteries. The major characteristic that is NOT shared with Nickel-Cadmium batteries is that Lithium-ion batteries do not have a “memory” and do not require to be completely discharged periodically. It is recommended that you charge your Lithium-ion batteries after each use so they will be fully charged when needed. -
Page 28: Exploded View
EXPLODED VIEW 16 17 18 19 20 21 25 26 31 32... -
Page 29: Parts List
PARTS LIST WARNING: When servicing, use only original equipment replacement parts. The use of any other parts may create a safety hazard or cause damage to the oscillating tool. Any attempt to repair or replace electrical parts on this oscillating tool may create a safety hazard unless repairs are performed by a qualified technician. - Page 30 PARTS LIST Key # Part # Part Name Quantity 3150010058 Blade 3140060010 Connection plate 4110020012 2040050013 Eccentric shaft 2030020028 Flat washer 4010010022 Bearing 61900Z 3140020015 O-ring 3190060001 Gasket 2040230002 Bearing block 4010050001 Bearing S607 2010130007 Balance block 4010010001 Bearing 605Z 2020050005 Head cover 4010010015...
-
Page 31: Warranty
® back to your nearest MENARDS® retail store. At its discretion, PERFORMAX agrees to have the tool or any defective part(s) repaired or replaced with the ®...
Need help?
Do you have a question about the 241-0500 and is the answer not in the manual?
Questions and answers