Table of Contents
Advertisement
Quick Links
Advertisement
Table of Contents

Subscribe to Our Youtube Channel
Related Manuals for Tally T8106


Summary of Contents for Tally T8106
- Page 1 Tally T8106/T8406 Color Laser Printers Quick Start Guide...
- Page 2 PEERLESS PRINT® 5c is a registered trademark of PEERLESS SYSTEMS CORP. Copyright © 1992-2001 PEERLESS SYSTEMS CORPORATION Adobe and PostScript are registered trademarks of Adobe Systems, Inc. All other trademarks are trademarks or registered trademarks of their respective companies. 2001 Tally Printer Corporation. All Rights Reserved.
-
Page 3: Table Of Contents
Contents Chapter 1 Introduction ......1 About This Manual ........1 Printer Components . - Page 4 Chapter 3 Installing Printer Drivers and Utilities ..33 Tally Printer Autoplay CD....... . . 33 Setting Up a Local Printer in Windows .
- Page 5 Help From Your Dealer....... . 58 Tally Technical Support ........59 How to Contact Tally.
-
Page 7: Chapter 1 Introduction
About This Manual This quick start guide is intended to provide guidance for the proper installation of your Tally T8106/T8406 printer. If you require more information to install your printer, consult the User Guide located on the Tally T8106/T8406 CD-ROM. For further help, you can reach Tally... -
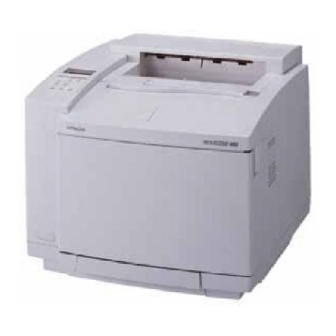
Page 8: Printer Components
Tally T8106/T8406 Color Laser Printers Quick Start Guide Printer Components Top Cover provides access to internal supplies such as the oil bottle, and Control Panel keys and functions as the paper exit tray. indicator lights allow you to control and monitor printer operations. - Page 9 Chapter 1 Introduction Parallel Port provides direct printer-to-computer connection. Power Cord Socket RJ-45 Port provides provides power to the printer. printer-to-network connection.
- Page 10 Tally T8106/T8406 Color Laser Printers Quick Start Guide Fusing Unit thermally bonds the toner to the media. Fuser Cleaning Roller removes any dust from the fusing unit and the Oil Bottle stores oil for fixing roller. use in the fixing process.
- Page 11 Chapter 1 Introduction Toner Cartridges provide the toner for the printing process. Ozone Filter reduces the amount of ozone emitted during the Waste Toner Pack printing process. collects and retains waste toner.
-
Page 13: Chapter 2 Setting Up Your Printer
Operating System Requirements To use the Tally printer drivers included for this model, the connecting computer must use one of the following Microsoft operating systems: • Windows 95 •... -
Page 14: Hardware Requirements
Tally T8106/T8406 Color Laser Printers Quick Start Guide Hardware Requirements The connecting computer must meet the following minimum hardware requirements: Microprocessor Pentium® 133 MHz minimum. Pentium® 200 MHz or higher microprocessor is recommended. Memory At least 32 MB. 64 MB or more of memory is recommended. - Page 15 Chapter 2 Setting Up Your Printer The surface that holds the printer must support at least 313 pounds or 142 kilograms, which includes the weight of the printer, paper, and all optional components. The surface must be large enough to support an extended paper tray.
-
Page 16: Unpacking The Printer
Tally T8106/T8406 Color Laser Printers Quick Start Guide Unpacking the Printer The printer is heavy. Two or more persons must use the four grip locations on the underside of the printer to move it. The printer is packaged with a lift-off box top and bottom tray carton. -
Page 17: Moving The Printer
Repacking a printer that has previously been installed needs careful attention. To find out more about the printer repacking instructions or for assistance, go to World Wide Web site www.Tally.com, or contact Tally at e-mail address support@Tally.com. See “Tally Technical... -
Page 18: Installing The Starter Kit
The printer also comes with an ozone filter and a waste toner pack that have been pre-installed at the factory. Additional items are also included with the printer: • Paper tray • Envelope feeder (T8406 only. The T8106 paper tray adjusts to handle envelopes.) • Power cord... - Page 19 Chapter 2 Setting Up Your Printer Fuser Cleaning Roller Toner Cartridges OPC Belt Cartridge Oil Bottle Envelope Feeder Paper Tray Power Cord Oil Dropper...
-
Page 20: Installing The Paper Tray
Tally T8106/T8406 Color Laser Printers Quick Start Guide Installing the Paper Tray No Paper Feeder Insert the paper tray squarely and evenly into the printer. T8106 With Paper Feeder 1. Pull the guide rails outward, and align the tip of the paper tray with the guide rails. -
Page 21: Installing Toner Cartridges
Chapter 2 Setting Up Your Printer Installing Toner Cartridges Each toner cartridge is labeled with the capital letter of the toner color. Insert the toner cartridges in the appropriate slots in the printer from the bottom to the top as follows: C (Cyan), M (Magenta), Y (Yellow), and K (Black). - Page 22 Tally T8106/T8406 Color Laser Printers Quick Start Guide 3. Rock the toner cartridge three or four times in the direction of the arrows on the cartridge to level out the toner inside. 4. Peel the tape off the cartridge and remove the protective cover from the cartridge.
-
Page 23: Installing The Oil Bottle And Fuser Cleaning Roller
Chapter 2 Setting Up Your Printer 5. Insert the toner cartridge care- fully along the guide and into the appropriate toner cartridge slot in the printer. 6. Repeat steps 3 through 5 for each toner cartridge. 7. Close the front cover. Installing the Oil Bottle and Fuser Cleaning Roller The oil lubricates the fusing unit. - Page 24 Tally T8106/T8406 Color Laser Printers Quick Start Guide 1. Release the top cover latch and open the top cover. 2. For the T8106, push the large green levers at the sides of the fuser rollers backward until they click into position.
-
Page 25: Setting The Fuser Cleaning Roller Counter To Zero
Chapter 2 Setting Up Your Printer 4. Insert the fuser cleaning roller. 5. Turn the two green lock levers to lock the fuser cleaning roller and the oil bottle in place. Note: After replacing the fuser cleaning roller, reset the fuser cleaning roller counter to zero. - Page 26 Tally T8106/T8406 Color Laser Printers Quick Start Guide 1. Turn on the printer and wait about 20 seconds while the display shows Load- ing..2. Press MENU/ENTER/ immedi- ately when the display shows Self Test, and continue pressing until the ONLINE lamp blinks.
-
Page 27: Installing The Optical Photoconductor (Opc) Belt
Chapter 2 Setting Up Your Printer Installing the Optical Photoconductor (OPC) Belt Cartridge Caution! Do not touch or wipe off any powder that is on the OPC belt, or expose the OPC belt to light. 1. Open the top and front covers. 2. - Page 28 Tally T8106/T8406 Color Laser Printers Quick Start Guide 3. With the top cover open, remove the protective sheet from the OPC belt cartridge. 4. Remove the two shipping pins from the OPC belt cartridge. 5. Slide the OPC belt cartridge...
- Page 29 Chapter 2 Setting Up Your Printer 6. Press the green OPC belt car- tridge lock levers to the closed position. 7. Close the top and front covers carefully until they lock shut. Note: After replacing the OPC belt cartridge, reset the OPC belt counter to zero.
-
Page 30: Setting The Opc Belt Counter To Zero
Tally T8106/T8406 Color Laser Printers Quick Start Guide Setting the OPC Belt Counter to Zero Printer software tracks OPC belt usage. After the counter reaches a pre- set number, the printer displays a message to indicate that maintenance is necessary. After the first installation, and after every replacement of the OPC belt, set the counter to zero. - Page 31 Chapter 2 Setting Up Your Printer 6. Press MENU/ENTER/ . The display will show Clear BeltCG Execute. 7. Press MENU/ENTER/ . The display will show Completed Clear BeltCG. 8. Press MENU/ENTER/ . The display will show Utility Menu Clear BeltCG. 9.
-
Page 32: Installing The Power Cord
Tally T8106/T8406 Color Laser Printers Quick Start Guide Installing the Power Cord Warning! Use properly grounded wall sockets. Do not use converter plugs. 1. Plug the printer power cord into the printer. 2. Plug the printer power cord into a power source with surge pro-... -
Page 33: Starting The Printer
Chapter 2 Setting Up Your Printer Starting the Printer After you install the Starter Kit and plug in the printer, load paper into the paper tray, turn on the printer, and print a test page. Loading Paper for Test Printing 1. - Page 34 Tally T8106/T8406 Color Laser Printers Quick Start Guide 3. Place about 100 sheets of A4 or standard letter-size (8-1/2” x 11”) paper into the paper tray. 4. Replace the tray cover (T8406 T8106 only). T8406 5. Slide the paper tray back into the...
-
Page 35: Turning On The Printer
“Ready.” Note: If the MESSAGE lamp is lit, a printer error has occurred. Check the display for an error message and see the Tally T8106/T8406 Color Laser Printer User Guide on the Tally CD-ROM. Printing a Test Page To print a test page, use A4 or standard letter-size (8-1/2”... - Page 36 Tally T8106/T8406 Color Laser Printers Quick Start Guide Panel Menu Panel Menu Panel Menu Panel Menu 4. Press the TRAY/ or MEDIA/ Test Menu Test Menu Test Menu Test Menu to select Test Menu. Test Menu Test Menu Test Menu Test Menu 5.
- Page 37 Chapter 2 Setting Up Your Printer Here is a typical printed test page for the Tally T8106/T8406 color printers: If the test page doesn’t print properly, check for error indications on the control panel display and see the Tally T8106/T8406 Color Laser Printers User Guide on the Tally CD-ROM.
-
Page 39: Chapter 3 Installing Printer Drivers And Utilities
Installing Printer Drivers and Utilities Tally Printer Autoplay CD The Tally T8106/T8406 CD included with your printer has an autoplay feature that will automatically start the installation process of the drivers and utilities for your printer. The CD contains the T8106/T8406 printer drivers, network utilities, and the documentation for your printer. -
Page 40: Setting Up A Local Printer In Windows
LPT1 port. To install the printer on your LPT1 port: 1. Insert the CD in your CD-ROM drive. 2. Click the I Accept button. 3. Click the T8106 - Install Software button or the T8406 - Install Software button. 4. To begin the local installation process, click Local. - Page 41 1. Insert the CD in your CD-ROM drive. 2. Click the I Accept button. 3. Click the T8106 - Install Software button or the T8406 - Install Software button. 4. Click the Network button to configure the computer for network printing.
-
Page 42: Assigning The Printer An Ip Address, Subnet Mask And Gateway Address
Tally T8106/T8406 Color Laser Printers Quick Start Guide Assigning the Printer an IP Address, Subnet Mask and Gateway Address To print using the TCP/IP protocol, you must assign the printer an IP address, subnet mask and a gateway. If you are uncertain about the settings you should use, consult your network administrator. - Page 43 Chapter 3 Installing Printer Drivers and Utilities Panel Menu Panel Menu Panel Menu Panel Menu 4. Press the keys to go to Network Menu Network Menu Network Menu Network Menu the Network Menu. Network Menu Network Menu Network Menu Network Menu 5.
- Page 44 Tally T8106/T8406 Color Laser Printers Quick Start Guide IP Addr IP Addr IP Addr IP Addr 9. Using the keys, change 192.168. 31. (027) 192.168. 31. (027) 192.168. 31. (027) 192.168. 31. (027) the number in parentheses to 027. Then, press the key.
- Page 45 Chapter 3 Installing Printer Drivers and Utilities The following example shows how to set the subnet mask address to 255.255.255.0. Note: Press the key to go back to the previous step. Tray1: Tray1: Tray1: Tray1: 1. Check that “Ready” appears on the Ready Ready Ready...
- Page 46 Tally T8106/T8406 Color Laser Printers Quick Start Guide Network Menu Network Menu Network Menu Network Menu 5. Press the ENTER/ key to select SubNet Mask SubNet Mask SubNet Mask SubNet Mask the SubNet Mask submenu. SubNet Mask= SubNet Mask= SubNet Mask= SubNet Mask= 6.
- Page 47 Chapter 3 Installing Printer Drivers and Utilities Network Menu Network Menu Network Menu Network Menu 11. Press the key to leave the Sub- SubNet Mask SubNet Mask SubNet Mask SubNet Mask Net Mask submenu. The Network Menu appears. Tray1: Tray1: Tray1: Tray1: 12.
- Page 48 Tally T8106/T8406 Color Laser Printers Quick Start Guide Tray1: Tray1: Tray1: Tray1: 2. Press the ONLINE key to go Offline Offline Offline Offline offline. Panel Menu Panel Menu Panel Menu Panel Menu 3. Press the MENU key to start the...
- Page 49 Chapter 3 Installing Printer Drivers and Utilities Gateway Addr Gateway Addr Gateway Addr Gateway Addr 7. Using the keys, change 192.(168). 192.(168). 192.(168). 192.(168). the number in parentheses to 168. Then, press the key. Gateway Addr Gateway Addr Gateway Addr Gateway Addr 8.
-
Page 50: Configuring The Tcp/Ip Printer Port In Windows 95/98/Me
Windows to print over the virtual printer port rather than the physical port. 1. From the Start button, select Settings and click Printers. 2. In the Printers folder, right-click the Tally T8106 or the Tally T8406 printer you just installed. 3. Click Properties. -
Page 51: Configuring The Tcp/Ip Printer Port In Windows Nt 4.0
1. From the Start button, select Settings and click Printers. 2. In the Printers folder, right-click the Tally T8106 or Tally T8406 printer you just installed and select Properties. 3. In the Printer Properties window, select the Ports tab. -
Page 52: Configuring The Tcp/Ip Printer Port In Windows 2000
1. From the Start button, select Settings and click Printers. 2. In the Printers folder, right-click the Tally T8106 or Tally T8406 printer you just installed and select Properties. 3. In the Printer Properties window, select the Ports tab. -
Page 53: Uninstalling Windows Drivers
Before installing any updates to the printer drivers, you should uninstall the old drivers. To uninstall Windows drivers: 1. From the Windows Start button, select Settings and click Printers. 2. In the Printers folder, right-click the Tally T8106 or Tally T8406 printer and select Delete. Installing Macintosh Printer Drivers 1. - Page 54 Note: If the Connected To: window does not show your printer, verify the printer is connected to the network and the printer is configured properly. For further help, see the user guide on the Tally CD-ROM. 10. Close the Chooser.
-
Page 55: Chapter 4 Operating Your Printer
Chapter 4 Operating Your Printer Turning the Printer On 1. Press the main power switch. The printer will perform a series of diag- nostic tests and then begin the warm-up cycle. This process may take up to 4 minutes. 2. Once the printer has completed the warm-up cycle, make sure the printer display reads “Ready.”... -
Page 56: Turning The Printer Off
Tally T8106/T8406 Color Laser Printers Quick Start Guide Turning the Printer Off 1. Ensure that the printer is not printing a job or warming up. 2. Press the power switch. Note: When restarting the printer, wait at least five seconds after turning off the printer before turning it on again. - Page 57 Chapter 4 Operating Your Printer 1. With both hands, gently lift and pull the paper tray out of the printer. 2. Remove the tray cover (T8406 only). 3. Using the green grips, adjust the lateral and end paper retainers according to the paper size.
- Page 58 Tally T8106/T8406 Color Laser Printers Quick Start Guide 4. Place the paper in the paper tray with the printing surface facing up. Make sure that the paper does not exceed the limit marked on the inside of the green grips.
-
Page 59: Control Panel
Chapter 4 Operating Your Printer Control Panel The control panel is made up of four indicator lamps, the display, and seven function keys that allow you to control and monitor printer operations. Display The display provides messages indicating the state of the printer. The example display below shows the printer printing a 2,534-kilobyte file using A4 paper loaded into Tray 1. -
Page 60: Indicators
Tally T8106/T8406 Color Laser Printers Quick Start Guide Indicators MESSAGE lamp (orange): Lights when an error message is on the display. READY lamp (green): Is lit when the printer is ready to print. During warm-up, this lamp blinks. DATA lamp (green): Blinks while the printer is receiving an incoming print job. -
Page 61: Control Keys
Chapter 4 Operating Your Printer Control Keys The T8106/T8406 control panel has seven control keys that allow you to control the printer functions. FORMFEED: Forces a job to print. CLEAR: Clears print data. ONLINE: Places the printer in online or offline status. -
Page 63: Chapter 5 Service And Support
Service and Support Overview This chapter provides information about different resources for information and technical support, including: • How to reach Tally Technical Support for assistance • How to order supplies and printer options • How to obtain Tally service contracts •... -
Page 64: Assistance Nearby
Tally, consider the options below. Help From Within Your Company If your organization is large and has purchased many Tally printers, the best source of assistance can be within your own company. Your company could have designated central support personnel that you can go to when you have problems or when you need supplies such as paper or toner cartridges. -
Page 65: Tally Technical Support
How to Contact Tally There are a number of ways to contact Tally or receive information about technical issues, products, and services. Contacting Tally Technical Support or Customer Service by Telephone In North America, call 866-359-2899 to speak to a representative about technical support, extended warranties, repairs, or customer service. - Page 66 Browse Service Programs to learn about ways to extend or enhance your existing warranty. Sending Internet Electronic Mail You can e-mail your questions to Tally, and we will respond within three business days. Send e-mail messages to: support@tally.com Sending a Facsimile Transmission...
- Page 67 Chapter 5 Service and Support Writing Tally You can mail your questions and comments to Tally Technical Support at the following address: Printer Technical Support Tally Printer Corp. P.O. Box 97018 Kent, WA 98064-9718...
-
Page 68: Ordering Options And Supplies
Tally T8106/T8406 Color Laser Printers Quick Start Guide Ordering Options and Supplies Contact your T8106/T8406 Series dealer to order printing supplies, or call 800-338-3010 to locate the Tally supplies dealer nearest you, or you can purchase supplies directly from Tally. The tables below list available printer options and order numbers. -
Page 69: T8106 Printer Supplies
Chapter 5 Service and Support T8106 Printer Supplies Order Part Description Number T8106 Cyan Toner Cartridge 083232 T8106 Magenta Toner Cartridge 083233 T8106 Yellow Toner Cartridge 083234 T8106 Black Toner Cartridge 083235 T8106 OPC Belt Cartridge 083236 T8106 Fuser Oil Bottle... -
Page 70: T8406 Printer Options
Tally T8106/T8406 Color Laser Printers Quick Start Guide T8406 Printer Options Order Part Description Number 500-sheet Lower Paper Feeder Unit (w/Cassette) 083197 Duplexer (Lower Paper Feeder Units Required) 083199 250-sheet Standard Cassette (Letter/A4) 083195 250-sheet Legal Cassette (Letter/A4) 083196 500-sheet Lower Paper Feeder Cassette (Letter/A4) -
Page 71: Tally Warranty And Service
Supplies. www.tally.com Tally Warranty and Service Your T8106/T8406 Series printer comes with a one-year on-site warranty. The complete warranty is provided below. All repair requests must be prequalified through Tally Product Support by calling 866-359-2899. You can extend the standard warranty on your new printer or upgrade to a different type of warranty. -
Page 72: T8106/T8406 Series Printer Limited Warranty
Tally to assure normal product operation. Tally incurs no obligation to furnish or install said items. Tally reserves the right to modify or update T8106/T8406 software as it deems necessary and to determine distribution policies for such changes to existing owners. - Page 73 (at Tally’s option) any part of the enclosed unit. The following are not covered by this warranty: 1. Any product which is not distributed in the U.S.A. or Canada by Tally or which is not purchased in the U.S.A. or Canada by the first con- sumer purchaser.
-
Page 74: Warranty Support
Tally T8106/T8406 Color Laser Printers Quick Start Guide Warranty Support Tally will pay labor and material expenses for covered items, but will not pay for the following: 1. Removal or installation charges. 2. Costs of initial technical adjustments (set-up), including adjustment of user controls. -
Page 75: Warranty Limitations
Chapter 5 Service and Support Tally requires you to provide the original bill of sale or receipt as proof of purchase in order to obtain warranty service. Please retain such proof of purchase with your records. You can contact Tally Customer Service and Technical Support by dialing 866-359-2899. - Page 76 Tally T8106/T8406 Color Laser Printers Quick Start Guide All products returned to Tally for service must have prior approval, and can be obtained by calling the above number. Any unit shipped to Tally without authorization may be returned freight collect.
Need help?
Do you have a question about the T8106 and is the answer not in the manual?
Questions and answers