Advertisement
Quick Links
Advertisement

Related Manuals for We Made Me Pao Papoose


Summary of Contents for We Made Me Pao Papoose
- Page 1 ™ BABY WEARING GUIDE QUICK&START...
- Page 2 Choosing to start a family may be the most natural (or irrational) decision you take in life, so we’ve made our Pao Papoose™ Babywearing Guide as simple and stress-free as possible, allowing you to get on with the very important business of bonding with your baby..
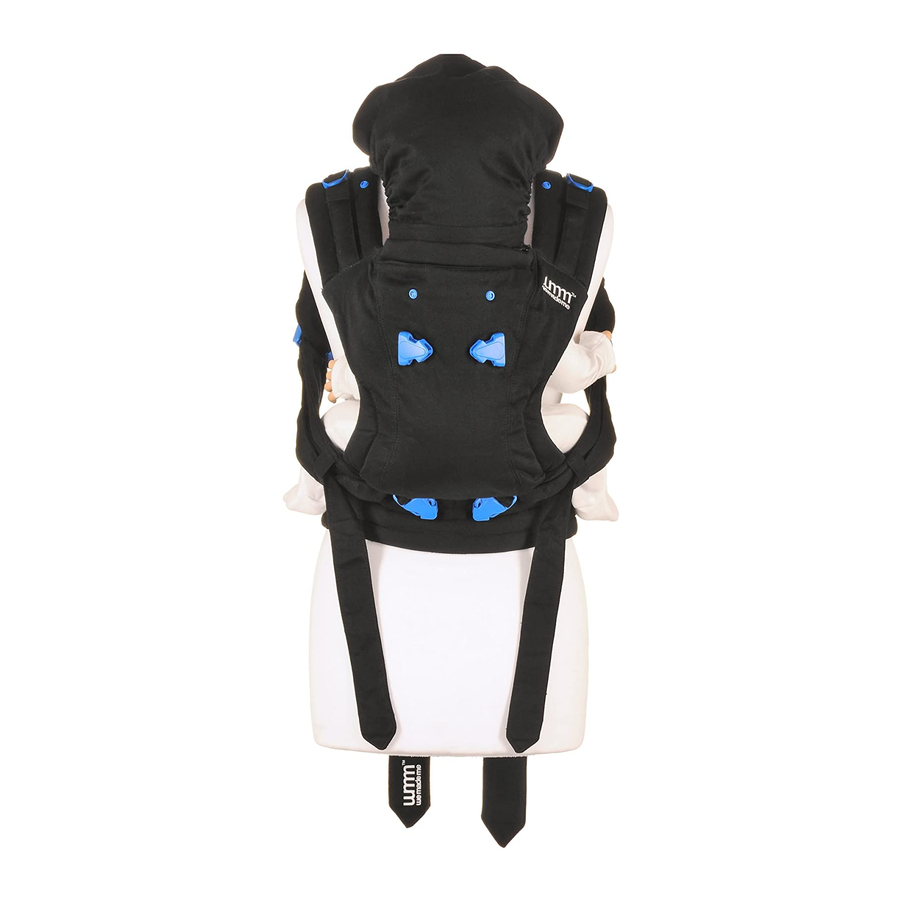
- Page 3 Getting to know your Pao Papoose™ Components and mechanisms: 1. Instructions pocket (a quick guide for when you’re out and about) 2. Waistband and buckle (adjustable) 3. Leg padding adjusters 4. Shoulder straps 5. Shoulder strap buckles 6. Shoulder strap adjusters 7.
- Page 4 (world-facing) Pages 14–17 (parent-facing) (back-carry) Pages 8–13 Pages 20–29 Three carrying positions...
- Page 5 WITHOUT baby. Familiarise yourself with the carrier’s user-friendly components and mechanisms, then practise the three carrying positions. When you and baby are ready for your Pao Papoose™ debut, try it near a soft surface such as a bed or sofa, or with someone watching.
- Page 6 This ensures baby’s back, hips and the back of their head are supported and protected. Our Pao Papoose™ is designed with this in mind and avoids baby assuming the dangling position where all their weight rests on their crotch.
- Page 8 front back (parent-facing position) 4–24m | 5.5–12.2kg | 12–26.9lbs This front position is perfect for those who want to share every snugly moment on the move, belly-to-belly with baby. Ideal for babies aged 4 to 24 months and comfortable both for when they are awake or asleep.
- Page 9 Step 01. Attach Lay your papoose out with the inner side and the instructions pocket facing upwards and the waistband nearest to you. 1. Pick up your papoose by the waistband and position it on to the front of your waist. 2.
- Page 10 Step 02. Embrace Now you are going to half-build the papoose before placing baby inside. 1–2. Bring one shoulder strap up and position over your shoulder. 3–5. Move it around your back to the front and clip it into the opposing lower surface-mounted buckle.
- Page 12 Step 02. Embrace continued 8–11. Supporting baby with one hand, use your other hand to bring the remaining shoulder strap up and position over your opposite shoulder. Again, move it around to the front and clip it into the other lower surface-mounted buckle.
- Page 13 Step 03. Adjust 1. Your baby is now securely strapped in your Pao Papoose™, but the carrier is likely to require some minor adjustments. 2. Using both hands, reach behind you and check that each shoulder strap adjuster is identical in length.
- Page 14 front (world-facing position) 5–12m | 6.4–10kg | 14–22lbs back This front position is for all those curious little ones who want to see the world ahead of them. It can be used for babies aged 5 to 12 months for up to 20 minutes at a time –...
- Page 15 Step 01. Attach Lay your papoose out with the inner side and the instructions pocket facing upwards and the waistband nearest to you. 1. Pick up your papoose by the waistband and position it on the front of your waist. 2.
- Page 16 Step 02. Embrace 1. Pick your baby up under their arms, turn them to face away from you and bring them towards your chest. Their bottom should be positioned level with the bottom of the waistband, allowing them to sit into the V-shape of fabric with support beneath their knees.
- Page 17 Step 03. Adjust Your baby is now securely strapped in your Pao Papoose™, but the carrier is likely to require some minor adjustments. 1. Using both hands, reach behind you and gently tighten each shoulder strap adjuster until each one is identical in length. Aim for the shoulder straps to be tight enough to give maximum support so your baby doesn’t change position when you move, but not too tight...
- Page 18 Easy transition from Bear Necessities to Doe-a-deer Alternatively, it’s really easy to move baby from the Bear Necessities (parent-facing) position to the Doe-a-deer (world-facing) position while still wearing the papoose. 1. Simply release the perfect-fit adjusters. 2. Fold and clip down the adjustable support/hood either before or after moving baby.
- Page 19 6–7. Then unclip the lower surface-mounted buckles and re-clip them into the upper surface-mounted buckles. 8. Re-adjust the perfect-fit adjusters evenly on both sides. Depending on the size of your baby, their arms can be positioned below or the above the folded adjustable head support/hood.
- Page 20 front (back-carry position) back 6–36m | 7.8–15kg | 17.2–33lb This back position is for the confident parent looking for even more freedom and the adventurous baby aged 6 to 36 months. We advise that you ensure the adjustable head support/hood is attached to the main body of the carrier and unrolled –...
- Page 21 Step 01. Attach Lay your papoose out with the inner side and the instructions pocket facing upwards and the waistband nearest to you. 1. Pick up your papoose by the waistband and position it on to the front of your waist. 2.
- Page 22 Step 01. Attach continued 4. Use both hands to tighten the straps comfortably. 5. The Raccoon Ride position uses the shoulder straps like rucksack straps, so before placing the shoulder straps over your shoulders, clip the chest strap together. 6–7. Then clip each shoulder strap into the lower surface- mounted buckle on the same side.
- Page 24 Step 02. Hip scoot 1. This next manoeuvre is called the ‘hip scoot’. Look your baby in the eyes, pick them up under their arms and rest them on your shoulder. 2. Now gently lower them into the bucket seat in an embrace position.
- Page 26 Step 03. Adjust Your baby is now securely strapped in the Pao Papoose™, but the carrier is likely to require some minor adjustments. 1. Using both hands, gently tighten each shoulder strap adjuster until each one is identical in length. The shoulder straps should be secure enough that baby doesn’t change position when you move.
- Page 27 Step 04. Adjustable head support/hood 1. If baby falls asleep or needs protecting from the sun, simply take each strap of the adjustable head support/hood… 2. …and clip the snaps/poppers into the corresponding fastener on each shoulder strap. Ensure you hear an audible click as each snap/popper fastens and that each adjustable head support/hood strap is identical in length.
- Page 28 Step 05. Remove 1. Release the chest strap. 2. Support baby with one hand. 3. Use the other hand to remove the shoulder strap from one shoulder. 4. Move the carrier and baby round to your opposite hip. 5. With the remaining shoulder strap in place. Continue supporting your baby at all times.
- Page 30 ™ This product, its distinctive shape and the trademark Pao Papoose™ is protected by trademark registrations. The product is also protected by patent pending and community design registration (European Union). © 2015 We Made Me Ltd We Made Me Ltd, 1 Amber House, 22b St. Johns Road, Hove, BN3 2EZ, United Kingdom.
Need help?
Do you have a question about the Pao Papoose and is the answer not in the manual?
Questions and answers