Table of Contents
Advertisement
Advertisement
Table of Contents

Related Manuals for NEFF B17CR32.0B


Summary of Contents for NEFF B17CR32.0B
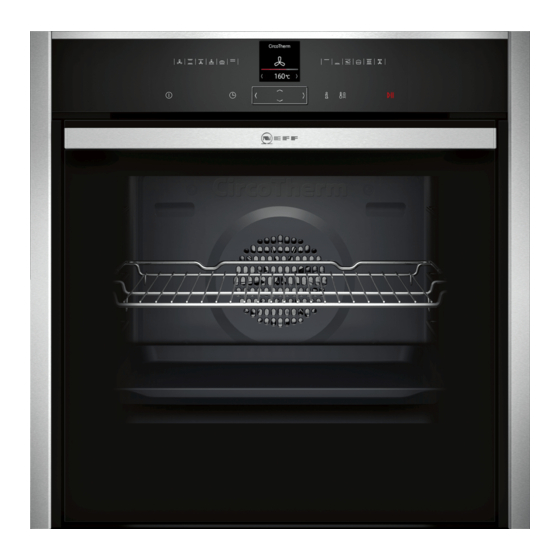
- Page 1 Built-in oven [en] INSTRUCTION MANUAL B17CR32.0B...
-
Page 3: Table Of Contents
Setting favourites ......16 replacement parts and services can be found at www.neff-international.com and in the online shop www.neff-eshop.com... -
Page 4: Intended Use
Intended use 8Intended use (Important safety information Read these instructions carefully. Only then I n t e n d e d u s e will you be able to operate your appliance General information safely and correctly. Retain the instruction i n f o r m a t i o n I m p o r t a n t s a f e t y manual and installation instructions for future... -
Page 5: Halogen Lamp
Important safety information en Warning Warning Risk of scalding! Hazard due to magnetism! The accessible parts become hot during Permanent magnets are used in the control ■ operation. Never touch the hot parts. Keep panel or in the control elements. They may children at a safe distance. -
Page 6: Causes Of Damage
Causes of damage ]Causes of damage 7Environmental protection General information Your new appliance is particularly energy-efficient. Here C a u s e s o f d a m a g e t e c t i o n E n v i r o n m e n t a l p r o you can find tips on how to save even more energy Caution! when using the appliance, and how to dispose of your... -
Page 7: Getting To Know Your Appliance
Getting to know your appliance en Note: Depending on the appliance model, individual *Getting to know your details and colours may differ. appliance Control panel In this chapter, we will explain the displays and controls. In the control panel, set the appliance's different y o u r a p p l i a n c e G e t t i n g t o k n o w You will also find out about the various functions of your... -
Page 8: Main Menu
Getting to know your appliance Main menu Basic settings " Individually adjusting the appliance Touch the 0 touch button to access the main menu. settings~ "Basic settings" on page 16 Menu Floor cleaning aid ® Types of heating ¢ Cleaning the cooking compartment floor Selecting the required type of heating and tempera- ~ "Cleaning function"... -
Page 9: Cooking Compartment Functions
Accessories en Cooking compartment functions _Accessories The functions in the cooking compartment make your appliance easier to use. This, for example, enables the Your appliance is accompanied by a range of cooking compartment to be well lit and a cooling fan to A c c e s s o r i e s accessories. -
Page 10: Inserting Accessories
Accessories Inserting accessories Combining accessories The cooking compartment has four shelf positions. The You can insert the wire rack and the universal pan at shelf positions are counted from the bottom up. the same time to catch drops of liquid. When inserting the wire rack, ensure that both spacers ‚... -
Page 11: Before Using For The First Time
Before using for the first time en Cleaning the cooking compartment KBefore using for the first To remove the new-appliance smell, heat up the time cooking compartment when it is empty and with the oven door closed. Before you can use your new appliance, you must Remove the accessories from the cooking t h e f i r s t t i m e B e f o r e u s i n g f o r... -
Page 12: Operating The Appliance
Operating the appliance Use the ( or ) button to select the temperature. 1Operating the appliance You have already learnt about the controls and how p l i a n c e O p e r a t i n g t h e a p they work. -
Page 13: Changing Or Cancelling The Appliance Operation
Operating the appliance en Changing or cancelling the appliance Activating the "PowerBoost" function Set CircoTherm hot air ‚ or the bread baking operation setting … and the temperature. Changing the appliance operation Note: Set a temperature above 100 °C to allow the Use the # button to stop the operation. -
Page 14: Time-Setting Options
Time-setting options Setting the cooking time OTime-setting options Once the set cooking time has elapsed, the appliance switches off automatically. The function can only be Your appliance has different time-setting options. used in combination with a type of heating. i o n s T i m e - s e t t i n g o p t Time-setting option Touch the # touch button. -
Page 15: Childproof Lock
Childproof lock en One-time childproof lock AChildproof lock The control panel is locked so that the appliance cannot be switched on. To switch it on, the one-time childproof Your appliance is equipped with a childproof lock so lock must be deactivated. After the appliance operation, C h i l d p r o o f l o c k that children cannot switch it on accidentally or change the control panel is no longer locked. -
Page 16: Basic Settings
Basic settings QBasic settings Fan run-on time Recommended Minimum There are various settings available to you in order to Pull-out system B a s i c s e t t i n g s help use your appliance effectively and simply. You can Yes (double or triple pull-out system change these settings as required. -
Page 17: Sabbath Mode
Sabbath mode en FSabbath mode DCleaning agent You can set a time of up to 74 hours using Sabbath With good care and cleaning, your appliance will retain S a b b a t h m o d e C l e a n i n g a g e n t mode. -
Page 18: Surfaces In The Cooking Compartment
Cleaning agent Surfaces in the cooking compartment Door panels Hot soapy water: Clean with a dish cloth and then dry with a soft The back wall, ceiling and side parts in the cooking cloth. compartment are self-cleaning. You can tell this from Do not use a glass scraper or a stainless steel the rough surface. -
Page 19: Cleaning Function
Cleaning function en Starting .Cleaning function Before setting the cleaning function, ensure that you have followed all instructions for preparation. Your appliance is equipped with EcoClean and the floor The duration for the cleaning function is preset to C l e a n i n g f u n c t i o cleaning aid. -
Page 20: Rails
Rails Finishing pRails As soon as the cleaning aid has finished, an audible signal sounds and the appliance ends the operation With good care and cleaning, your appliance will retain automatically. R a i l s its appearance and remain fully functional for a long As soon as you open the appliance door, the interior time to come. -
Page 21: Appliance Door
Appliance door en Fitting the appliance door qAppliance door Reattach the appliance door in the opposite sequence to removal. With good care and cleaning, your appliance will retain A p p l i a n c e d o o r When attaching the appliance door, ensure that both its appearance and remain fully functional for a long hinges are inserted straight into the opening... -
Page 22: Removing The Door Cover
Appliance door Removing the door cover Removing and installing the door panels The stainless steel inlay in the door cover may become To facilitate cleaning, you can remove the glass panels discoloured. To carry out thorough cleaning, you can from the appliance door. remove the cover. - Page 23 Appliance door en Fitting the door on the appliance Insert the front panel at the bottom into the retainers (figure Close the front panel until both upper hooks are opposite the opening (figure " Press the front panel at the bottom until it clicks audibly into place (figure Open the appliance door again slightly and remove the tea towel.
-
Page 24: Trouble Shooting
Trouble shooting 3Trouble shooting Warning Risk of electric shock! Incorrect repairs are dangerous. Repairs may only be If a fault occurs, there is often a simple explanation. carried out and damaged power cables replaced by T r o u b l e s h o o t i n g Before calling the after-sales service, please refer to the one of our trained after-sales technicians. -
Page 25: Replacing The Bulb In The Top Of The Cooking Compartment
Customer service en Replacing the bulb in the top of the cooking 4Customer service compartment If the cooking compartment light bulb fails, it must be Our after-sales service is there for you if your appliance replaced. Heat-resistant, 40 watt, 230 V halogen bulbs C u s t o m e r s e r v i c e needs to be repaired. -
Page 26: Tested For You In Our Cooking Studio
Tested for you in our cooking studio Baking on two levels JTested for you in our Use CircoTherm. Baked items that are placed into the oven on trays or in baking tins/dishes at the same time cooking studio will not necessarily be ready at the same time. Universal pan: Level 3 ■... - Page 27 Tested for you in our cooking studio en Note: Baking times can not be reduced by using higher If you wish to follow one of your own recipes when temperatures. Cakes or small baked items would only baking, you should use a similar baked item in the table be cooked on the outside, and would not be fully baked as a reference.
-
Page 28: Tips On Baking
Tested for you in our cooking studio Dish Accessories/cookware Shelf Type of Tempera- Cooking position heating ture in °C time in mins. Multishelf baking Victoria Sponge Cake, 2 levels 4x Ø20 cm tins 160-170* 25-35 ‚ Scones, 2 levels 2 baking trays 170-190* 12-16 ‚... -
Page 29: Roasting And Braising
Tested for you in our cooking studio en Roasting and braising The steam evaporates in the cookware when roasting. Carefully pour in more liquid if required. Here, you can find information on roasting and braising Shiny roasting dishes made from stainless steel or poultry and meat. - Page 30 Tested for you in our cooking studio Type of heating used: ‚ CircoTherm hot air ■ Dish Accessories/cookware Shelf Type of Temperature in Cooking time in position heating °C mins. Beef Slow roast joint wire rack 130-140* 40+40 ‚ Top side / Top rump wire rack 160-170* 30+25...
-
Page 31: Grilling
Tested for you in our cooking studio en Tips on roasting and braising The cooking compartment becomes Prepare your food in an enclosed roasting dish with higher temperature or use the grill tray. You will achieve very dirty. the best roasting results if you use the grill tray. The grill tray can be bought later as a special accessory. The roast is too dark and the Check the shelf position and temperature. - Page 32 Tested for you in our cooking studio Use tongs to turn the pieces of food you are grilling. If Covered cookware When cooking with covered cookware, the cooking you pierce the meat with a fork, the juices will run out compartment remains considerably cleaner.
- Page 33 Tested for you in our cooking studio en Dish Accessories Shelf Type of Tempera- Cooking time position heating ture in °C in mins. Lamb Steaks, height 2-3 cm wire rack 290* 1st side 8-10 ˆ 2nd side 4-6 Chops, height 2-3 cm wire rack 1st side 7-9 ˆ...
-
Page 34: Convenience Products
Tested for you in our cooking studio Convenience products Wire rack Insert the wire rack with the open side facing the Here, you can find the ideal settings for preparing appliance door and the outer rail pointing downwards . chilled and frozen food. Universal pan or baking tray Only use original accessories supplied with your Slide the universal pan or the baking tray in carefully as... -
Page 35: Yogurt
Tested for you in our cooking studio en Dish Accessories/cookware Shelf Type of Tempera- Cooking position heating ture in °C time in mins. Baked goods, frozen, prebaked Rolls, baguettes universal pan 180-200 10-15 „ White bread universal pan 180-200 15-30 ‚... -
Page 36: Acrylamide In Foodstuffs
Tested for you in our cooking studio Note: Baking times can not be reduced by using higher Recommended setting values temperatures. Cakes or baked items would only be Here, you can find specifications for the various dishes cooked on the outside, but would not be fully cooked in with CircoTherm Eco and Top/bottom heating Eco. -
Page 37: Slow Cook
Tested for you in our cooking studio en Slow cook Cookware Use shallow cookware, e.g. a glass/porcelain serving Slow cooking is a technique for cooking food over a dish. Place the cookware into the cooking compartment long period at low temperatures. For this reason, it is to preheat it. -
Page 38: Drying
Tested for you in our cooking studio Dish Cookware Shelf Type of Searing time Tempera- Cooking position heating in mins. ture in °C time in mins. Lamb Saddles of lamb, boneless, 200 g each Cookware, uncovered 120-180 Š Leg of lamb, boned, medium, 1 kg, tied Cookware, uncovered 180-240 Š... -
Page 39: Preserving
Tested for you in our cooking studio en Preserving Vegetables Fill the jars with the vegetables along with hot, boiled You can preserve fruit and vegetables using your water. appliance. Wipe the rims of the jars, as they must be clean. Place a damp rubber ring and a lid on each jar. -
Page 40: Allowing The Dough To Prove At Dough Proving
Tested for you in our cooking studio Allowing the dough to prove at dough Do not open the appliance door during the proving process, as moisture will escape. Do not cover the proving setting dough. Yeast dough will prove considerably more quickly using Condensation builds during operation which steams up the "Dough proving"... -
Page 41: Defrosting
Tested for you in our cooking studio en Defrosting Tip: Items which were frozen flat or portioned defrost faster than those frozen in a block. Use heating type "CircoTherm" to defrost frozen fruit, vegetables and baked items. Poultry, meat and fish Remove frozen food from the packaging and place it in should ideally be defrosted in the refrigerator. - Page 42 Tested for you in our cooking studio Types of heating used: ‚ CircoTherm hot air ■ ƒ Top/bottom heating ■ „ Pizza setting ■ Dish Accessories Shelf Type of Tempera- Cooking position heating ture in °C time in mins. Baking Piped cookies (Preheat for 5 minutes) Baking tray 140-150*...
- Page 44 Constructa Neff Vertriebs-GmbH Carl-Wery-Straße 34 D-81739 München *9001002257* Register your product online www.neff-international.com 9001002257 950108...
Need help?
Do you have a question about the B17CR32.0B and is the answer not in the manual?
Questions and answers