
Related Manuals for NEFF B 1544 Series


Summary of Contents for NEFF B 1544 Series
- Page 1 Gebrauchsanleitung Instructions for use Mode d’emploi B 1544 . .
- Page 2 Quellenstraße 2 Per Telefon: D-81701 München A-1100 Wien Fax: +49 (0) 89 / 45 90-35 32 Fax: +43 (0) 1/ 6 05 75-5 12 60 Internet: www.neff.de Internet: www.neff.at 0,12/min. DTAG Für Österreich: Tel: 08 10 / 70 04 00...
- Page 3 Notizen...
-
Page 4: Table Of Contents
Safety information ....47 Baking ..... . 60 Reasons for damage . -
Page 5: Important Information
Packaging and Your new appliance was protected by suitable packaging while it was on its way to you. All materials old appliances used for this purpose are environmentally friendly and can be recycled. Please make a contribution to protecting the environment by disposing of the packaging appropriately. -
Page 6: Safety Information
Incorrectly done repairs are dangerous. There is a risk of electrocution. Repairs may only be carried out by after-sales service technicians who have been fully trained by BSH. If there is a fault, switch off the oven fuse at the fuse box. Call the after-sales service. -
Page 7: Reasons For Damage
Very dirty oven seal If the oven seal is very dirty, the oven door will no longer close properly when the oven is in use. The fronts of adjacent units could be damaged. -
Page 8: Your New Cooker
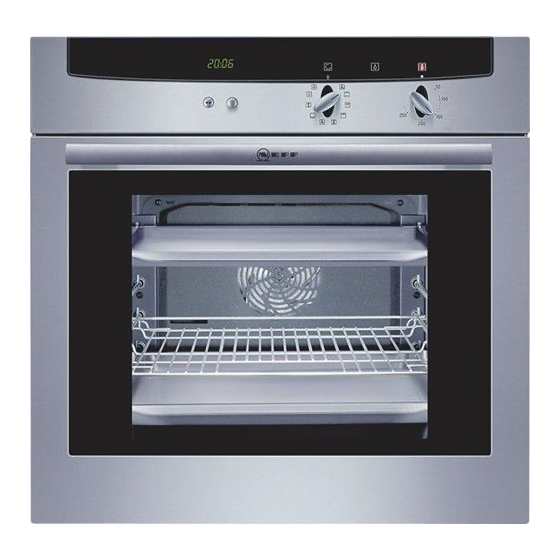
Your new cooker Here you will learn more about your new oven. The control panel and its switches and indicators are explained here. The heating modes and the accessories included with your oven will be explained here. The control panel... -
Page 9: Temperature Selector
The numbers are marked in the oven. When usung hot-air baking or roasting, do not use slide-in level »2«, in order not to block air circulation. The hook-in grilles and telescopic rails can be inserted at your preferred slide-in level. -
Page 10: Accessories
Z 1912 X0 Note: The baking tray or universal pan may distort while the oven is operating. This is cau- sed by major temperature differences on the utensil. These differences may occur if only one part of the utensil was covered or if deep-frozen food, e.g. pizza, was placed on the utensil. -
Page 11: Before Using Your Appliance
Initial burn-in Heat the empty oven for approx. 30 minutes. Select top and bottom heat at a setting of 240° C. During the initial burn-in phase, please open the kitchen windows to dissipate unpleasant odours. Time of day Before using the appliance for the first time, you must set the current time on the electronic clock. -
Page 12: Electronic Clock
Electronic clock The electronic clock can be operated with one hand; after pressing the button, set the time with the rotary knob. Settings can be made for as long as the function display flashes (~4 seconds). The control panel Rapid heat up... -
Page 13: Minute Timer
To stop the signal, press the > button. Automatic timer You can switch the oven on and off via the electronic clock. Automatic switch off If you wish to bake or roast food immediately, it is only necessary to set the ON time. - Page 14 Automatic switch on and If the food is to be baked or roasted later on, both switch off the ON time and OFF time must be set. Select the heating system and the oven temperature. > Press the button until the...
-
Page 15: Description Of Oven Features
Description of Oven Features Hot-air circulation A fan system located in the rear oven wall circulates the hot air in the oven, achieving an especially effective heat transfer to the food being baked or roasted. Advantages: – Simultaneous baking and roasting possible on up to 3 levels –... - Page 16 – Especially suited for frozen products, e.g. pizzas, chips etc. Defrost A fan in the rear wall of the oven circulates the air in the oven around the frozen food. The fan system is running without heating. Advantages: –...
- Page 17 The oven cleaning function featured in your oven is (oven cleaning system) intended to help you keep your oven neat and tidy. An amount of cleaning solution is vaporised automatically. The combined effects of heat and steam soften the soil deposits on the oven wall enamel and facilitate their removal.
-
Page 18: Switching The Oven On And Off
The appliance features a cooling fan which runs until the oven has cooled down. Rapid heat up Switching the oven ON: When the oven has been switched on, rapid heating can be switched on with hot air via the clock. > Press the button until the symbol flashes. -
Page 19: Baking
Light coloured baking tins made from thin-wall materials lead to longer baking times and uneven browning of the cake. If a cake collapses after removing it from the oven, consider using a longer baking time, or use a slightly lower temperature setting. -
Page 20: Cooking Tips And Helpful Hints
The bottom of a cake baked Use a grill and not a baking sheet to support the in a tin stays too light cake tin during baking. The bottom of cake or... -
Page 21: Roasting
Roasting in a covered pot Place the meat into the roasting pot (or Dutch oven), cover it with a matching lid, and place it on the grill in the oven. We recommend that beaf roast be prepared in a covered roasting pot. - Page 22 (done on the outside, raw on the inside). Choose slightly longer roasting times. Very moist roasts (e.g. roasts You can let the steam escape from the oven and prepared with water) cause a thereby reduce the forming of water droplets by...
-
Page 23: Grilling
Always close the oven door when grilling. The grilling temperatures are variable. Always use the grill and the universal pan. Always place food to be grilled in the centre of the wire grill. If the grilling radiator (heating element) switches OFF automatically, the overheating protection was activated. -
Page 24: Combination Hot-Air/Surface Grilling
(e.g., pork roast with rind). Use the grill and universal pan together. Turn large roasts after about half of the total grilling time has elapsed. To prevent breakage after removing them from the oven, place glass utensils on a dry kitchen towel instead of cold or wet surfaces. -
Page 25: Defrosting And Cooking
(especially meats) require less cooking time than fresh products, since freezing has a pre-cooking effect. If frozen meat is placed in the oven, the defrosting time must be added to the required cooking time. Always defrost deep-frozen poultry before cooking because the giblets must be removed. - Page 26 Defrost dry deep-frozen yeast cakes at 160 – 170° C for 20 – 30 minutes. Defrost moist deep-frozen yeast cakes (with fruit topping) at 160 – 170° C for 30 – 50 minutes after wrapping in aluminium foil to prevent cake from drying out.
-
Page 27: Cleaning And Care
Enamel and glass Use hot detergent suds for cleaning. For cleaning the mating surface of the oven door at the front of the oven, the door should be removed. Oven door pane The temperature of the pane inside the oven door is reduced by a heat-reflecting coating. - Page 28 You can reduce the degree of soiling by frequent cleaning using the hot-air system. Do not clean the warm oven with any of the cleaning products specifically designed for this purpose. When baking very moist cake, use the universal baking pan.
-
Page 29: Catalytic Oven Surfaces
Cleaning the oven floor, Use hot soapy water or a vinegar solution. the oven ceiling and the It is best to use oven cleaner if the oven is very dirty. side walls Only use oven cleaner in a cold oven. -
Page 30: Easyclean
Pour approx. 400 ml of water mixed with a little dishwashing detergent into the floor pan of the oven cavity. In the case of heavy soil build-up, you may wish to allow the cleaning solution to soak in for a while before you activate the cleaning function. - Page 31 After deactivating the oven Cleaning tips: cleaning function Never leave the residual water in the oven for any length of time, e.g. overnight. Open the oven door and pick up the remaining water with a large absorbent sponge cloth. Using the detergent-soaked sponge cloth, a soft brush or a plastic pot scrubber, wipe of the oven interior.
-
Page 32: The Oven Door
Close the catch levers on the left and right. Close the oven door. Lowering the heating element In order to clean the oven ceiling more easily turn down the grill heating element. Warning: The heating element must have cooled down. -
Page 33: Inset Rack / Telescopic Pull-Outs
Always insert the telescopic pull-outs all the way. Do not close the oven door until all telescopic pull-outs have been inserted. Attention: The telescopic pull-outs become hot when the oven is on. Risk of burns when the telescopic pull-outs are pulled out... -
Page 34: Service And Repair Information
Service and Repair Information In the event of problems or repairs that you cannot solve or perform yourself, our customer service will be happy to help. Check the customer service directory for a customer service facility in your area. Caution: Calling the customer service because of an... -
Page 35: Trouble-Shooting Guide
Without exception, prior to starting such repairs, the appliance must be disconnected from the mains. This may be accomplished by tripping the automatic fuse or by removing the fuse from the fuse box that controls your flat or apartment. - Page 36 . . . if the oven shows increasing Normal occurrence, Briefly open the oven door occasionally condensation water? e.g. in the case of cakes during baking or roasting, wipe up the with very moist topping condensation water after operation. (fruit) or roasts.
- Page 37 Notizen...
- Page 38 Notizen...
- Page 39 Notes...
- Page 40 Notes...
- Page 42 5750 206 239 Printed in Germany 0304 Es.
Need help?
Do you have a question about the B 1544 Series and is the answer not in the manual?
Questions and answers