Table of Contents
Advertisement
Quick Links
Advertisement
Table of Contents
Troubleshooting

Summary of Contents for Xitrix DeskFrame MX-910
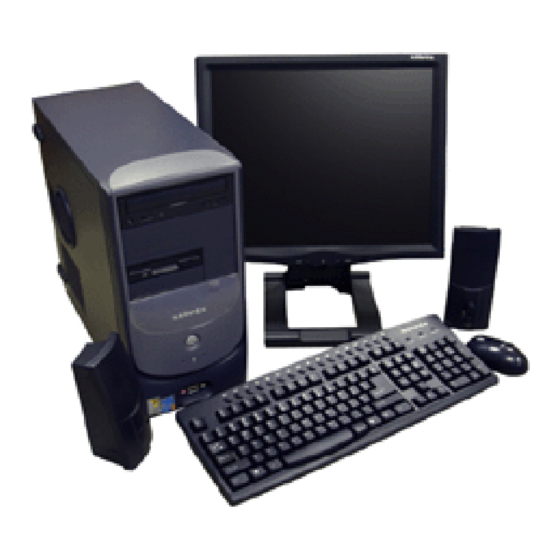
- Page 1 Desktop PC User Guide...
- Page 2 - ii -...
-
Page 3: Table Of Contents
Online help ......... Xitrix online information ....... - Page 4 Standard keyboard ........Keyboard features ........Using the mouse .
- Page 5 Telephone support ........Before calling Xitrix Customer Care ....
- Page 6 A Safety, Regulatory, and Legal Information ..Index ........- vi -...
-
Page 7: Getting Help
Chapter 1 Getting Help • Using the Xitrix Website • Using Help and Support • Using big fix • Using On-line help • Contacting Xitrix - 1 -... -
Page 8: Thank You For Purchasing Our Computer
Chapter 1: Getting Help Thank you for purchasing our computer! You have made an excellent decision choosing Xitrix. We are sure that you will be pleased with the outstanding quality, reliability, and performance of your new computer. Each and every Xitrix computer uses the latest technology and passes through the most stringent quality control tests to ensure that you are provided with the best product possible. -
Page 9: Xitrix Web Site
Xitrix Web site Xitrix Web site Xitrix' online support is available 24 hours per day, 7 days per week and provides the most current drivers, product specifications, and information about your computer. Visit the Xitrix Customer Care Web site at xitrix.com/support/. -
Page 10: Searching For A Topic
Chapter 1: Getting Help Searching for a topic To search for a topic in Help and Support, type a word or phrase (keyword) in the Search box located at the top of any Help and Support screen, then click the arrow button. -
Page 11: Online Help
Online help Many programs provide information online so you can research a topic or learn how to perform a task while you are using the program. You can access most online help information by selecting a topic from Help menu or by clicking a Help button. You can search for information by viewing the help contents, checking the index, searching for a topic or keyword, or browsing through the online help. -
Page 12: Xitrix Online Information
Chapter 1: Getting Help Xitrix contact information To help you locate Xitrix contact information, you can find the Xitrix Web site, Online Support, and technical support contact information, Click on the Start menu button, right-click on My Computer and select Properties, then Click the Support Information button. -
Page 13: Checking Out Your Xitrix Computer
Chapter 2 Checking Out Your Xitrix Computer • Identifying features • Locating your computer model and serial number • Locating the Microsoft Certificate of Authenticity • Locating the specifications for your computer • Purchasing accessories - 7 -... -
Page 14: Desktop Pc Front
Chapter 2: Checking Out Your Xitrix Computer Desktop PC Front Your computer includes the following components. DVD/CD Drive DVD/CD Drive (Optional) Floppy Drive Power Button/ (Power Indicator) Hard Drive Access Indicator USB ports Microphone Jack Headphone Jack - 8 -... - Page 15 - 9 -...
-
Page 16: Desktop Pc Back
- 10 -... - Page 17 - 11 -...
- Page 18 - 12 -...
-
Page 19: Identifying Your Model
Identifying your model Xitrix model and serial number The label on the side of your computer case contains information that identifies your computer model and serial number. Xitrix Customer Care will need this information if you call for assistance. - 13 -... -
Page 20: Microsoft Certificate Of Authenticity
Microsoft Certificate of Authenticity The Microsoft Certificate of Authenticity label found on the back or side of your computer includes the product key code for your operating system. Chapter 2: Checking Out Your Xitrix Computer - 14 -... -
Page 21: Getting Started
Chapter 3 Getting Started • Using your computer safely • Protecting your computer from power source problem • Turning your computer on and off • Adjusting the volume • Using the keyboard and the mouse • Using the computer display •... -
Page 22: Working Safely
Chapter 3: Getting Started Working Safely Before using your computer, read the following recommendations for setting up a safe and comfortable work area and avoiding discomfort and strain Reducing eye strain Sunlight or bright indoor lighting should not reflect on the monitor screen or shine directly into your eyes. -
Page 23: Setting Up Your Computer And Computer Accessories
Working safely Adjust the height of the computer desk so your hands and arms are positioned parallel to the floor when you use the keyboard and mouse. If the desk is not adjustable or is too tall, consider using a keyboard drawer. Use an adjustable chair that is comfortable, distributes your weight evenly, and keeps your body relaxed. -
Page 24: Protecting From Power Source Problems
Chapter 3: Getting Started Protecting from power source problems During a power surge, the voltage level of electricity coming into your computer can increase to far above normal levels and cause data loss or system damage. Protect your computer and peripheral devices by connecting them to a surge protector, which absorbs voltage surges and prevents them from reaching your computer. -
Page 25: Starting Your Computer
Starting your computer To set the voltage selection switch: Use a tool such as an opened paper clip to slide the voltage selection switch to the correct voltage position. Starting your computer To start your computer: Connect the cables to your computer. See the setup poster. Turn on your computer. -
Page 26: Waking Up Your Computer
Chapter 3: Getting Started Waking up your computer When you have not used your computer for several minutes or have not turned off your computer, it may enter a power-saving mode called Standby. While in Standby, the power indicator flashes. If your computer is in Standby mode, move the mouse or press the power button to “wake ”... -
Page 27: Restarting (Rebooting) Your Computer
Restarting (rebooting) your computer Restarting (rebooting) your computer If your computer does not respond to keyboard or mouse input, you may have to close programs that are not responding. If closing unresponsive programs does not restore your computer to normal operation, you may have to restart (reboot) your computer. To close unresponsive programs and restart your computer: 1. -
Page 28: Using The Keyboard
Chapter 3: Getting Started Using the keyboard Multimedia keyboard Audio Playback Buttons Function Internet Buttons Audio Playback Indicators Buttons Keys Directional Numeric Keypad Windows Key Keys Application Key Standard keyboard - 22 -... -
Page 29: Keyboard Features
Using the keyboard Keyboard features The keyboard has several different types of keys and buttons. Your keyboard also has status indicators that show which keyboard feature is active. - 23 -... -
Page 30: Using The Mouse
Chapter 3: Getting Started Using the mouse The mouse is a device that controls the pointer movement on the computer display. This illustration shows the standard mouse. Right button Left button Scroll wheel As you move the mouse, the pointer (arrow) on the display moves in the same direction. You can use the left and right buttons on the mouse to select objects on the display. - Page 31 Using the mouse For instructions on how to clean the mouse, see “Cleaning the mouse” on page - 25 -...
-
Page 32: Connecting The Modem
Chapter 3: Getting Started Connecting the modem Your computer has a built-in 56K modem that you can use to connect to a standard telephone line. To connect the modem: 1. Insert one end of the modem cable into the modem jack on the back of your computer. -
Page 33: Connecting To A Wired Ethernet Network
Connecting to a wired Ethernet network Connecting to a wired Ethernet network Your computer has a network jack that you can use to connect to a 10/100 wired Ethernet network. To connect to a wired Ethernet network: 1. Insert one end of the network cable into the network jack on the back of your computer. -
Page 34: Installing A Printer, Scanner, Or Other Peripheral Device
For more information about port locations, “Checking Out Your Xitrix Computer” on page IEEE 1394 and USB ports support plug-and-play and hot-swapping, which means that your computer will usually recognize such a device whenever you plug it into the appropriate port. -
Page 35: Using Drives And Ports
Chapter 4 Using Drives and Ports • Using the diskette drive • Using the memory card reader • Using CD or DVD drives - 29 -... -
Page 36: Using The Diskette Drive
Chapter 4: Using Drives and Ports Using the diskette drive The optional diskette drive uses 3.5-inch diskettes (sometimes called floppy disks). Diskettes are useful for storing files or transferring files to another computer. Floppy Disk Drive Eject Button Activity Indicator To use a diskette: 1. -
Page 37: Using The Memory Card Reader
Using the memory card reader Using the memory card reader You can use the optional memory card reader to transfer pictures from a digital camera to your computer. You can also use the memory card reader to transfer data between your computer and a device that uses memory cards, such as a PDA, MP3 player, or cellular phone. -
Page 38: Inserting A Memory Card
Chapter 4: Using Drives and Ports Inserting a memory card To use a memory card: 1. Insert the memory card into the memory card slot as indicated in the previous table. 2. To access a file on the memory card, click Start, then click My Computer. Double- click the drive letter (for example, the E: drive), then double-click the file name. -
Page 39: Using The Cd Or Dvd Drive
Using the CD or DVD drive Using the CD or DVD drive You can use your computer to enjoy a wide variety of multimedia features. Identifying drive types Your computer may contain one of the following drive types. Look on the front of the drive for one or more of the following logos: - 33 -... -
Page 40: Inserting A Cd Or Dvd
Chapter 4: Using Drives and Ports Inserting a CD or DVD Activity Indicator Manual Eject Hole Eject Button (Location varies) (Location varies) To insert a CD or DVD: 1. Press the eject button on the CD or DVD drive. 2. Place the disc in the tray with the label facing up. 3. -
Page 41: Playing A Cd
Using the CD or DVD drive Playing a CD Use the music program or Windows Media Player on your computer to: Play music CDs Create MP3 music files from your music CDs Edit music track information Use your music files to build a music library Listen to Internet Radio Playing a DVD A Digital Versatile Disc (DVD) is similar to a standard CD but has greater data capacity. - Page 42 Chapter 4: Using Drives and Ports - 36 -...
-
Page 43: Maintaining Your Computer
Chapter 5 Maintaining your Computer • Caring for your computer • Updating Windows • Protecting your computer from viruses • Cleaning your computer • Restoring your system • Opening the computer case • Adding memory and replacing the battery - 37 -... -
Page 44: Caring For Your Computer
Chapter 5: Maintaining Your Computer Caring for your computer To extend the life of your computer: When transporting your computer, we recommend that you put it in the original packaging materials. Keep diskettes and your computer away from magnetic fields. Magnetic fields can erase data on both diskettes and hard drives. -
Page 45: Protecting Your Computer From Viruses
Protecting your computer from viruses Protecting your computer from viruses A virus is a program that attaches itself to a file on a computer, then spreads from one computer to another. Viruses can damage data or cause your computer to malfunction. Some viruses go undetected for a period of time because they are activated on a certain date. - Page 46 Chapter 5: Maintaining Your Computer 2. Click Scan for Viruses. SCAN 3. Click the type of scan you want to make in the Scan for Viruses area, then under Actions, click Scan. To remove a virus: 1. If EZ AntiVirus finds a virus, follow all on-screen instructions to remove the virus.
-
Page 47: Cleaning Your Computer
Cleaning your computer To update eTrust EZ AntiVirus: Tips & Tricks You received a free, limited-time subscription to the eTrust EZ AntiVirus service when you purchased your computer. To update eTrust EZ AntiVirus after the free subscription period, you must extend your subscription. -
Page 48: Cleaning The Keyboard
Chapter 5: Maintaining Your Computer Your computer is cooled by air circulated through the vents on the case, so keep the vents free of dust. With your computer turned off and unplugged, brush the dust away from the vents with a damp cloth. Be careful not to drip any water into the vents. Do not attempt to clean dust from the inside of your computer. - Page 49 Cleaning your computer To clean your trackball mouse: 1. Turn the mouse upside down. 2. Rotate the retaining ring on the bottom of the mouse counter-clockwise, then remove the retaining ring and mouse ball. 3. Remove any dust, lint, or dirt from the mouse ball with a soft cloth. 4.
-
Page 50: Cleaning Cds Or Dvds
Chapter 5: Maintaining Your Computer Cleaning CDs or DVDs Wipe from the center to the edge, not around in a circle, using a product made especially for the purpose Restoring your system All programs that were preinstalled on your computer are available on the backup restore discs that you created with the recovery media program, on the hard drive, or on restore discs that were included with your computer. -
Page 51: Preventing Static Electricity Discharge
Preventing static electricity discharge Preventing static electricity discharge The components inside your computer are extremely sensitive to static electricity, also known as electrostatic discharge (ESD). Before opening the computer case, follow these guidelines: Turn off your computer. Wear a grounding wrist strap (available at most electronics stores) and attach it to a bare metal part of your computer. -
Page 52: Opening The Case
Chapter 5: Maintaining Your Computer Opening the case Your computer case provides easy access to internal components. Removing the side panel To remove the side panel: 1. Follow the instructions in “First steps” on page 2. Shut down your computer, then disconnect the power cord and modem, network, and all peripheral device cables. -
Page 53: Removing The Front Bezel
Opening the case Removing the front bezel To remove the front bezel: Position the computer where you can grasp the top front edge of the bezel, then pull the bezel away from the case. Continue to loosen the bezel until you can remove it from the front of the case. -
Page 54: Closing The Case
Chapter 5: Maintaining Your Computer Closing the case Replacing the side panel To replace the side panel: 1. Make sure that all of the internal cables are arranged inside the case so they will not be pinched when you close the case. 2. -
Page 55: Replacing The Front Bezel
Closing the case Replacing the front bezel To replace the front bezel: 1. Align the latch pins with the computer latch holes. 2. Press the bezel firmly into place. - 49 -... -
Page 56: Installing Memory
Chapter 5: Maintaining Your Computer Installing memory When you upgrade the computer memory, make sure that you install the correct type of memory module for your computer. Your computer uses DIMM memory. To install or replace DIMM memory: Remove the side panel by following the instructions in “Removing the side panel”... - Page 57 Installing memory 4. If you are removing a DIMM from the memory module bank, gently pull the plastic tabs away from the sides of the memory module and remove it. - OR - If you are adding a DIMM to an empty memory module bank, gently pull the plastic tabs away from the sides of the memory module bank.
-
Page 58: Replacing The System Battery
Chapter 5: Maintaining Your Computer Replacing the system battery If the computer clock does not keep time or the settings in the BIOS Setup utility are not saved when you turn off your computer, replace the system battery. Use a battery of the same size and voltage as the original battery that was in your computer. - Page 59 Replacing the system battery 9. Make sure that the positive (+) side of the new battery is facing up, then press the battery into the socket until it snaps into place. Replace the side panel by following the instructions in “Replacing the side panel”...
- Page 60 Chapter 5: Maintaining Your Computer - 54 -...
-
Page 61: Troubleshooting
Chapter 6 Troubleshooting • Troubleshooting typical hardware and software problems • Getting telephone support • Using automated troubleshooting systems • Getting tutoring and training - 55 -... -
Page 62: Safety Guidelines
Chapter 6: Troubleshooting Safety guidelines While troubleshooting your computer, follow these safety guidelines: Never remove your computer case cover while your computer is turned on and while the modem cable and the power cord are connected. Make sure that you are correctly grounded before accessing internal components. For more information about preventing damage from static electricity, see “First steps”... -
Page 63: Troubleshooting
Troubleshooting Troubleshooting Add-in cards The computer does not recognize an add-in card Shut down and restart your computer. Make sure that you have installed the required software. For more information, see the documentation that came with your add-in card. Audio “Sound”... - Page 64 Chapter 6: Troubleshooting Audio CD does not produce sound Make sure that the disc label is facing up, then try again. Some music CDs have copy protection software. You may not be able to play these CDs on your computer. Make sure that the volume controls are turned up.
-
Page 65: Computer
Troubleshooting Computer The computer will not start Make sure that the power cord is connected to an AC power source and your computer is turned on. Diskette drive The diskette drive is not recognized Shut down and restart your computer. You cannot save a file to diskette or you see the message “disk is full or write-protected”... -
Page 66: Dvd Drives
Chapter 6: Troubleshooting You see a “Non-system disk” or “Disk error” error message Eject the diskette from the diskette drive, then press ENTER. Make sure that the diskette you are using is IBM-compatible. The diskette drive LED is lit continuously Remove the diskette from the drive. -
Page 67: Hard Drive
Troubleshooting Hard drive You see an “Insufficient disk space” error message Delete unnecessary files from the hard drive using Disk Cleanup. Empty the Recycle Bin by right-clicking the Recycle Bin icon, then clicking Empty Recycle Bin. Save your files to another drive. If the hard drive is full, copy any files not regularly used to backup media, then delete them from the hard drive. -
Page 68: Internet
Chapter 6: Troubleshooting Internet See also “Modem (dial-up)” on page You cannot connect to the Internet If you are using a dial-up modem, make sure that the modem cable is plugged into the modem jack and not the Ethernet network jack. See “Desktop PC Back”... -
Page 69: Keyboard
Troubleshooting People are sending you e-mail messages, but you have not received any mail Click the receive button in your e-mail program. Make sure that your account with your Internet service provider (ISP) is set up correctly. Contact your ISP for technical support. Keyboard The keyboard does not work Make sure that the keyboard cable is plugged in correctly. -
Page 70: Memory
Chapter 6: Troubleshooting Memory You see a “Memory error” message Use a third-party diagnostic program to help determine if a memory module is failing. You see a “Not enough memory” error message Close all programs, then restart your computer. Memory card reader Drive letters for the memory card slots do not appear in the My Computer window Reboot your computer. - Page 71 Troubleshooting To check the dialing properties: 1. Click Start, then click Control Panel. The Control Panel window opens. If your Control Panel is in Category View, click Printers and Other Hardware. 2. Click/Double-click the Phone and Modem Options icon, then click the Dialing Rules tab.
- Page 72 Chapter 6: Troubleshooting You cannot connect to the Internet The ISP may be having technical difficulties. Contact your ISP for technical support. See if the modem works with a different communications program. The problem may be with just one program. Review the troubleshooting information under “Internet”...
- Page 73 Troubleshooting 4. Click your modem, then click Properties. The Modem Properties dialog box opens. 5. Click the Diagnostic tab, then click Query Modem. If information about the modem appears, the modem passed diagnostics. If no modem information is available, a white screen appears with no data, or if you get an error such as port already open or the modem has failed to respond, the modem did not pass diagnostics.
-
Page 74: Monitor
Chapter 6: Troubleshooting Monitor The screen resolution is not correct Change the screen resolution from the Display Properties dialog box. The computer is running but there is no picture Make sure that the monitor is plugged in and turned on. If the monitor is turned on, the power LED should be lit. -
Page 75: Mouse
Troubleshooting Use the monitor degauss feature (see your monitor documentation) or turn off your computer and monitor, leave them off for at least a half hour, then restart your computer. Change the display settings. Move the monitor away from sources of electrical interference, such as televisions, unshielded speakers, microwaves, fluorescent lights, and metal beams or shelves. -
Page 76: Networks
Chapter 6: Troubleshooting Networks You cannot connect to your company network Every network is unique. Contact your company computer department or network administrator for help. Passwords Your computer does not accept your password Make sure that CAPS LOCK is turned off, then retype the password Power Your computer will not turn on Make sure that your power cord is connected correctly to your computer. - Page 77 Troubleshooting Check the cable for bent or broken pins. If the printer you want to print to is not the default printer, make sure that you have selected it in the printer setup. To set a default printer: 1. Click Start, then click Control Panel. The Control Panel window opens.
-
Page 78: Sound
Chapter 6: Troubleshooting Wait until files have been printed before sending additional files to the printer. If you print large files or many files at one time, you may want to add additional memory to the printer. See the printer documentation for instructions for adding additional memory. -
Page 79: Telephone Support
If you have recently installed hardware or software, make sure that you have installed it according to the instructions provided with it. If you did not purchase the hardware or software from Xitrix, see the manufacturer’s documentation and technical support resources. -
Page 80: Telephone Numbers
“Identifying your model” on page 13. Self-help If you have how-to questions about using your Xitrix -supplied hardware or software, see the following resources: The printed or online documentation that came with your hardware or software. In many cases, additional product information and online documentation for Xitrix- supplied hardware can be found in our Web site's Documentation Library. -
Page 81: Legal Information
Appendix A Safety, Regulatory and legal information • Safety information • Regulatory statements • Notices - 75 -... -
Page 82: Important Safety Information
Appendix A: Important safety information Your Xitrix system is designed and tested to meet the latest standards for safety of information technology equipment. However, to ensure safe use of this product, it is important that the safety instructions marked on the product and in the documentation are followed. -
Page 83: Regulatory Compliance Statements
Regulatory compliance statements United States of America Federal Communications Commission (FCC) Unintentional emitter per FCC Part 15 This device has been tested and found to comply with the limits for a Class B digital device, pursuant to Part 15 of the FCC rules. These limits are designed to provide reasonable protection against harmful interference in a residential installation. - Page 84 Appendix A: Telecommunications per Part 68 of the Code of Federal Regulations (CFR 47) (applicable to products fitted with USA modems) Your modem complies with Part 68 of the Code of Federal Regulations (CFR 47) rules. On the computer or modem card is a label that contains the FCC registration number and Ringer Equivalence Number (REN) for this device.
-
Page 85: Laser Safety Statement
Lightning protection For added protection of any Xitrix product during a lightning storm or when it is left unattended or unused for long periods of time, unplug the product from the wall outlet and disconnect the antenna or cable system. - Page 86 Appendix A: Power lines Do not locate the antenna near overhead light or power circuits, or where it could fall into such power lines or circuits. - 80 -...
-
Page 87: Macrovision Statement
Due to continuing system improvements, Xitrix is not responsible for inaccurate information which may appear in this manual. For the latest product updates, consult the Xitrix Web site at www.xitrix.com. In no event will Xitrix be liable for direct, indirect, special, exemplary, incidental, or consequential damages resulting from any defect or omission in this manual, even if advised of the possibility of such damages. - Page 88 Appendix A: - 82 -...
- Page 89 - 83 -...
Need help?
Do you have a question about the DeskFrame MX-910 and is the answer not in the manual?
Questions and answers
How to restore laptops to its factory default
To restore the Xitrix DeskFrame MX-910 laptop to factory default:
1. Use the backup restoration discs that you created with the recovery media program, or
2. Use the backup files located on the hard drive.
Follow the instructions provided in the instruction booklet that came with the restore discs to complete the process.
This answer is automatically generated