Table of Contents
Advertisement
Advertisement
Table of Contents

Related Manuals for Omron BP652CAN


Summary of Contents for Omron BP652CAN
- Page 1 INSTRUCTION MANUAL 7 series Automatic Wrist Blood Pressure Monitor Model BP652CAN...
-
Page 2: Table Of Contents
table of contents TABLE OF CONTENTS Before using the Monitor Introduction ......................3 Safety Information ....................4 Operating the Device ................4 Care and Maintenance ................. 5 Operating Instructions Before Taking a Measurement ................6 Know Your Unit ....................7 Unit Display ...................... -
Page 3: Introduction
The BP652CAN comes with the following components: • Monitor • Storage Case • 2 “AAA” Alkaline Batteries • Instruction Manual printed in English and French • Quick Start Guide The BP652CAN 7 series Automatic Wrist Blood Pressure Monitor is intended for home use. Please read this instruction manual thoroughly before using the unit. Please keep for future reference. For specific information about your own blood pressure, CONSULT YOUR DOCTOR. -
Page 4: Safety Information
SAfETY INfORMATION INTENDED USE This product is designed to measure the blood pressure and pulse rate of people within the range of the designated wrist cuff, following the instructions in this instruction manual. It is mainly designed for general household use. Please read the “Safety Information” in this instruction manual before using the unit. To assure the correct use of the product, basic safety measures should always be followed including the warnings and cautions listed in this instruction manual. -
Page 5: Care And Maintenance
Unlawful disposal may cause environmental pollution. Do not use a cellular phone near the device. It may result in an operational failure. Use only Omron authorized parts and accessories. Parts and accessories not approved for use with the device may damage the unit. -
Page 6: Before Taking A Measurement
BEfORE TAKING A MEASUREMENT To ensure a reliable reading follow these recommendations: 1. Avoid eating, drinking alcohol, smoking, exercising, and bathing for 30 minutes before taking a measurement. Rest for at least 15 minutes before taking the measurement. 2. Stress raises blood pressure. Avoid taking measurements during stressful times. 3. -
Page 7: Know Your Unit
Automatic Wrist Blood Pressure Monitor Model BP652CAN 5330245-3A INTRODUCTION Thank you for purchasing the Omron BP652CAN 7 series Automatic Wrist Blood Pressure Monitor . Fill in for future reference. DATE PURCHASED: __________________ SERIAL NUMBER: ____________________ • Staple your purchase receipt here 2 “AAA”... -
Page 8: Unit Display
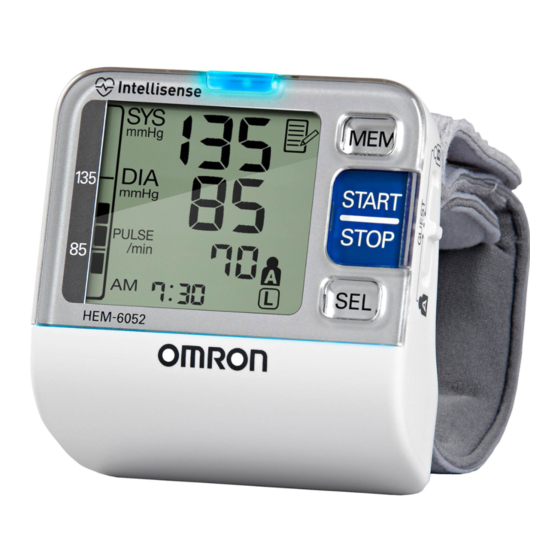
UNIT dISPLAY Heart guide indicator Diastolic blood pressure Memory symbol Systolic blood pressure Average value symbol Deflation symbol Irregular heartbeat symbol Movement error symbol Blood pressure level indicator Buzzer symbol User ID symbol (A or B) (If “GUEST” is selected, A or Date/Time display B will not be displayed.) Heartbeat symbol... -
Page 9: Display Symbols
dISPLAY SYMBOLS IRREGULAR HEARTBEAT SYMBOL ( When the monitor detects an irregular rhythm two or more times during the measurement, the Irregular Heartbeat Symbol ( ) will appear on the display with the measurement values. An irregular heartbeat rhythm is defined as a Normal Heartbeat rhythm that varies by less than 25% from the Pulse average rhythm or 25% more than the average rhythm detected while the monitor is measuring... - Page 10 dISPLAY SYMBOLS This is a general guideline because blood pressure depends on age and morbidity. The CHS recommends a lower home blood pressure goal for certain patients, including people with diabetes or kidney disease WARNING Contact your physician for specific information about your blood pressure. Self-diagnosis and treatment using measured results may be dangerous. Follow the instructions of your physician or licensed healthcare provider.
-
Page 11: Battery Installation
BATTERY INSTALLATION CAUTION Use only 1.5V “AAA” alkaline batteries with this device. 1. Press the hook on the bottom of the battery cover and lift the cover off in the direction of the arrow. 2. Install 2 “AAA” size batteries so the + (positive) and - (negative) polarities match the polarities of the battery compartment as indicated. 3. Set the date and time. Refer to “Setting the Date and Time”. - Page 12 BATTERY INSTALLATION BATTERY REPLACEMENT Low Battery Indicator When the Low Battery Indicator appears on the display, turn the monitor off and remove all the batteries. Replace with 2 new batteries at the same time. Long-life alkaline batteries are recommended. WARNING If battery fluid should get in your eyes, immediately rinse with plenty of clean water.
-
Page 13: Setting The Date And Time
SETTING THE dATE ANd TIME Set the monitor to the current date and time before taking a measurement for the first time. The setting buttons are inside the battery compartment. 1. TO START THE SETTING Press the Date/Time Setting button ( ) to adjust the date and time. The year flashes on the display. 2. SETTING THE YEAR Press the Date/Time Setting button ( ) to advance by increments of one year. - Page 14 SETTING THE dATE ANd TIME 4. SETTING THE DAY Press the Date/Time Setting button ( ) to advance by increments of one day. Press the Date/Time Setting button ( ) to set the current day. The hour flashes on the display. 5. SETTING THE HOUR The time is set using AM or PM.
-
Page 15: Setting The Heart Guide Indicator
SETTING THE HEART GUIDE INDICATOR You can change the options for various settings on your monitor. Pressing the SET button to change a setting. Press the MEM button to select the options for that setting. After selecting a setting, press the START/STOP button to confirm the setting and turn the power off. -
Page 16: Setting For Right Or Left Wrist Measurement
SETTING THE HEART GUIDE INDICATOR on1: After the Heart Guide Indicator lights in blue for more than 2 seconds, or in orange for more than 5 seconds, measurement starts automatically, even though the monitor may not be in the proper position. on2: When in the correct position, the Heart Guide Indicator lights in blue for more than 2 seconds, measurement starts automatically. -
Page 17: Resetting To The Default Setting
SETTING THE HEART GUIdE INdICATOR 2. Press the MEM button to select the buzzer setting. If the Heart Guide Indicator is “on1” or “on2”: on1: The buzzer sounds only when the monitor is in proper position. on2: The buzzer sounds a series of two short blips if your wrist is too far away from the measuring position, and beeps when your wrist is in the proper position. -
Page 18: Applying The Wrist Cuff
APPLYING THE WRIST CUff CAUTION Read all of the information in the instruction manual and any other literature in the box before operating the unit. CAUTION This device is intended for use in measuring blood pressure and pulse rate in the adult population. Do not use this device on infants or persons who cannot express their intentions. -
Page 19: Applying The Cuff On The Right Wrist
APPLYING THE WRIST CUff 5. Fold the remaining part of the wrist cuff back out of the way. APPLYING THE CUFF ON THE RIGHT WRIST When taking a measurement using the right wrist position the cuff as shown in the illustration. Refer to “Setting for Right or Left Wrist for Measurement”. -
Page 20: Taking A Measurement
TAKING A MEASUREMENT The monitor is designed to take measurements and store the measurement values in memory for two people using USER ID A and USER ID B. The monitor can be used to take a single measurement using the GUEST mode are not stored in the memory. 1. Sit comfortably on a chair with your feet flat on the floor. 2. Select your User ID (A or B). 3. - Page 21 TAKING A MEASUREMENT The cuff starts to inflate automatically. As the cuff inflates, the monitor automatically determines your ideal inflation level. This monitor detects your blood pressure and pulse rate during inflation. The Heartbeat Symbol ( ) flashes at every heartbeat. Remain still and do not move until the entire measurement process is completed. NOTE: To stop the inflation or measurement, push the START/STOP button. The monitor will stop inflating, start deflating, and will turn off. 5. After the monitor has detected your blood pressure and pulse rate, the cuff automatically deflates. Your blood pressure and pulse rate are displayed. 6.
-
Page 22: Using The Memory Function
USING THE MEMORY fUNCTION Every time you complete a measurement the monitor stores the blood pressure and pulse rate for each user (A and B) in the memory. The monitor automatically stores up to 100 sets of measurement values (blood pressure and pulse rate) for each user (A and B). -
Page 23: To Delete All Values Stored In The Memory
USING THE MEMORY fUNCTION NOTES: • The date and time are alternately displayed with the measurement values. • Press the MEM button repeatedly to display the next values. • Press and hold the MEM button to display the values faster. 3. Press the START/STOP button to turn the monitor off. TO DELETE ALL VALUES STORED IN THE MEMORY The values stored in the memory are deleted by User ID. You cannot partially delete values stored in the memory. -
Page 24: Care And Maintenance
Use the unit in a manner consistent with the instructions provided in this manual. CAUTION Use only Omron authorized parts and accessories. Parts and accessories not approved for use with the device may damage the unit. CAUTION Changes or modification not approved by the manufacturer will void the user warranty. -
Page 25: Error Indicators
ERROR INdICATORS SYMBOL CAUSE CORRECTION Take another measurement and Monitor could not remain still until the measurement is detect pulse wave. complete. Cuff under-inflated. Cuff not applied Remove the monitor from your wrist. correctly. Read “Taking a Measurement”. Wait 2-3 minutes. Cuff over-inflated. Take another measurement. Device error. -
Page 26: Troubleshooting Tips
TROUBLESHOOTING TIPS PROBLEM CAUSES AND SOLUTIONS Replace both batteries with new ones at the same No power. time. Check the battery installation for proper No display appears on the unit. placement of the battery polarities. Blood pressure varies constantly. Many factors including stress, time of day, how you wrap the Measurement values appear too cuff, may affect your blood pressure. -
Page 27: Fcc Statement
fCC STATEMENT Note: POTENTIAL FOR RADIO/TELEVISION INTERFERENCE (for U.S.A. only) This product has been tested and found to comply with the limits for a Class B digital device, pursuant to part 15 of the FCC rules. These limits are designed to provide reasonable protection against harmful interference in a residential installation. -
Page 28: Limited Warranty
LIMITEd WARRANTY Your BP652CAN 7 series Automatic Wrist Blood Pressure Monitor, excluding the wrist cuff and batteries, is warranted to be free from defects in materials and workmanship appearing within 5 years from the date of purchase, when used in accordance with the instructions provided with the monitor. -
Page 29: Specifications
SPECIfICATIONS BP652CAN (HEM-6052-CA) Model: LCD Digital Display Display: Pressure: 0 to 299 mmHg, Pulse: 40 to 180/min. Measurement Range: Pressure: ±3mmHg or 2% of reading Accuracy/Calibration: Pulse: ±5% of reading Automatic by electric pump Inflation: Automatic pressure release valve Deflation:... - Page 30 Omron Healthcare, Inc. 1200 Lakeside Drive Bannockburn, IL 60015 www.omronhealthcare.ca Copyright © 2010 Omron Healthcare, Inc. Made in China 5330245-3A...
Need help?
Do you have a question about the BP652CAN and is the answer not in the manual?
Questions and answers