Table of Contents
Advertisement
Advertisement
Table of Contents

Related Manuals for Optoma WU1500


Summary of Contents for Optoma WU1500
- Page 1 Projector ® User manual...
-
Page 2: Table Of Contents
TablE of ConTEnTs safETY ....................4 Important Safety Instruction....................... 4 3D Safety Information ........................ 5 Copyright ........................... 6 Disclaimer ..........................6 Trademark Recognition ......................6 FCC ............................7 Declaration of Conformity for EU countries ................7 WEEE ............................7 InTRoDUCTIon .................. 8 Package Overview........................ - Page 3 Lens shift adjustment range ..................... 64 Calculate lens offset ......................... 65 Projector dimensions and ceiling mount installation ..............67 IR remote codes ........................68 Troubleshooting ........................71 Warning indicators ........................73 Specifications ........................... 75 Optoma global offices ....................... 76 English...
-
Page 4: Safety
‡ Do not attempt to service the unit yourself. Opening or removing covers may expose you to dangerous voltages or other hazards. Please call Optoma before you send the unit for repair. ‡ See projector enclosure for safety related markings. -
Page 5: 3D Safety Information
‡ Only use attachments/accessories specified by the manufacturer. ‡ Do not look into straight into the projector lens during operation. The bright light may harm your eyes. ‡ When replacing the lamp, please allow the unit to cool down. Follow instructions as described on page ‡... -
Page 6: Copyright
‡ Watching 3D projection while wearing 3D glasses for an extended period of time may cause a headache or fatigue. If you experience a headache, fatigue or dizziness, stop viewing the 3D projection and rest. ‡ Do not use the 3D glasses for any other purpose than for watching 3D projection. ‡... -
Page 7: Fcc
This device has been tested and found to comply with the limits for a Class A digital device pursuant to Part 15 of the FCC rules. These limits are designed to provide reasonable protection against harmful interference in a residential installation. This device generates, uses and can radiate radio frequency energy and, if not installed and used in accordance with the instructions, may cause harmful interference to radio communications. -
Page 8: Introduction
InTRoDUCTIon Package overview Carefully unpack and verify that you have the items listed below under standard accessories. Some of the items under optional accessories may not be available depending on the model, specification and your region of purchase. Please check with your place of purchase. Some accessories may vary from region to region. The warranty card is only supplied in some specific regions. -
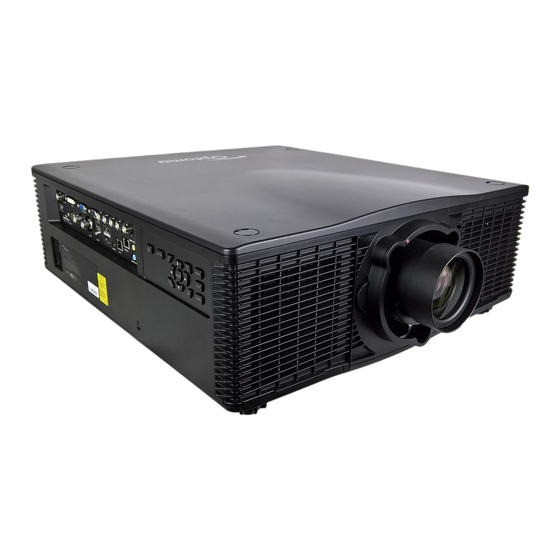
Page 9: Product Overview
InTRoDUCTIon Product overview note: Do not block projector inlet or outlet air vents. (*) optional accessory varies depending on model, specification, and region. Item Item Lens Kensington Lock Port Lens Release Button Power Switch Front IR Receiver 10. Power Socket Tilt-Adjustment Feet 11. -
Page 10: Connections
InTRoDUCTIon Connections Item Item 3D Sync OUT Connector HDBaseT Connector DVI-D Connector 10. RJ-45 Connector VGA IN / YPbPr Connector 11. SERVICE Connector VGA OUT Connector 12. USB Power Out (5V 0.5A) Connector HDMI Connector 13. 3G-SDI IN Connector Component/RGBHV IN Connector 14. -
Page 11: Keypad
InTRoDUCTIon Keypad Item Item Power Lens Shutter Zoom Auto Exit Enter 10. Four Directional Select Keys Input 11. Menu Focus English... -
Page 12: Remote Control
InTRoDUCTIon Remote control Mode Info Auto Input Enter Menu Exit Gamma Bright Cont. Lens H Focus Lens V Keystone H Zoom Keystone V Shutter Hot Key Pattern (AV Mute) Item Item Item Power On Bright Mode Number Keys 10. Lens H Input Info 11. -
Page 13: Setup And Installation
sETUP anD InsTallaTIon Installing the projection lens Before setting up the projector, install the projection lens on the projector. ImPoRTanTT! ‡ Make sure the projector is properly turned off before installing the lens. ‡ During lens installation, do not adjust the lens shift, zoom, or focus either using the remote control or the projector keypad. -
Page 14: Installing The Projector
sETUP anD InsTallaTIon Rotate the lens clockwise to lock the lens in place. Installing the projector Your projector is designed to be installed in one of four possible positions. Your room layout or personal preference will dictate which installation location you select. Take into consideration the size and position of your screen, the location of a suitable power outlet, as well as the location and distance between the projector and the rest of your equipment. -
Page 15: Adjusting The Projector Position
sETUP anD InsTallaTIon adjusting the projector position When you select a position for the projector, consider the size and shape of your screen, the location of your power outlets, and the distance between the projector and the rest of your equipment. Follow these general guidelines: ‡... - Page 16 sETUP anD InsTallaTIon Portrait mode ‡ The projector is in portrait mode when the viewing angle is from 70° to 110° as illustrated below. Portrait mode Portrait mode 90 degree 90~110 degree Portrait mode 70~90 degree non-Portrait mode ‡ The projector is in non-portrait mode when the viewing angle is 250° to 290° as illustrated below. 270 degree 270~290 degree 250~270 degree...
-
Page 17: Connecting Sources To The Projector
sETUP anD InsTallaTIon Connecting sources to the projector Item Item RS-232C Cable 10. CAT5e/6/6A Cable DVI-D Cable 11. RJ-45 Cable VGA-In Cable 12. Mini USB cable (service only) RCA Component Cable 13. WiFi Dongle Composite Video Cable 14. HDMI Cable VGA-Out Cable 15. -
Page 18: Adjusting The Projector Image
sETUP anD InsTallaTIon adjusting the projector image Image height The projector is equipped with elevator feet for adjusting the image height. Locate the adjustable foot you wish to adjust on the underside of the projector. Rotate the adjustable foot clockwise or counterclockwise to raise or lower the projector. Tilt-Adjustment Feet Tilt-Adjustment Ring Zoom and focus... -
Page 19: Remote Setup
sETUP anD InsTallaTIon Remote setup Installing / replacing the batteries Two AAA size batteries are supplied for the remote control. Remove the battery cover on the back of the remote control. Insert AAA batteries in the battery compartment as illustrated. Replace back cover on remote control. - Page 20 sETUP anD InsTallaTIon 32.8’(10m) 23’(7m) ±40° (horizontally) 23’(7m) ±15° (vertically) 32.8’(10m) 23’(7m) ±40° (horizontally) 23’(7m) ±15° (vertically) English...
-
Page 21: Using The Projector
UsInG THE PRoJECToR Powering on / off the projector Mode Info Auto Input Enter Menu Exit Gamma Bright Cont. Powering on Securely connect the power lead and signal/source cable. Lens H Focus Set the Power switch to the “ON” position. Turn on the projector by pressing “... -
Page 22: Selecting An Input Source
UsInG THE PRoJECToR selecting an input source Turn on the connected source that you want to display on the screen, such as computer, notebook, video player, etc. The projector will automatically detect the source. If multiple sources are connected, press the Input button on the projector keypad or the remote control to select the desired input. -
Page 23: Menu Navigation And Features
UsInG THE PRoJECToR menu navigation and features The projector has multilingual on-screen display menus that allow you to make image adjustments and change a variety of settings. The projector will automatically detect the source. To open the OSD menu, press "Menu" on the remote control or the projector keypad. When OSD is displayed, use pqtu to navigate within the menu and adjust a setting up or down. -
Page 24: Osd Menu Tree
UsInG THE PRoJECToR osD menu tree main menu sub menu sub menu 2 sub menu 3 sub menu 4 Values Presentation Video Bright DICOM SIM Display Mode By source set 2D High Speed User Save to User Brightness 0 ~ 100 Contrast 0 ~ 100 Sharpness... - Page 25 UsInG THE PRoJECToR main menu sub menu sub menu 2 sub menu 3 sub menu 4 Values Blue Part of White 0 - 1000 1000 Color Matching Reset to Default Yes/No Normal Look BrilliantColor™ Bright Look Bright Look White Peaking 0 - 100 By source set VIdeo...
- Page 26 UsInG THE PRoJECToR main menu sub menu sub menu 2 sub menu 3 sub menu 4 Values Overscan Zoom By source set Crop H Digital Zoom 50% ~ 400% V Digital Zoom 50% ~ 400% H Digital Shift 0 ~ 100 V Digital Shift 0 ~ 100 PC Mode...
- Page 27 UsInG THE PRoJECToR main menu sub menu sub menu 2 sub menu 3 sub menu 4 Values English French Spanish German Italian Russian Language Chinese Simplified English Chinese Traditional Japanese Korean Portuguese Indonesian Dutch Ceiling Mount Auto Auto Rear Projection Focus Zoom Lens Shift...
- Page 28 UsInG THE PRoJECToR main menu sub menu sub menu 2 sub menu 3 sub menu 4 Values Enable Start IP 192.168.001.100 End IP 192.168.001.120 WLAN Subnet Mask 255.255.255.000 Default Gateway 192.168.001.100 MAC Address XX:XX:XX:XX:XX:XX SSID SSID@XXXXX Projector Name SSID@XXXXX Restart Network Network Network Factory SETUP...
- Page 29 UsInG THE PRoJECToR main menu sub menu sub menu 2 sub menu 3 sub menu 4 Values Blank Screen Aspect Ratio Hot-Key settings Freeze Screen Blank Screen Overscan Closed Captions 0.5W mode Standby Power Communication mode Communication Mode mode Direct Power On 5 Mins 10 Mins Power Settings...
- Page 30 UsInG THE PRoJECToR main menu sub menu sub menu 2 sub menu 3 sub menu 4 Values Light Sensor Calibration Light Sensor Calibrated? (Display Yes/No) Model Name Serial Number Native Resolution Firmware Main Source - Resolution - Signal Format - Pixel Clock - Horz Refresh - Vert Refresh Sub Source...
-
Page 31: Picture Menu
UsInG THE PRoJECToR PICTURE menu PICTURE PICTURE Display Mode Presentation Brightness Contrast oUTPUT Sharpness Color Tint sETUP Phase Frequency Horz Position oPTIon Vert Position PICTURE (1/2) PICTURE PICTURE Auto Image 3D Display Color Matching oUTPUT Advanced sETUP oPTIon PICTURE (2/2) Display mode There are many factory presets optimized for various types of images. - Page 32 UsInG THE PRoJECToR brightness Adjust the brightness of the image. Contrast The contrast controls the degree of difference between the lightest and darkest parts of the picture. sharpness Adjust the sharpness of the image. Color Adjust a video image from black and white to fully saturated color. Tint Adjust the color balance of red and green.
-
Page 33: Dlp Link
UsInG THE PRoJECToR 3D Display menu 3D Display PICTURE 3D Enable Auto 3D Invert DLP Link oUTPUT sETUP oPTIon 3D Enable Set 3D format. Supports Mandatory 3D formats and frame sequential 3D@120Hz. ‡ auto: When a 3D identification signal is detected, the 3D format is selected automatically. ‡... - Page 34 UsInG THE PRoJECToR Color matching menu Color matching PICTURE Enable Auto Test Pattern Red Part of Red 1000 oUTPUT Green Part of Red Blue Part of Red Green Part of Green 1000 sETUP Red Part of Green Blue Part of Green Blue Part of Blue 1000 oPTIon...
- Page 35 UsInG THE PRoJECToR Reset to Default Select “Yes” to reset all the color matching adjustments to the factory defaults or select “No” to keep the current values. about Color matching You may require a unique color gamut (range) for a single projector or application, or you may need to precisely match colors across multiple adjacent displays.
- Page 36 UsInG THE PRoJECToR advanced menu advanced PICTURE BrilliantColor Bright Look White Peaking Gamma VIdeo oUTPUT Color Temperature Bright Color Space Auto Color Settings sETUP Color Enhancement Color Wheel Speed DynamicBlack oPTIon Noise Reduction brilliantColor™ This adjustable item utilizes a new color-processing algorithm and enhancements to enable higher brightness while providing true, more vibrant colors in picture.
- Page 37 UsInG THE PRoJECToR Dynamicblack™ Dynamic Black enables the projector to automatically optimize the brightness of the display during dark / light movie scenes to be shown in incredible detail. noise Reduction Select a filter sensitivity to be applied on noise. A higher value may improve noisy sources, but it will soften the image.
-
Page 38: Output Menu
UsInG THE PRoJECToR oUTPUT menu oUTPUT PICTURE Aspect Ratio Auto Overscan H Digital Zoom oUTPUT V Digital Zoom H Digital Shift V Digital Shift sETUP Image Warping PIP/PBP oPTIon aspect Ratio Choose your desired aspect ratio. ‡ auto: Automatically selects the appropriate display format. ‡... - Page 39 UsInG THE PRoJECToR Image Warping menu Image Warping PICTURE PC Mode H Keystone V Keystone oUTPUT H Pincushion V Pincushion sETUP oPTIon PC mode Enable PC software to control advanced geometry using multi-point grid adjustment. H Keystone Adjust image distortion horizontally and make a squarer image. Horizontal keystone is used to correct a keystoned image shape in which the left and right borders of the image are unequal in length.
- Page 40 UsInG THE PRoJECToR PIP/PbP menu PIP/PbP PICTURE PIP/PBP Enable Main Source Sub Source DVI-D oUTPUT Swap Size Large Layout PBP, Main Left sETUP oPTIon PIP/PbP Enable Toggle between displaying two sources at once (Main and PIP/PBP images) or one source only. main source From the list of active inputs, select one to be used as the main image.
- Page 41 UsInG THE PRoJECToR PIP layout and size table as described below: PIP size PIP layout small medium large PIP-Bottom Right PIP-Bottom Left PIP-Top Left PIP-Top Right PIP/PBP compatibility table as described below: PIP/PbP network 3G-sDI CVbs HDmI HDbaseT Display matrix —...
-
Page 42: Setup Menu
UsInG THE PRoJECToR sETUP menu sETUP PICTURE Language English Ceiling Mount Auto Rear Projection oUTPUT Lens Function Menu Preferences Keypad LED Settings sETUP Closed Captioning Communications oPTIon language Choose the multilingual OSD menu. Ceiling mount Turn the image upside down for ceiling-mounted projection. Rear Projection Reverse the image so you can project from behind a translucent screen. - Page 43 UsInG THE PRoJECToR lens function menu lens function PICTURE Focus Zoom Lens Shift oUTPUT Lens Calibration Lens Lock sETUP oPTIon focus Adjust focus function on the projected image. Zoom Adjust zoom function on the projected image. lens shift Shift the projected image. lens Calibration Perform calibration and return lens to the center position.
- Page 44 UsInG THE PRoJECToR menu Preferences menu menu Preferences PICTURE Menu Transparency Show Messages oUTPUT sETUP oPTIon menu Transparency Change OSD menu background to be transparent. show messages Display status messages on the screen. Pin menu PICTURE Pin Protect Change PIN oUTPUT sETUP oPTIon...
- Page 45 UsInG THE PRoJECToR Communications menu Communications PICTURE WLAN Network oUTPUT Serial Port Baud Rate 19200 Serial Port Echo Serial Port Path RS232 sETUP Projector Address oPTIon Configure the local area network (LAN) settings. ‡ DHCP: Turn the DHCP ON/OFF. ‡ IP address: Select an IP address.
- Page 46 UsInG THE PRoJECToR Projector address Set the projector address. The projector will respond to IR remotes set either at the same address as the projector or to IR remotes set to address 0. How to use web browser to control your projector Make sure your PC is in the area with the projector.
-
Page 47: Setup Network Control Settings Menu
UsInG THE PRoJECToR setup network control settings menu lan_RJ45 function For simplicity and ease of operation, the projector provides diverse networking and remote management features. The LAN / RJ45 function of the projector through a network, such as remotely manage: Power On / Off, Brightness and Contrast settings. - Page 48 lan RJ45 Connect an RJ45 cable to RJ-45 connector on the projector and the PC (laptop). On the PC (Laptop), select start > Control Panel > network Connections. Right-click on the Local area Connection, and select Property. In the Properties window, select the General tab, and select Internet Protocol (TCP / IP). English...
- Page 49 UsInG THE PRoJECToR Click “Properties”. Type in the IP address and Subnet mask, then press “OK”. In this example, the PC IP address is 10.10.10.99, and the projector IP address is 10.10.10.10. Press the “Menu” button on the projector. Select sETUP > Communications > lan. Enter the following connection parameters: ±...
- Page 50 UsInG THE PRoJECToR Press “Enter”. The projector is setup for remote management. The LAN / RJ45 function displays as follows: Main page Information page Tool page Contact IT helpdesk English...
- Page 51 UsInG THE PRoJECToR Rs232 by Telnet function There is different method to control the projector using RS232 commands but without using serial (RS232) connection, this method is called TELNET and uses LAN/RJ45 interface. Quick start-Guide for “Rs232 by Telnet” ‡ Check and get the IP address on OSD of the projector.
-
Page 52: Option Menu
UsInG THE PRoJECToR oPTIon menu oPTIon PICTURE Auto Source High Altitude Test Pattern oUTPUT Background Color Logo Hot-Key settings Blank Screen Power Settings sETUP Light Source Settings Light Sensor Information oPTIon Factory Reset OPTION (1/2) oPTIon PICTURE Service oUTPUT sETUP oPTIon OPTION (2/2) auto source... - Page 53 UsInG THE PRoJECToR light source settings Configure the light source settings. Refer to “Light Source Settings menu” on page 55. light sensor light sensor Calibration: Calibrate the Light Sensor for use with the Constant Luminance mode, ‡ which allows the projector to be set for constant brightness. If the Light Sensor has not been calibrated, Constant Luminance mode will be disabled.
- Page 54 UsInG THE PRoJECToR Power settings menu Power settings PICTURE Standby Power Mode Communication mode Direct Power On Auto Power Off 20 Mins oUTPUT Sleep Timer sETUP oPTIon standby Power mode Set the standby power mode setting. ‡ 0.5W mode: The projector is in standby mode when connected to AC power. (<0.5W) ‡...
- Page 55 UsInG THE PRoJECToR light source settings menu light source settings PICTURE Light Source Mode Constant Power Constant Power Settings Constant Luminance Settings oUTPUT Current Light Source Both Auto Switch On Failure Only Auto Switch Time (Hours) sETUP Light Source Info Reset Light Source Hours oPTIon light source mode...
-
Page 56: 3D Setup
UsInG THE PRoJECToR 3D setup Turn on your projector. Connect your 3D source. For example, 3D Blu ray, Games console, PC, Set top box, etc. Ensure you have inserted 3D content or selected the 3D channel. Turn on your 3D glasses. Please refer to the 3D glasses user manual on how to operate the 3D glasses. -
Page 57: Maintenance
maInTEnanCE Replacing the lamp Procedure: Switch off the power to the projector by pressing “ ” on the projector keypad or pressing “ ” on the remote control. Set the Power switch to the “OFF” position. Allow the projector to cool down for at least 30 minutes. Disconnect the power cord. -
Page 58: Installing And Cleaning The Dust Filter (Optional)
maInTEnanCE Installing and cleaning the dust filter (optional) Installing the dust filter note: Dust filters are only required/supplied in the selected regions with excessive dust. Cleaning the dust filter We recommend you to clean the dust filter every three months. Clean it more often if the projector is used in a dusty environment. -
Page 59: Additional Information
aDDITIonal InfoRmaTIon Compatible resolutions signal frame Resolution QD881 HDmI 3G-sDI HDbaseT CVbs Type rate (Hz) 640x480 DMT0660 — — 640x480 DMT0672 — — 640x480 DMT0675 — — 640x480 DMT0685 — — 640x480 66.6 APP0667 — — 720x400 IBM0770H — — 800x600 DMT0860 —... - Page 60 aDDITIonal InfoRmaTIon signal frame Resolution QD881 HDmI 3G-sDI HDbaseT CVbs Type rate (Hz) 1280x800 CVT1275_ — — 1280x800 CVT1285_ — — 1280x960 CVT1250 — — — — 1280x960 CVT1260 — — 1280x960 CVT1275 — — 1280x960 CVT1285 — — 1280x1024 CVT1250G —...
- Page 61 aDDITIonal InfoRmaTIon signal frame Resolution QD881 HDmI 3G-sDI HDbaseT CVbs Type rate (Hz) 720p — — 1080p — — 1080p — — 1080p — — HDTV 1080p — — 1080p — — 1080p — — 1080p — — 1080p — —...
- Page 62 aDDITIonal InfoRmaTIon signal frame Resolution QD881 HDmI 3G-sDI HDbaseT CVbs Type rate (Hz) — — — — — — 1080p 3GA-SDI 59.94 — — — — — — YcbCr422 10bit — — — — — — — — — — —...
-
Page 63: Image Size And Projection Distance
aDDITIonal InfoRmaTIon Image size and projection distance Diagonal lens Type screen size length W x H size of Width Height screen (inch) 1.08 0.67 1.29 0.81 1.51 0.94 10.9 1.72 1.08 12.4 1.94 1.21 14.0 2.15 1.35 15.5 2.37 1.48 17.1 2.59 1.62... -
Page 64: Lens Shift Adjustment Range
aDDITIonal InfoRmaTIon lens shift adjustment range projected image V projected image height 60% x V H projected image width A20/A21/A22/A23 15% xV 60% x V 25% x H projected image 5% x H V projected image height H projected image width A18/A19 13% x V English... -
Page 65: Calculate Lens Offset
aDDITIonal InfoRmaTIon Calculate lens offset The vertical image offset (shift) ranges for the projector are +/-120% (WUXGA) and +/-140% (HD). The horizontal image offset (shift) range for the projector is +/-50% (HD/WUXGA). The method for calculating lens offset complies with Industry standards. Example for Vertical lens offset: ‡... - Page 66 aDDITIonal InfoRmaTIon Vertical Image Offset: 120% Offset (WUXGA) Image has been offset 720 pixels above lens center, so the center of the image is now 720 pixels above where the center of the image was at 0% offset (or lens center). The offset is +720/600 * 100% = +120%.
-
Page 67: Projector Dimensions And Ceiling Mount Installation
InfoRmaTIon Projector dimensions and ceiling mount installation To prevent damage to your projector, please use the Optoma ceiling mount. If you wish to use a third party ceiling mount kit, please ensure the screws used to attach a mount to the projector meet the following specifications: ‡... -
Page 68: Ir Remote Codes
aDDITIonal InfoRmaTIon IR remote codes Mode Info Auto Input Enter Menu Exit Gamma Bright Cont. Lens H Focus Lens V Keystone H Zoom Keystone V Shutter Hot Key Pattern (AV Mute) Address Data Repeat Key Legend Description Position Format Byte 1 Byte 2 Byte 3 Byte 4 Press to turn on the projector. - Page 69 aDDITIonal InfoRmaTIon Address Data Repeat Key Legend Description Position Format Byte 1 Byte 2 Byte 3 Byte 4 Use as numeric keypad number “5”. Use as numeric keypad number “6”. Use as numeric keypad number “7”. Use as numeric keypad number “8”. Use as numeric keypad number “9”.
- Page 70 aDDITIonal InfoRmaTIon Address Data Repeat Key Legend Description Position Format Byte 1 Byte 2 Byte 3 Byte 4 Press to adjust zoom to achieve a desired Zoom ▲ image size. Keystone Press to adjust the horizontal keystone. Press to adjust the horizontal keystone. Keystone Press to adjust zoom to achieve a desired Zoom ▼...
-
Page 71: Troubleshooting
aDDITIonal InfoRmaTIon Troubleshooting If you experience a problem with your projector, please refer to the following information. If a problem persists, please contact your local reseller or service center. Image problems No image appears on-screen ‡ Ensure all the cables and power connections are correctly and securely connected as described in the "Installation"... - Page 72 aDDITIonal InfoRmaTIon Blurry double image ‡ Select “PICTURE-->3D Display-->3D Enable-->Off” from the OSD to avoid normal 2D image is blurry double image. Two images, side-by-side format ‡ Select “PICTURE-->3D Display-->3D Enable-->Side by Side” from the OSD for input signal is HDMI 1.3 2D 1080i side-by-side.
-
Page 73: Warning Indicators
aDDITIonal InfoRmaTIon Warning indicators When the warning indicators (see below) light up or flash, the projector will automatically shutdown: ‡ Both “Lamp 1” LED or “Lamp 2” LED indicators (green and red) light up. This indicates the lamp 1 or lamp 2 time has expired and lamp should be replaced. - Page 74 aDDITIonal InfoRmaTIon shutter lED status lED lamp 1 lED lamp 2 lED message Green Green Green Green Lamp2 driver communication fail AC power is off (without AC plug in) AC has been applied, projector is in standby mode AC has been applied, projector is in communication standby mode...
-
Page 75: Specifications
aDDITIonal InfoRmaTIon Specifications optical Description Native Resolution: WUXGA(1920 x 1200) Maximum resolution Maximum Resolution: Graphic up to WUXGA@60Hz (Reduced blanking) Lens Power zoom and power focus 1500 hrs typical @ 465W Lamp 2000 hrs typical @ 370W Image size (diagonal) 50”~ 500”... -
Page 76: Optoma Global Offices
InfoRmaTIon Optoma global offices For service or support, please contact your local office. Japan 3178 Laurelview Ct. 888-289-6786 東京都足立区綾瀬3-25-18 Fremont, CA 94538, USA 510-897-8601 info@os-worldwide.com 株式会社オーエス www.optomausa.com services@optoma.com 0120-380-495 www.os-worldwide.com コンタクトセンター: Canada Taiwan 3178 Laurelview Ct. 888-289-6786 12F., No.213, Sec. 3, Beixin Rd.,... - Page 77 www.optoma.com...
Need help?
Do you have a question about the WU1500 and is the answer not in the manual?
Questions and answers