Table of Contents
Advertisement
Advertisement
Table of Contents

Related Manuals for OJ Electronics WLM2


Summary of Contents for OJ Electronics WLM2
-
Page 1: Installation Manual
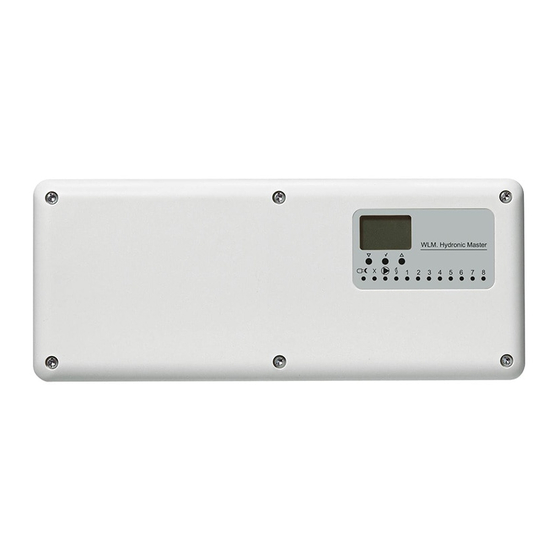
57641 01/08 (LJE) Installation Manual WLM2 WLTA WLTD WLTP WLCT www.oj.dk p. 1... -
Page 2: Table Of Contents
Configuring of the total system ....Page 14 Interconnection of WLM2 product ....Page 32 Installation ........Page 15 Electrical installation ......... -
Page 3: Quickguides
QUICKGUIDES QUICK INSTALLATION GUIDE We recommend the preparation of an area schedule chart on the backside of the user manual before commencing the installation. This identifies piping circuits to specific rooms and enables the correct allocation of a channel number in the WLM system. Mount the Master and AO modules in the correct way on the wall in accordance with electrical regulations. - Page 4 Connect the actuators to the channel outputs on the master in accordance with the pipe manifold layout (please refer to the area schedule). Actuator no. 1 on the manifold to output no. 1 on the master. Actuator no. 2 on the manifold to output no. 2 on the master. etc.
-
Page 5: Setting Up The System
SETTING UP THE SYSTEM Turn on the power supply. Set the clock on any WLCT room controller: a. If the hour digit is not flashing, press the small pinhole button with the clock symbol, otherwise.. b. Adjust the hours and press OK. c. -
Page 6: Testing The System
TESTING THE SYSTEM: Switch on DIP-3 to activate learn mode: - power light will blink quickly Each red channel light on the master should now be lit if a Room sensor is present on that channel. Switch off DIP-3 to de-activate learn mode again – power light stops blinking. Turn all adjustable temperature settings on the Room sensors to minimum. -
Page 7: Troubleshooting
TROUBLESHOOTING: Problem Possible cause & solution Channel light is not coming on. Make sure the power light is fast blinking. If not then put DIP-3 to ON position. (When in Learn mode) 2-wire bus may be incorrectly connected. Voltage at each Room sensor should not be lower than 4.0V (check for + &... - Page 8 Output relay for Main pump, Cooling, High Incorrect connection to device (output relay has volt free contacts, see master wiring diagram for limit valve or other attached device. correct connection) Bad electrical connection between terminals and attached device. Install mode is not activated. Attached device may be faulty.
- Page 9 Room is too cold. The Room sensor is placed in a position that does not represent the general temperature in (After running for at least 48 hours) the room. E.g. mounted on external wall or near an extraneous heat source. If the room is controlled by a CT Room sensor, check that the time and temperatures are set correctly.
-
Page 10: Instructions
INSTRUCTIONS WLM Underfloor Heating Controller p. 10... - Page 11 p. 11...
- Page 12 p. 12...
-
Page 13: Description
Room sensor Bus 2 wire low voltage ......bus signal from Room sensors Additional data for WLM2-1FS & WLM2-3FS (not applicable to the basic version) Application sensor and Limit sensor ....... -
Page 14: Environment
Environment Please help us to protect the environment by disposing of the packaging in accordance with the national regulations for waste processing. Recycling of obsolete appliances Appliances with this label must not be disposed off with the general waste. They must be collected separately and disposed off according to local regulations. -
Page 15: Installation
INSTRUCTIONS Installation Fit the WLM master to a suitable wall. It will generally be found more convenient if the unit is within 0.8 metre of the manifold, as most thermal actuators are supplied with 1m cables. Cables can be run on the surface into the terminals using either the cable releases in the cover or by pressing out the cable entries in the lower part of the cover. -
Page 16: Pump Output
10 sec after the start of the main pump. Basic versions without display. Type WLM2-1BA and WLM2-3BA The boiler relay will stop if there is no heat demand measured by the Room sensors. -
Page 17: Thermal Actuators
The X relay output is volt free as shown in fig 8a. If the relay is required to be used as a L & N switch, connect a link wire from mains L to C1, connect the device L to C2, and the device N to mains N. Boiler pump: Where a boiler primary pump is required to be switched on from the master, the relay output can be used for this purpose. -
Page 18: External Switch For Night Setback
External Switch (TIMER) for night setback Fig 7 From factory the master is delivered with a jumper in the switch/ timer terminals I & O. The day temperature setpoint is defaulted to 20°C and the night temperature to 15°C. These default settings can be changed if the master has a display. -
Page 19: Room Sensors - Wireless Setup
Room sensors - Wireless setup: Fig 12 Where wireless Room sesors/controllers (WLTx-29) are being used is necessary for the WLM master to “learn” that the Room sensors/controllers are communicating correctly. To achieve this: 1. On master, switch on DIP-3 to activate learn mode: 2. -
Page 20: Setting Up Which Room Sensor/Controller Should Work With Wich Thermal Actuator
Setting up Which Room sensor Should Work With Which Thermal Actuator Each Room sensor can be selected to operate a specific output which in turn controls the thermal Fig 10 actuators on the manifold. Under the front cover of the Room sensor, a selector can be accessed, and the number of its output (its CH channel) can be set with a screwdriver. -
Page 21: Supply Water Temperature Sensor And Mixing Value
MANUAL, MASTER TYPE WLM2. Mixing valve actuator control Control of a mixing valve actuator is possible using the digital masters WLM2-1FS and WLM2-3FS The actuator must be 24Vac powered (max 6VA) and positioned via the 0-10V DC signal, and should be configured so that it closes the valve if there is no heating demand (0Vdc signal). The control signal can be reversed to 10-0V via the master menu system if required. -
Page 22: Creating A Network
INSTRUCTIONS Creating a Network In large buildings with more than 14 zones where multiple manifolds are utilized, it is possible to use multiple masters to create a single network. One master must be defined as the “network controlling master” by setting both encoders to zero (see pic). -
Page 23: Using Cooling Function
A hot water sensor is connected to the Room controller and measures the temperature in the storage cylinder. A zone valve is then controlled via the WLM2 master, which in turn activates the boiler on demand. • Install the hot water senser (ETF) on the hot water take off pipe immediately above the storage cylinder. -
Page 24: Radiator Control
• Connect the hot water sensor to the controllers sensor terminals. • Connect the hot water zone valve to an output on the WLM master and set the channel number on the hot water controller to the corresponding number. Note: When the WLCT/HW calls for heat it does not start the circulation pump on the under floor heating system Radiator control: It is possible to control a radiator circuit room temperature with a special Room controller (WLCT/R) to... -
Page 25: Commissioning Mode
Commissioning mode: Digital masters include a special “commissioning mode”, which allows the temperature of the supply Supply temp. water to be controlled to assist the drying out of a newly laid concrete floor. Max. To start this function: • Set DIP-4 to “on”. •... -
Page 26: Guidelines And Special Features
Guidelines and Special Features POWER UP RECOMMENDATIONS When all connections are complete, we recommend to use the quick guide, setting up system. System check: Correct operation of the system can be checked using a special “Install Mode”. This enables the installer to individually test and prove each output. Testing the system: Switch on DIP-3 to activate learn mode: - power light will blink quickly Each red channel light on the master should now be lit if a sensor/controller is present on that... -
Page 27: Factory Default Settings
Factory Default Settings: Master Settings Factory setting Own settings House temperature 21˚C BA/FS Night temperature 18˚C Off temperature 5˚C Floor Limit temp high 27˚C Floor Limit temp low 17˚C Max water temperature 55˚C Weather compensation Outdoor temperature -3˚C Cold (winter) water temperature 45˚C Weather compensation... -
Page 28: Error Indication
Error Indication During normal operation the green power LED will be ON when the master control is energised. The red output Channel LED’s (1 to 8 on the master, and 9 to 14 on the add-on module) will indicate if the channel output relay is ON/OFF. An error / fault message is shown by flashing the green power LED or one of the 8 red output Channel LED’s. - Page 29 Flashing output LED (red): The appropriate output channel LED can flash, indicating that the room sensor or room contoller on that channel has a fault/error. The failure code can also be seen in the service menu (submenu 2a). E1, 1 flash The master has lost communication to the room sensor.
- Page 30 Each Room sensor with manual adjustment is capable of increasing or decreasing the preset DAY & NIGHT setpoints on the master by +/- 4C for the heating zone which it is controlling. The Room controller WLCT has its own DAY & NIGHT temperature settings that can be set separately, and if manual Room sensors are attached to its ”group”...
-
Page 31: Add On Module
INSTRUCTIONS Add On Module Configuring the Total System Each master module is capable of controlling 8 heating zones, each of which may use one or more loops of piping, with one or more thermal actuators. These zones are referred to as channels 1 to 8. -
Page 32: Outdoor Compensation Module
(RJ45) For connecting WLM2 add on modules to WLM2 masters, a plug in connector is provided with the add on module. A WLRC wireless receiver is also connected to a WLM2 master, using the plug in connector provided with the receiver. -
Page 33: Waterline Wireless System
INSTRUCTIONS Waterline Wireless System Technical Data Product Programme Supply Voltage ....24 V from Master WLRC-19 Receiver Distance to master ....Max 3 m Enclosure . -
Page 34: Type Wlct
INSTRUCTIONS Type WLCT Introduction The room controller type WLCT is part of the underfloor heating system type WLM. The room controller can be set to control one single room, or it can be set as a master to control a group of room sensors (rooms/zones). - Page 35 Display Automatic Manual Time and mode mode temperature Day number 4-event symbol Wake Night Home Setting the room controller into operation First time power is connected the clock and day will be flashing and must be set. If you need to adjust the time of the thermostat at a later date, insert a pin into the hole marked (see fig.
-
Page 36: Daily Use Of The Room Sensor
Daily Use of the room sensor 4-Event Clock Mode The day has been split into 4 events describing a typical day. When the room Wake up sensor is in this 4-event mode it will change the temperature to the required level automatically at the programmed times. -
Page 37: Programming 4-Event Clock Time And Temperature
Programming 4-Event Clock Time and Temperature For each event, the start time and required temperature needs Press OK ( ) button for 3 secs. to begin programming to be set. Day 1 - 5 For example, in the morning you wish the heating to start at ✓... -
Page 38: Advanced Settings And Read-Out
Advanced Settings and Read-out Press both UP ( ) and DOWN ( ) buttons together for 3 seconds. INFO is displayed. Continue pressing the UP( ) button until you reach one of the desired sub menus, PRO, Hi Li, Scal, and ArEA (For explanations, see below. - Page 39 Hi Li - Floor sensor. Max and min allowed temperature of the floor surface A limit sensor can be connected to the room controller. Max limitation is used for safety to prevent high floor temperatures. For example wooden floor constructions which should not be allowed to exceed a maximum of 27˚C.
- Page 40 ArEA - (Group of rooms) The rooms that are to be set as part of the WLCT area will follow the temperature settings of the room controller example, an area could be the living room kitchen, and children’s rooms having a high room temperature during afternoon and ear evening, and a lower temperature during the early part of the day and at night.
-
Page 41: Reset To Factory Settings - Room Controllers
Reset to fatctory Settings - room controllers Factory reset: Press the pin button R for 3 secs. and the thermostat returns to factory settings. Remember to set time, day and area. Factory settings 4-event time and temperature Day 1-5 Time Temperature 06:00 21˚C... -
Page 42: Waterline Room Sensors
INSTRUCTIONS Waterline Room sensors Introduction Fig.1 Product programme WLTP-19/29 Room sensor tamper proof WLTA-19/29 Room sensor with adjustment WLTM-19/29 Room sensor with adjustment and mode switch Auto, Day, Night, OFF WLTD-19/29 Room sensor with adjustment, mode switch Auto, Day, Night, OFF and limit sensor WLCT2-19/29 Room controller with 4-event clock Mounting of Room sensor fig. -
Page 43: Set-Up
Set-up Setting up which Room sensor should work with which thermal actuator Fig 3 Each Room sensor can be selected to operate a specific output which in turn controls the thermal actuators on the manifold. Under the front cover of the Room sensor, a selector can be accessed, and the number of its output (its CH channel) can be set with a screwdriver. -
Page 44: Setting Of Room Temperature
WLCT Room controller and not in the master, but the same local ±4°C adjustment is available. On the Master WLM2-1FS and WLM2-3FS, if the temperature setting is changed, then the default temperature for all the rooms is changed, but each WLTA, WLTM or WLTD Room sensor is locally adjustable with its own adjustment knob. -
Page 45: Limit Sensor - Wltd And Wlct
Limit Sensor - WLTD and WLCT Room sensors/controllers with a limit sensor have a mechanical jumper on the printed circuit board allowing the limitation to be set for MIN. or MAX. temperature control. If set for MAX., it will have a temperature setting of 27°C. - Page 46 OJ ELECTRONICS A/S OJ ELECTRONICS UK STENAGER 13B CRUSADER PARK DK-6400 SØNDERBORG WARMINSTER DENMARK WILTSHIRE, BA12 8SP UNITED KINGDOM T.+45 73 12 13 14 T.+44 01985 213 003 F.+45 73 12 13 13 F.+44 01985 213 310 OJ@OJ.DK SALES@OJUK.CO.UK WWW.OJ.DK...
Need help?
Do you have a question about the WLM2 and is the answer not in the manual?
Questions and answers