
Related Manuals for Haier HDS-2580EG


Summary of Contents for Haier HDS-2580EG
- Page 1 HDS-2580EG Please read this booklet carefully before fixing and using and save it for future reference.
-
Page 2: Installation
Installation 1. Remove the packaging and take out the distance limiter from accessory in microwave oven (some models have been installed already), unlock the power cord, according to the specific shape of distance limiter, install by following the given instruction. The purpose of the distance limiter is to make the microwave oven to keep a certain distance from the wall. - Page 3 normal sockets to avoid overloading and causing fire. 5. The microwave oven for home heating and cooking food and design, please do not use for industrial and commercial. 6. Do not cover the ventilation openings to avoid damage to the oven because of the over-temperature.
-
Page 4: Household Use Only
adequate instructions have been given so that the child is able to use the oven in a safe way and understands the hazards of improper use. 18. WARING: It is hazardous for anyone other than a competent person to carry out any service or repair operation that involves the removal of a cover which gives protection against exposure to microwave energy. -
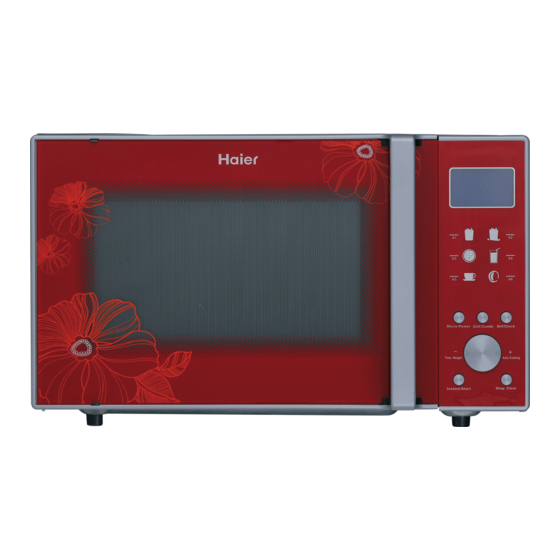
Page 5: Product Introduction
PRODUCT INTRODUCTION Appearance and structure diagram Waveguide cover Turn glasstable Housing Oven foot Door interlock rotating axis Oven door rotating ring Oven cavity Grill rack a. Do not remove the Waveguide cover during cleaning b. Make sure the Waveguide cover installation right and no damage during cooking... -
Page 6: Control Panel
2. Control panel Select grill or combi cooking menu Set power level Select Auto defrost menu and clock Select cooking time or weight during cooking Select Auto cooking menu Stop cooking or clear Start settings 3、LCD instruction and display when the child lock set or used when the power level when the defrost is begin... -
Page 7: Clock Setting
do not press Stop. Clear button once or open the door the beep will be sounded at an interval of 3 minutes. 2. Clock setting Clock button make it available for you to input current or preset time when “:” flashes onto LCD display after plugged in, or try to skip it over to continue if unnecessary. -
Page 8: Grill.combi
Medium 40% microwave power. Applicable for defrosting food Low power 20% microwave power. Applicable for keeping warm Low power a. The max time which can be set is 60minutes b. Never operate the oven empty. c. If you turn the food during operation, press the Instant/Start button once and the preset cooking procedure will continue. - Page 9 Grill, the heat element will be energized during operation time. Which is applicable for rolling thin meats or pork, sausage, chicken wing as good brown color can be obtained Combination of Grill and microwave cooking. 30% of time microwave output and 70% of time light wave Combination of Grill and microwave cooking.
- Page 10 For defrosting poultry, the weight range from 0.2 to 3.0kg. For defrosting seafood, the weight range from 0.1 to 0.9kg. a. It is necessary to turn over the food during operation to obtain uniform effect. b. Usually defrosting will need longer time than that of cooking the food. c.
-
Page 11: Auto Cooking
6. Auto cooking The oven has default cooking menu for simple operation. When the LCD flash colon, press the Auto Cook button and LCD will cycle to show A.1、A.2 …… A.6 Choose the appropriate menu according to the food type and weight and strictly observe the directions in below table, otherwise the cooking effect will be largely influenced. -
Page 12: Automatic Starting (Delayed Function)
Depress Display : 1. After power-up, the colon flashes Press Auto Cooking/ Time. Weight button to set the cooking menu 3. Start cooking by pressing Instant/Start button and LCD will 6:30 count down to show running time. 6. Automatic starting (delayed function) If you do not want the menu be started immediately, you can preset the cooking menu and time and the preset menu will be automatically started at your set time. - Page 13 Example: Now it is 12:30 clock, if you hope that the microwave oven will automatically start cooking with 100P microwave power for 9 minutes and 30 seconds at 14:20 Depress Display : After power-up, the colon flashes 00:00 Depress Defrost/Clock button 12:00 Set hours by Pressing Auto Cooking/ Time.
-
Page 14: Multi-Sequence Cooking
7. Multi-sequence cooking To obtain best cooking result, some recipes call for different cook mode and time. You may program your personalized menu as follow: Example: You want cook food with 100P microwave for 3 minutes then 20P for 9 minutes. This is 2 sequence setting. Depress Display 100P microwave for 3min... -
Page 15: Cooking Tips
Depress Display Depress and hold Stop. Clear button about set lock 3 seconds Depress and hold Stop. Clear button about : cancel lock 3 seconds 9. UTENSILS GUIDELINE It is strongly recommended to use the containers which are suitable and safe for microwave cooking. - Page 16 Place thicker areas towards outside of dish, the thinner part towards the centre and spread it evenly. Do not overlap if possible. Cooking time length Start cooking with a short time setting, evaluate it after it times out and extend it according to the actual need. Over cooking may result in smoke and burns.
-
Page 17: Cleaning And Maintenance
Microwave safe plastic cookware Some microwave safe plastic cookware might not be suitable for cooking foods with high fat and sugar content. Also, the preheating time specified in the dish instruction manual must not be exceeded CLEANING and MAINTENANCE Microwave oven care The oven should be cleaned regularly and any food deposits removed. -
Page 18: Tips For Cleaning
TIPS for cleaning Exterior: Wipe the enclosure with a dampened soft cloth Door: Using a dampened soft cloth, wipe clean the door and window Wipe the door seals and adjacent parts to remove any spill or spatter Wipe the control panel with a slightly dampened soft cloth Interior walls: Wipe clean the interior surfaces with a dampened soft cloth Wipe clean the waveguide cover to remove any food splashed... -
Page 19: Servicing Safeguards
If both the wall socket and the fuse are functioning properly, CONTACT YOUR NEAREST SERVICE CENTER APPROVED. SERVICING SAFEGUARDS MICROWAVE RADIATION! It is hazardous for anyone, other than a qualified service technician, to carry out any service for repairing operation which involves removal of any cover which gives protection against exposure to microwave energy. - Page 20 The following conditions may cause undue microwave exposure during servicing. Improper fitting of magnetron; Improper matching of door interlock, door hinge and door; Improper fitting of switch support; Door, door seal or enclosure has been damaged. 1. if LED displays Err0 during working ,it indicates that sensor has been short circuit and you need replace it at the nearest repaired department.
Need help?
Do you have a question about the HDS-2580EG and is the answer not in the manual?
Questions and answers
Instant/Start and Cancel/Stop buttons are not working and even some other options aren't showing on my haier oven model 25L HDS-2580EG