Table of Contents
Advertisement
FCC Information
This device generates and uses radio frequency (RF) energy, and if not installed and used properly, this
EN
equipment may cause interference to radio and television reception.
This equipment has been type tested and found to comply with the specifications in Subpart J of Part 15 of FCC Rules.
These rules are designed to provide reasonable protection against radio and television
interference in a residential installation. However, there is no guarantee that interference will not occur in particular
installations.
If this equipment does cause interference to radio or television reception (which you can determine by
turning the equipment off and on), try to correct the interference by one or more of the following measures:
• Reorient the receiving antenna (that is, the antenna for the radio or television
that is "receiving" the interference).
• Move the unit away from the equipment that is receiving interference.
• Plug the unit into a different wall outlet so that the unit and the equipment
receiving interference are on different branch circuits.
If these measures do not eliminate the interference, please consult your dealer or an experienced
radio/television technician for additional suggestions.
Also, the Federal Communications Commission has prepared a helpful booklet, "How To Identify and Resolve Radio TV
Interference Problems." This booklet is available from the U.S. Government Printing Office, Washington, DC 20402. Please
specify stock number 004-000-00345-4 when ordering copies.
For Your Safety
For Your Records
In the event that service should be required, you may need both the model number and the serial number. In the space
below, record the date and place of purchase, and the serial number:
Model No. RP8085
Remote Control No.
Date of Purchase
Place of Purchase
Serial No.
Service Information
This product should be serviced only by those specially trained in appropriate servicing techniques. For instructions on
how to obtain service, refer to the warranty included in this Guide
The AC power plug is polarized (one blade is wider than the other) and only fits into AC power
outlets one way. If the plug won't go into the outlet completely, turn the plug over and try to insert
it the other way. If it still won't fit, contact a qualified electrician to change the outlet, or use a
different one. Do not attempt to bypass this safety feature.
CAUTION: TO PREVENT ELECTRIC SHOCK, MATCH WIDE BLADE OF PLUG TO WIDE SLOT, FULLY
INSERT.
WARNING : TO PREVENT
THE LIGHTNING FLASH
AND ARROW HEAD WITHIN
FIRE OR ELECTRICAL
T H E T R I A N G L E I S A
WARNING SIGN ALERTING
SHOCK HAZARD, DO NOT
YOU OF "DANGEROUS
VOLTAGE" INSIDE THE
EXPOSE THIS PRODUCT TO
PRODUCT.
RAIN OR MOISTURE.
CAUTION
RISK OF ELECTRIC SHOCK
DO NOT OPEN
CAUTION: TO REDUCE THE RISK OF
THE EXCLAMATION POINT
ELECTRIC SHOCK, DO NOT REMOVE
WITHIN THE TRIANGLE IS A
C O V E R
( O R
B A C K ) .
N O
U S E R
WARNING SIGN ALERTING
SERVICEABLE PARTS INSIDE. REFER
Y O U
O F
I M P O R T A N T
SERVICING TO QUALIFIED SERVICE
I N S T R U C T I O N S
PERSONNEL.
A C C O M P A N Y I N G
PRODUCT.
SEE MARKING ON BOTTOM/BACK OF PRODUCT
T H E
Advertisement
Table of Contents

Related Manuals for RCA RP8085


Summary of Contents for RCA RP8085
-
Page 1: Fcc Information
In the event that service should be required, you may need both the model number and the serial number. In the space below, record the date and place of purchase, and the serial number: Model No. RP8085 Remote Control No. -
Page 2: Table Of Contents
Contents FCC/ Safety Information Using the Remote Control......... 12 First Things First ....2 Unpack the System ......2 Troubleshooting Tips ..13 Check for Moisture ......2 Choose a Location ......2 Care and Maintenance ..13 Connections ......3 Index ........14 Connecting the CD player to an amplifier ......... -
Page 3: First Things First
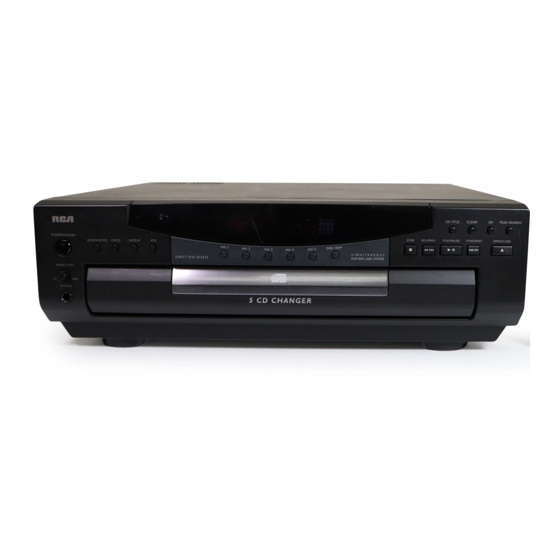
First Things First POWER REVERSE PLAY FORWARD CD TITLE CLEAR PEAK SEARCH PREV STOP PAUSE NEXT POWER/ STANDBY TIME/TEXT CD-TITLE DISC SKIP STOP REW/PREV PLAY/PAUSE F.FWD/NEXT OPEN/CLOSE DEMO/INTRO PROG. REPEAT MUTE TIME EDIT S I M U L T A N E O U S DIRECT DISC ACCESS PLAY AND LOAD SYSTEM PHONE LEVEL... -
Page 4: Connections
Connections White Digital Out (Optical) Connecting the CD Player to an amplifier 4. If your amplifier is equipped with optical Prior to or during connections, the CD player input, connect it with an optical cable (not should NOT be plugged to an AC power outlet. supplied, available at general audio shops) to 1. -
Page 5: General Controls
General Controls CD TITLE CLEAR PEAK SEARCH POWER/ STANDBY STOP REW/PREV PLAY/PAUSE F.FWD/NEXT OPEN/CLOSE DEMO/INTRO PROG. REPEAT S I M U L T A N E O U S D I RE CT D I S C AC C E S S PLAY AND LOAD SYSTEM PHONE LEVEL PHONES... -
Page 6: Messages
General Controls Selected Mode Music Calendar RANDOM 1 ALL PROGRAM CD TEXT REPEAT SHUFFLE DISCS TRACK PEAK STEP 10 11 12 13 14 15 ATS TIME Playing Disc CD Message Display/ Track Time /Track Number Fig. 1 Vacuum Fluorescent Display CD TITLE Vacuum Fluorescent For inputting CD titles. -
Page 7: Remote Control
General Controls Remote Control You can control or adjust most of the function keys as those are present on the main unit through the remote control. However, the following keys are present on the remote control only: REVERSE/ FORWARD POWER In play mode, press and hold to start reverse or forward search operations. -
Page 8: Using The Cd Player
Using the CD Player CD TITLE CLEAR PEAK SEARCH POWER/ STANDBY STOP REW/PREV PLAY/PAUSE F.FWD/NEXT OPEN/CLOSE DEMO/INTRO PROG. REPEAT S I M U L T A N E O U S D I R E C T D I S C AC C E S S PLAY AND LOAD SYSTEM PHONE LEVEL PHONES... -
Page 9: Shuffling Play Order
Using the CD Player Shuffling Play Order the four discs by pressing DISC SKIP to rotate the tray clockwise and anti-clockwise to load Select the SHUFFLE feature to randomize the and unload CDs. Press OPEN/ CLOSE again to order of track play. close the tray. -
Page 10: Using Ats (Auto Track Skip)
Using the CD Player RANDOM PROGRAM CD TEXT REPEAT SHUFFLE DISCS TRACK PEAK STEP 10 1 1 12 13 14 15 TIME Fig. 3 Using Auto Track Skip Clearing the ATS Program Clearing the ATS program is also a lot like (ATS) clearing a regular program. -
Page 11: Erasing Cd Titles
Using the CD Player Erasing CD Titles programming by yourself to be recorded on side B of the cassette tape. (Note: when For single disc: playback ends for recording on side A of 1. Press CD TITLE to activate the feature. “CD cassette tape, the unit will pause playback TITLE”... -
Page 12: Cd Display Messages
Using the CD Player CD Display Messages When using the CD function, you may encounter the following messages: CD compartment tray is in. CD compartment tray is out. Program is full (applies to both Program and ATS mode). Reading disc’s table of contents (how many tracks there are and the total time for the disc). -
Page 13: Using The Remote Control
Using the Remote Control Open the battery compartment lid. Insert 2 AAA-size batteries with the correct polarities by following the engraved diagram in the compartment. Replace and close the lid. Refer to the description of the remote control on page 6. Now you can operate the unit from a distant! “...don’t point, it’s rude!”... -
Page 14: Troubleshooting Tips
Troubleshooting Tips Problem Solution CD Player doesn’t turn on • Make sure power cord is securely plugged into the AC power outlet. • Unplug the unit for a moment, then plug it back in. • Check the outlet by plugging in another device. No sound •... -
Page 15: Index
Index AC power outlet 3 Open/close 4 Amplifier 3 Assigning CD titles and play order 9 ATS (Auto Track Skip) 4 Auxiliary 3 PHONES (jack) 5 Phones level 5 PLAY/PAUSE 4, 6 Playing discs 7 Cables 2,3 Polarized Plug 3 Care and maintenance 13 POWER 4, 6 CD display messages 10... -
Page 16: Us Warranty
US Warranty What your warranty cover: Any defect in material or workmanship. For how long after our purchase: One year. • (The warranty period for rental units begins with the first rental or 45 days from date of shipment to the rental firm, whichever comes first.) What we will do: Provide you with a new or, at our options, a refurbished unit. -
Page 17: Canadian Warranty
Canadian Warranty Thomson Consumer Electronics Canada, Inc. warrants to the purchaser or gift recipient that if any manufacturing defect becomes apparent in this product within 1 year from the original date of purchase, it will be replaced free of charge, including return transportation. This warranty does not include damage to the product resulting from accidents misuse or leaking batteries.
Need help?
Do you have a question about the RP8085 and is the answer not in the manual?
Questions and answers