Table of Contents
Advertisement
Advertisement
Table of Contents

Related Manuals for Dericam H201C


Summary of Contents for Dericam H201C
- Page 1 User Manual Model: H201C Outdoor 720P HD IP Camera Ver. 1.0 ...
-
Page 2: Table Of Contents
Shenzhen Dericam Technology Co., Ltd H201C User Manual ‐Contents‐ 1 Product Overview ............................ 4 1.1 Technical Parameters ........................ 4 1.2 PC Performance Requirements .................... 5 1.3 Smart Mobile Performance Requirements ................... 5 1.4 Third‐party's IP Camera Software Compatible ................ 5 1.5 NVR Compatible .......................... 6 1.6 Interfaces ............................ 6 1.7 ... - Page 3 Shenzhen Dericam Technology Co., Ltd H201C User Manual 4.5 Wireless Setting .......................... 18 4.6 Dynamic DNS .......................... 18 4.7 Platform Setting .......................... 19 4.8 Onvif Setting .......................... 20 4.9 Alarm IN ............................ 20 4.10 Motion Detect .......................... 21 4.11 Alarm Mode Setting ........................ 21 4.12 ...
- Page 4 Shenzhen Dericam Technology Co., Ltd H201C User Manual 6.1 Directly View the Mobile Page: .................... 31 6.2 IP Cam Viewer for iPhone and Android .................. 31 6.3 Free App for Android Phone ....................... 32 7 How to Record Video with Synology NAS .................... 32 8 How to Record Video with Blue Iris or other Software ................ 36 9 How to View Video on VLC Player ...................... 39 10 Spec Table ............................ 41 11 Trouble Shooting .......................... 43 ...
-
Page 5: Product Overview
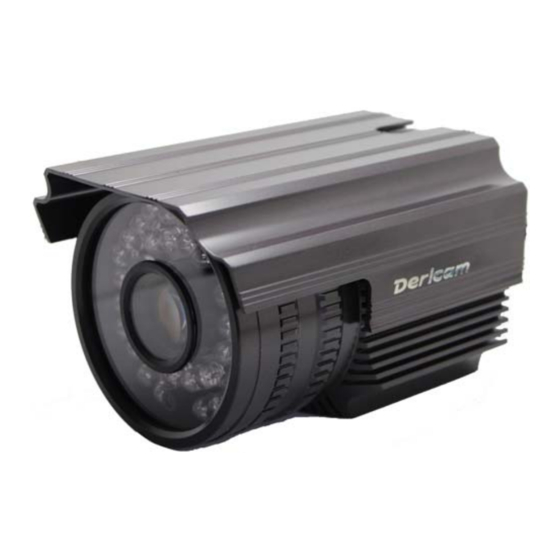
Shenzhen Dericam Technology Co., Ltd H201C User Manual 1 Product Overview Welcome to use Dericam wired/wireless IP Camera. IP camera is electronic equipment which can transmit dynamic video stream to all over the world through the network. User can always monitor the place any‐ where he is, as long as he can connect to Internet. Dericam IP camera works based on the TCP/IP standard. A Web server is integrated inside which can sup‐ port Internet Explorer or other major browsers. And this feature can help you to accomplish online man‐ agement and maintenance on your device simply, such as remote configuration, remote start‐up and firm‐ ware upgrade. You can use IP camera to monitor homes, offices, factories, stores, nurseries and etc., simply, conveniently and real‐time. 1.1 Technical Parameters Mega pixels CMOS sensor, support 720P (1280*720)/640*360/320*180 video resolution. Support H.264 Main Profile video coding. Support multi language: Chinese, English, German, French, Spanish, Russian, Dutch, Polish, and Italian. Support Mobile monitoring. User can access any online IP Camera anywhere through intelligent mobile phone, iPhone or Android‐OS (Operation System) based mobile phone Support Gmail, Hotmail and Yahoo email alert, attaching 720P picture when alarm is triggered. Free DDNS and support third party DDNS. http://www.dericam.com ... -
Page 6: Pc Performance Requirements
Shenzhen Dericam Technology Co., Ltd H201C User Manual Support Motion‐Detection (multiple regions and sensitivity can be set) and sensor alarm. Support remote alarm linkage, multiple alarm time can be set. Support recording and snapshot in PC through live video. Support up to 10 users browsing at the same time (four users with first stream and six users with second stream). Support multiple network protocol, such as TCP/IP,HTTP,TCP,ICMP,UDP,ARP, IGMP,SMTP,FTP, DHCP,DNS,DDNS,NTP,UPNP and so on. Support UPnP. Only 1 network port is used for IE Browsing, stream transmitting and command access, convenient for rout‐ er setting. Simple configuration: Standard Web browser GUI can help users to control and manage the IP cameras through LAN or Internet. 1.2 PC Performance Requirements To view camera through network, the minimum hardware requirements of your computer should be: Pentium III CPU or better, 1GHz or higher frequency; At least 256M memory; Windows XP, 2000, Windows 7, Windows 8(32bit or 64bit); Internet Explorer version 6.0 or above, IE 8.0 is strongly recommended. Support Firefox, Safari and Google Chrome. 1.3 Smart Mobile Performance Requirements To view camera through smart mobile, the mobiles should be met: Android OS mobile iPhone or iPad. Other Smart Phone (need other third party app, such as IPCam viewer). 1.4 Third‐party's IP Camera Software Compatible Blue Iris H264 webcam IP Cam Viewer Pro ... -
Page 7: Nvr Compatible
Shenzhen Dericam Technology Co., Ltd H201C User Manual 1.5 NVR Compatible This type can work with Synology, QNAP, and other NVRs which support Onvif protocol. 1.6 Interfaces DC12V Jack: Connect to power adapter. RESET Button:If user forgets the password, just press it at least 5 seconds to restore to default setting. RJ45 Port: Used to connect network cable to router or switch. 1.7 Packing List ●HD Outdoor IP Camera x 1 ●CDROM x 1 (including user guide, control, IP search tool) ●Quick Installa on Guide x 1 ●Power Adapter x 1 ●Network Cable x 1 ●Bracket x 1 http://www.dericam.com ... -
Page 8: Product Installation
Shenzhen Dericam Technology Co., Ltd H201C User Manual 2 Product Installation 2.1 Hardware Installation 2.1.1 Install network connection: Insert one crystal head of twisted pair cable into the cable slot of NIC (Network Interface Card), which lo‐ cates on the back of IP camera. Then, connect the other crystal head of the cable to the router or switch. Tips: The length of twisted pair cable should be less than 100 meters. Otherwise, the communication will not be stable. If the connection distance exceeds 100 meters, switch repeater is recommended. 2.1.2 Connect the power Connect the IP camera with power slot through power cable distributed in the package box. Cautions: Please use the original power adaptor distributed with the camera device, otherwise, it may cause hardware damage. 2.1.3 Check the network indicator light When the camera works, normally the green indicator of the IP camera is on continuously and yellow light flashes. 2.2 Software Installation To view the video in IE browser, user must install OCX plug‐in first. There are two ways: CD‐ROM installation 1. Please insert the attached CD into the CD‐ROM driver in your PC. 2. Open the “OCX” folder, and double‐click “ClientPlus_Setup.exe”. Installation can be finished automatical‐ ly. Download OCX from the Camera Server 1. When the software is not installed in your PC, meanwhile, the camera is connected to the network, you will be prompted to download and install the “ClientPlus_Setup.exe” from camera login window: ... -
Page 9: Search Ip Camera In Lan
Shenzhen Dericam Technology Co., Ltd H201C User Manual You can download and save it to any folder you want. After downloading is completed, double‐click it and automatic installation will be implemented. 2.3 Search IP camera in LAN 1) Make sure the equipment is properly connected with the network and power supply. 2) The router must support DHCP (Dynamic Host Configuration Protocol), because obtaining dynamic IP ad‐ dresses is one of the factory settings of camera. If the device cannot get the correct IP address, it will use the default IP address. 3) The camera cannot be immediately used when power connection is OK, system initialization will cost more than 20 seconds. Please find the search tools “IP Cam Search_en.exe” on the CD. This program will search the network cam‐ eras, and display the searched IP address, port number, and device name, as shown as the following picture: http://www.dericam.com ... -
Page 10: System Login
Shenzhen Dericam Technology Co., Ltd H201C User Manual 2.4 System Login 2.4.1 Login in IE Browser: Click the IP address in the guide windows. It will directly pop up the login window. If your default browser is IE, then you will be here: Please choose the language you need first, now H201C have multi languages such as Chinese, English, Ger‐ man, French, Spanish, Russian, Dutch, Polish, and Italian. Click the option "PC View" . User will be asked to type the username and password. The default is “admin”, “admin”. Click “OK”. It will pop up the camera server windows. If you don’t install OCX, it will prompt again for instal‐ lation. http://www.dericam.com ... - Page 11 Shenzhen Dericam Technology Co., Ltd H201C User Manual If OCX has been installed, user just need allow run the OCX in browser, then video will display. 2.4.2 Login in Firefox, Chrome and Safari browser: When you login in Firefox, Chrome or Safari, you will be here: User need install the Quick Time to view the video. http://www.dericam.com ...
-
Page 12: Live Video Area And Panel
Shenzhen Dericam Technology Co., Ltd H201C User Manual 3 Live Video Area and Panel 3.1 Live Video Area The video displaying area corresponds to the resolution. The higher the resolution is, the larger the display‐ ing area will be. If motion detection is set, when it has detected any movements of the certain area, it will show a pane to call user’s attention. 3.2 Video Panel Video panel is some shortcut keys to achieve functions Connection status display ‐ Audio play button: it can play the sound through speaker which is collected to the computer. Click it again to stop playing. ‐ Talk‐back button:It can transmit the sound through speaker which is collected to the equipment. Click it again to stop playing. http://www.dericam.com ... -
Page 13: Function Buttons
Shenzhen Dericam Technology Co., Ltd H201C User Manual Note: H201C doesn’t support audio function. ‐ shortcut key to change default path: you may change default path to save recording and capturing. The default location is D:/record. 3.3 Function Buttons Click "SD Card" to browse files in the SD Card (Camera must has SD Card Slot inside and card plugged!) Click the Capture button to take photos for the current video and store the image at the current path. Click “Record” button to record the video and store it at the current path. When it is recording, there will be an indicated symbol in the status of video display area. Click the “Record” button again to stop recording. Click “Playback” button to play the video stored in your PC disk. http://www.dericam.com ... - Page 14 Shenzhen Dericam Technology Co., Ltd H201C User Manual These buttons are for play, pause, previous recording, next recording, open the recording file. Please click the button of “open the recorder file” first, and select the file you want to play, you can playback the recording. http://www.dericam.com ...
-
Page 15: Functions Settings
Shenzhen Dericam Technology Co., Ltd H201C User Manual 4 Functions Settings IP camera function setting options are in the right side. When user clicks the “setting” button, settings page will be expanded. 4.1 Video Setting Page The first option is video setting: 4.1.1 Video Format: If the monitoring site adopts lighting, user should set a corresponding frequency as power frequency. If the two frequencies are different, the image will flash. 4.1.2 Resolution Adjustment: First Stream: There are 720P(1280*720)、VGA(640*352)、QVGA(320*176) resolution options; Second Stream: There are VGA(640*352)、QVGA(320*176); The bigger the resolution is, the clearer the image will be. On the other hand, the bigger the bit rate is, the more bandwidth is. http://www.dericam.com ... -
Page 16: Image Setting
Shenzhen Dericam Technology Co., Ltd H201C User Manual 4.1.3 Bit Rate Adjustment (First stream): User can choose a certain bit rate. Generally speaking, the bigger the bit rate is, the clearer the image will be. Please choose the suitable bit rate according to your bandwidth. If you select a bigger bit rate, while the bandwidth is worse, it will cause the video stream can’t be transferred smoothly, and the video quality will be not perfect. 4.1.4 Max Frame Rate Adjustment: User can choose a certain frame rate. When the bandwidth is limited, it’s recommended to reduce the value. Generally, the video is fluency when the value is more 15 frames. Default is 25 frames. 4.1.5 Bit Rate Control: There are two modes for bit rate control, CBR and VBR. If user choose CBR mode, the video encoder will encode according to the bit rate you have selected. If user choose VBR mode, the video encoder will con‐ sider to the image quality and encode to some extent according to the selected bit rate, but not strictly ac‐ cording to this bit rate. We suggest choosing VBR mode. 4.1.6 OSD Setting: User can choose whether the time information is displayed in the video or not. 4.2 Image Setting http://www.dericam.com ... -
Page 17: Audio Setting
Shenzhen Dericam Technology Co., Ltd H201C User Manual 4.2.1 Brightness/Saturation/Contrast: User can change these values to adjust the image quality. 4.2.2 Shutter: User can define the shutter to adjust the light through the camera sensor. 4.2.3 Flip/Mirror: User can control the direction of image, up or down, left or right. 4.2.4 Smoothing mode: This option will make the image more smoothly. 4.2.5 Night mode: User can choose this option for prompt the night vision. 4.3 Audio Setting 4.3.1 Audio Setting: If the camera has audio cable, user can connect it to external MIC or Speaker. Audio Type: including G.726 and G.711 4.3.2 Input mode: MIC: when user uses built‐in or external microphone, choose microphone input; Line in: When user connects external pick‐up, choose linear input; http://www.dericam.com ... -
Page 18: Network Setting
Shenzhen Dericam Technology Co., Ltd H201C User Manual 4.4 Network Setting 4.4.1 Select DHCP: Device will automatically obtain the IP, which is not fixed (this feature requires the router to support DHCP protocol, and this feature should be activated). 4.4.2 Using the specified IP address (static IP): To specify the IP address of camera, it is required to fix IP address manually. Fill in relevant information step by step and click the “Apply” button. This function of equipment will take effect after restart. 4.4.3 HTTP Port HTTP Port: The IP address identifies one IP camera in the network. You can run several programs on this equipment, and every program will transfer data through some port. In fact data is transferred from one port to another. The port setting of this page is asking user choose which port to transfer the data for the web server;Doing port mapping, need to maintain consistent with the port (equipment factory default port is 80) 4.4.4 RTSP Port http://www.dericam.com ... -
Page 19: Wireless Setting
Shenzhen Dericam Technology Co., Ltd H201C User Manual IP camera supports RTSP protocol. User can use VLC tools such as direct broadcast ( default RTSP port is 554) 4.4.5 RTSP Permission Choose "on" for RTSP connection use, user need to input the camera login user name and password. Choose "off" for RTSP connection user doesn't need to input the camera user name and password. 4.5 Wireless Setting 4.6 Dynamic DNS 4.6.1 Show Internet IP address Click the “Show” button as above Figure, it will show you another new page, displaying the WAN IP address when camera is connected to the Internet. 4.6.2 Manufacturer's Domain name:Device manufacturer has established a DDNS, and allotted a dy‐... -
Page 20: Platform Setting
Shenzhen Dericam Technology Co., Ltd H201C User Manual 4.6.3 Third‐party Domain Name: User can also use third‐party DDNS, such as www.dyndns.com. User must apply for a free domain name from this website and fill the info into the below blanks and save the settings. Then the domain name can be used. 4.6.4 UPnP settings UPnP is to realize automatic port mapping function. If the camera is connected to a router, in order to ac‐ cess the camera through WAN, it is required to open a specified port of the router to the camera. (router is required to support this feature, and this feature is enabled. Otherwise, you need to set up port mapping in the router manually). If the UPnP is enabled successfully, the below figure will be displayed. 4.7 Platform setting As below picture, before opening platform, user need to input "login ID" and "password", "server ad‐ dress" (login ID, password and server address by platform service providers) http://www.dericam.com ... -
Page 21: Onvif Setting
Shenzhen Dericam Technology Co., Ltd H201C User Manual 4.8 Onvif setting H201C support the Onvif protocol and you can configure the Onvif and port here. 4.9 Alarm IN H201C doesn’t support alarm input. http://www.dericam.com ... -
Page 22: Motion Detect
Shenzhen Dericam Technology Co., Ltd H201C User Manual 4.10 Motion Detect User can define up to four motion window. After choosing windows, user can drag it to define the motion range. Then you can set the sensitivity level for every window. Please click “apply” after settings are done, and motion detection takes effect. The higher sensitivity, the cam is more easily triggered. Motion detection is for the user who wants to deploy the detected region. When somebody or something breaks into the detected region, motion detection will be triggered. IP camera will send photos to the e‐mail address or ftp server of user. User should set up e‐mail/ftp server before using this feature. 4.11 Alarm Mode Setting When the alarm is triggered, user can adopt several ways to alarm. 4.11.1 Send alarm info to E‐mail: it will send the alarm email with captured photos (1280*720). 4.11.2 Send alarm info to Ftp Server: it will upload the captured photos to FTP server. 4.11.3 Save video to Ftp Server: it will upload video to FTP server. 4.11.4 Capture live picture to SD card. 4.11.5 Record 30s video on the SD Card (including 5 seconds long video before the alarm was triggered). 4.11.6 Relay out: enable external alarm function and set the time. http://www.dericam.com ... -
Page 23: Schedule
Shenzhen Dericam Technology Co., Ltd H201C User Manual 4.11.7 Image Capture: User can choose 1‐3 photos to send to Email address/FTP server. Note: Saving Video and photos on the SD card are only available when SD Card is plugged in. 4.12 Schedule: The device will trigger the alarm only during the armed time period. Note: Please make sure your system time is correct before you set the alarm time period. 4.13 User Management There are 3 levels of user authorization. Administrator:”admin” has the highest authority. It can make any settings. Factory default password: ad‐ min User: user can only operate the device but can’t change any setting. The default password is user Guest: User can view the video, but can’t operate the device. The default password is guest Note: Please change these 3 level passwords when you use for the first time in order to ensure security. http://www.dericam.com ... -
Page 24: Auto Snap Setting
Shenzhen Dericam Technology Co., Ltd H201C User Manual 4.14 Auto Snap Setting User can set the period of sending Email or FTP server. 4.15 Schedule Recording User can setup the schedule date of recording video to SD Card. After user define the date of recording video, camera will save the video segment on SD card, segment duration can be defined by user. Note: This function is available only when SD card is plugged in. 4.16 Mail Setting When there is an alarm, you can send e‐mail to the specified email address. We take Gmail s as an example: http://www.dericam.com ... -
Page 25: Ftp Setting
Shenzhen Dericam Technology Co., Ltd H201C User Manual After setup, user can click the “test” button to test if it works. 4.17 FTP Setting Note: in order to use FTP functions, firstly we need to apply for on the FTP server application user name and password, and apply for certain storage space, and user has the permission to write and create directory. Server: Used to set the user's FTP server address. Port: User’s port of FPT server, usually it is default values. Addresser: User’s name to log in FTP server. Password: User’s password to log in FTP server. http://www.dericam.com ... -
Page 26: Terminal
Shenzhen Dericam Technology Co., Ltd H201C User Manual Folder: Users upload images to FTP server folder. 4.18 Terminal This option is only available for wireless IP cameras. It doesn’t suit for H201C. 4.19 Date and time Please refer to above Figure. Select the time zone first. There are three options to set the time and date. Manually Sync the time and date with the computer Getting time from the NTP server. 4.20 Initialize User can reboot the device here, or update the firmware. http://www.dericam.com ... -
Page 27: Device Information
Shenzhen Dericam Technology Co., Ltd H201C User Manual Click “Factory Default” button, equipment will restart and restore to default settings. Click “save”, it will save all the present settings. “Restore” part, select the setting file you have saved, click OK, it will recover all the settings. “Upgrade” part, select the firmware file for upgrading, click OK, and you are able to upgrade the equipment. After the upgrading, equipment will restart. Upgrading took a little long, please wait pa‐ tiently. If upgrading is finished, it will show you a message to remind you. 4.21 Device Information This option will display the system info of the camera. If camera has SD card inside, you can check and for‐ mat it here. http://www.dericam.com ... -
Page 28: System Log
Shenzhen Dericam Technology Co., Ltd H201C User Manual 4.22 System Log Users can view the events of equipment for fault diagnosis. http://www.dericam.com ... -
Page 29: How To Access Ip Camera Via Wan
Shenzhen Dericam Technology Co., Ltd H201C User Manual 5 How to Access IP camera via WAN 5.1 What’s DDNS? Dynamic DNS, also called as dynamic domain name, is used to handle the problem that user’s device doesn’t have fixed IP address while accessing via Internet. With assist of DDNS, user can connect to his/her IP camera directly via DDNS. If user wants to access his/her IP camera via WAN. The following two conditions should be met. 1. User knows the WAN IP address or domain name of the IP camera. 2. If IP camera connects to a router, the corresponding mirror port of router must be set for IP camera, so that user can access the IP Cam located in LAN through WAN. Most users don’t have fixed IPs. Every time when the device connects with Internet, networking service provider allocates a dynamic IP to the device. If the connection breaks and rebuilds, a new IP will be allo‐ cated again. Normally, user doesn’t know the IP of device. DDNS feature can overcome this problem. As long as user knows the dynamic domain name, he/she is always able to access his/her networking device. 5.2 How to get the DDNS account: For user’s convenience, IP camera binds one free DDNS account. Each IP camera has a unique global domain name, which is marked on device body. Also, user can obtain the domain name via IP Cam tools. Please re‐ fer the figure attached below. The device also supports third‐party domain name resolution. It currently supports www.3322.org and www.dyndns.org. If users need a third‐party domain solution, he can access the appropriate site and apply for the dynamic domain. Then, fill the applied domain information in the menu. http://www.dericam.com ... -
Page 30: Use Upnp Map The Port
Shenzhen Dericam Technology Co., Ltd H201C User Manual Next, we introduce how to do port mapping on router. Two methods are available. 1. Mapping port automatically via UPnP on router. 2. Establish virtual server via setting router. Above two methods can be finished on GUI web page of the router. We recommend the first solution. 5.3 Use UPnP Map the Port: If user selects No.1 solution, he/she should ensure that the router supports UPnP protocol, and enables UPnP port mapping feature. The following introduction takes LinkSYS router as an example to show how to activate UPnP port mapping function and how to establish a virtual server. If you use LinkSys routers, please refer to this note. In the browser, type the router’s IP address (E.g. http://192.168.1.1, router IP address usually is written in the label of router. Please confirm the IP address of router first), open the router GUI page "forwarding rule" >> "UPnP Settings" to ensure that the current UPnP state is "opened" as shown below: Login IP camera and open the Settings page "Network Connections">> "UPnP port mapping", select the "Enable" and click "Save". It will cost a few seconds to update UPnP success, as shown below: 5.4 How to Establish Virtual Server: Open the router GUI page of LinkSys, click NAT/Qos and enter the “Port Forwarding”. Click the "Add", fill in the equipment IP 192.168.1.89 and port 90, choose "both" protocol, as shown as be‐ http://www.dericam.com ... - Page 31 Shenzhen Dericam Technology Co., Ltd H201C User Manual low Click "Save". It will return the following page. Tips: According to our test, we find out that some routers will give higher priority to the virtual server port map‐ ping. If both the virtual servers and UPnP port are mapped, and two different IP address are conflicted, the router will connect to the specified virtual server IP address. This will lead to UPnP mapping useless, alt‐ hough it is set successfully. It’s not recommended to set both virtual server and UPnP port mapping. User can access IP Camera through WAN after he finishes setting dynamic DNS domain name and port mapping. http://www.dericam.com ...
-
Page 32: How To Access Ip Camera Through Intelligent Mobile Phone
Shenzhen Dericam Technology Co., Ltd H201C User Manual 6 How to Access IP Camera through Intelligent Mobile Phone H201C supports to view by iPhone, Android OS mobile or other smart phone. You have following ways to setup: 6.1 Directly view the mobile page: If DDNS of camera is http://dericam.dyndns.org:88, then you can view the video by smart mobile phone directly through: http://ipcam.dyndns.org:88/mobile.html User can choose the mobile video size under the video option. User can adjust the fps value for stream option to get more smoothly video. 6.2 IP Cam Viewer for iPhone and Android User can use third‐party software such as IP Cam Viewer. Go to apple Store or Android market and search app name “IP Cam Viewer” (from NibblesnBits). After installing the app, user can add camera from Dericam brand and the model should be H201C or H501. http://www.dericam.com ... -
Page 33: Free App For Android Phone
Shenzhen Dericam Technology Co., Ltd H201C User Manual 6.3 Free App for Android Phone 1. Find “iCamPlayer_SF.apk” APP from CD in the package, and install to your Android mobile phone, or go to www.dericam.com to download this app. 7 How to Record video with Synology NAS Running the NAS surveillance system Click "Add" button http://www.dericam.com ... - Page 34 Shenzhen Dericam Technology Co., Ltd H201C User Manual Choose “complete set”, type camera IP/HTTP port/user password, choose ONVIF type, and click "Next": Choose h. 264 coding, resolution choose "1280 * 720", and click "Next" http://www.dericam.com ...
- Page 35 Shenzhen Dericam Technology Co., Ltd H201C User Manual Set the video schedule. Choose continuous or motion detection mode, then click "OK". Go to advanced setup, and choose the live video and motion detect source from camera or Surveillance Sta‐ http://www.dericam.com ...
- Page 36 Shenzhen Dericam Technology Co., Ltd H201C User Manual tion. Click "Implementing image" Image preview http://www.dericam.com ...
-
Page 37: How To Record Video With Blue Iris Or Other Software
Shenzhen Dericam Technology Co., Ltd H201C User Manual 8 How to Record Video with Blue Iris or other Software Installand runBlue Iris 3 Click button to add a camera. Input the camera name. In “New camera” window, click “Video”, click “Configure” button. http://www.dericam.com ... - Page 38 Shenzhen Dericam Technology Co., Ltd H201C User Manual Choose “Dericam H201C RTSP”, then input IP address or DDNS name. The default RTSP port is 554. If you have more than one camera, please fix the port with different number. http://www.dericam.com ...
- Page 39 Shenzhen Dericam Technology Co., Ltd H201C User Manual In the main interface, it will display the camera image http://www.dericam.com ...
-
Page 40: How To View Video On Vlc Player
Shenzhen Dericam Technology Co., Ltd H201C User Manual 9 How to View Video on VLC Player After VLC Player is installed, please go to “open Network Stream”. Input the URL as following.Please note that the port “1040” is the RTSP port of the camera, and 11 means the first stream, 12 means second stream, and 13 means third stream. click “Play”, it will prompt to type the username and password of camera. http://www.dericam.com ... - Page 41 Shenzhen Dericam Technology Co., Ltd H201C User Manual Following are video with different stream . http://www.dericam.com ...
-
Page 42: Spec Table
Shenzhen Dericam Technology Co., Ltd H201C User Manual 10 Spec Table Item Spec Description Dericam H201C Outdoor Mega Pixel HD IP Camera Sensor Mega Pixels CMOS Sensor Image illumination 0 Lux Min(IR LED Turn On) Sensor Lens f=4/6/8mm, F=1.4, IR IR‐CUT Dual Switch Filter Trigger Light Sense Resistance Control IR LED LED 36x8mm IR LED 850nm, Night vision distance up to 30M Resolution 1280*720/640*352/320*176 Compress H.264/MJPEG Video Frame/S 30 fps Code Rate Main: 32kbps ~ 6.144Mbps; Second:32kbps~6.144Mbps Image Rotate Mirror/invert ... - Page 43 Shenzhen Dericam Technology Co., Ltd H201C User Manual DDNS Free DDNS from Factory.Dyndns or3322 can be choosed Ethernet 10Base‐T/100base‐TX TF Standard TF Card Slot Card(Optional) Interface Reset Reset Button on the Back Power input DC 12V,1A Input Watts <8W Waterproof IP65 Waterproof Level Net Weight 850g Physical Gross Weight 1250g Dimensions 14.5*10*10 cm Storage Temper. ‐10°C ~ 60° (14°F ~ 140°F) Storage Humidity 0% ~ 90% non‐condensing Environment Operate Temper. 0° ~ 55°C (32°F ~ 131°F) ...
-
Page 44: Trouble Shooting
Shenzhen Dericam Technology Co., Ltd H201C User Manual 11 Trouble Shooting 11.1 IP Address cannot be found in the IP Tool Step1: Please check your power and network connection firstly. When connection is OK, green LED on Ethernet Port will turn on and the yellow led is flashing. Step2: Please check your PC firewall and anti‐virus software disable them and try again. Note: This cam will not patrol automatically when it restarts or it’s powered on. 11.2 No video in the IE10 Please check the IE browser and ensure it works under “compatible View mode”. 11.3 Image is very fuzzy Please open the front case and turn around the lens ring and make it left or right, then you can make it be best focus and clear image. Sometimes dirty spots on the lens will affect the image, please make it clear. 11.4 Can this camera work with PoE router? Dericam has PoE adapter for HD IP Camera. Please contact Dericam for more information. 11.5 I Forget password There is a "Reset" button on the back panel of the IP camera. Press it 5 times to restore all default parameters (Factory settings), user name and password are "admin"...
Need help?
Do you have a question about the H201C and is the answer not in the manual?
Questions and answers