Northern Lights M773LW3 Assembly Instructions Manual
Hide thumbs
Also See for M773LW3:
- Operator's manual (58 pages) ,
- Assembly instructions manual (16 pages) ,
- Operator's manual (44 pages)
Advertisement
Quick Links
Download this manual
See also:
Operator's Manual
Soundshield Assembly Instructions
Corporate Headquarters
4420 14th Avenue
Northwest
Seattle, WA 98107
Tel: (206) 789-3880
Fax: (206) 782-5455
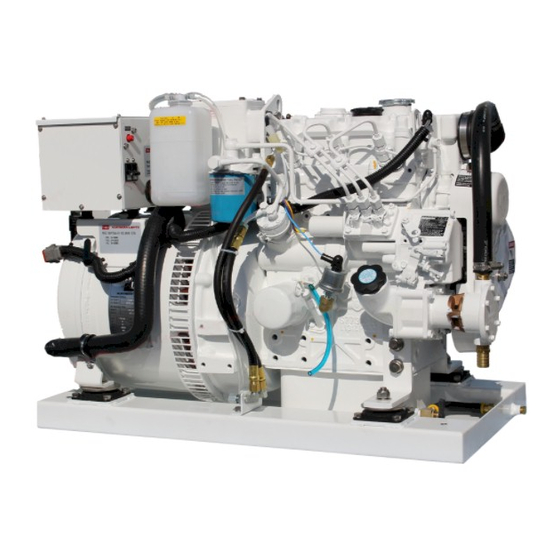
M773LW3
Alaska Branch Office
1200 West International
Airport Road
Anchorage, AK 99519
Tel: (907) 562-2222
Fax: (907) 563-1921
www.northern-lights.com
Southeastern U.S.A.
1419 West Newport
Center Drive
Deerfield Beach, FL 33442
Tel: (954) 421-1717
Fax: (954) 421-1712
East Coast Branch
15 Aegean Dr.
Suite 4
Methuen MA 01844
Tel: (978) 475-7400
Fax: (978) 475-7745
Advertisement

Related Manuals for Northern Lights M773LW3


Summary of Contents for Northern Lights M773LW3
- Page 1 M773LW3 Soundshield Assembly Instructions Corporate Headquarters Alaska Branch Office Southeastern U.S.A. East Coast Branch 4420 14th Avenue 1200 West International 1419 West Newport 15 Aegean Dr. Northwest Airport Road Center Drive Suite 4 Seattle, WA 98107 Anchorage, AK 99519 Deerfield Beach, FL 33442...
- Page 2 L613 9/15...
-
Page 3: Specifications
M773LW3 SOUND SHIELD ITEM DESCRIPTION NLI P/N NOTES TOE BRACKET 23-78007 #10-32 MACHINE SCREW x 1/2” LONG, STAINLESS STEEL 12-00000 #10 FLATWASHER, USS STAINLESS STEEL 15-70002 #10-32 NYLOCK HEX NUT, STAINLESS STEEL 14-00032 -001 EXTRUSION, VERTICAL 05-78638 BOLTING ASSEMBLY, SHORT, STAINLESS STEEL... - Page 4 Prior to assembly, inspect all components for damage. Report any damage to the shipping company. Check the packing list in the back of this manual to be sure all parts are included. Select a mounting location in accordance with the guidelines in the IM1000 Installation Manual (supplied with the generator set).
- Page 5 Install the four vertical extrusions (item 5) with four bolting assemblies (item 6) per FIGS 2 and 2a. Don’t fully tighten these nuts until final assembly. Extrusion should be loose enough for adjustment during the building process. You should have what appears in Fig 3 at this time. Fig.
- Page 6 Before the top of the enclosure frame can be added, the front and left hand side panel retainer blocks (item 8) must be installed. The panel retainer blocks (item 8) are anchored to the vertical extrusion with a single long bolting assembly (item 7).
- Page 7 Fig. 5 Fig. 5a Note how the assembly fits inside vertical extrusion. Finger tighten only until all four corners have been fully installed. (Viewed from Bottom) Now install the junction box support cover (item 15) into place. Note the shape of the foam backing and see the space beneath the generator junction box at the rear of the genset.
- Page 8 Next, install the rear sound shield panel (item 16) to the rear of the enclosure frame. The rear panel is designed to be stationary and is retained at the bottom by two short 5/16” bolts, and flat washers as well as at the top of the panel using a set of pre-installed retaining clips built into the top enclosure frame/top panel assembly.
- Page 9 Fig. 7b Fig. 7c Fig. 7d Fig. 7e When making the intake air snorkel hose connection, It is important to ensure that the hose is not kinked or bent in such a way to restrict the engine’s intake air flow. This arrangement is designed to allow the hose to follow it’s natural path when properly installed into the rear panel.
- Page 10 Now it is time to install the stainless steel wet exhaust tube included with this shield. The stainless tube connects to the genset’s wet exhaust elbow and provides you with an external exhaust stub connection outside of the shield. Fig. 7f Following the installation of the rear panel, now take the tube (Item 23) and note its shape.
- Page 11 Install connections for exhaust, AC power leads, DC Control panel leads, battery and water through holes in the rear panel as shown in Figure 8 and as described below: Connect the genset exhaust outlet to the exhaust system of the vessel. Push the two inch hose on to the exhaust connection pipe protruding through the left mid-section of the rear panel.
- Page 12 IF YOU HAVE CHOSEN TO INSTALL A SIPHON BREAK: Note the pre-installed penetration plate (item 13) in the forward right corner of the top of the enclosure. Reference the plumbing diagram in the mounting and exhaust sections of the IM1000 installation manual. Remove the white plastic hole plugs by pushing them out from the inside and replace with the two rubber grommets (item 21) provided.
- Page 13 Do ensure that the block does not rotate upon tightening as it may affect engagement. Northern LIghts sound shield removable panels now feature a nylon block retaining system that omits all but one panel latch. Install the left side panel (item 17) and the front panel (item 18) by aligning the panel bottom pins to the base pan flange grommets and push until engaged.
- Page 14 Fig. 10 Fig. 10a To access the top panel, remove the latched right side (service) panel. Reach in with your fingers and push up on the panel from the inside. The front and left side panels remove similarly, by pushing out from the inside. Finally, note the generator set base frame pan has four mounting feet “pockets.”...
- Page 16 M773LW3 SOUND SHIELD PACKING LIST ITEM# DESCRIPTION NLI PART # QTY NOTES: PACKED Enclosure frame top, pre-assembled: (consists of the following parts and assemblies) Extrusion, horizontal, sides 05-78639-001 2 assembled Extrusion, ends 05-78641-001 2 assembled Corner casting 05-70001-001 4 assembled...
- Page 17 AND MUST BE REMOVED BEFORE PANEL INSTALLATION. Completed By: Date: Northern Lights, Inc. • 4420 14th Ave. NW., • Seattle WA 98107 Tel: 206-789-3880 • 1-800-762-0165 • Fax: 206-782-5455 Information and dimensions subject to change without notice. Northern Lights and Lugger are registered trademarks of Northern Lights, Inc.
Need help?
Do you have a question about the M773LW3 and is the answer not in the manual?
Questions and answers